Creating an Indico Account (with/without Shibboleth)
Scenario:
You are a university lecturer planning to organize or attend the "National Research Conference 2025" hosted via Indico by LEARN.
You want to access the conference site, register, submit an abstract, or even manage the event as an organizer.
To do this, you must first create an Indico account — either by logging in through your institution (EduID) or by registering manually.
01. Option A: Manual Account Registration (No Shibboleth)
Use this if you're an external participant or your university is not in EduID.
Example:
Prof. Lee, an invited reviewer from outside Sri Lanka, manually registers with his Gmail address and completes email verification. He is then added as an abstract reviewer for NRC 2025.
Step-by-Step:
How to Create an Indico Account (Standard Email Registration)
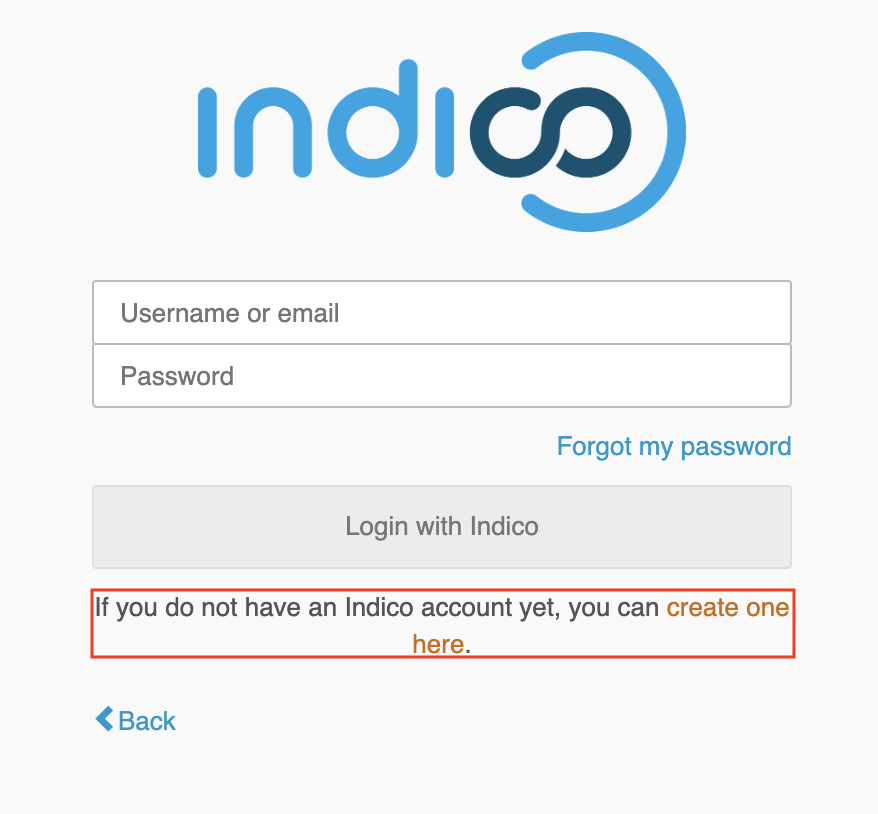
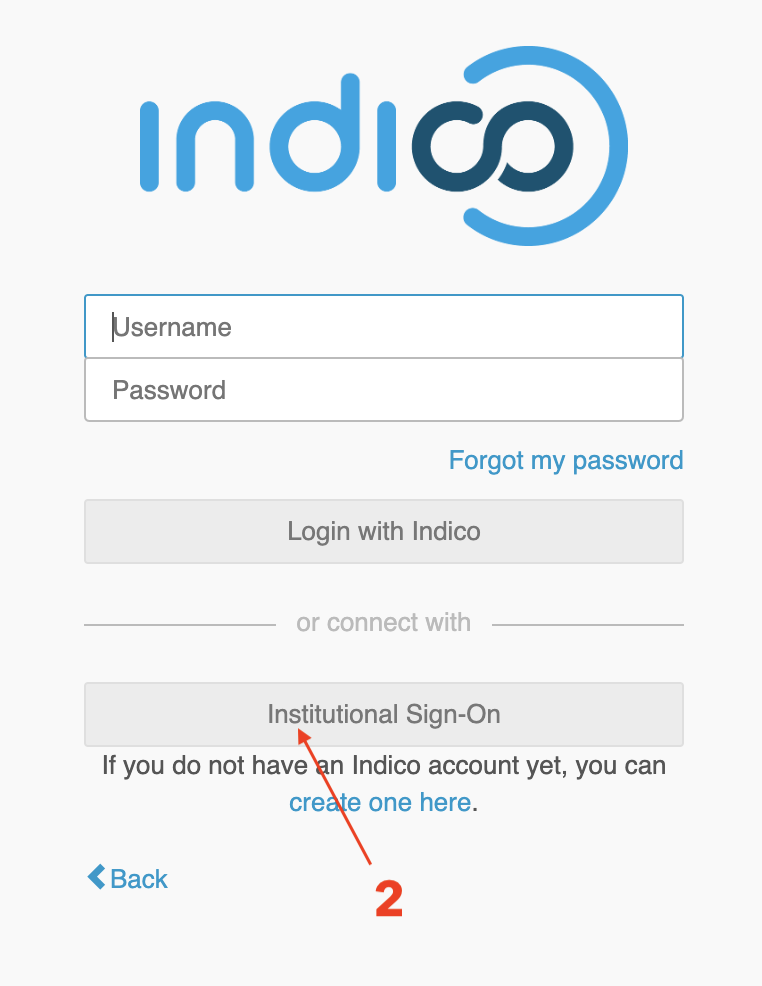
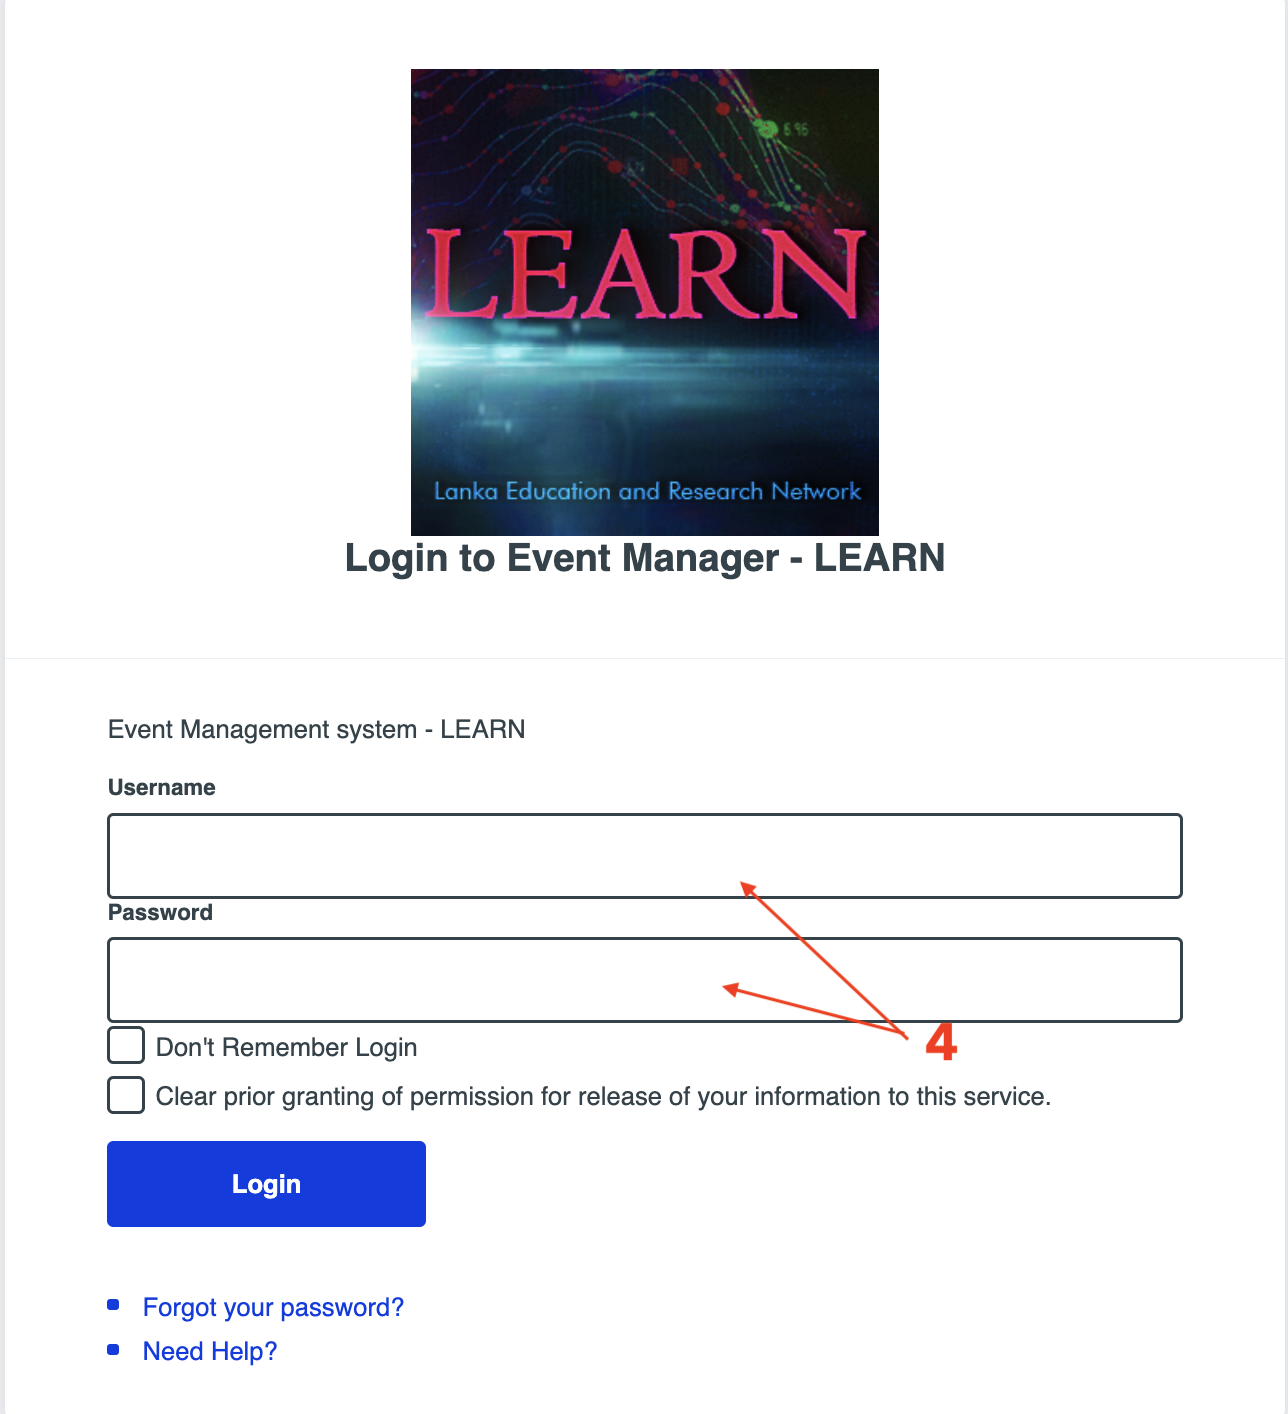
Step 1: Go to the Login Page
- Open your browser and navigate to your institution's Indico login page.
-
Below the login form, click on:
➡ "If you do not have an Indico account yet, you can create one here."
Step 2: Start Profile Creation
- You will be redirected to a page to begin the registration.
- Enter your email address [1].
- Complete the CAPTCHA [2] (if shown).
-
Then click on:
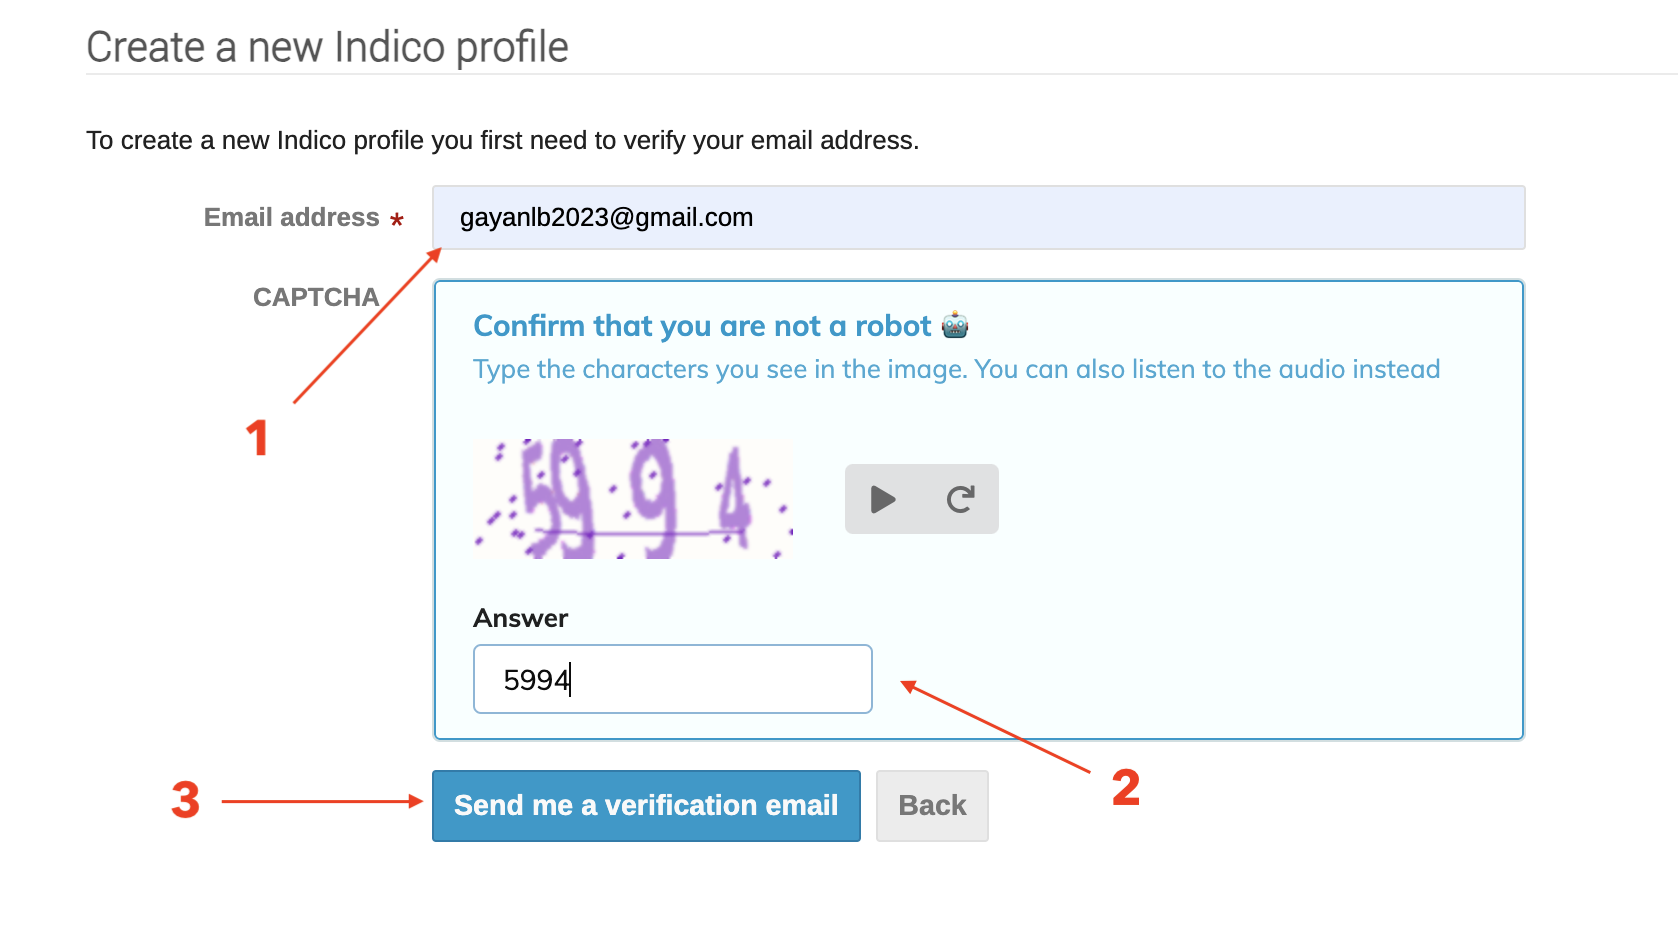
“Send me a verification email” [3]
This sends a confirmation email to the address you provided.
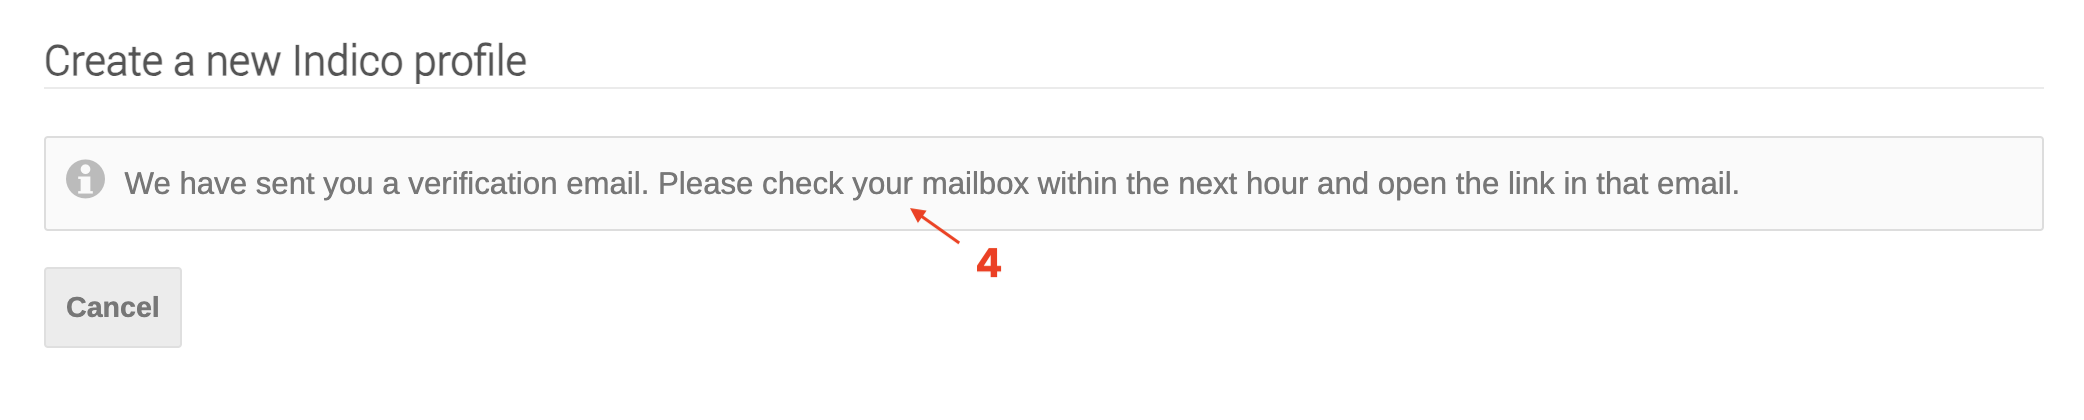
Step 3: Verify Your Email
- Check your inbox for a message from Indico.
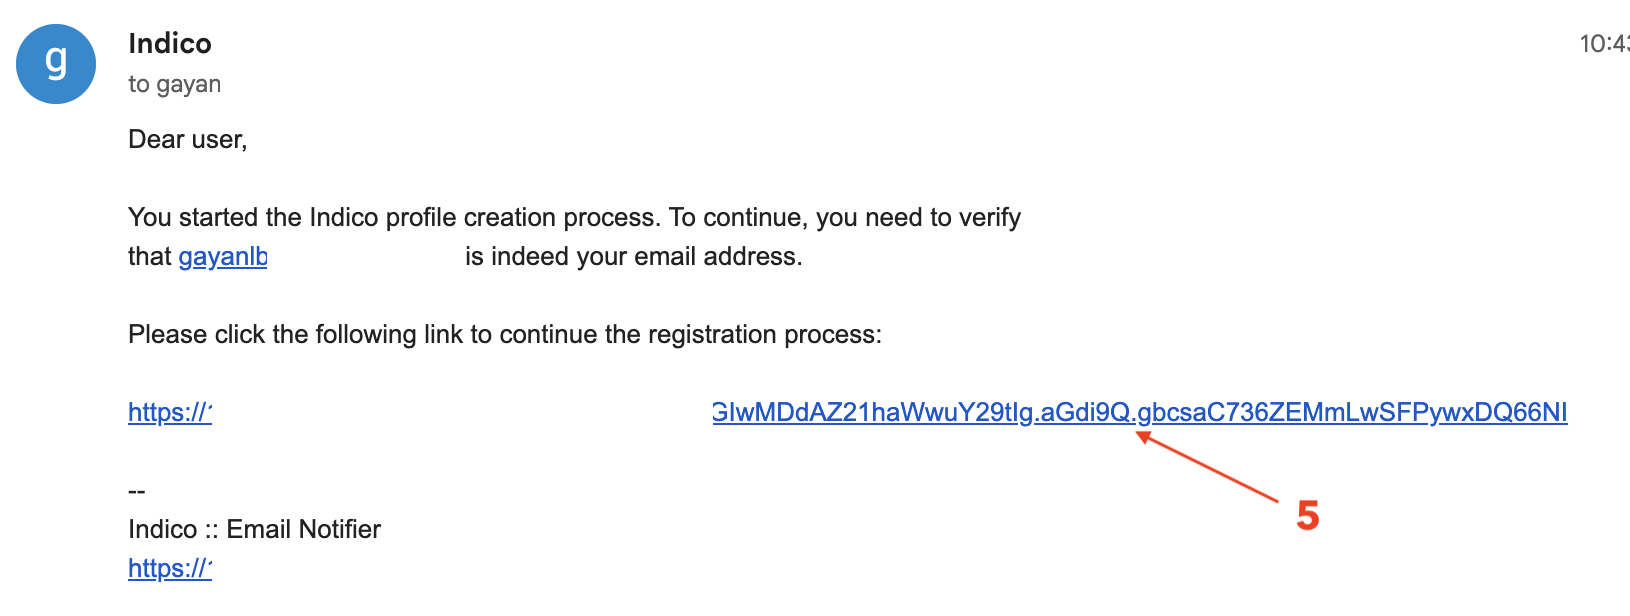
- The email contains a confirmation link
- Click the long verification URL to proceed with account creation [5].
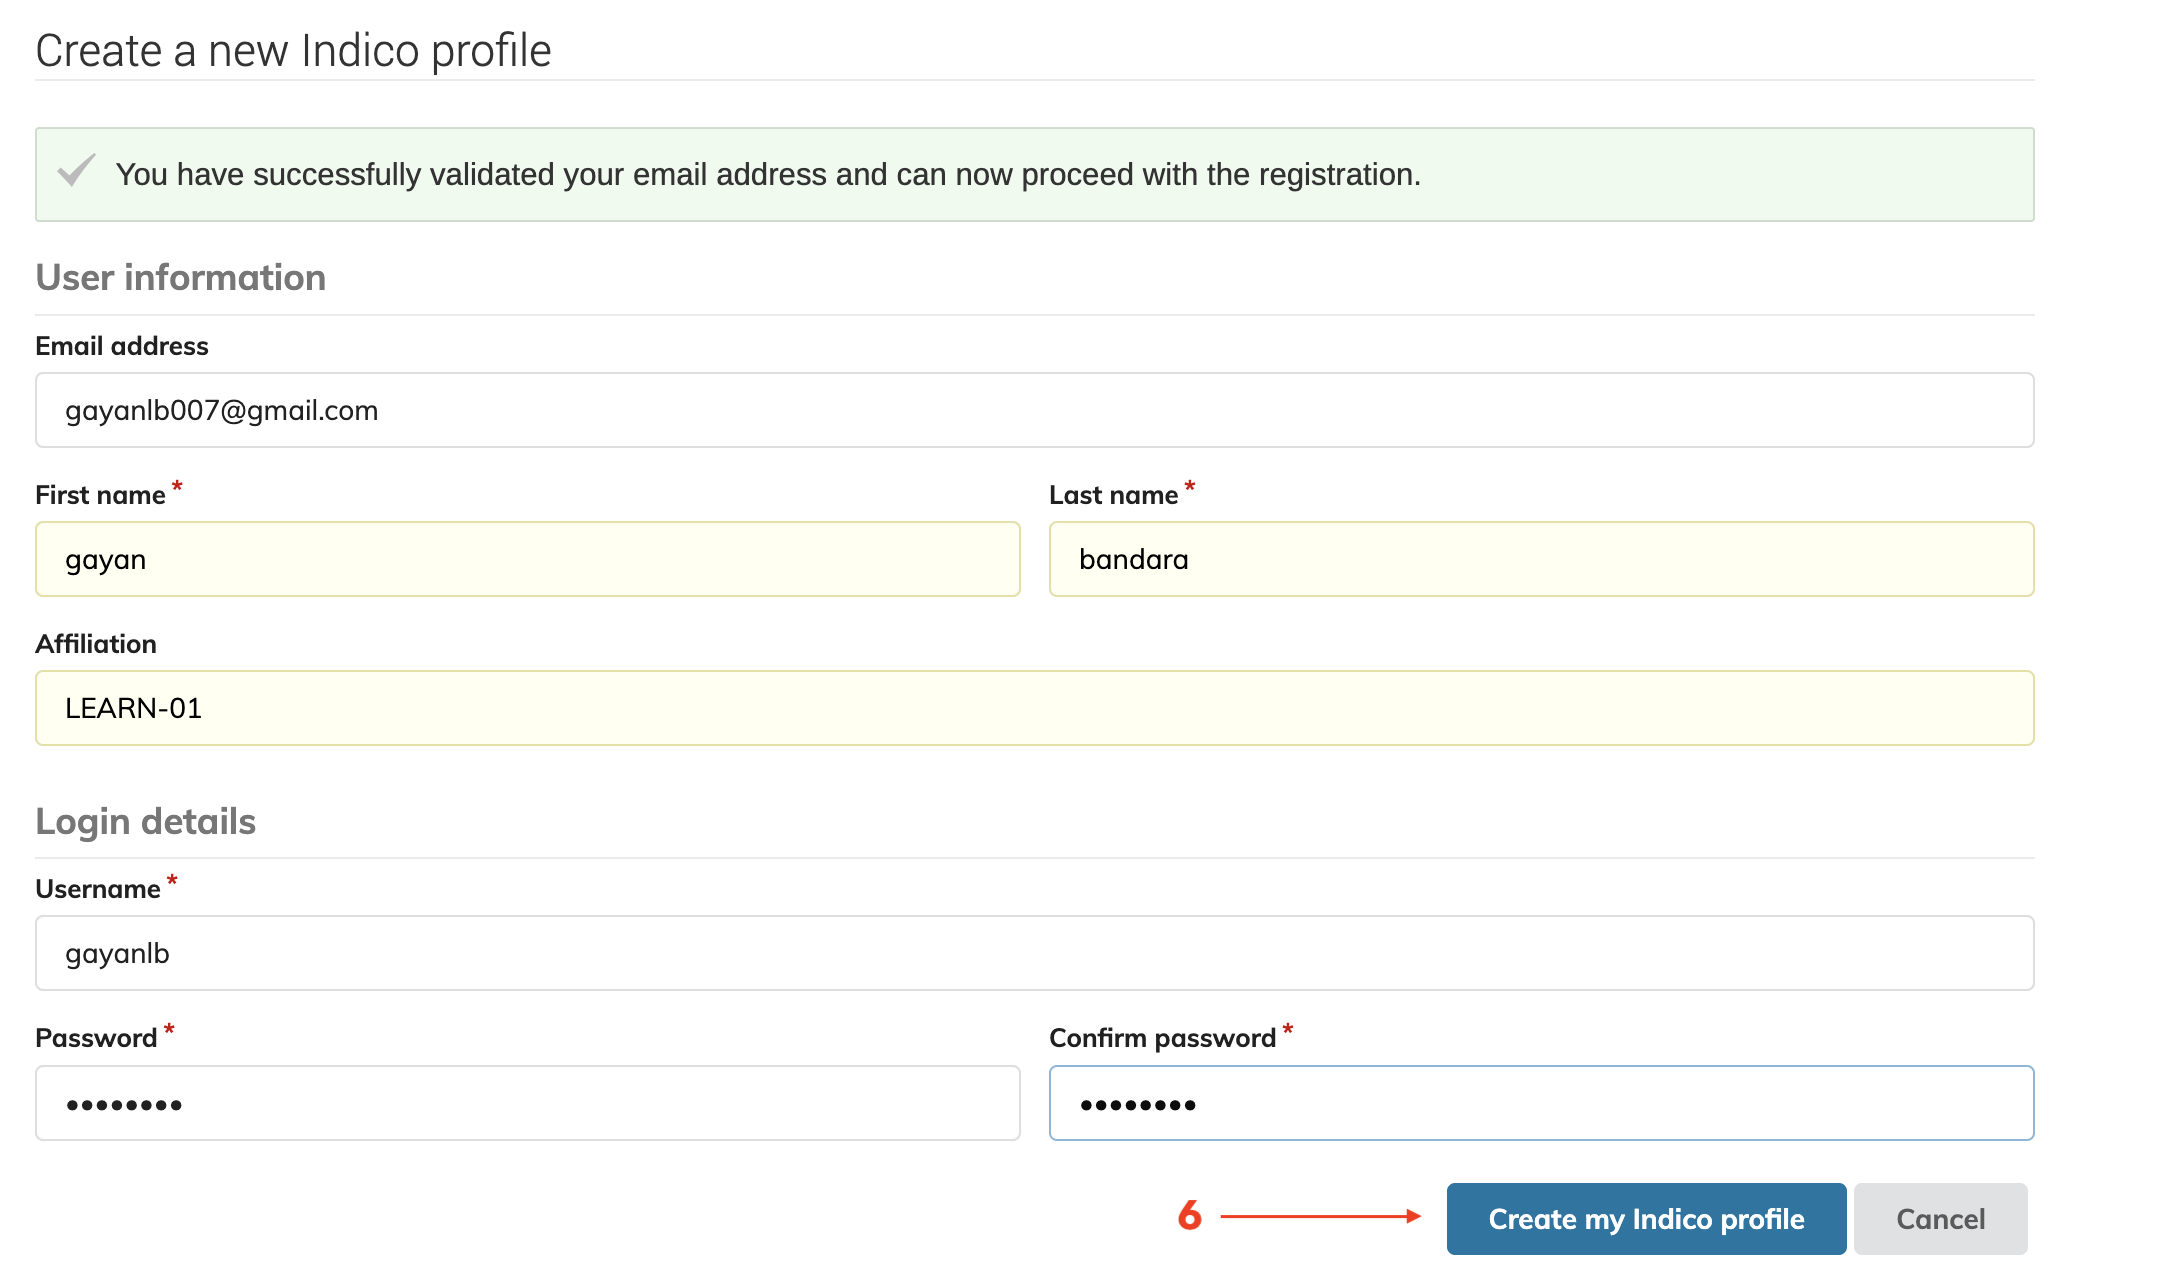
Step 4: Complete Your Indico Profile
-
After clicking the link, you'll be directed to complete your profile:
-
- Email address (pre-filled)
-
- First name
-
- Last name
-
- Affiliation (e.g., University name)
-
- Username (your login name)
-
- Password
-
When done, click:
“Create my Indico profile” [6]
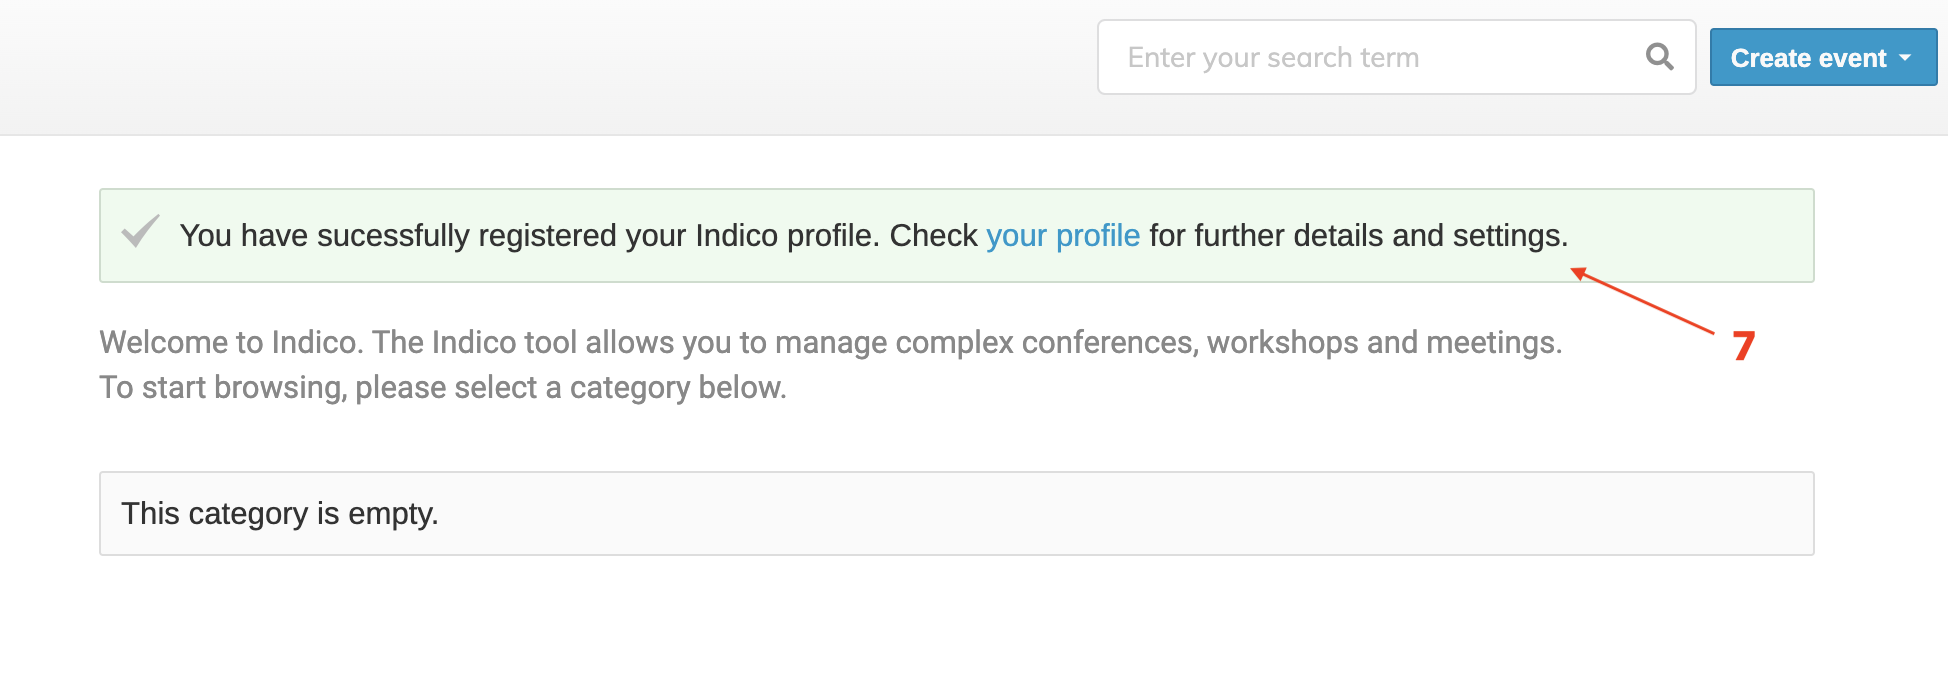
Final Confirmation
-
Once the profile is created, you’ll see the message:
“You have successfully registered your Indico profile.” [7]
-
Click on “your profile” to review or update personal settings.
02 Option B: Create an Account with Shibboleth (EduID)
Recommended for users from Sri Lankan universities connected to LEARN’s federated identity system.
Step-by-Step:
1. Go to the Indico portal Example: https://wsindico.learn.ac.lk
2. Click Login (top-right)

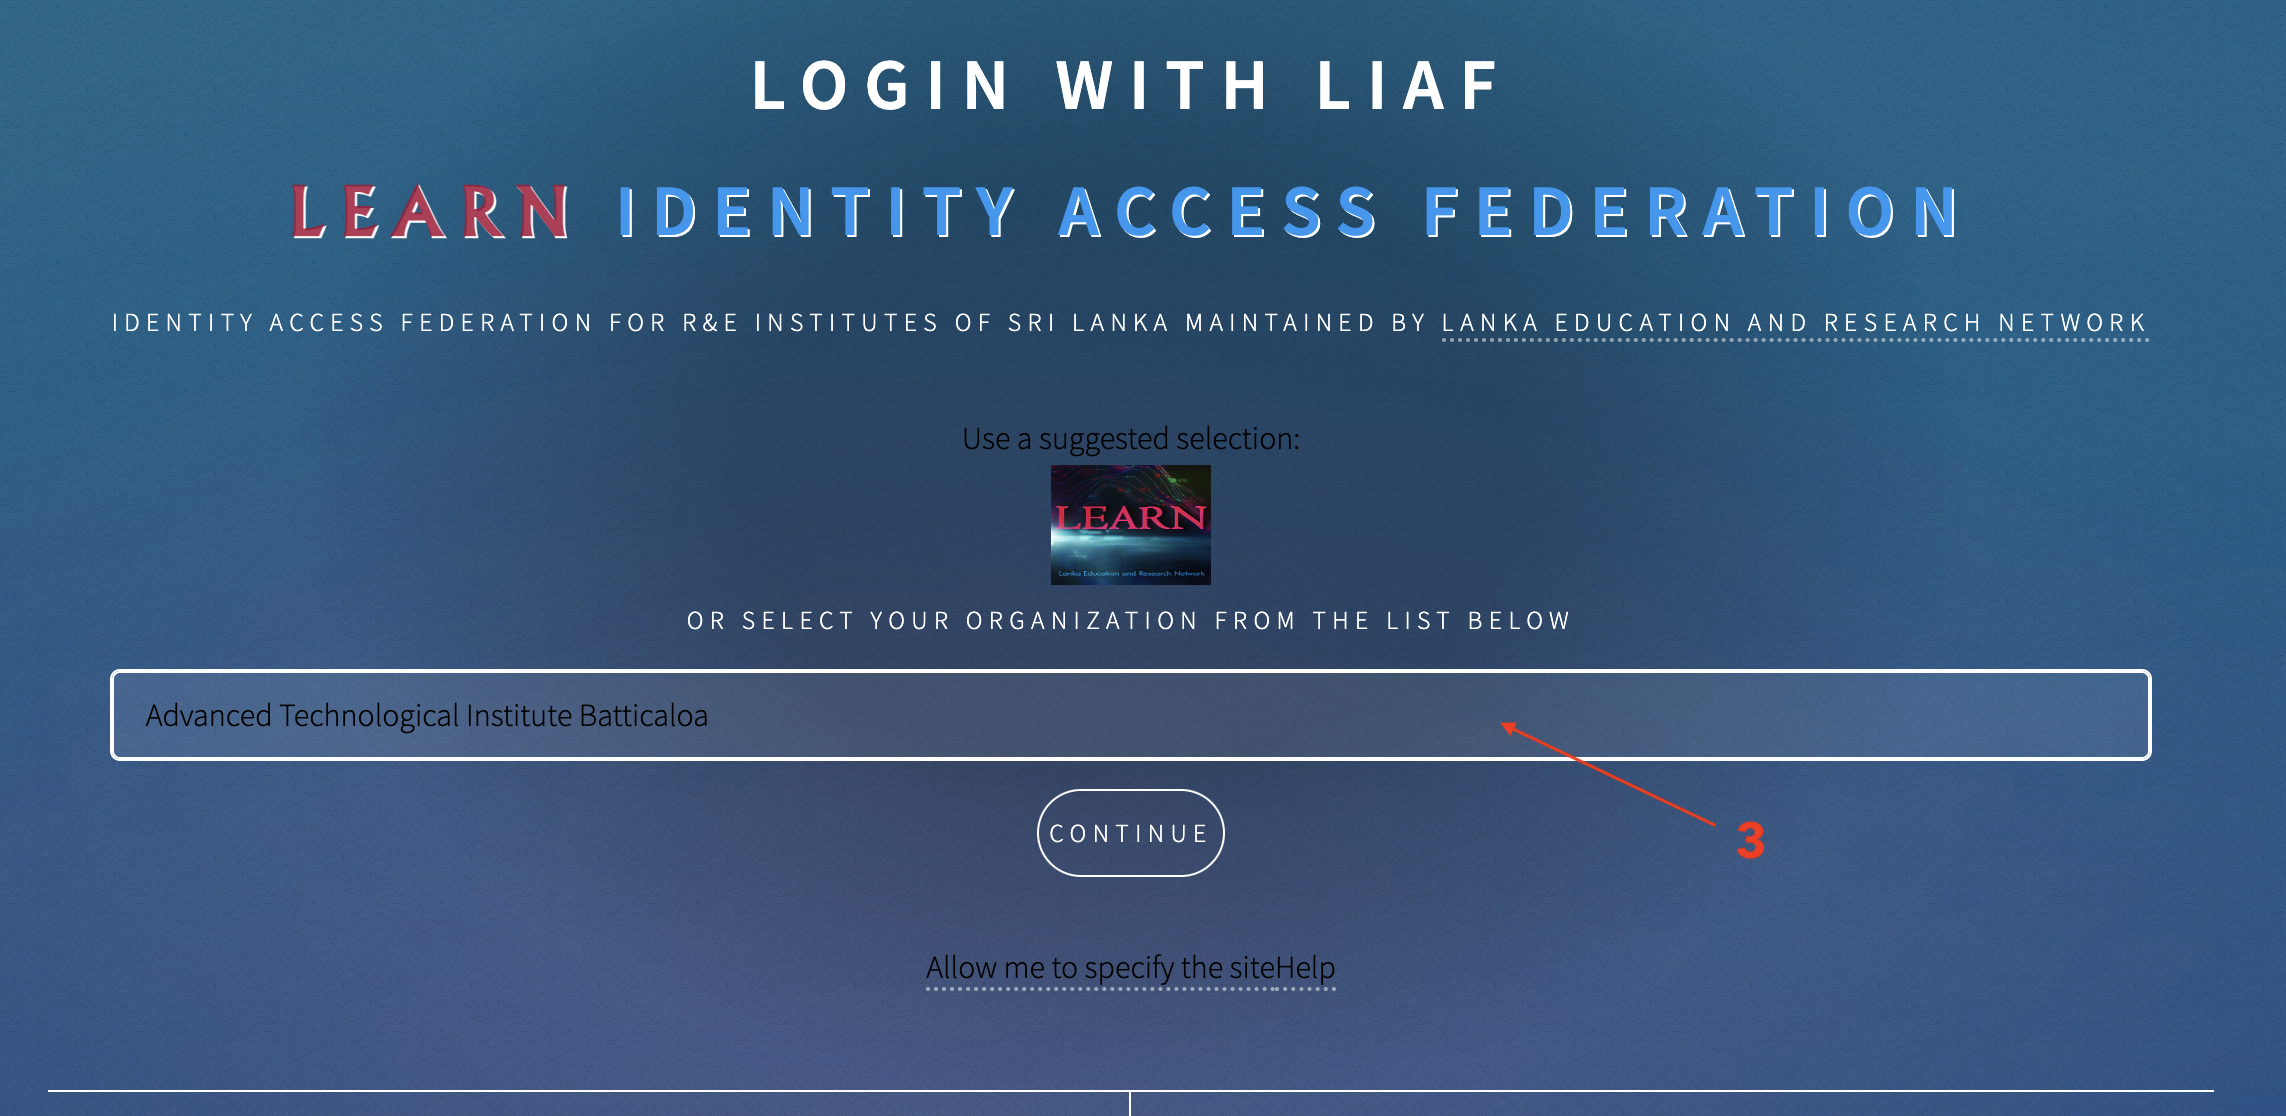
3. Select Login using your institution
You will be redirected to:
https://idp.learn.ac.lk
4. Select your university from the dropdown (if prompted)
5. Login with your institutional email/password (EduID)
6. If this is your first time:
-
- You’ll be redirected back to Indico
-
- Click “Create new Indico profile”
-
- Your name and email will be filled automatically
-
- Fill in any missing info (e.g., affiliation)
7. Click Create Profile
From now on, you will log in with your university account — no password needed for Indico itself.

Example:
Dr. Silva from the University of Peradeniya selects "University of Peradeniya" from the institution list and logs in with his university email and password. His Indico account is created automatically.
Quick Comparison
| Feature | Shibboleth Login | Manual Registration |
|---|---|---|
| Secure SSO Login | Yes (via EduID) | No |
| Uses University Email | Yes | Optional |
| Needs Admin Approval | No | Maybe (if auto-register disabled) |
| Login Method | Institutional credentials | Username & password |
How to Update Your Indico Profile
Keeping your Indico profile updated ensures accurate participant records, certificates, and communication.
Example:
Ms. Kumari, the conference coordinator from the University of Peradeniya, logs in to Indico via EduID. She updates her profile with her full name, role, and university affiliation. This helps the LEARN admin easily assign her as the manager of the NRC 2025 conference.
Step-by-Step Guide
1. Login to your Indico account
→ Visit: https://wsindico.learn.ac.lk/ and sign in
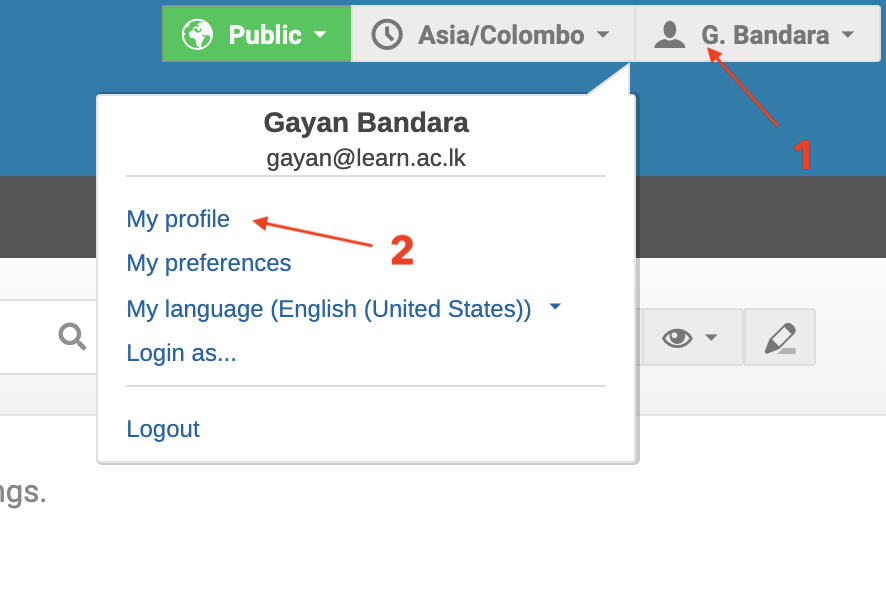
2. Click your name [1] at the top-right corner
3. From the dropdown menu, select “My Profile [2]”
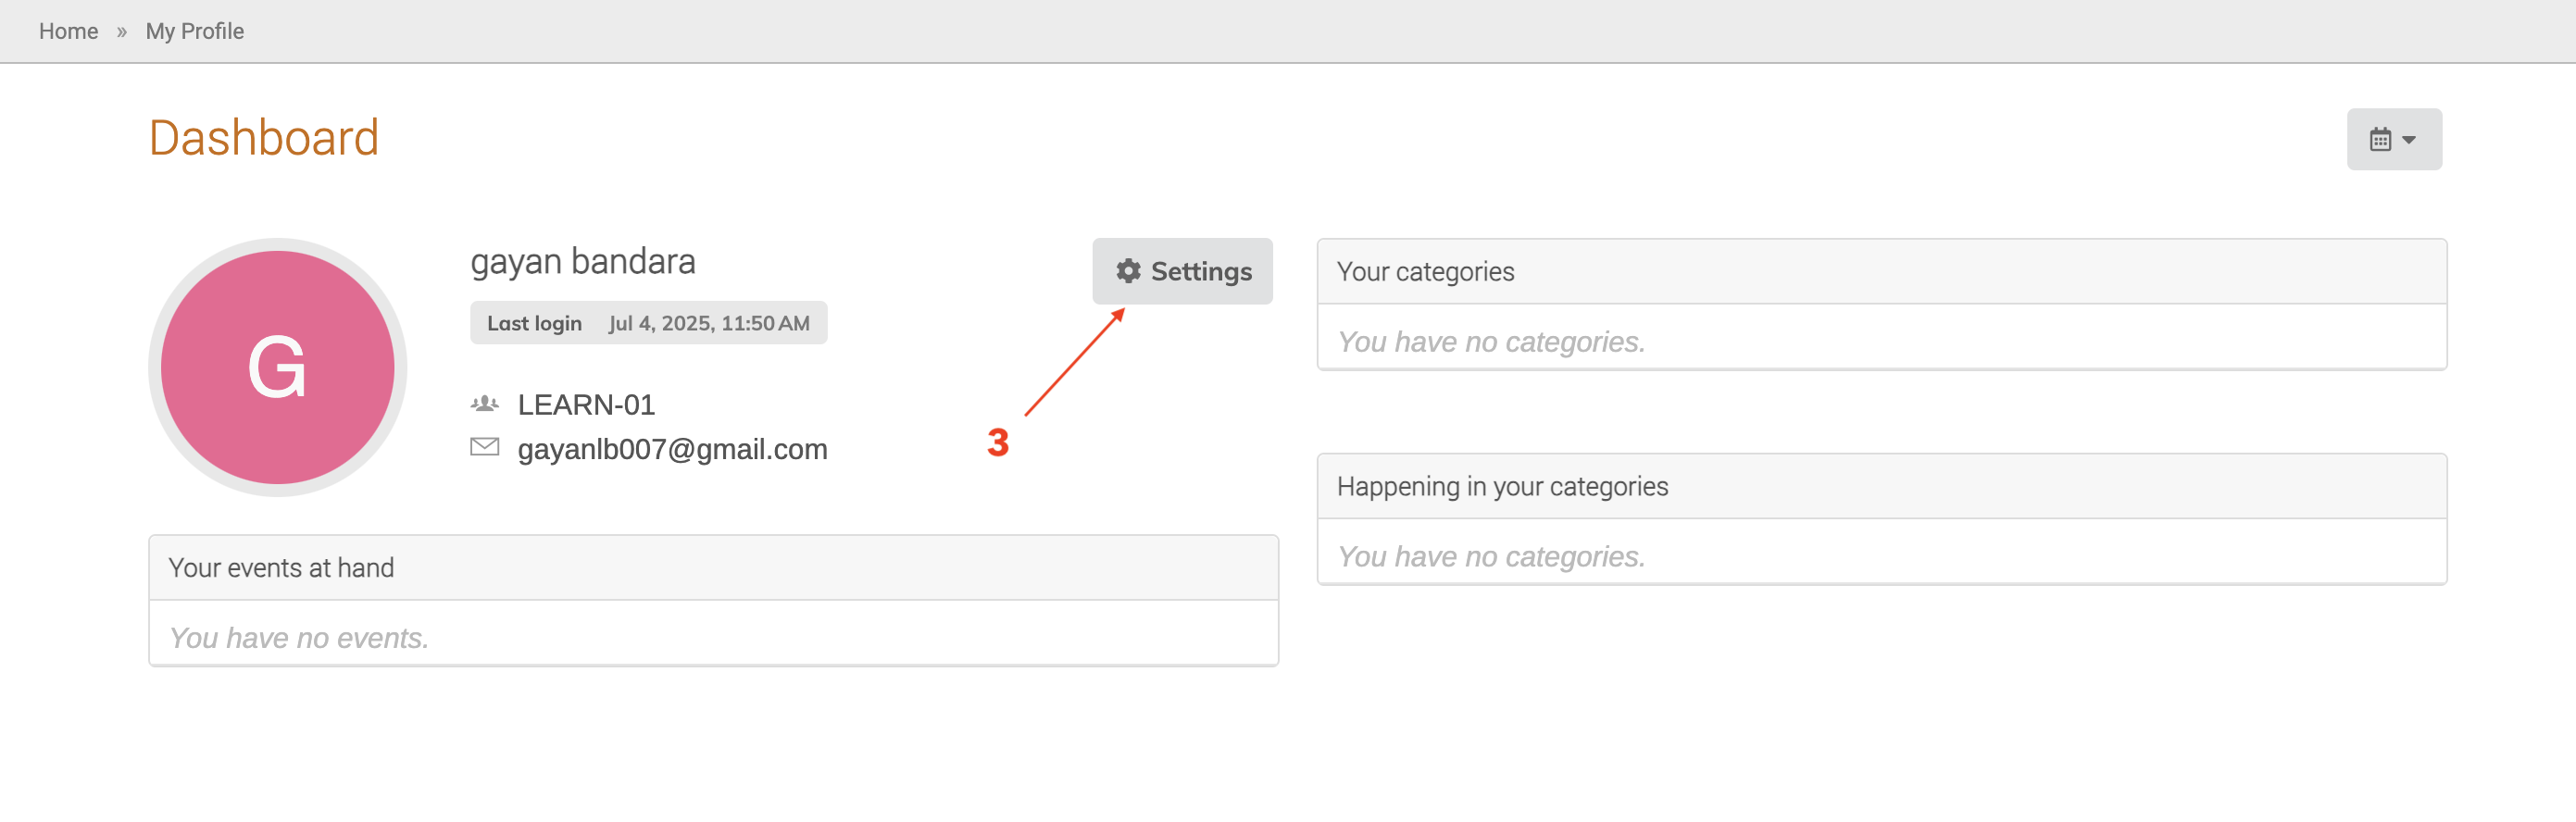
4. In the profile page click setting [3] > update the following fields as needed [4]:
- Full Name
- Affiliation (e.g., University or Organization)
- Phone Number
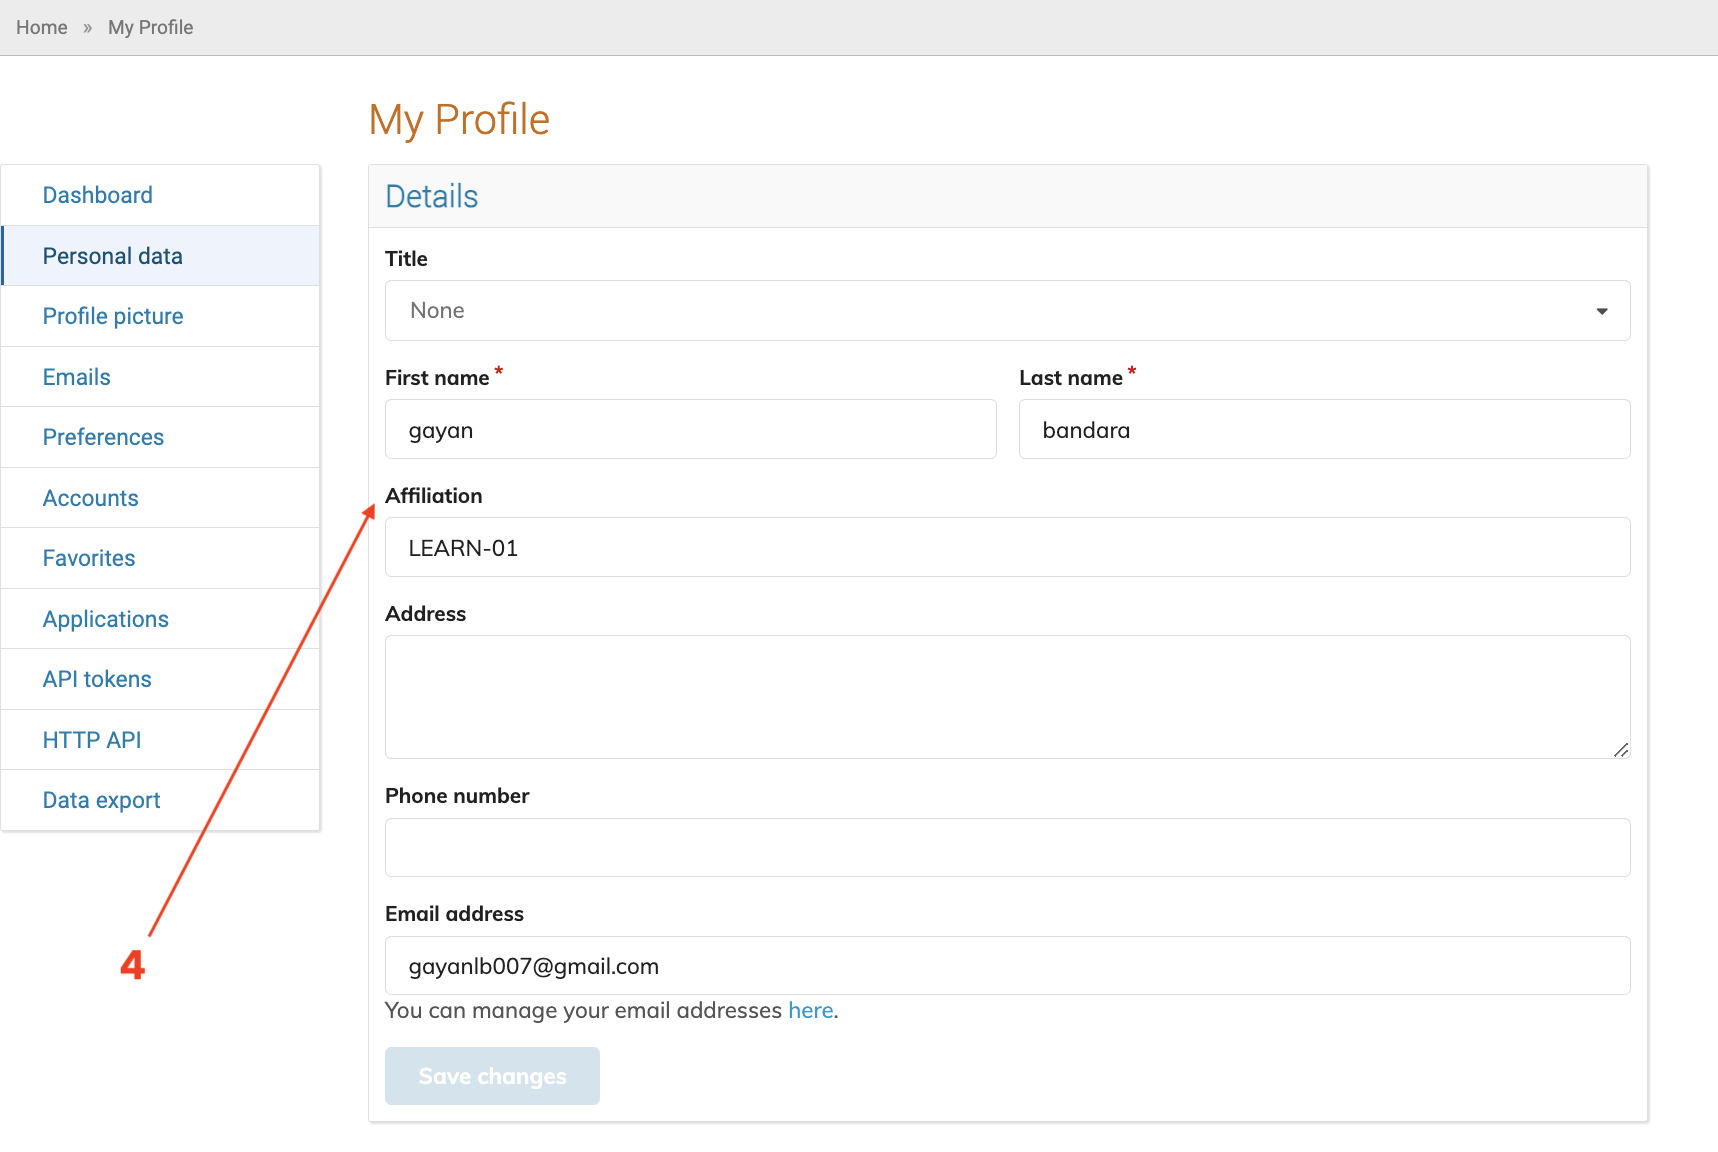
- Profile Picture [5,6] (optional)
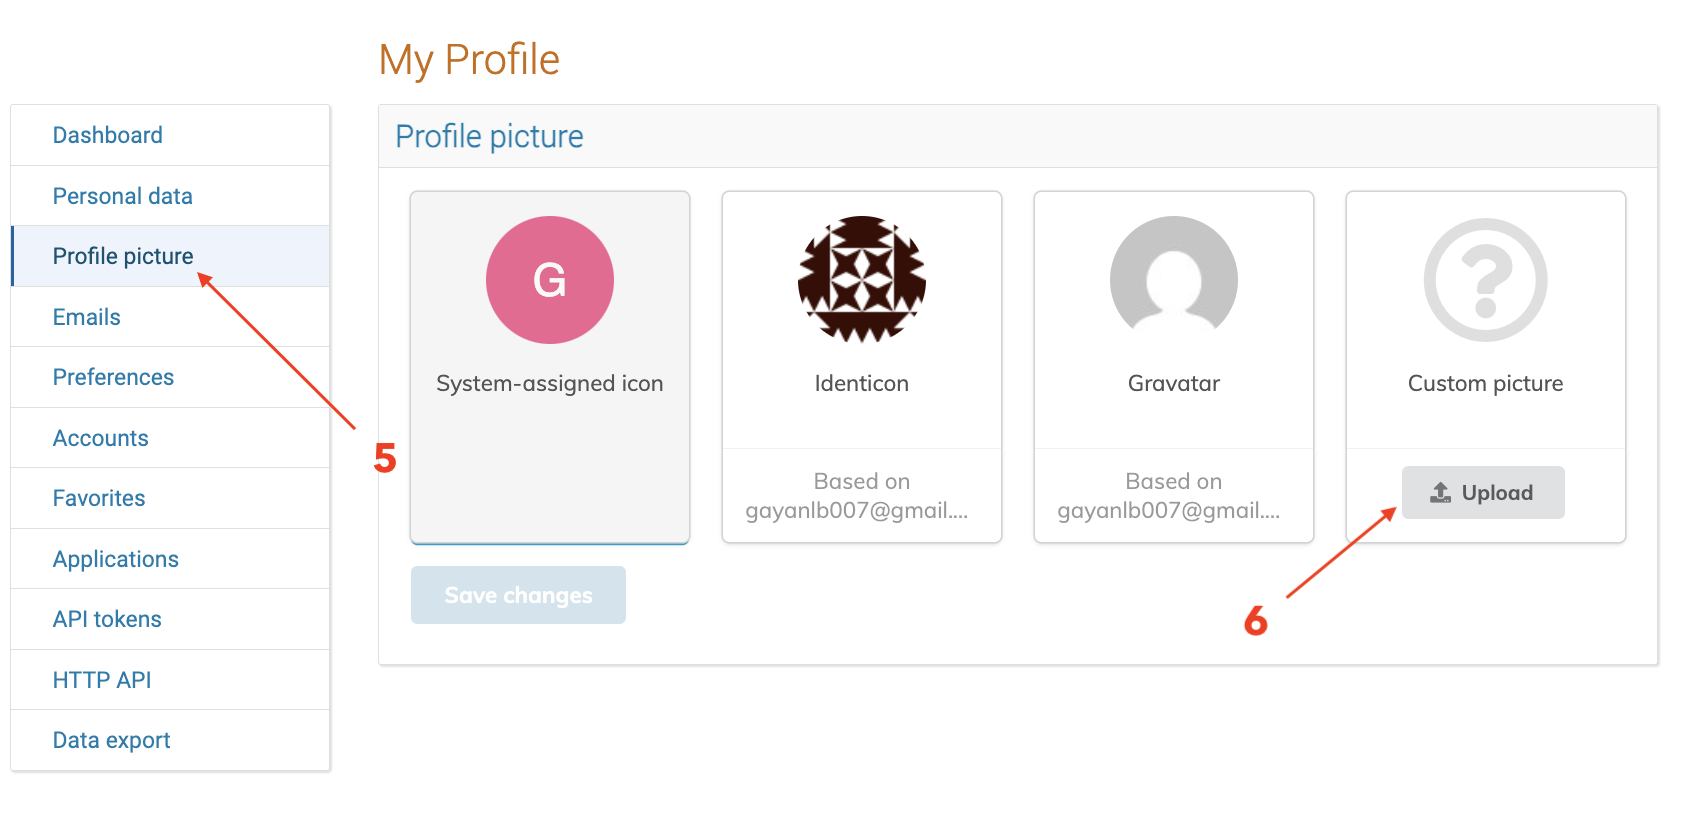
- Language and Timezone [7] (use
Asia/Colombo)
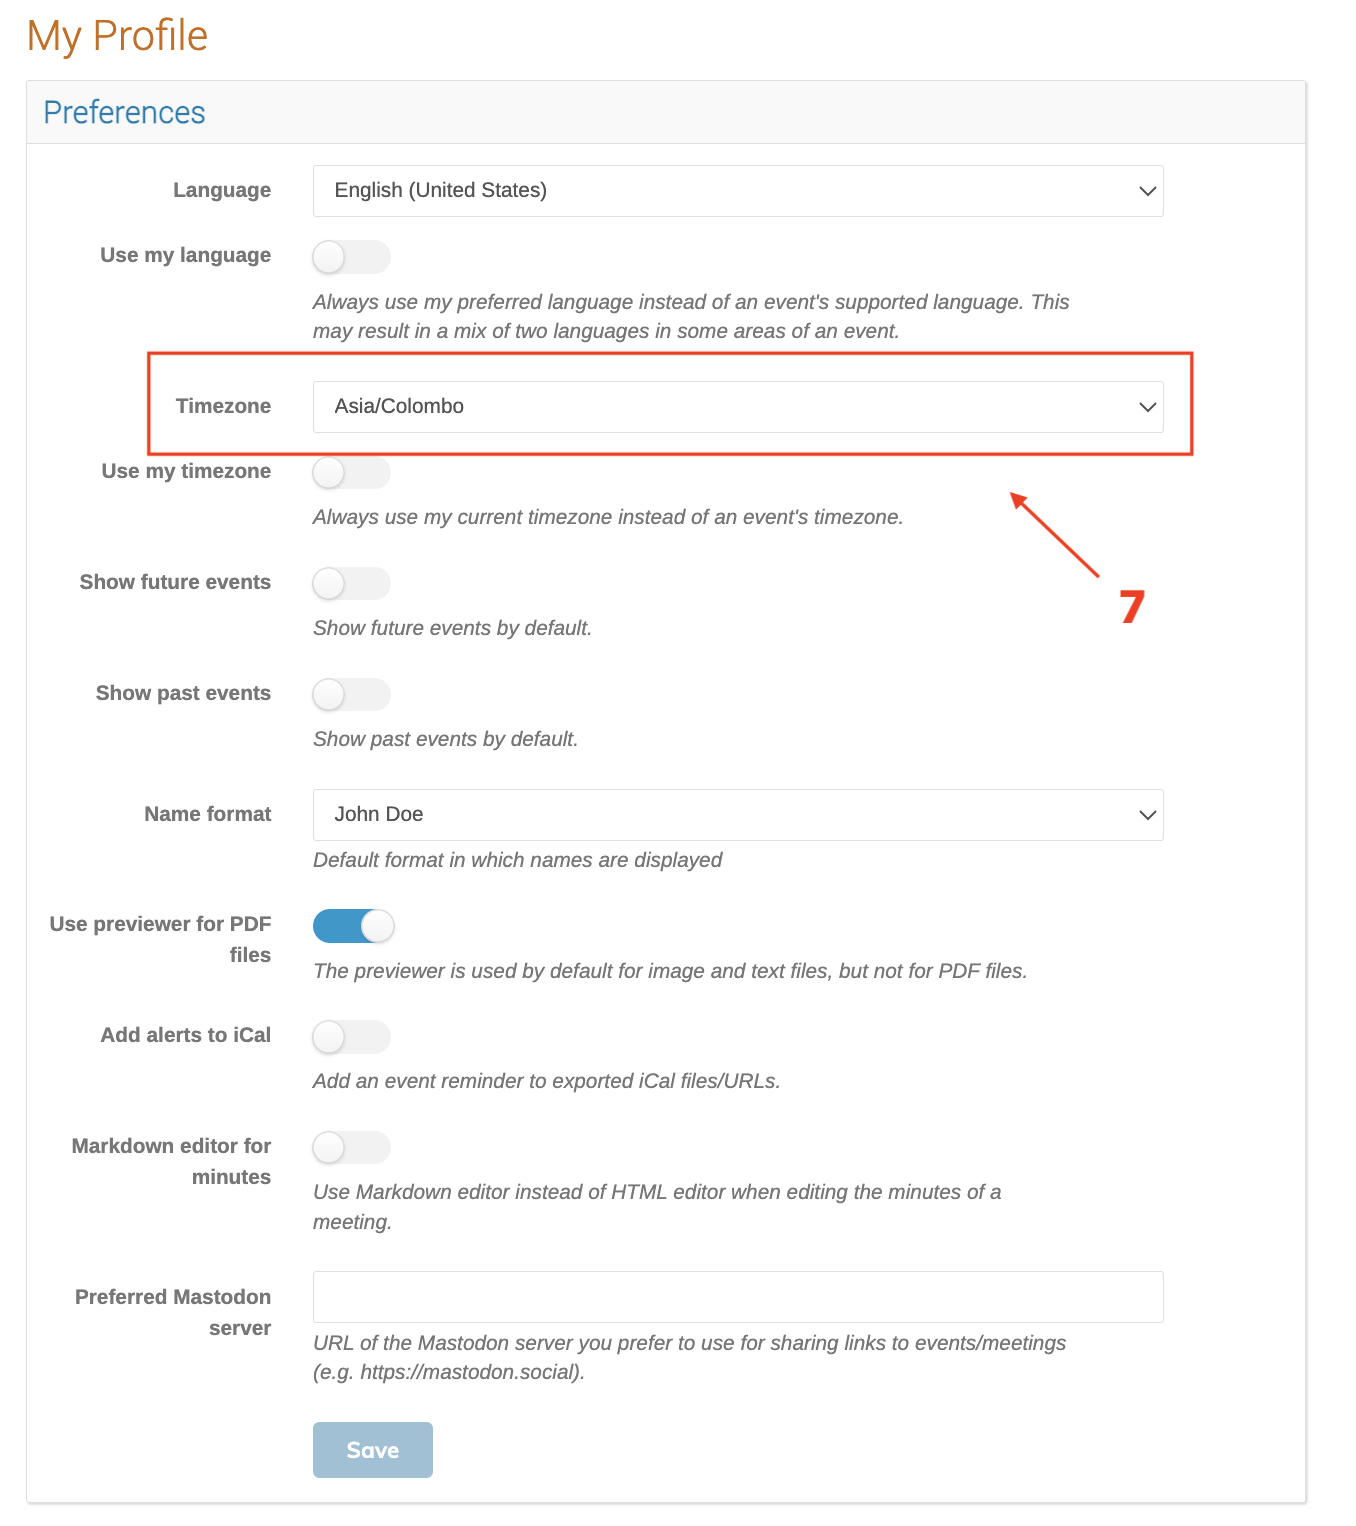
5. Click “Save Changes” at the bottom of the form
Why It’s Important
- Enables proper identification and role assignment by Indico administrators.
- Ensures accurate communication for abstract submissions, scheduling, and room bookings.
- Required before assigning a user as a Conference Manager or Location Manager.