Steps to Use Room Booking for “National Research Conference 2025”
This guide outlines how to set up and manage room bookings for the National Research Conference 2025, including how to add a location, assign permissions to a location manager (e.g., Dr. Silva), add a room, book a room, and optionally link it to the event timetable.
LEARN Admin Tasks
1. Navigate to the Event
- Log in to your Indico instance.
- From the homepage or dashboard, find and select the event: National Research Conference 2025.
2. Access the Room Booking Section
- On the event page, click the gear icon or “Manage event” to open the Management Area.
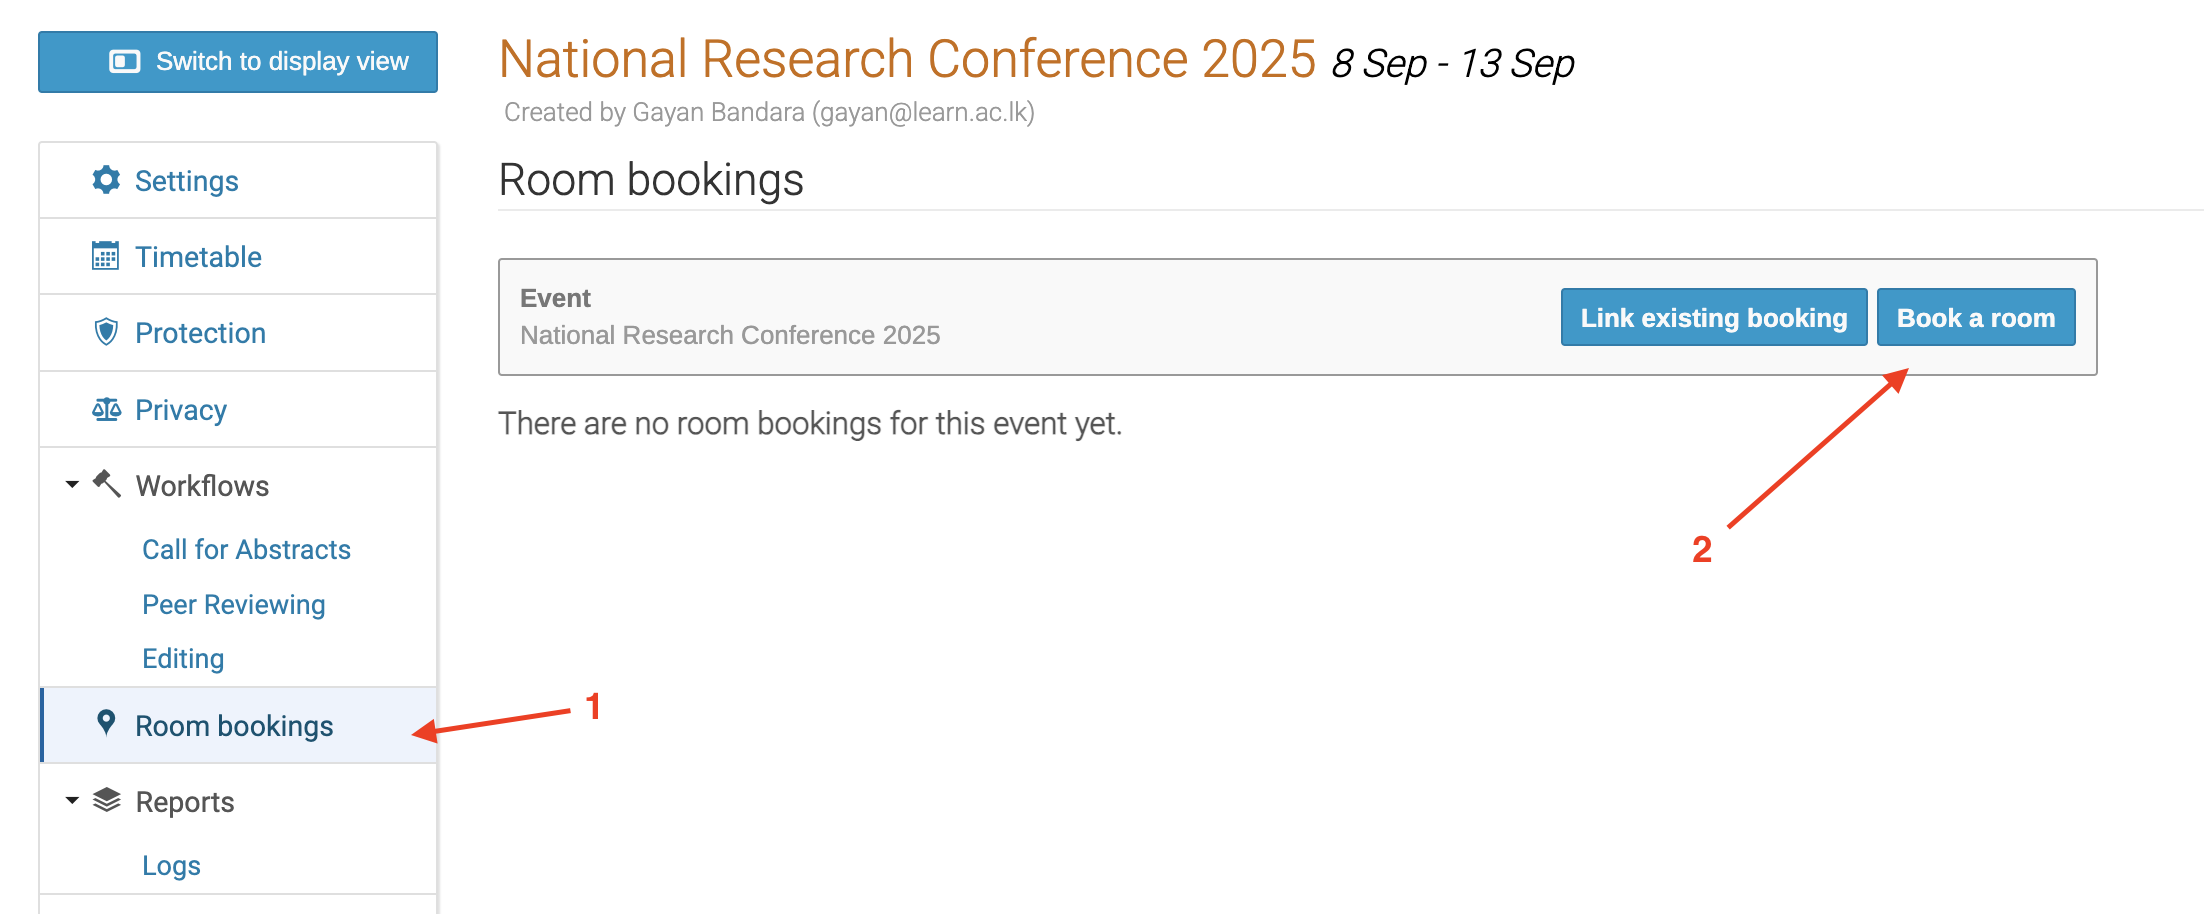
- In the left sidebar, scroll down and click Room bookings.
- You’ll see the Room bookings [1] tab with options. Click “Book a room” [2] to open the Room Booking Dashboard.
3. Open the Room Booking Dashboard
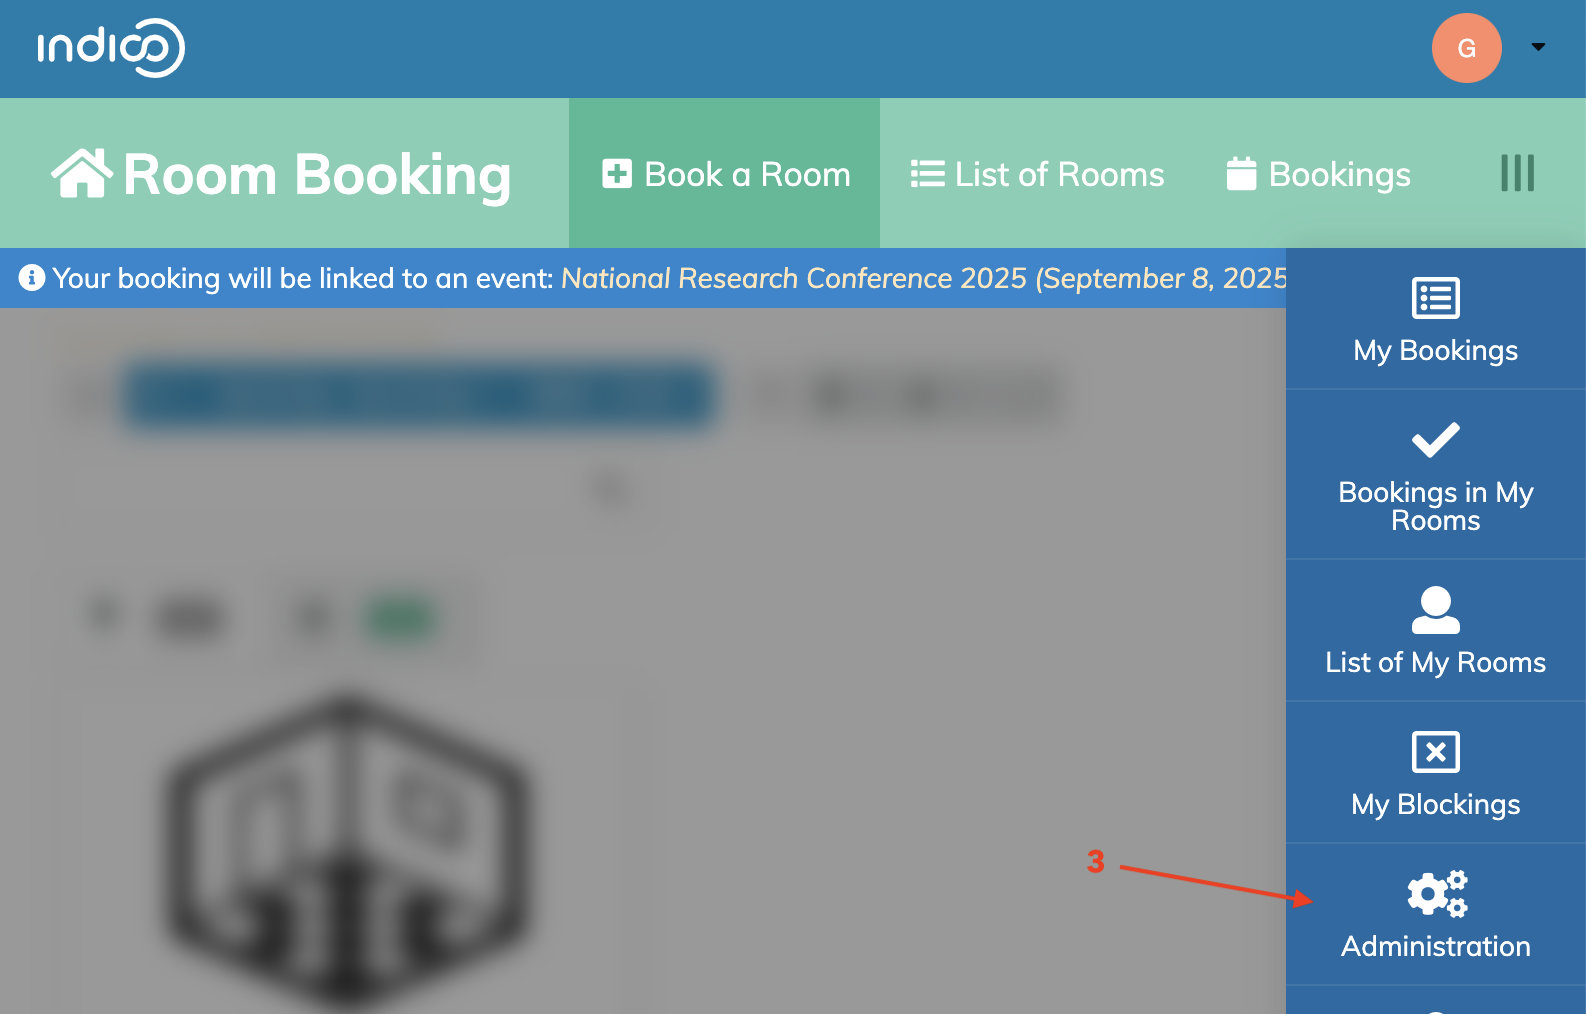
- Once inside the Room Booking interface, click the Administration [3] tab in the right-hand sidebar to configure room booking settings.
4. Add a New Location
-
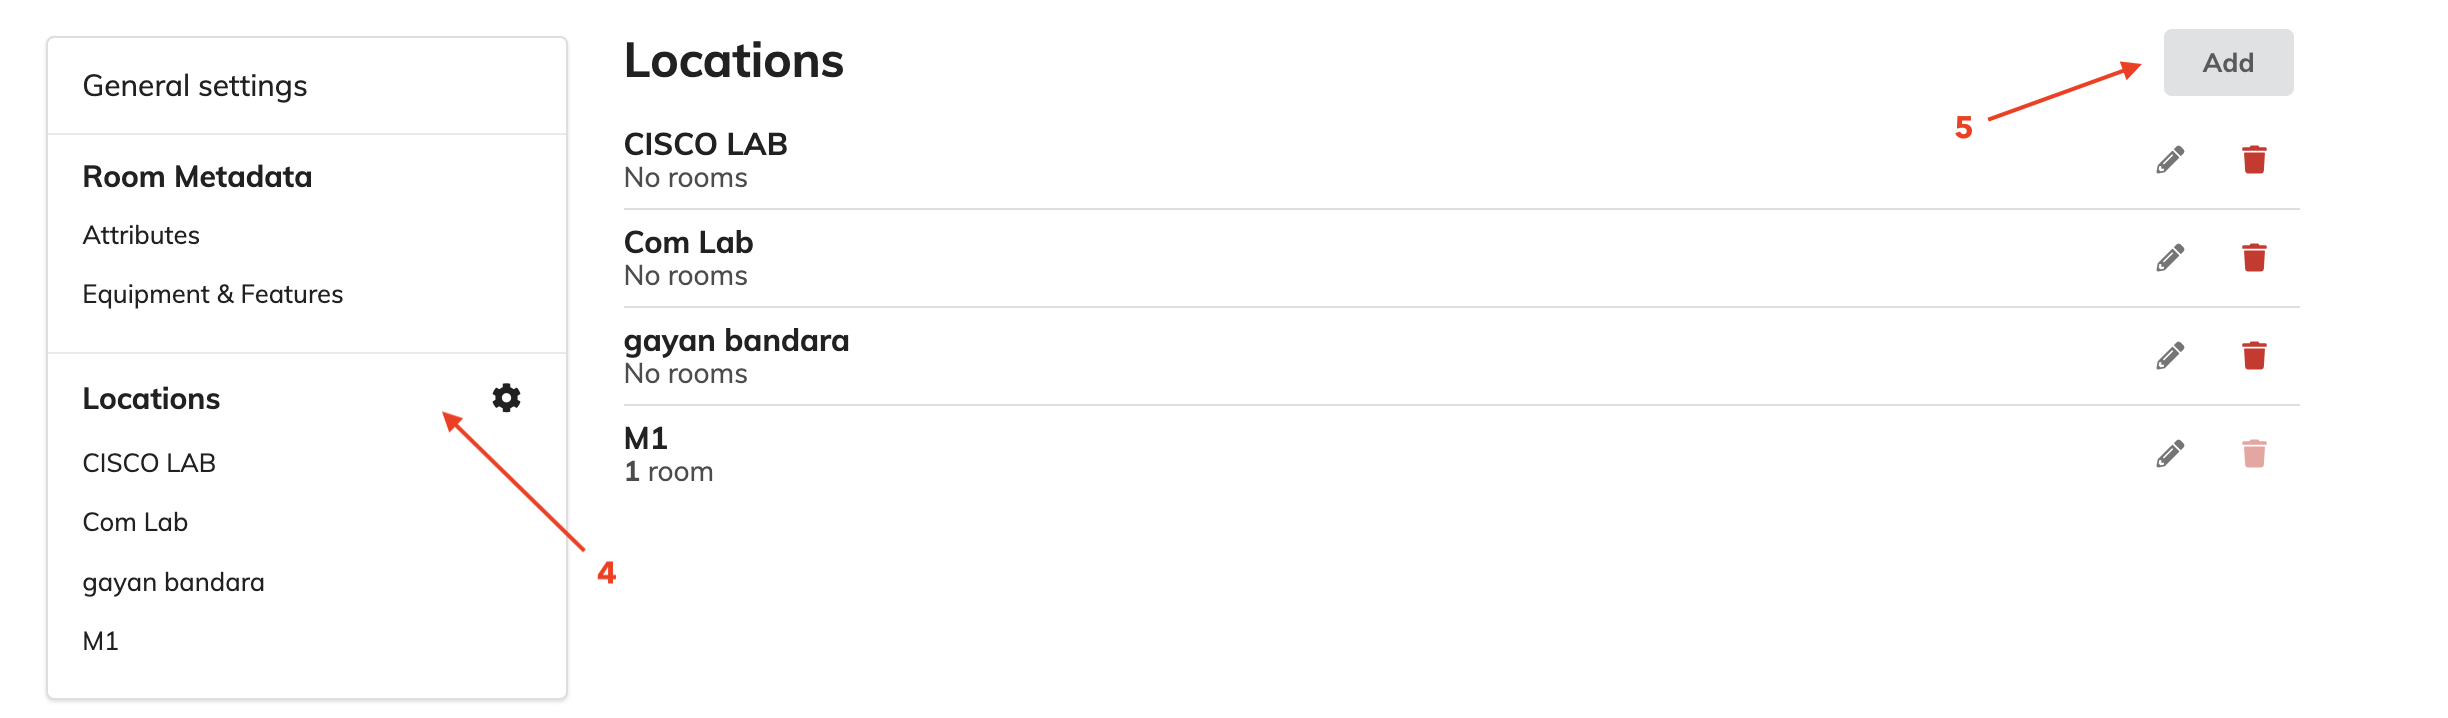
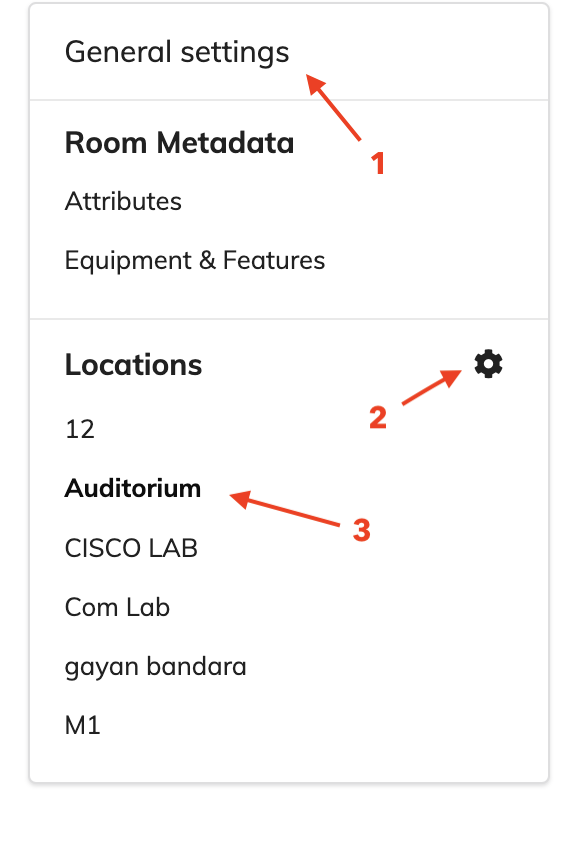
In the left sidebar under General Settings, click Locations [4].
-
Click the ➕ Add [5] button in the top-right.
- In the Add Location popup, fill in the details:
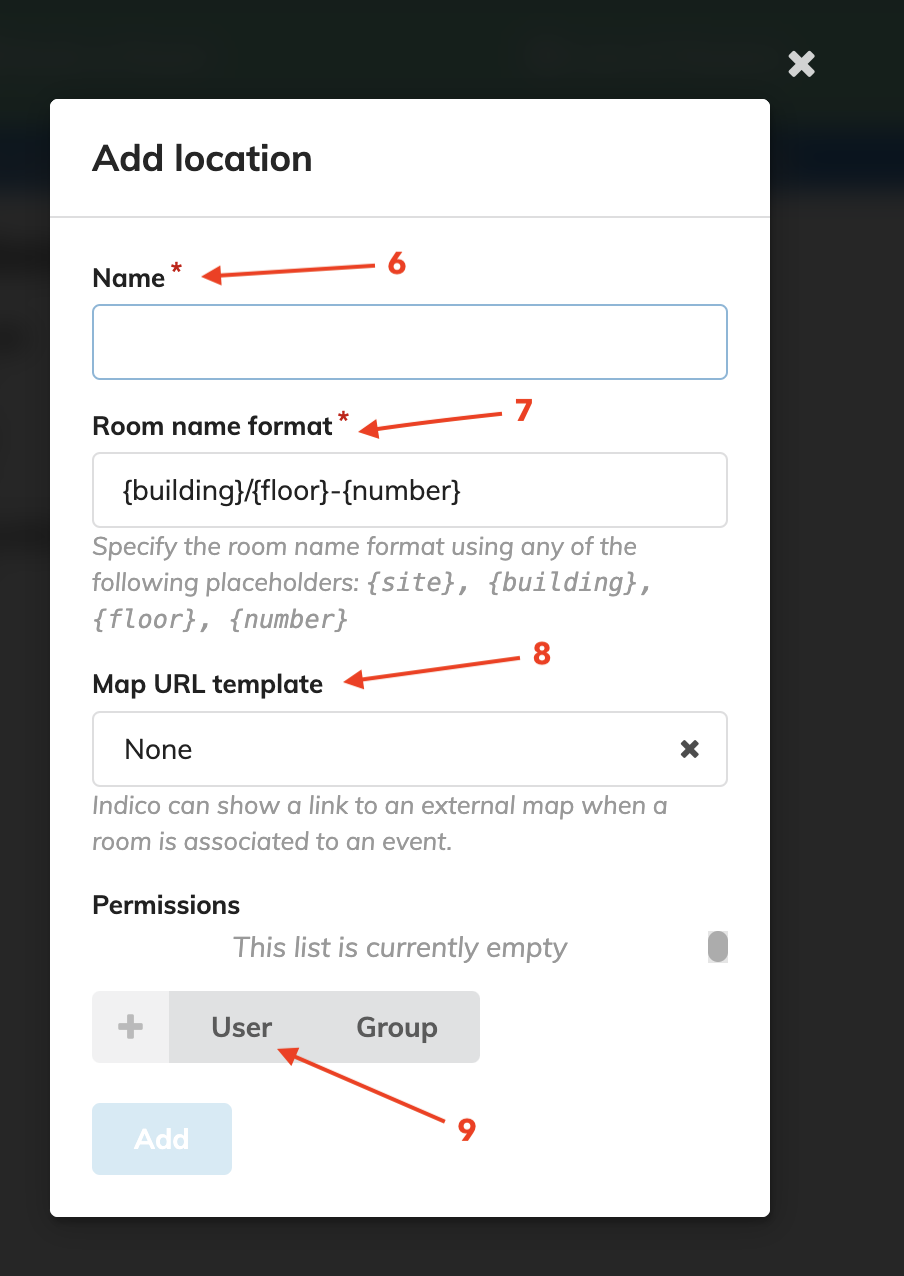
- Name [6]:
Auditorium - Room name format [7]: e.g.,
{building}/{floor}-{number}(e.g.,Auditorium/1-001) - Map URL template [8] (optional): e.g.,
https://maps.example.com?room={building}/{floor}-{number}
4. Click Add to create the location.
5. Assign a Location Manager (e.g., Dr. Silva)
- From the Room Booking dashboard, go to: Room Booking → Permissions
- Click the + button under User [9] or Group.
- Search for Dr. Silva (Conference Manager).
-
Grant Dr. Silva the following rights:
-
- Can manage bookings
-
- Room manager (if required for location approval)
-
-
Click Add to apply the permissions.
Location Manager Tasks (Performed by Dr. Silva)
6. Add Room to the Location
i. Open Room Booking Administration
- Log in to Indico with admin rights.
- Go to the event: National Research Conference 2025.
- From the left sidebar, select Room bookings.
- On the right sidebar, click the Administration tab.
ii. Open Locations in General Settings
-
In the left sidebar under General Settings [1], click Locations [2].
-
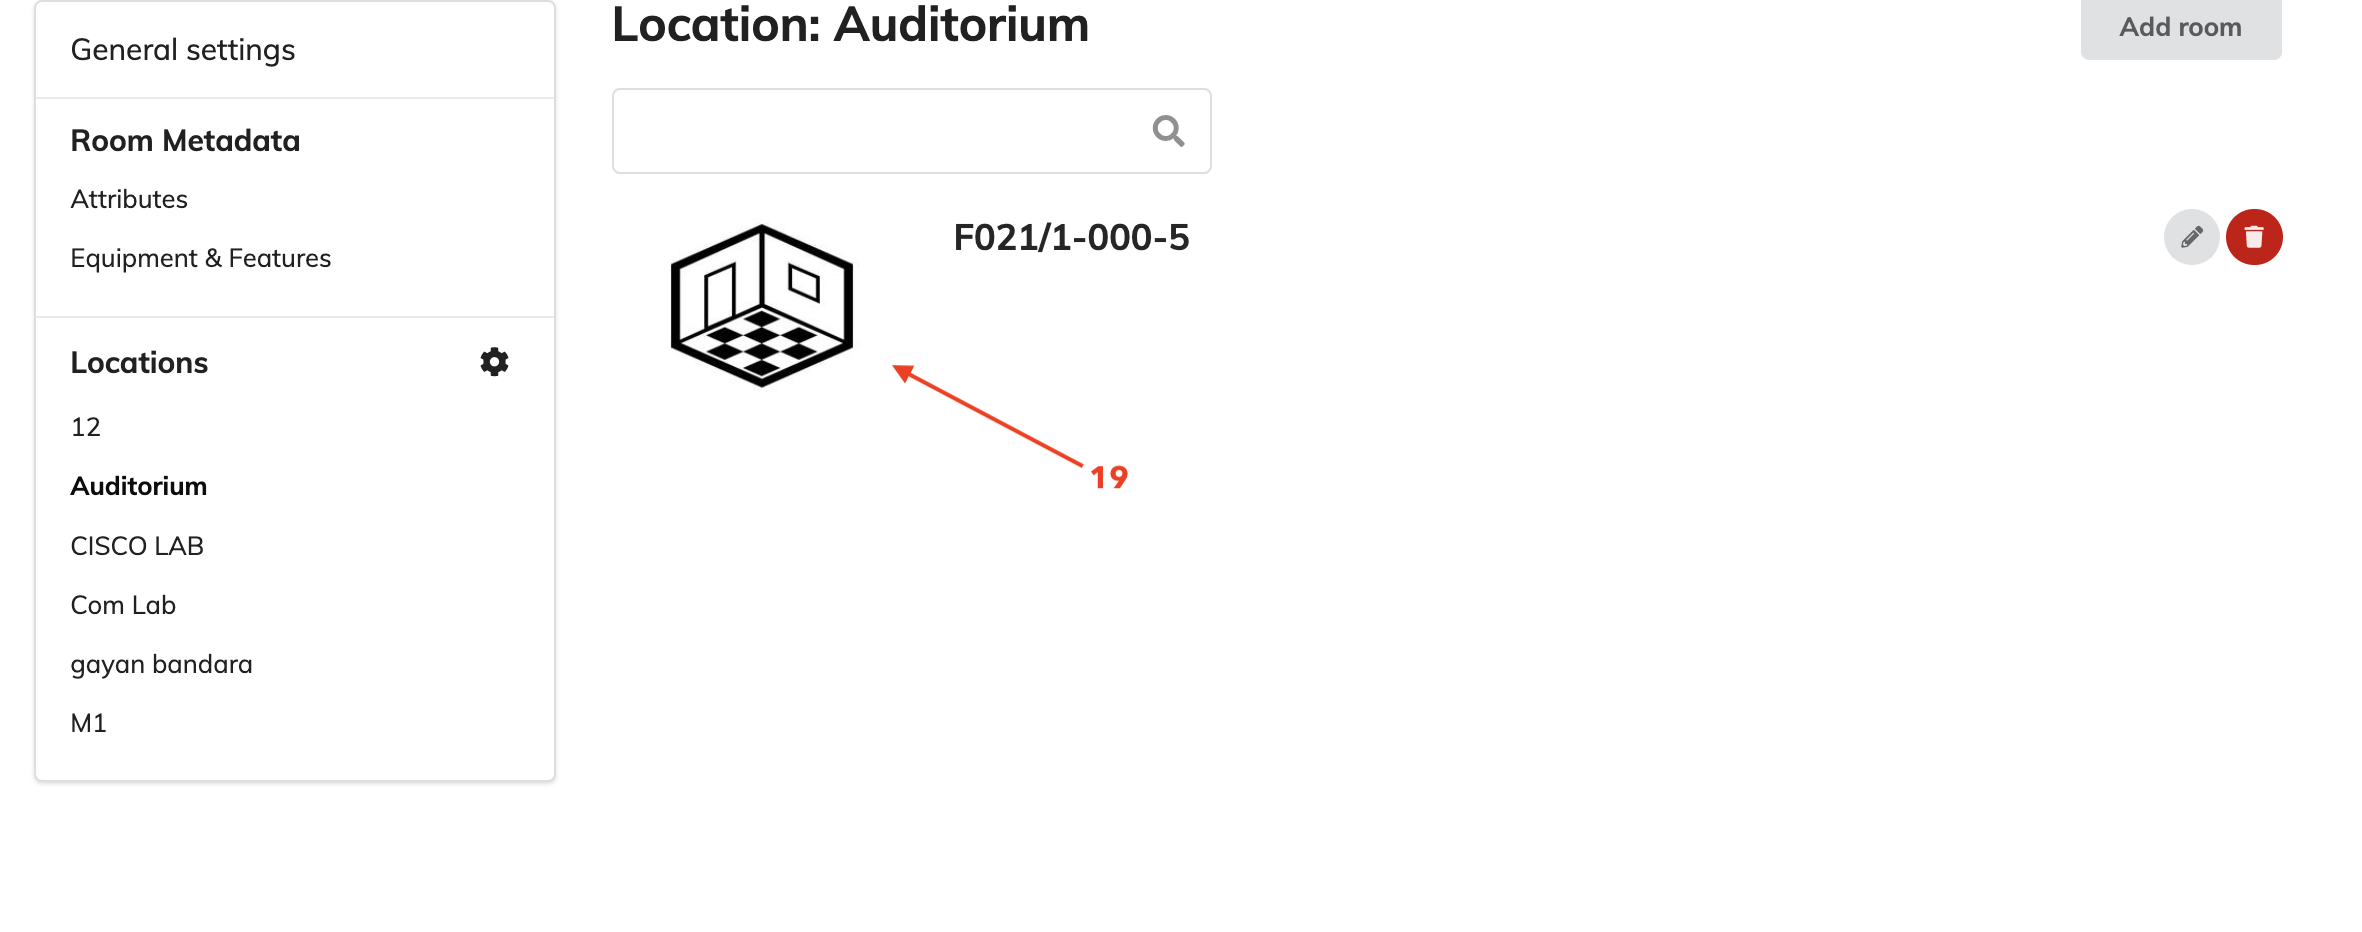
Find the previously created location: Auditorium.
- Click on Auditorium [3] to open its details.
iii. Add a New Room
-
Inside the Auditorium location, click the Add room [4] button.

-
A popup window titled Add Room will open with three tabs:
-
- Basic Details
-
- Location
-
- Permissions
-
iv. Fill in Basic Room Details
In the Basic Details [5] tab, provide:
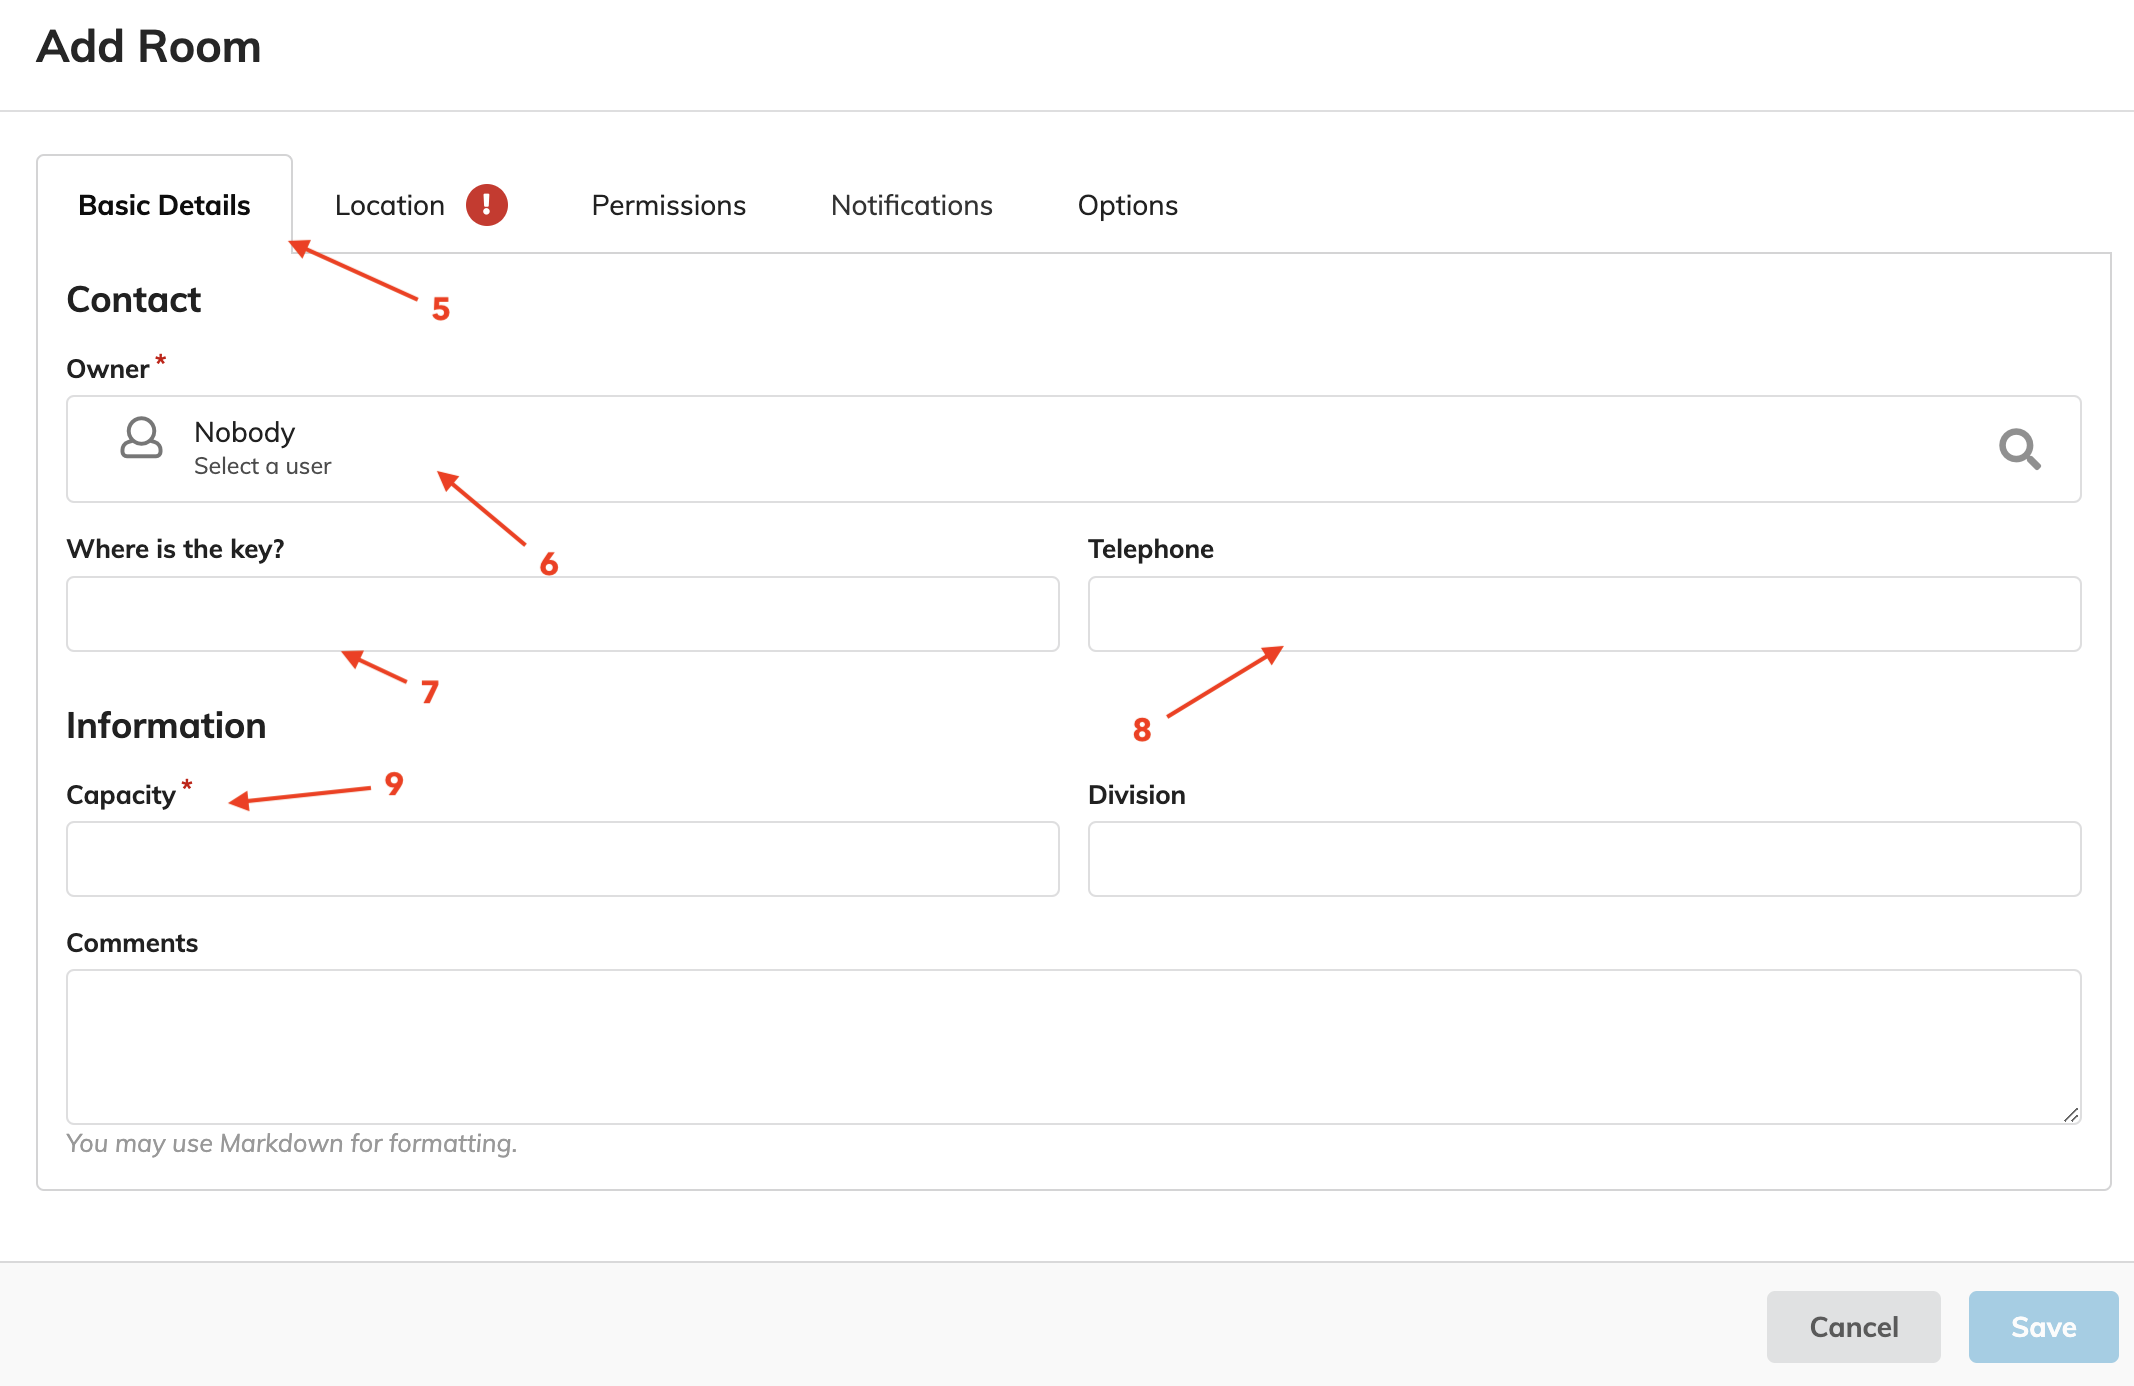
- Where is the key? [7]:
Reception Desk, Auditorium - Telephone [8]:
+94 ########## - Capacity [9]:
200 - Leave other optional fields blank unless needed.
- Click Next or move to the Location tab.
v. Complete the Location Tab [10]
Fill in the required fields as follows:
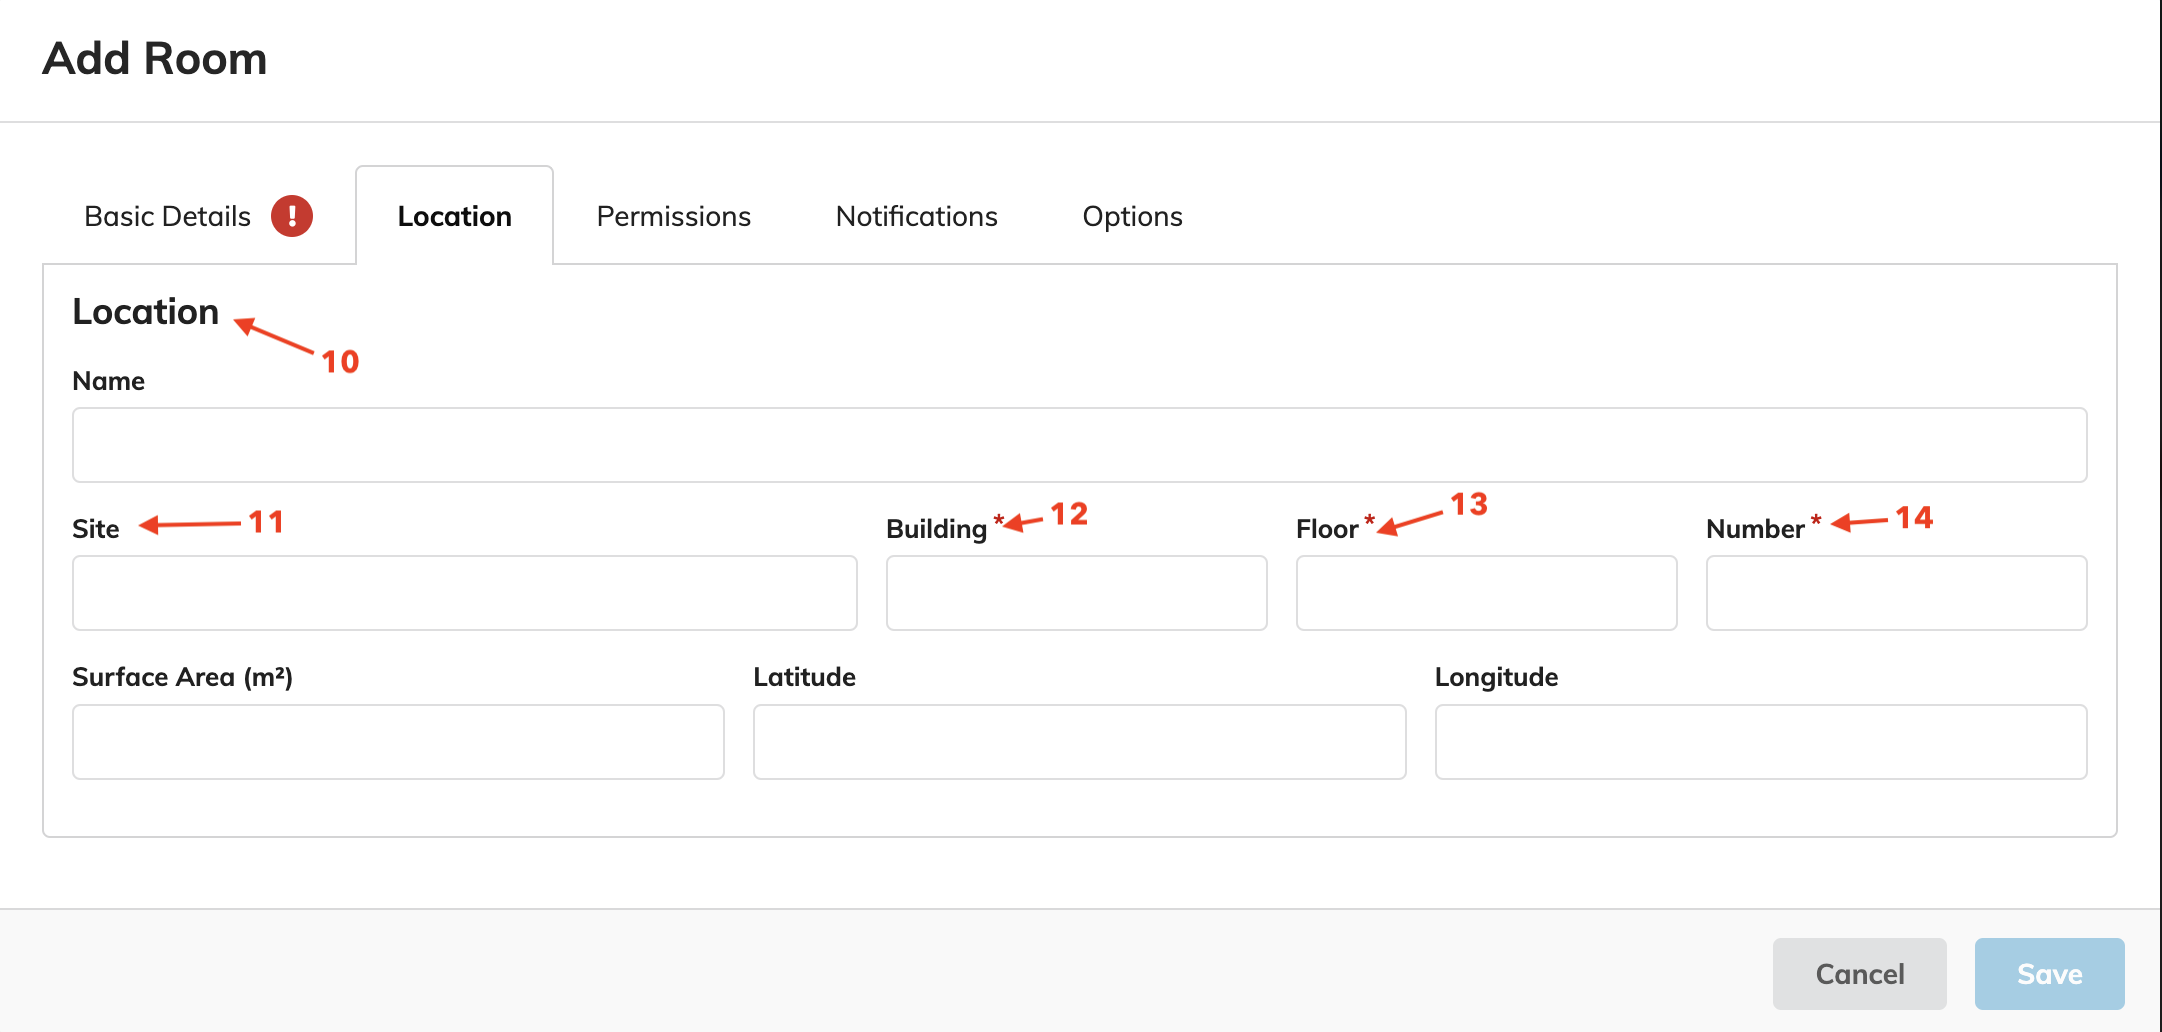
- Name:
Main Auditorium - Site [11]:
University of Peradeniya - Building [12]:
Arts Faculty Building - Floor [13]:
1 - Number [14]:
001 -
Example Format:
"Main Auditorium" located on Floor 1 of Arts Faculty Building - Click Next to go to the Permissions tab.
vi. Set Room Permissions
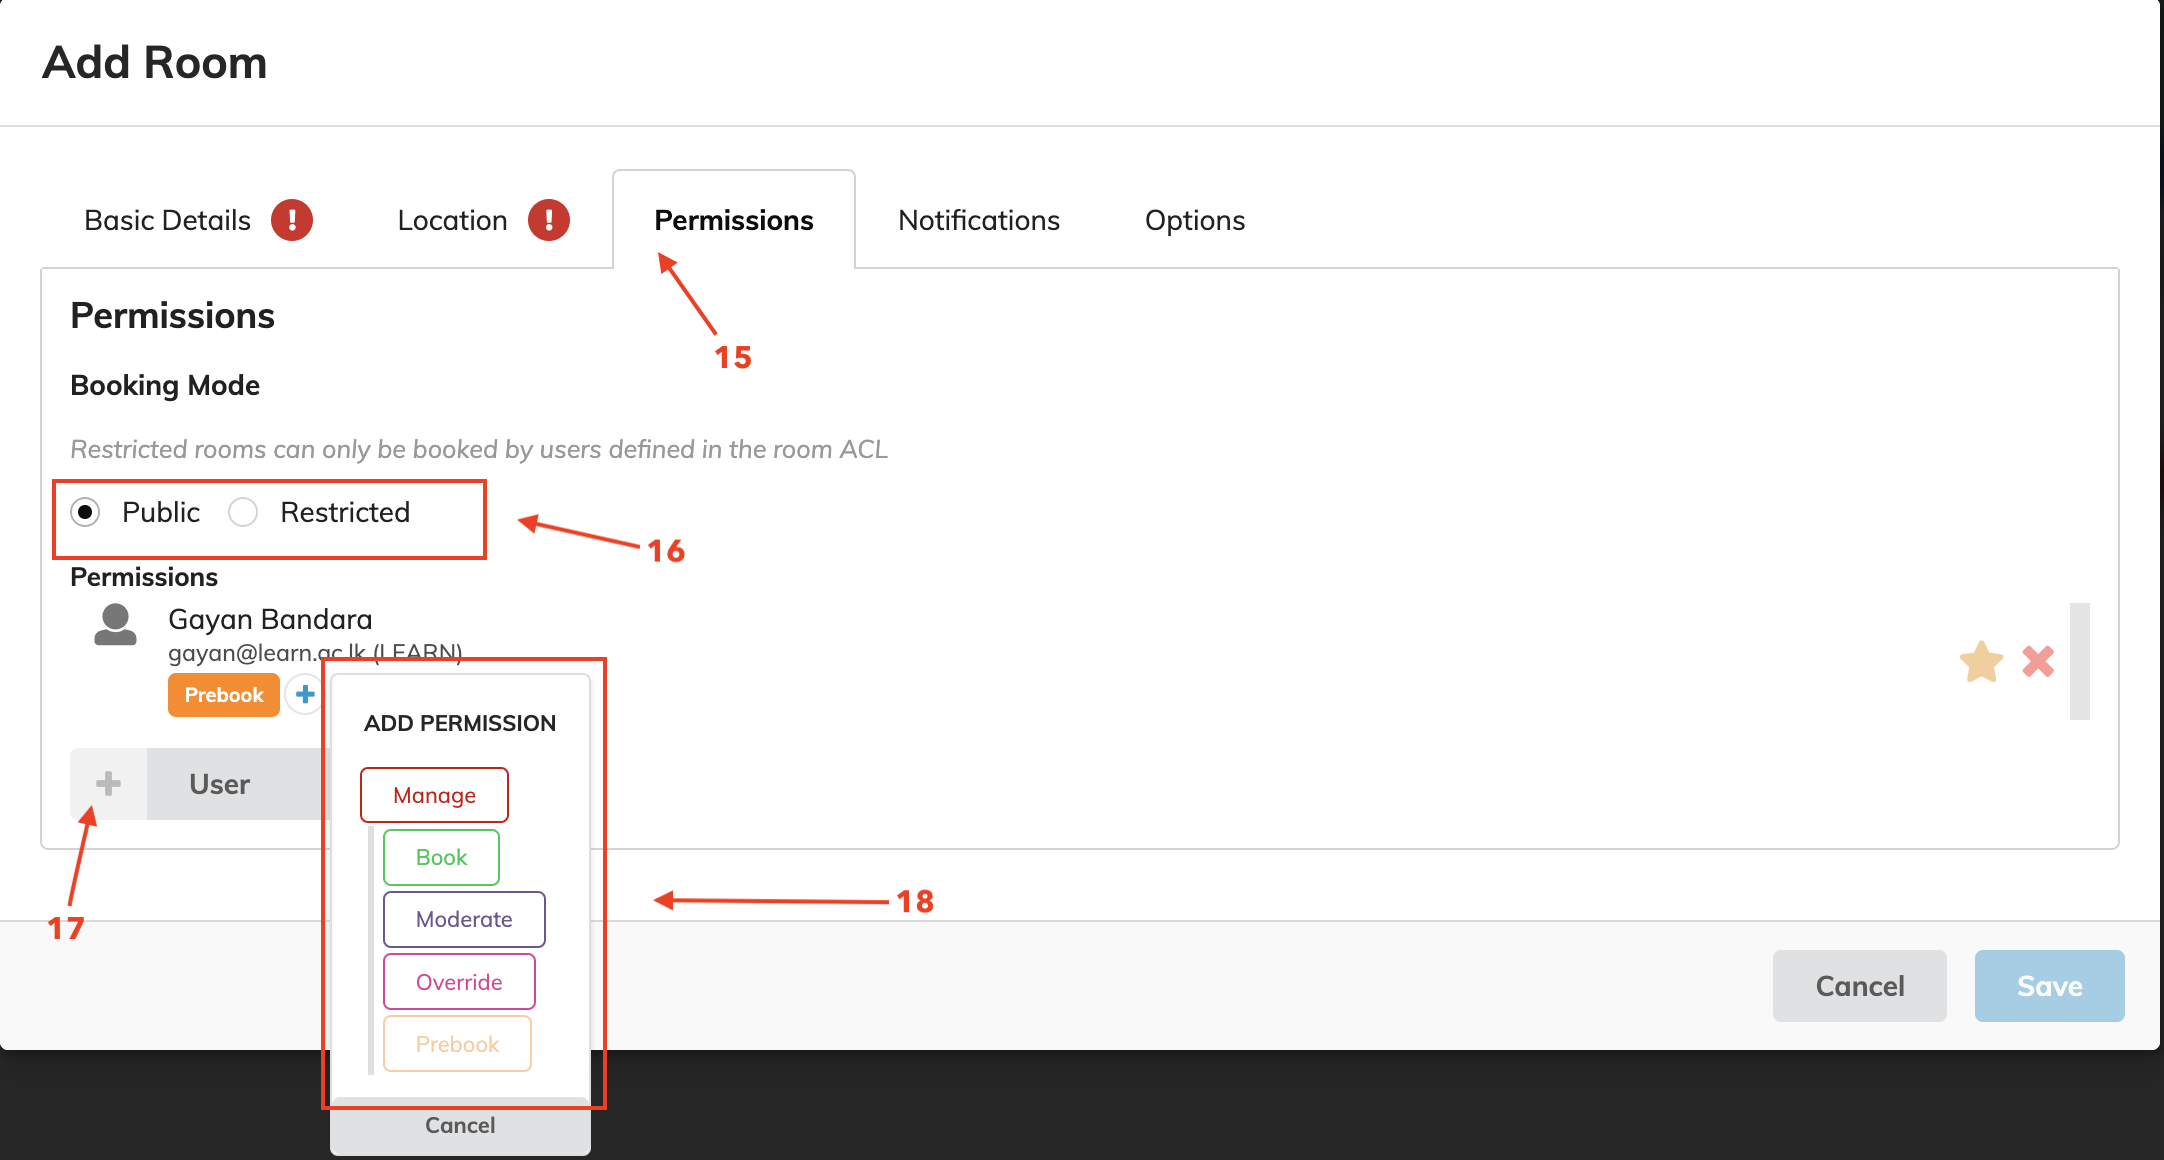
In the Permissions [15] tab:
- Booking Mode:
- Select Public [16] for open access OR
- Select Restricted [16] to limit booking to selected users
- If Restricted, check: Restricted rooms can only be booked by users defined in the room ACL
- Click + Add [17] and search for Dr. Silva
- Assign Dr. Silva the following permissions [18]:
- Manager: Full control of room settings
- Moderate: Approve/reject booking requests
- Override: Book over existing reservations
- Click Add to save Dr. Silva's permissions.
vii. Save the Room
- Review all three tabs for accuracy.
- Click Save or Add Room to finish.
- The new room (Main Auditorium [19]) will now be listed under the Auditorium location.
7. Book a Room
- Return to the Room Booking dashboard.
- click on list of Rooms Tab`.

3. Click Book next to the room (e.g., Auditorium/1-001)

4. Fill in the booking form: - Reason: e.g., “Conference Session” - Confirm or adjust the selected time/location
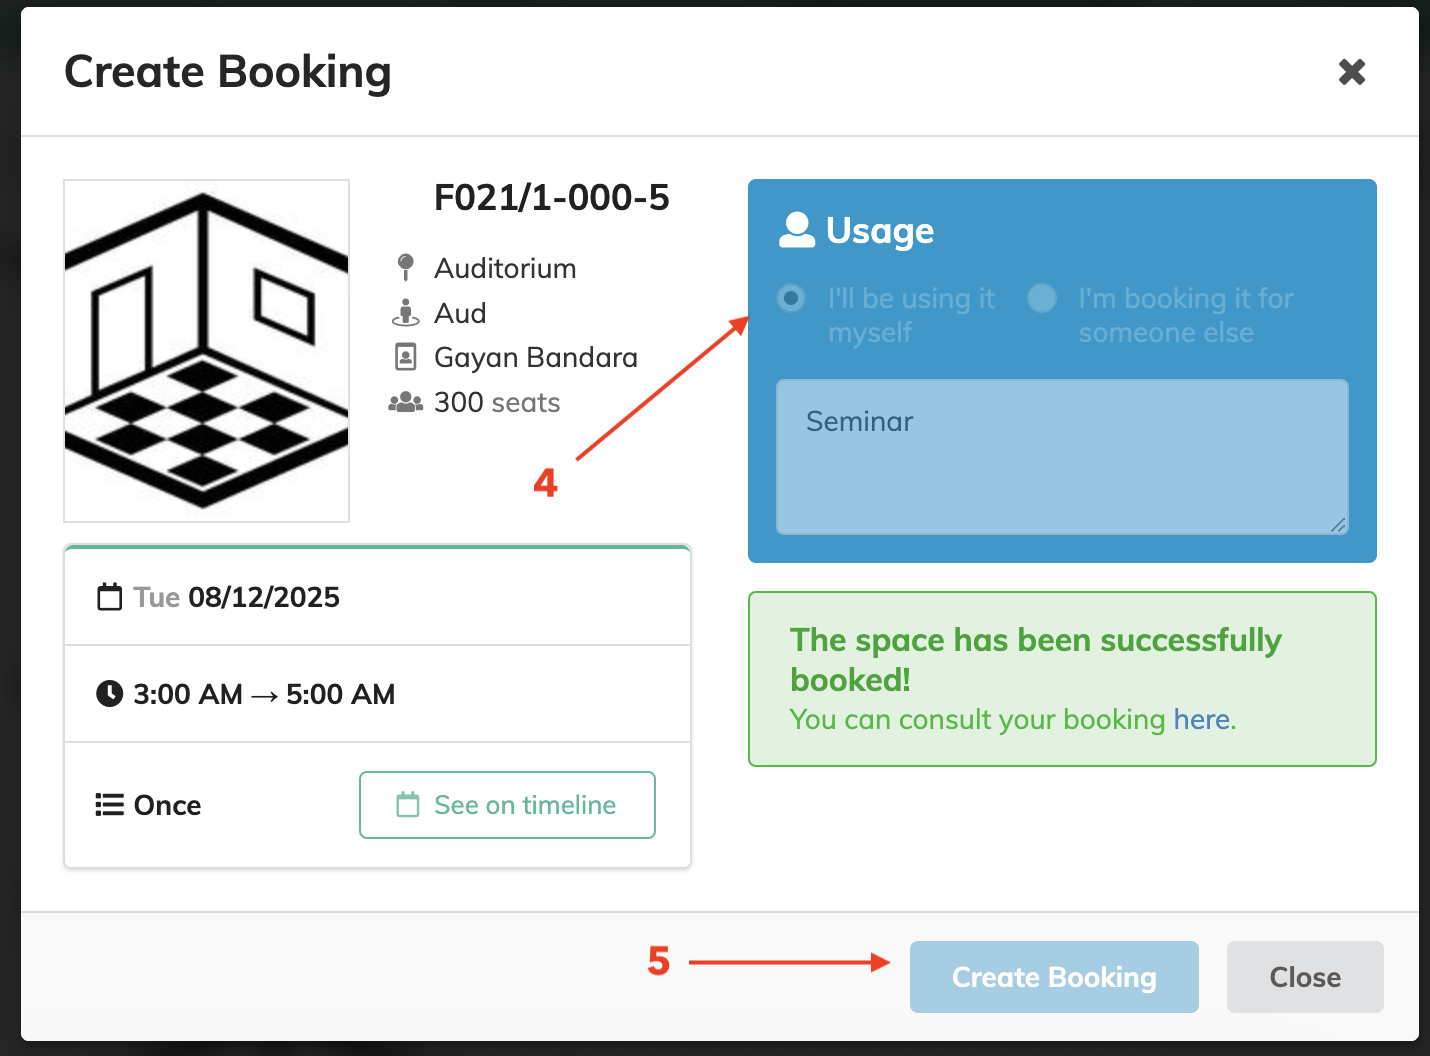
5. Click Submit
If room booking moderation is enabled, Dr. Silva will need to approve the request via Bookings in My Rooms.
8. Link Room to Timetable (Optional)
- Go to the event’s Management Area → Timetable
- Click Add new session or edit an existing one.
- Assign the booked room (e.g.,
Auditorium/1-001) to the session. - Save your changes.
This allows participants to see room allocations directly from the event schedule.
Notes
- Required Fields: All fields marked with (*) must be completed to add the room.
- Permissions: LEARN Admins must have appropriate rights to add locations and assign permissions. Dr. Silva’s actions depend on the assigned Location Manager rights.
- Troubleshooting:
- Room not showing? Check if the location is active.
- Error when saving? Avoid duplicate room names.
- Booking issues? Ensure moderation settings are configured correctly.