Grading
Grading system is a comprehensive tool that allows instructors to assess student performance and provide feedback. Here's a step-by-step guide on how to use the grading system:
Grading from the Assignment page
Getting to the Activity Grading Interface
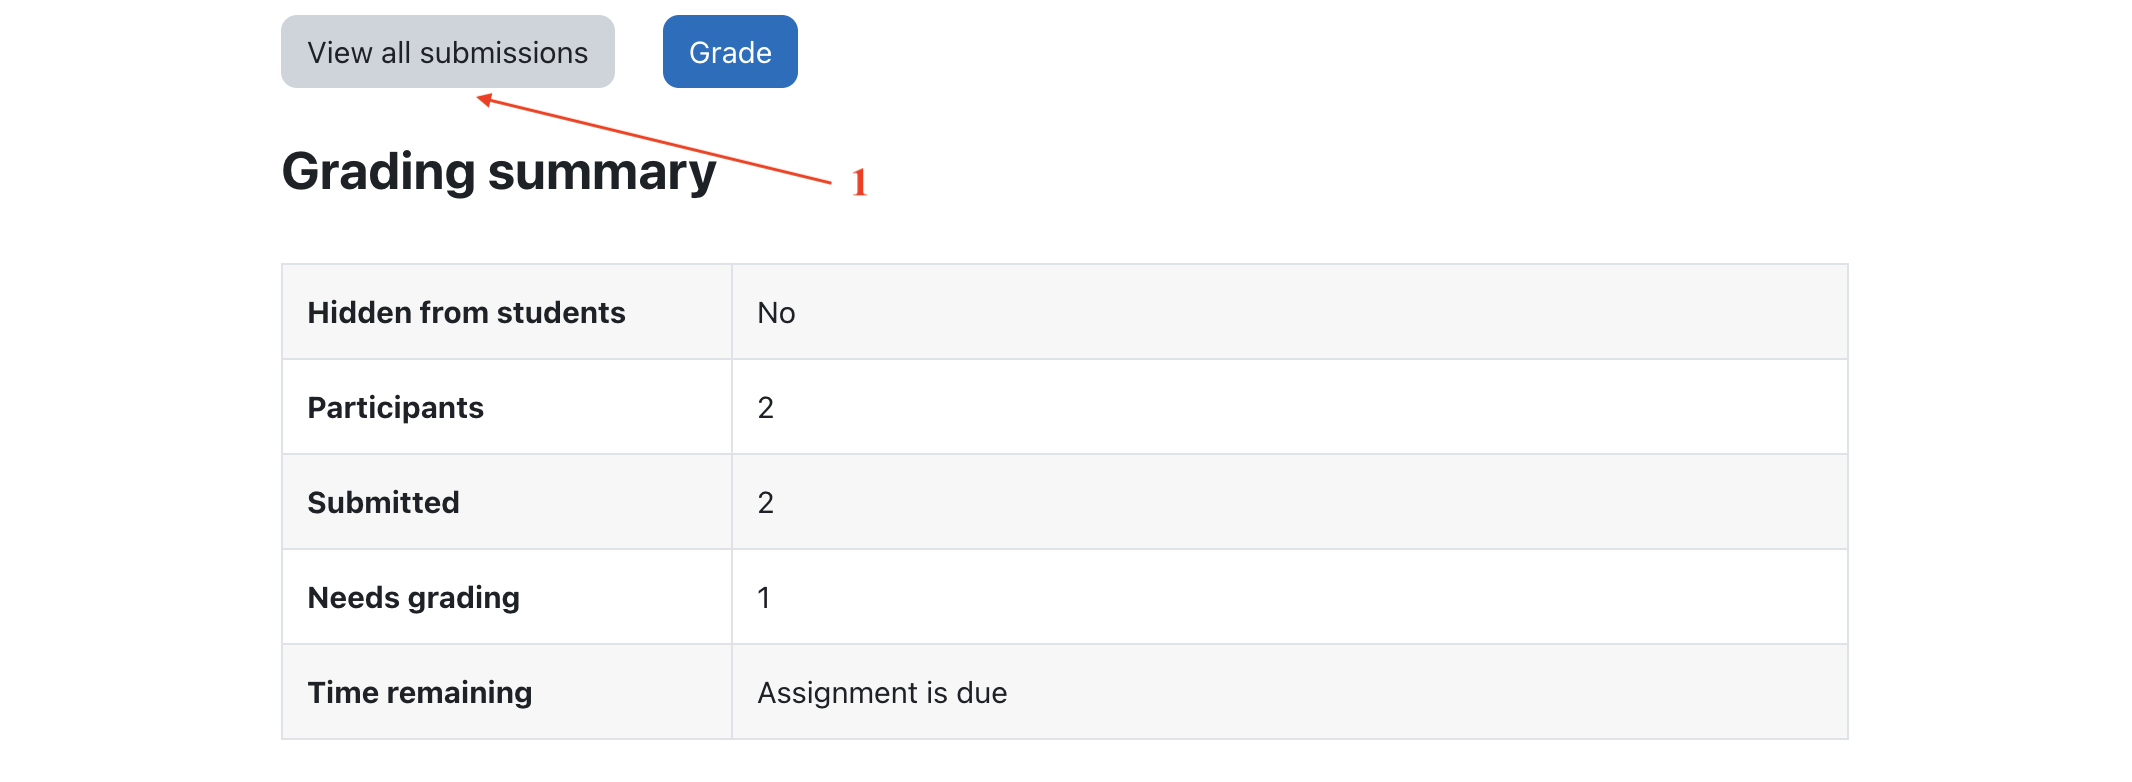
To grade assignments that involve student submissions (files, online text, etc.), access the grading interface directly from the assignment page. Navigate to the assignment and click on "View/Grade All Submissions [1].
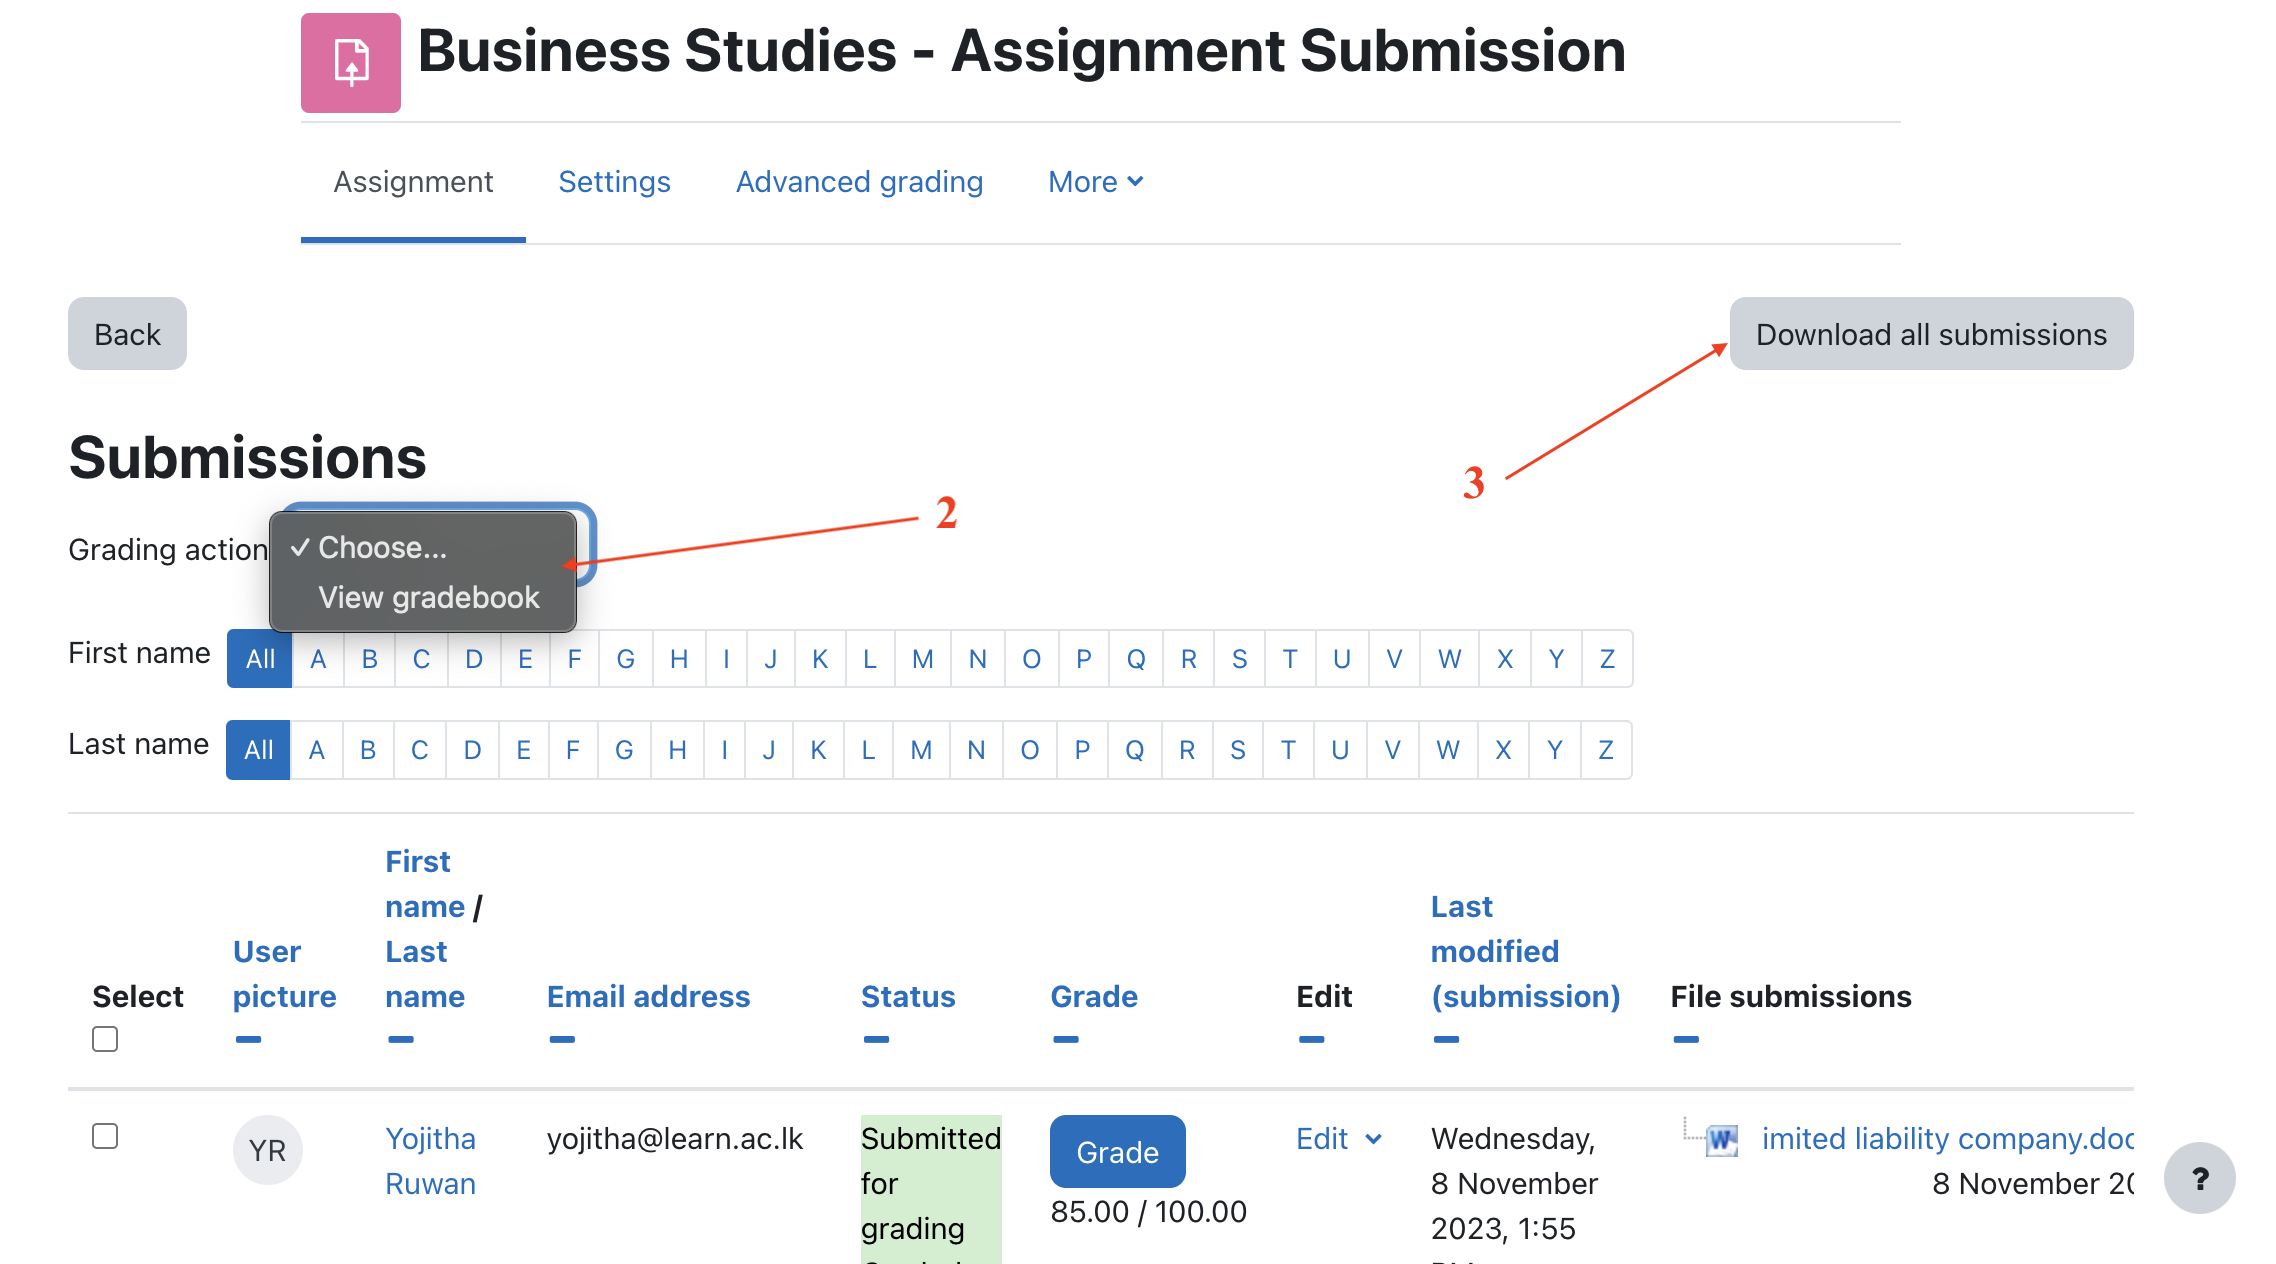
The subsequent page provides an interface for editing grades, adding feedback, and reviewing students' work. At the top of the page, you'll find a that offers the option to download all student submissions [3]. This feature is particularly useful for assignments involving essays or other file-based submissions.
Finding the submissions that are ready to be graded
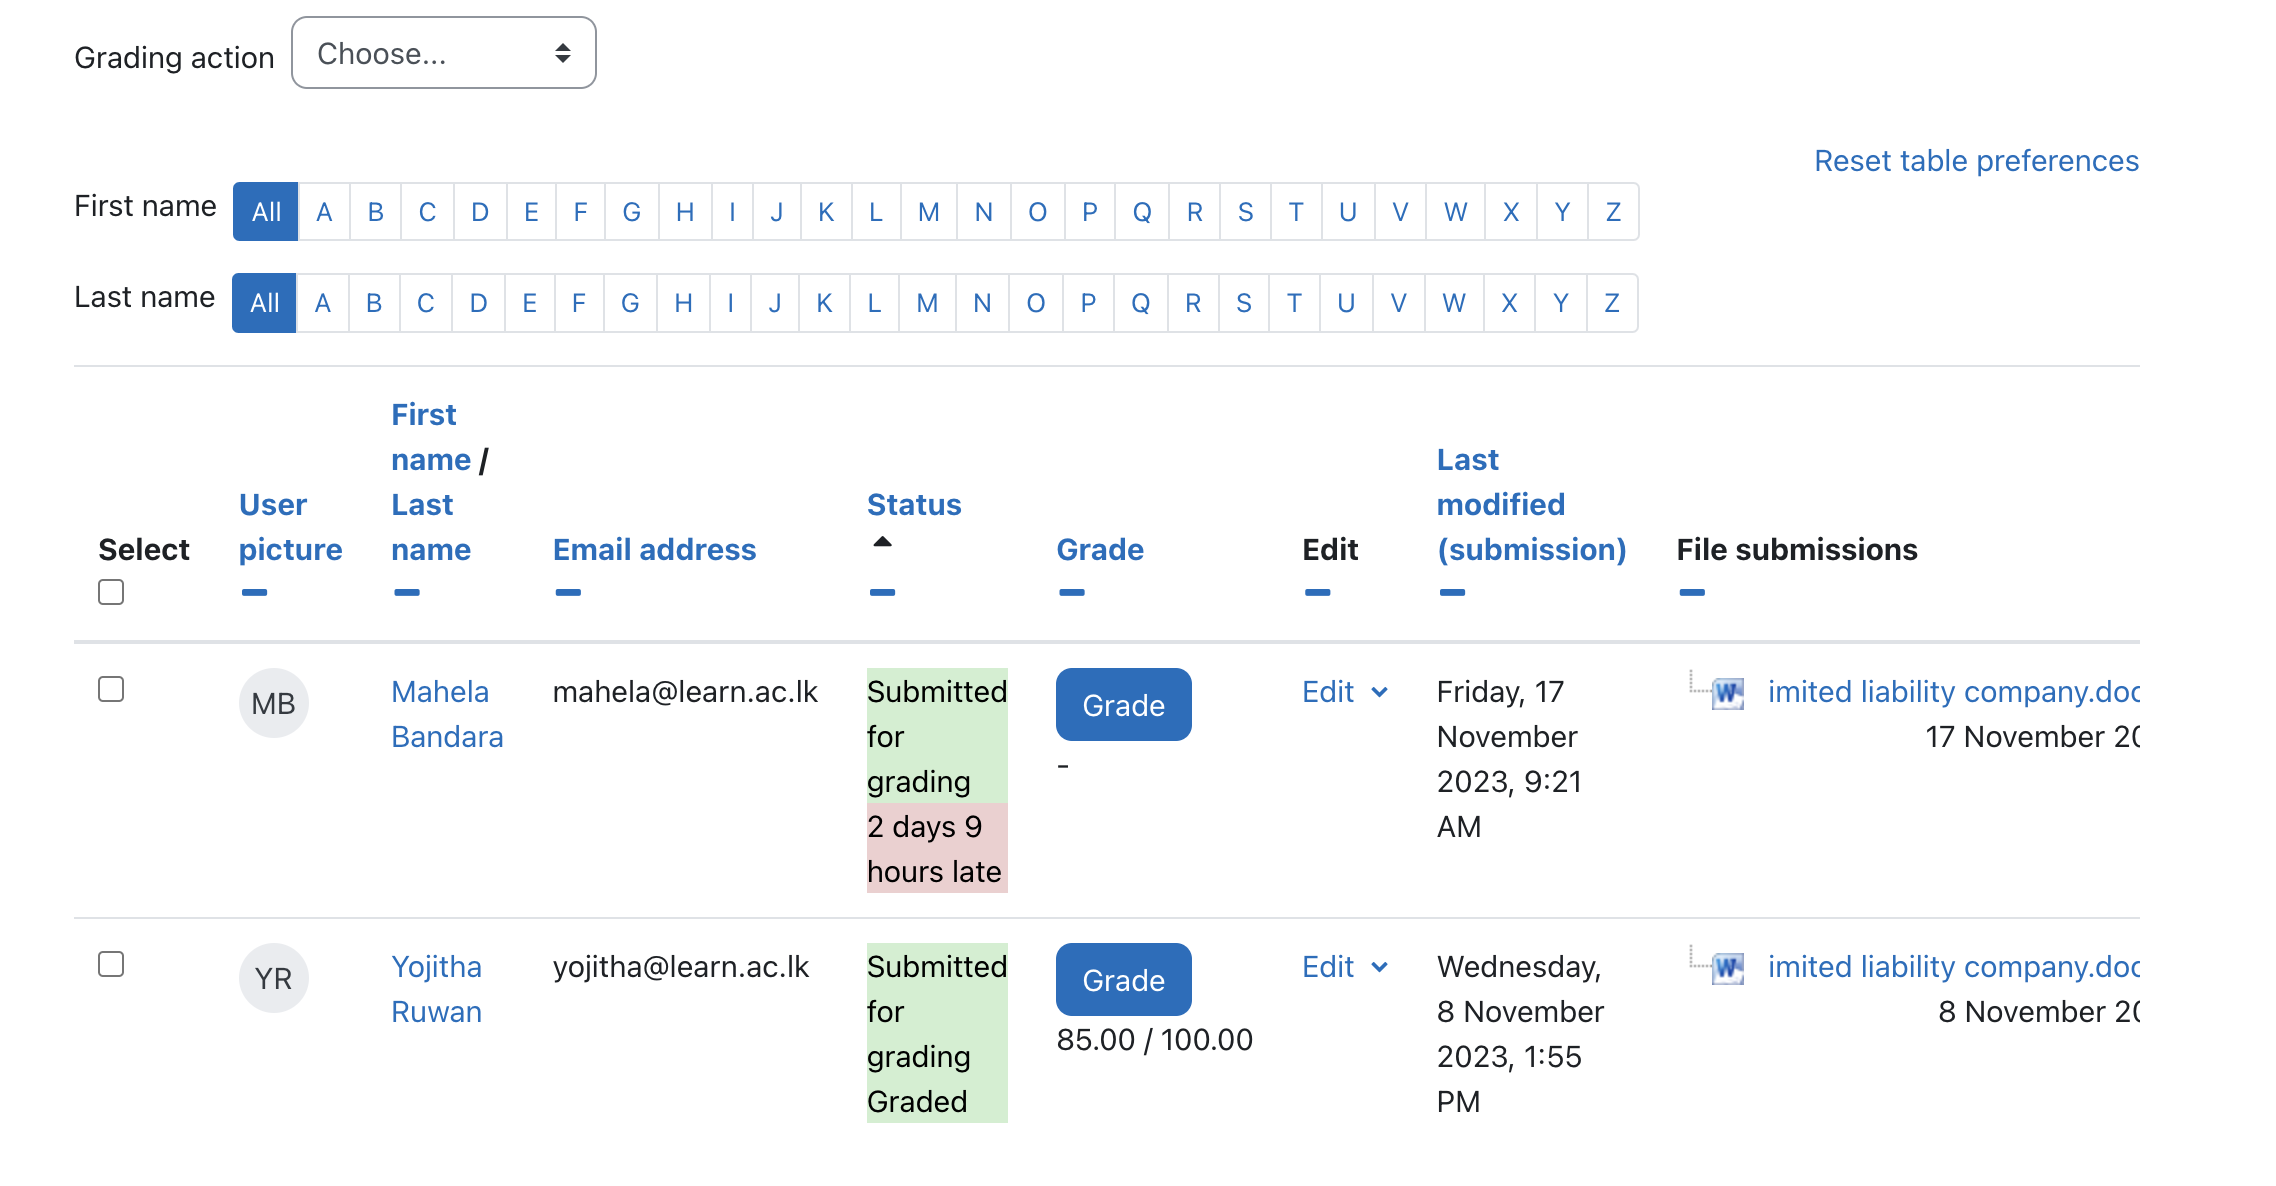
The student table is sortable by clicking on the column headers. Clicking the Grade column header twice will prioritize assignments requiring grading, bringing them to the top of the table.
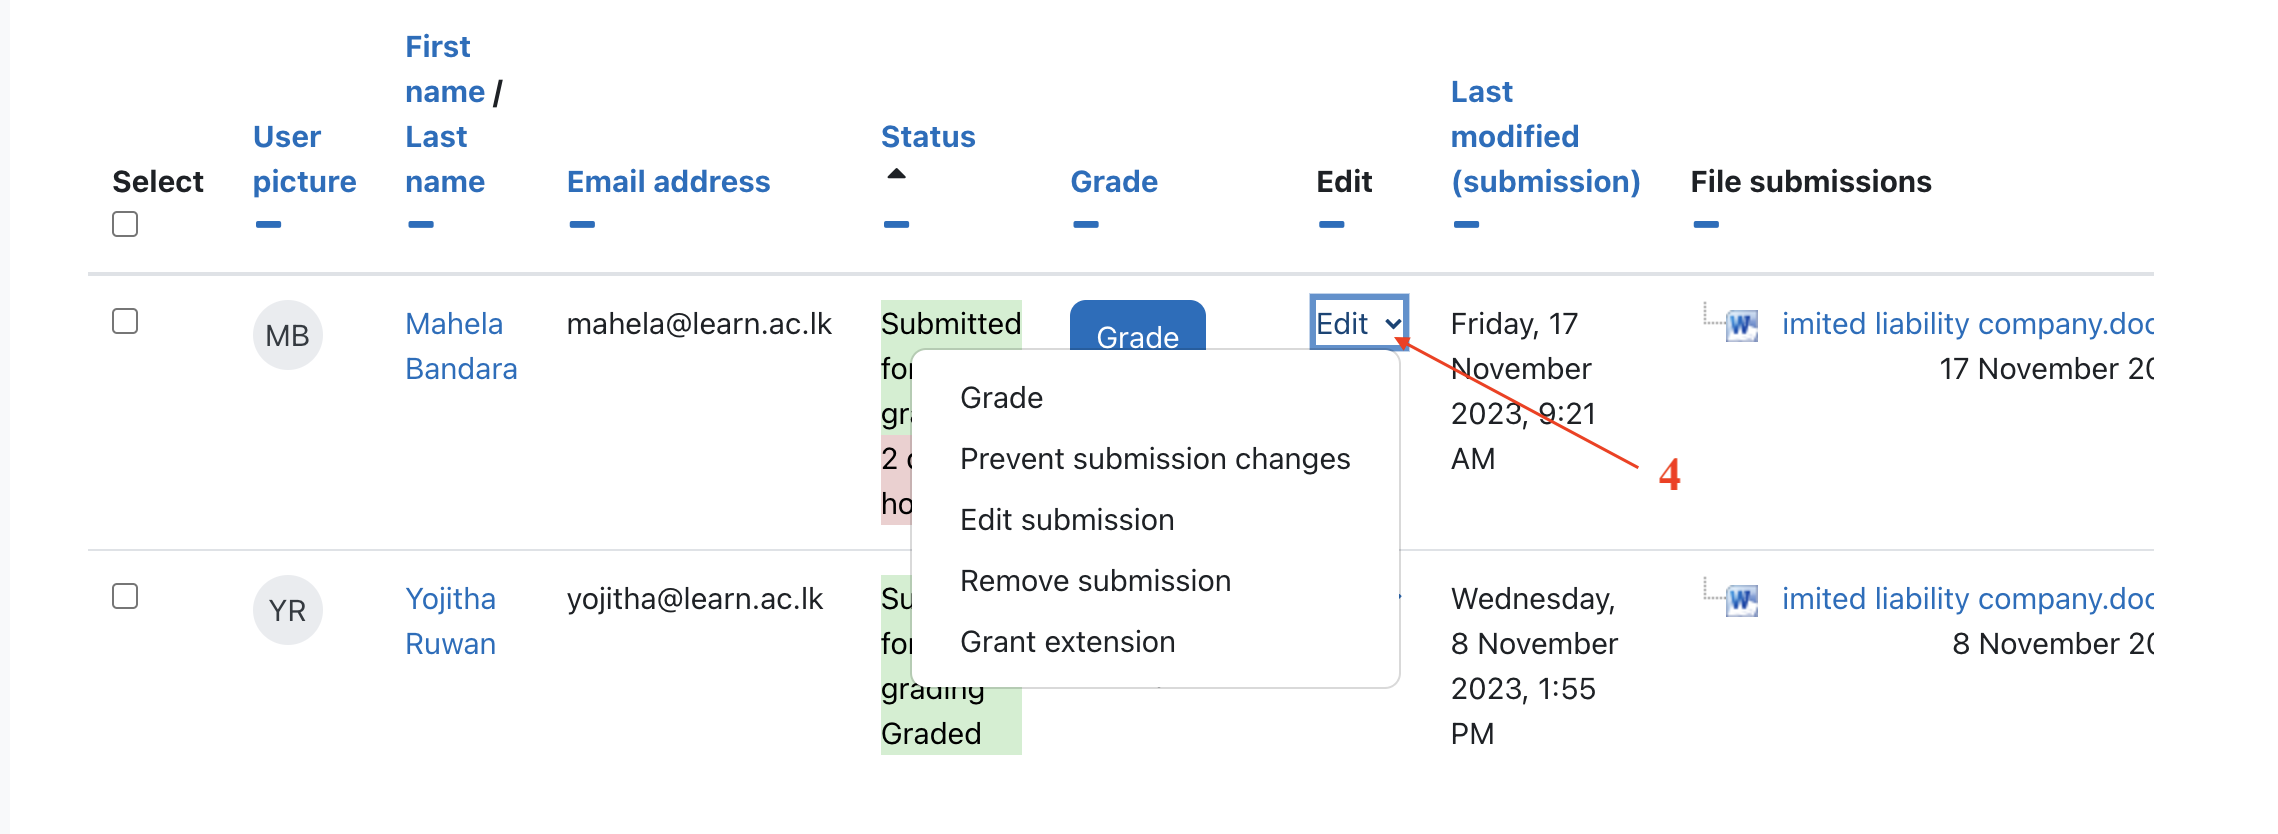
Entering grades
To access the grading page for a specific student, select the 'Edit' option and then choose 'Edit Grade'.
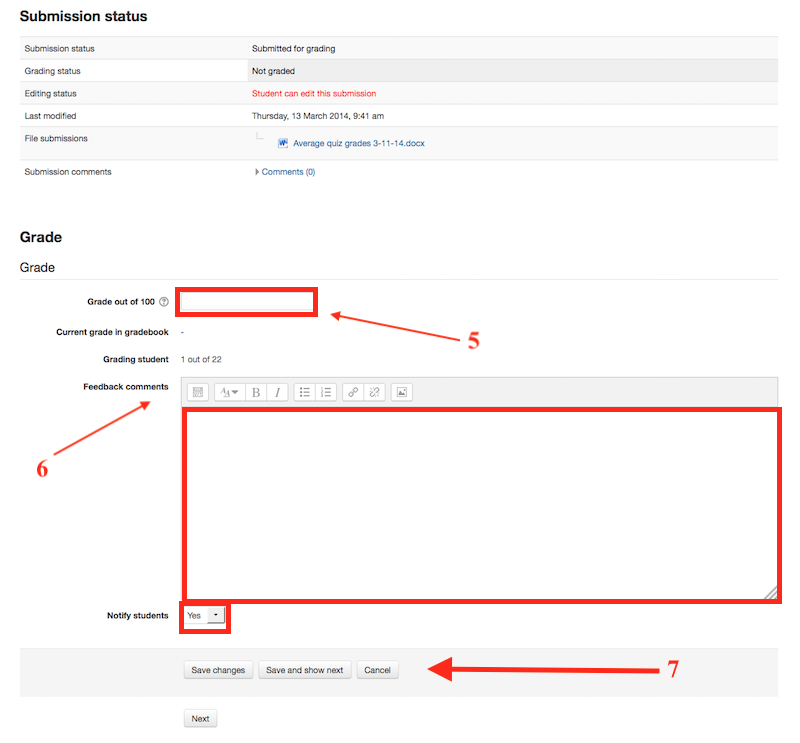
On the following page, you can enter a grade [5], provide feedback [6], and choose whether to notify the student. Once completed, click "Save". The "Save and Show Next" [7] button will save the grade for the current student and proceed to the next student's grading page.
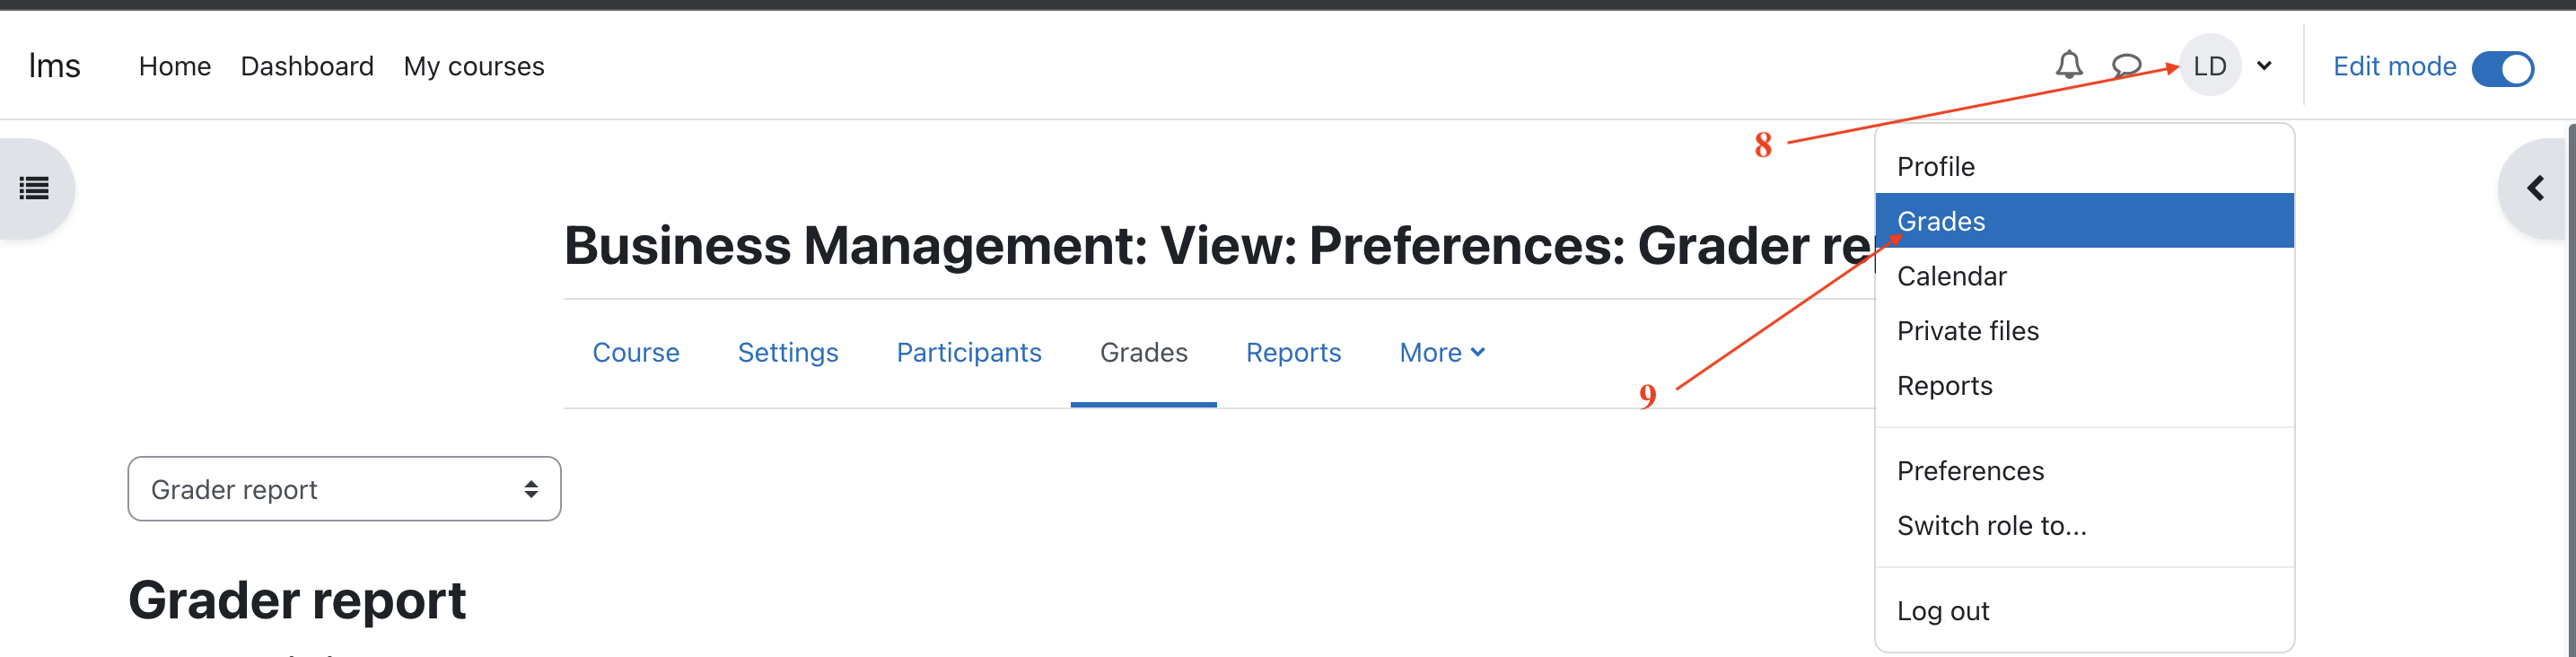
The grader report provides a comprehensive overview of the grade book, displaying all course grades in a grid format. To access the grader report, navigate to the Grade menu within the User Profile section.
Entering grades
To add grades directly into the grader report, activate editing mode by clicking the "Turn editing on" button located in the top right corner of the page. Once editing is enabled, each cell in the grid will display one or two input fields, depending on your gradebook setup. The input field with a solid border is used for entering grades, while the input field with a dashed border is used for providing feedback.
In most instances, grades are saved automatically as you enter them. However, you may need to refresh the page to see the updated course total reflected with the new grades. In some cases, a "Save" button may be present in the bottom left corner of the page for manual saving.
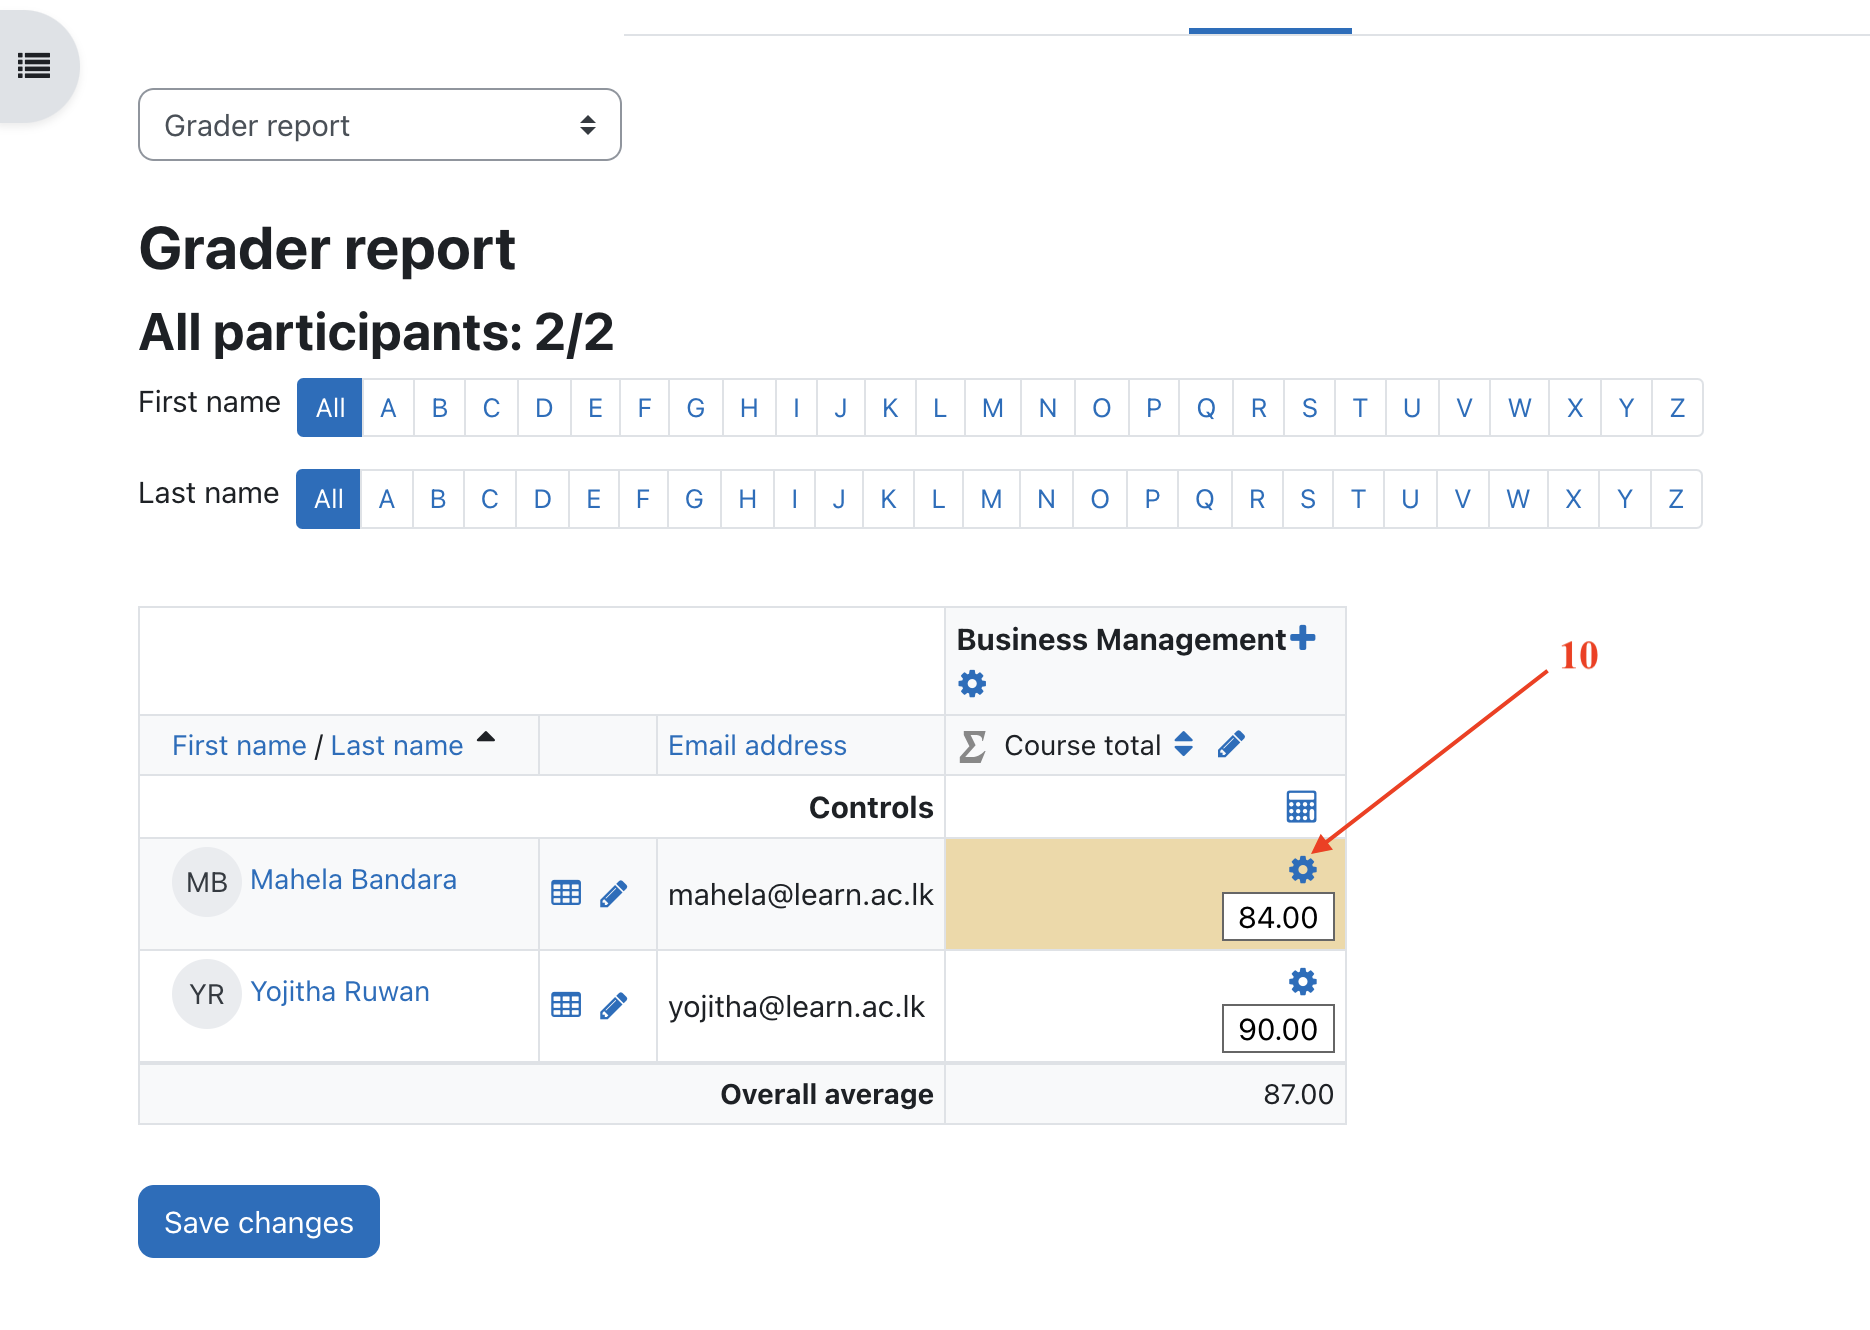
Overridden grades
"Entering grades directly on this page will override the grades from the assignment and highlight the cells in yellow or orange [10]. Changes made on the Assignment Grading page will not affect these grades."
Grading from the Single View Tab in the Grader Report
This interface provides teachers with the capability to efficiently input grades in bulk for a particular activity or student. When utilizing the single view, grades are seamlessly incorporated into the Grader Report. It's important to note that any grades entered through this interface are marked as "Overridden," signifying that they are not subject to modification through the Assignment or Activity-specific grading interfaces.
Accessing the Single View
You can navigate to the Single View through various pathways. If your grade-book features tabs or a dropdown menu at the top, typically used for accessing Setup and other options, you'll find an option there to enter the Single View screen.
Additionally, there are pencil icons strategically placed for easy access. At the top of each column in the Grader Report, adjacent to the activity name, clicking the pencil icon will direct you to the Single View page for that specific activity. Another pencil icon, positioned in a column directly to the right of the student's name, provides a shortcut to the Single View for that particular student.
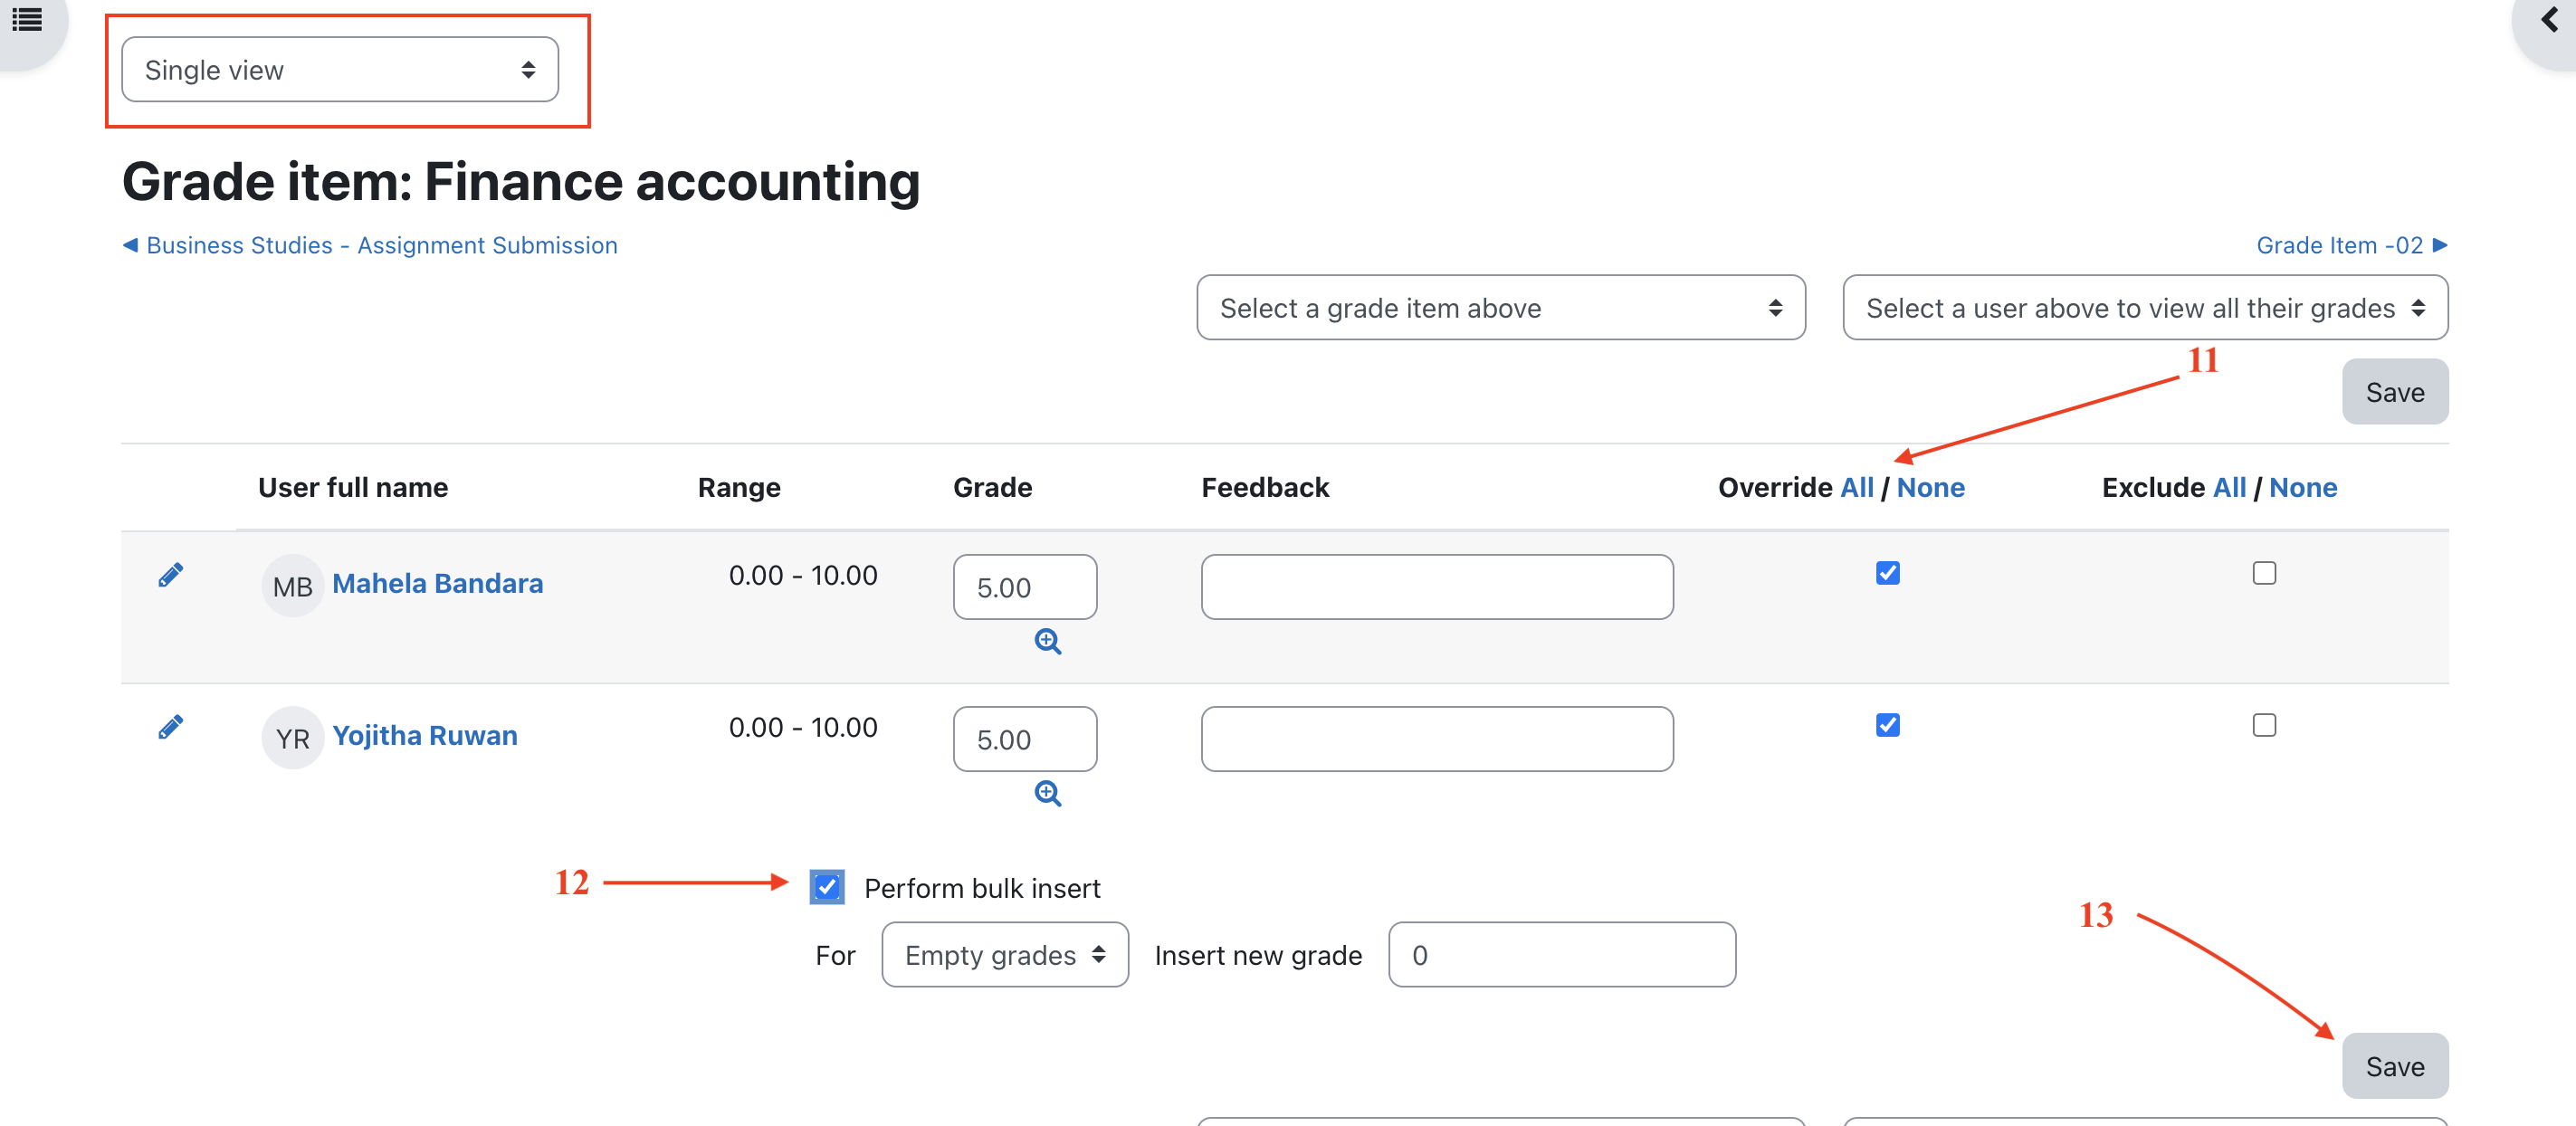
Entering Grades
Upon accessing the page, locate the Override checkbox positioned to the right of the grade you wish to modify. For a streamlined process when entering grades in bulk, selecting 'All' [11] at the top of this column enables modifications for all grades simultaneously.
Towards the bottom of the page, activating the Perform Bulk Insert checkbox [12] empowers you to input a grade. This grade will be applied either universally to all selected overrides or exclusively to grades that are currently empty (choose the relevant option from the dropdown box).
After completing these adjustments, finalize the process by clicking on Save [13] to update the grades.