Configuring Email Outgoing
Configuring Email Outgoing
To configure outgoing email in Moodle, follow these steps:
1. Access Outgoing Mail Configuration
- Log in to Moodle as an administrator.
- Go to Site administration > Server > Email > Outgoing mail configuration.
2. Configure SMTP Settings
Note: When you have a lot of students in your Moodle site, using an educational Gmail account cannot be recommended as it holds daily limit of 500 emails sending limits. You have to own an email (SMTP) account from your on premise hosted campus mail server or obtain a business email account without such daily limits.
- SMTP hosts: Enter the SMTP server address. For example, for Gmail, it’s
smtp.gmail.com:465for SSL andsmtp.gmail.com:587for TLS. For others, use the SMTP details provided by your email service. - SMTP security: Choose TLS or SSL if required by your SMTP server (e.g., Gmail requires TLS/SSL).
- SMTP username: Enter the email address you are using to send mail.
- SMTP password: Enter the password for the SMTP email account. (For Gmail, you have to use app passwords)
3. Set No-Reply Email Address
- No-reply address: Enter a no-reply address like
noreply@yourdomain.com. This address appears as the sender for automated emails where replies are not needed.
4. Additional Settings (Optional)
- SMTP session limit: Set the number of messages that can be sent per SMTP session (leave blank for default).
- Character set: Use UTF-8 (default for Moodle), but can be changed if required by your email provider.
5. Save Changes
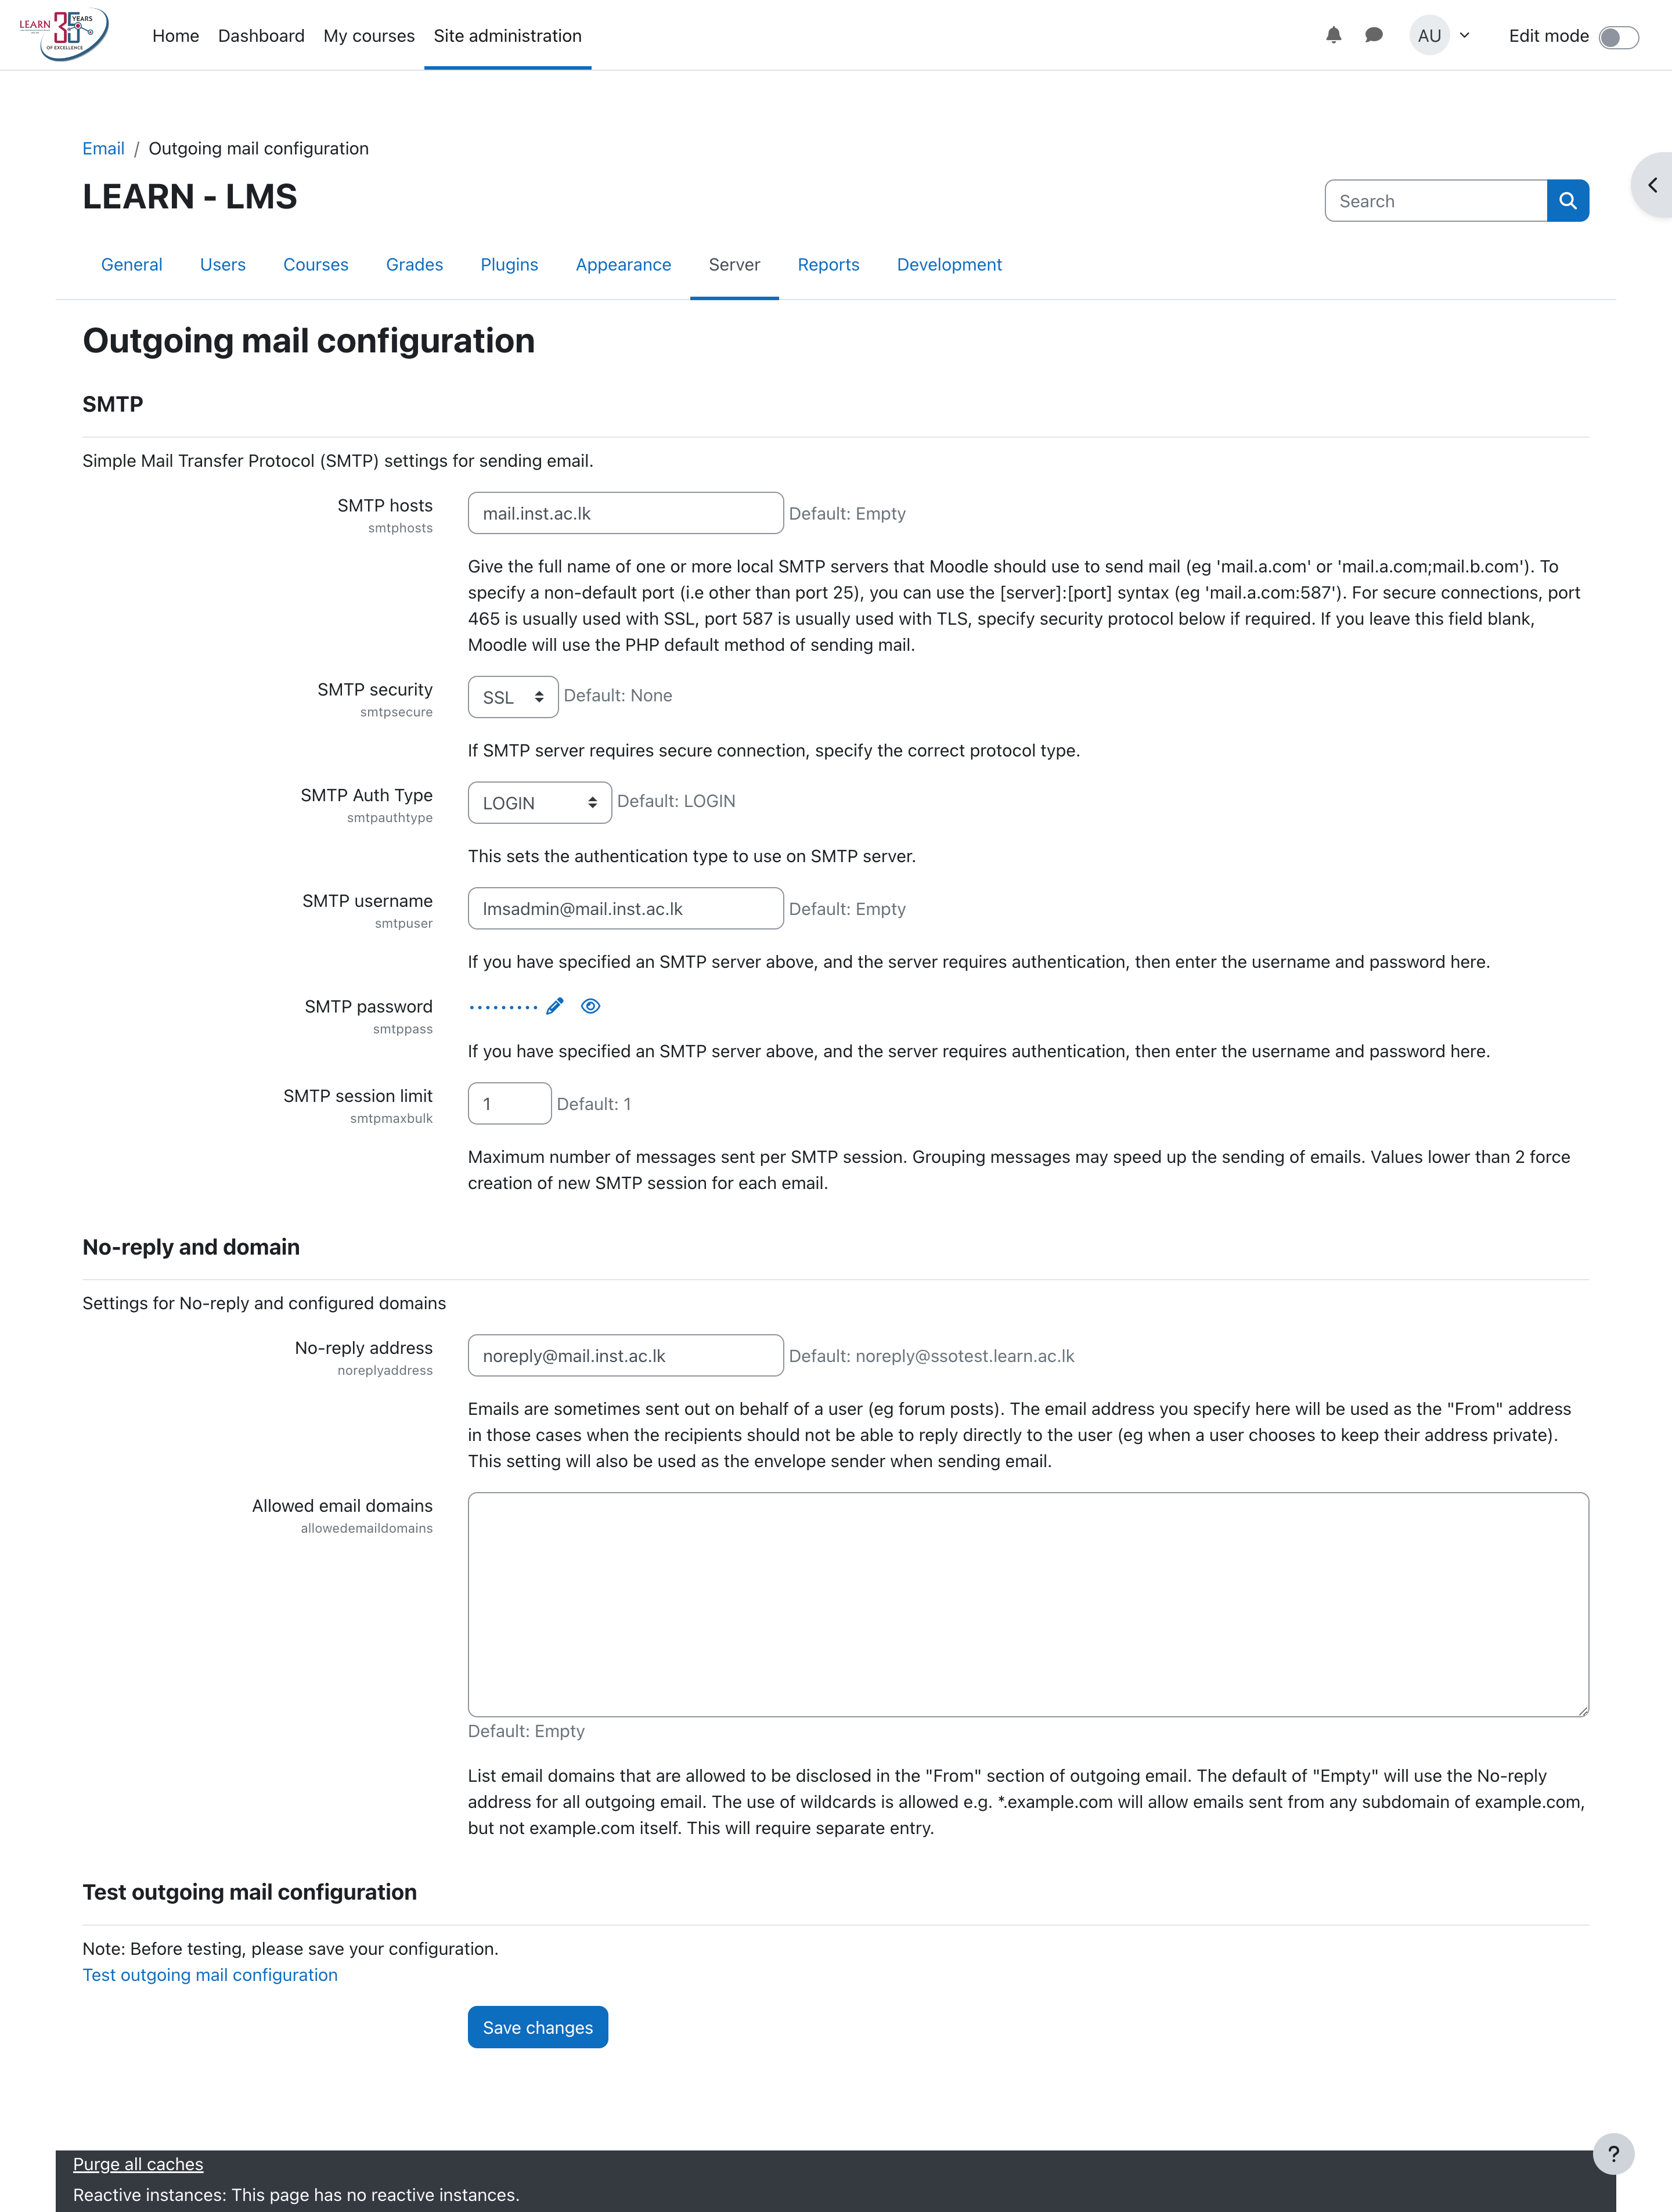
- Click Save changes to apply your settings.
6. Test Outgoing Email
- Scroll to the Test outgoing mail configuration section at the bottom of the page.
- Enter an email address to send a test message and click Send a test message.
- Check the inbox of the test email to confirm the email was received.
After completing these steps, Moodle should be able to send emails for notifications, password resets, and other communications.