Adding Sources, Customization & Recording
4. Adding Sources
-
Select Scene:
- Ensure your created scene is selected in the "Scenes (Guide)"[1] section.
- Ensure your created scene is selected in the "Scenes (Guide)"[1] section.
-
Add Display Capture:
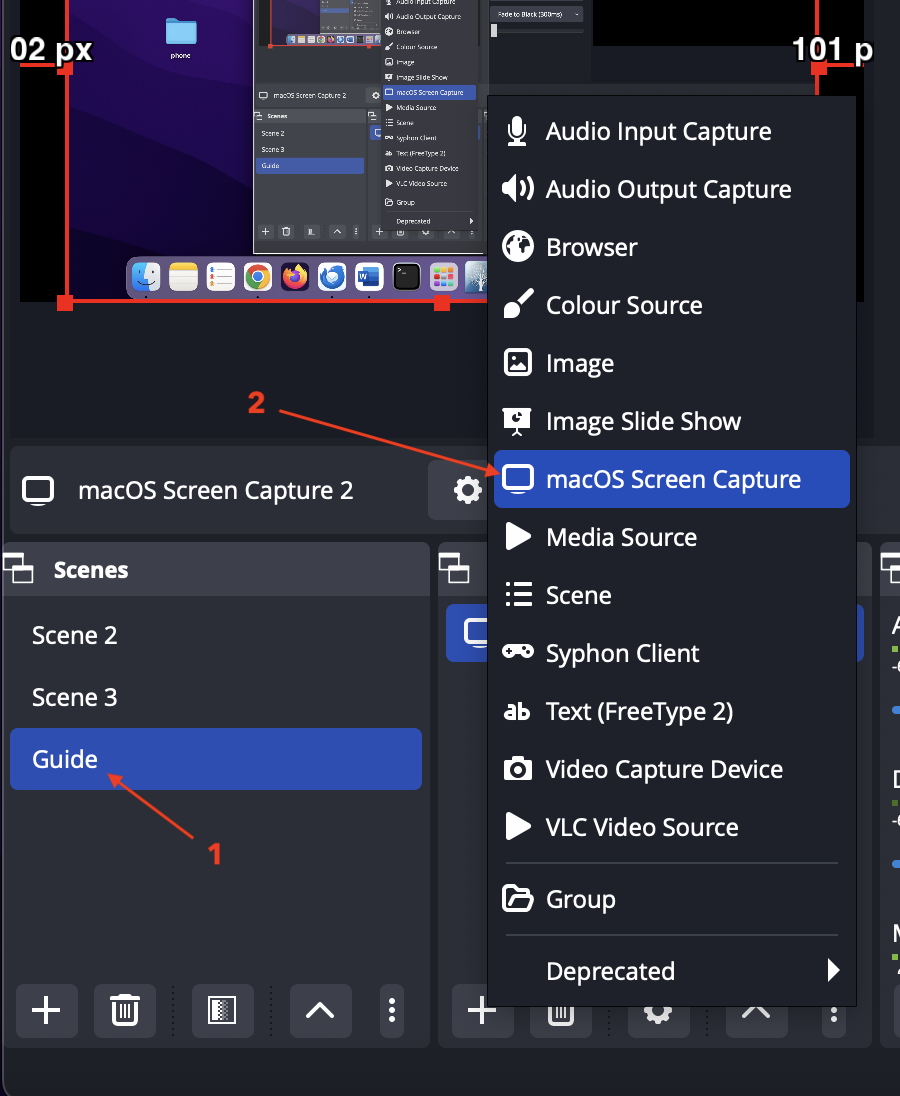
- In the "Sources" section, click the "+" button.
- Select "macOS Screen Capture/Display Capture" [2] from the dropdown menu and click "OK."
- A window will appear with the following options:
- Create new
- Add Existing:
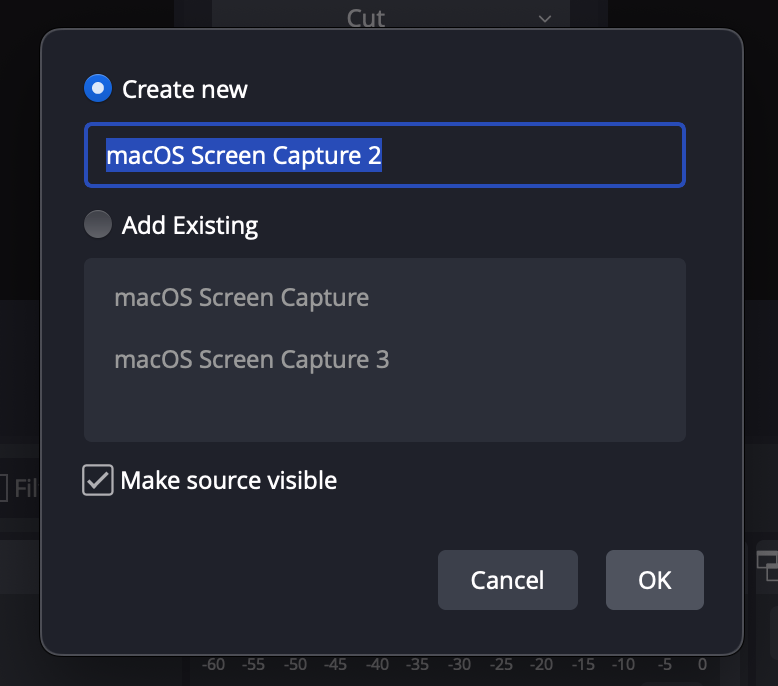
- Select Create New and Click "OK" to proceed.
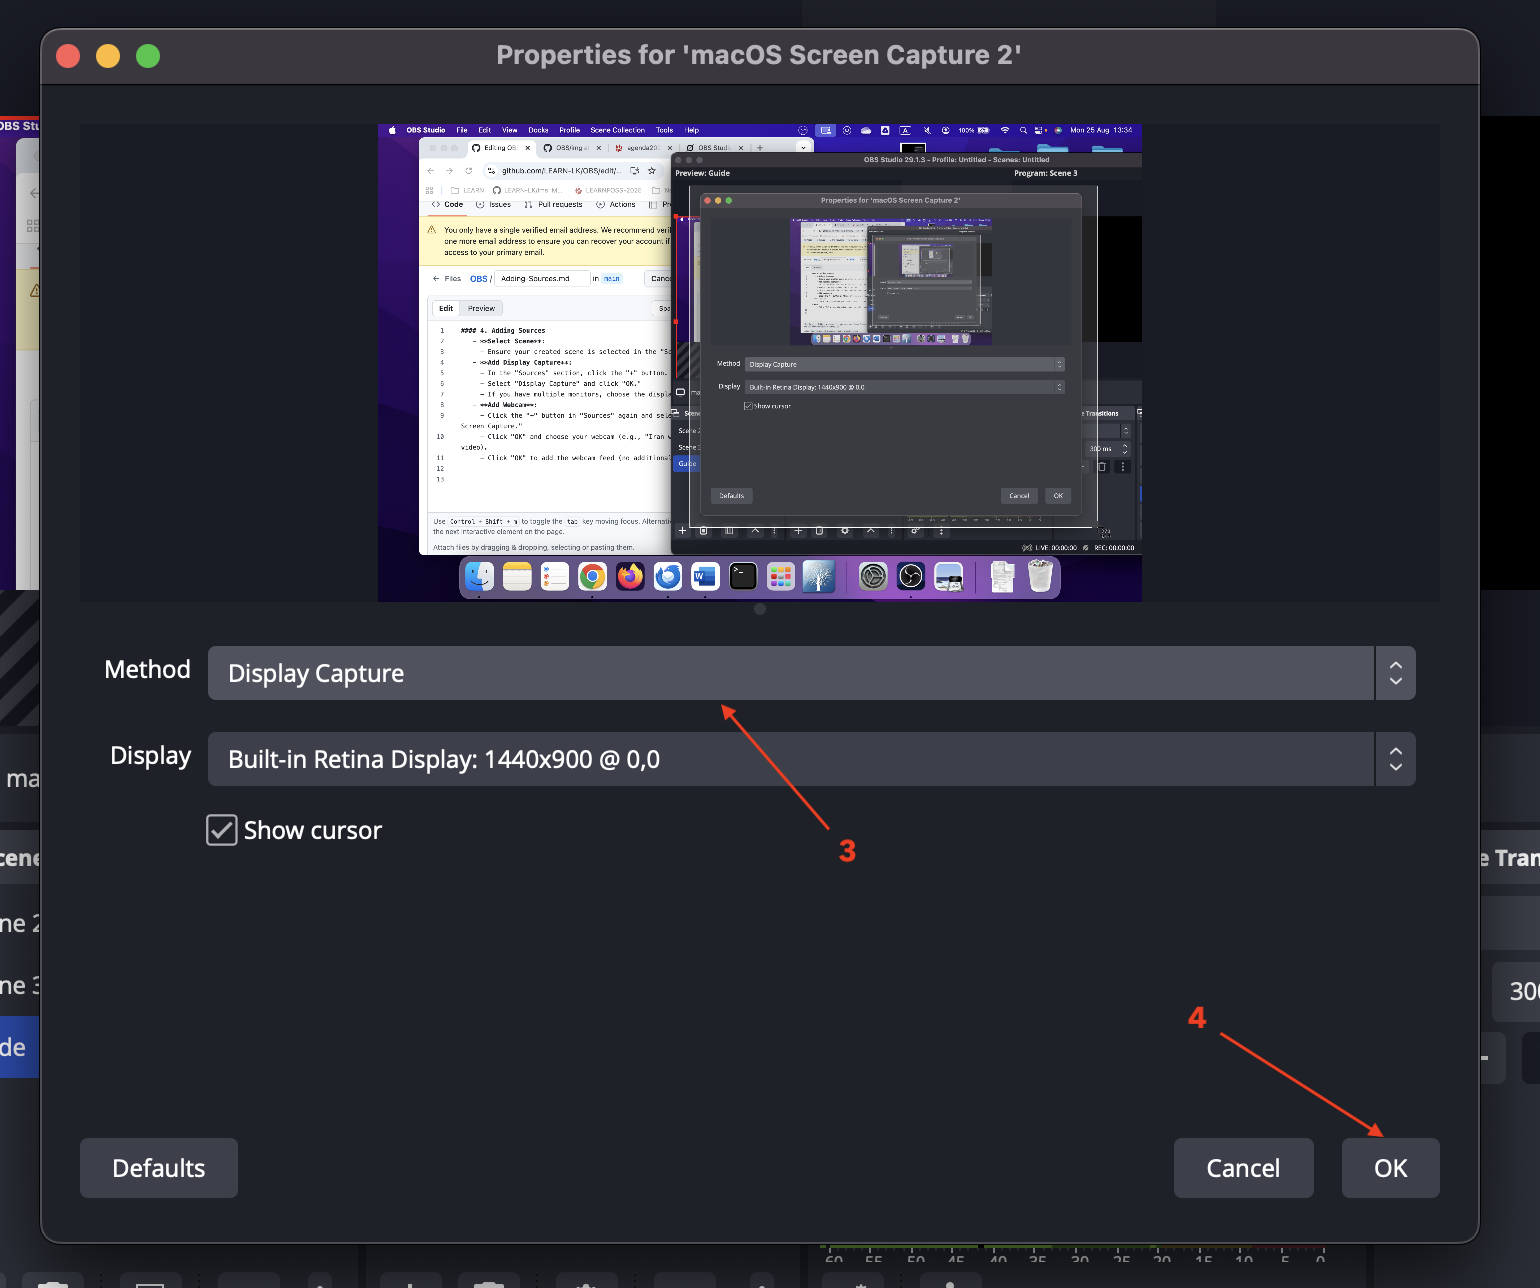
- In the next window select the capture method:
- Choose Display Capture [3] from the "Method" dropdown to capture the entire screen.
- Leave "Window Capture" or "Application Capture" unselected unless you want to focus on a specific window or application.
- Check "Show cursor" if you want the mouse cursor to be visible in the recording (optional).
- Click "OK" [4] to add the screen capture feed.
- Add Webcam:
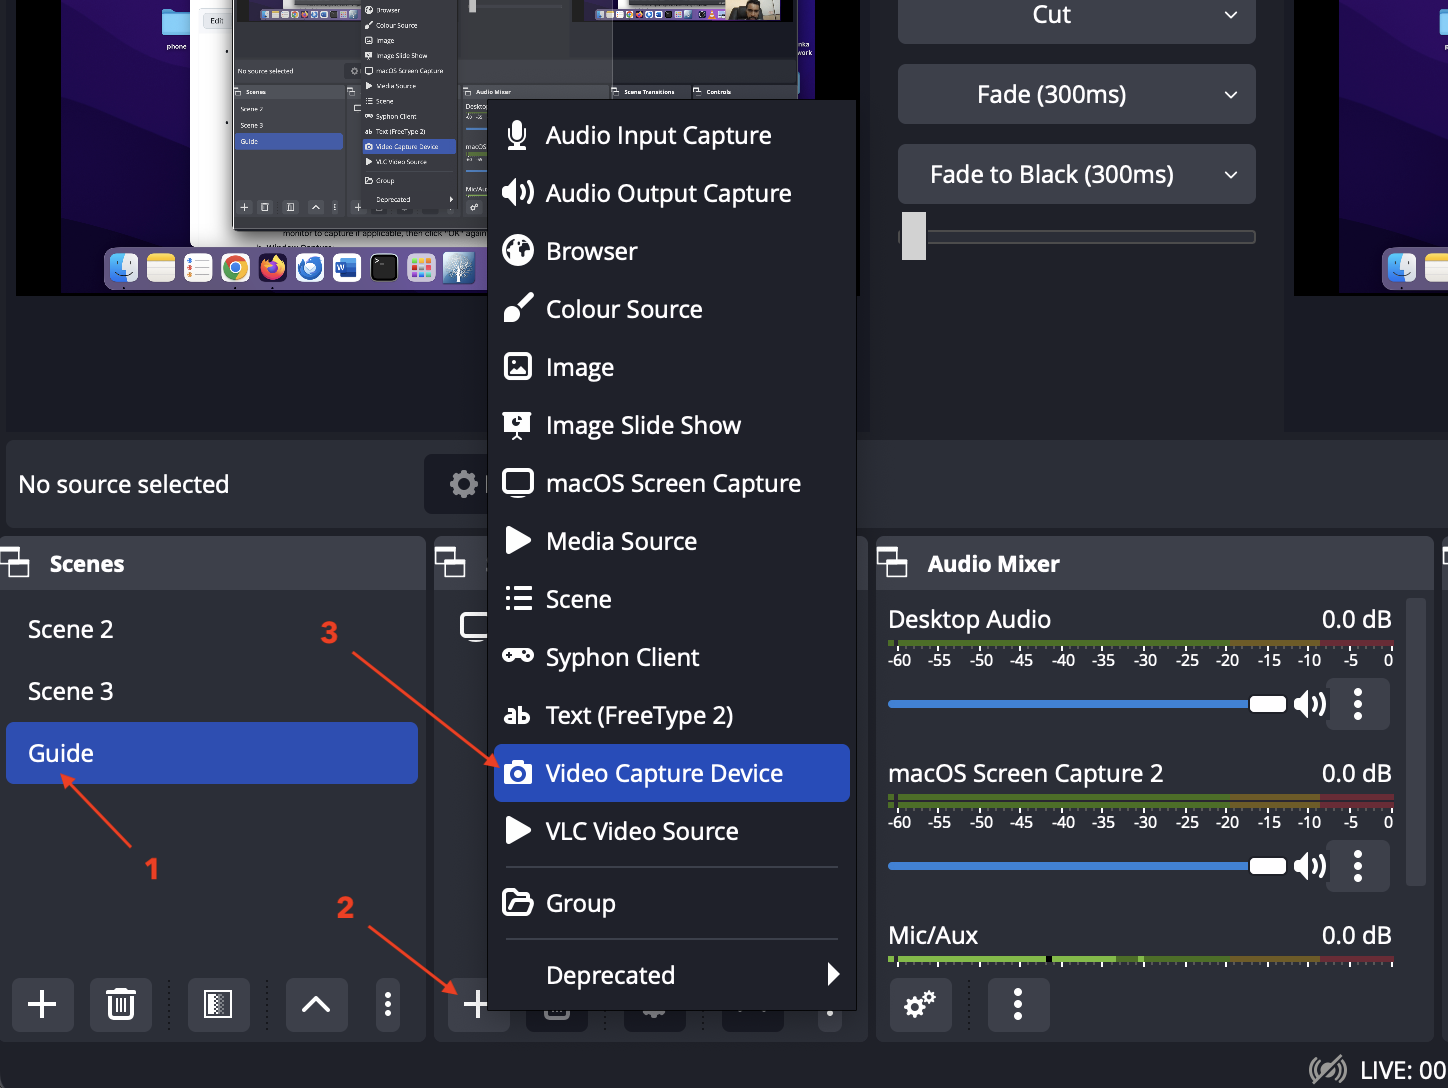
- Click the "+" [2] button in "Sources" again.
- Select "Video Capture Device" [3] from the dropdown menu and click "OK."
- A window will appear with the following options:
- Create new [4]: Select this option and name the source (e.g., "Video Capture Device 2").
- Add Existing: Use this if you’ve already created a video capture source and want to reuse it (not applicable here since you’re adding a new one).
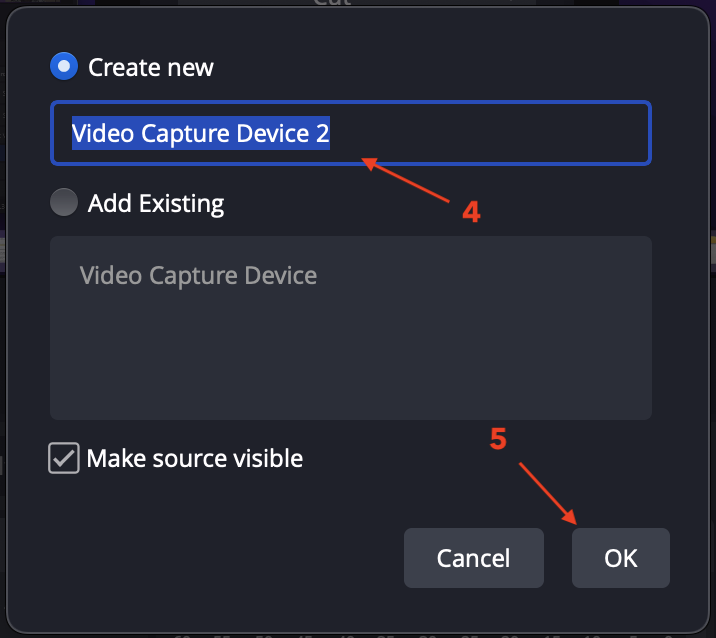
- Ensure "Make source visible" is checked to display the webcam feed immediately.
-
Click "OK" [5] to proceed.
-
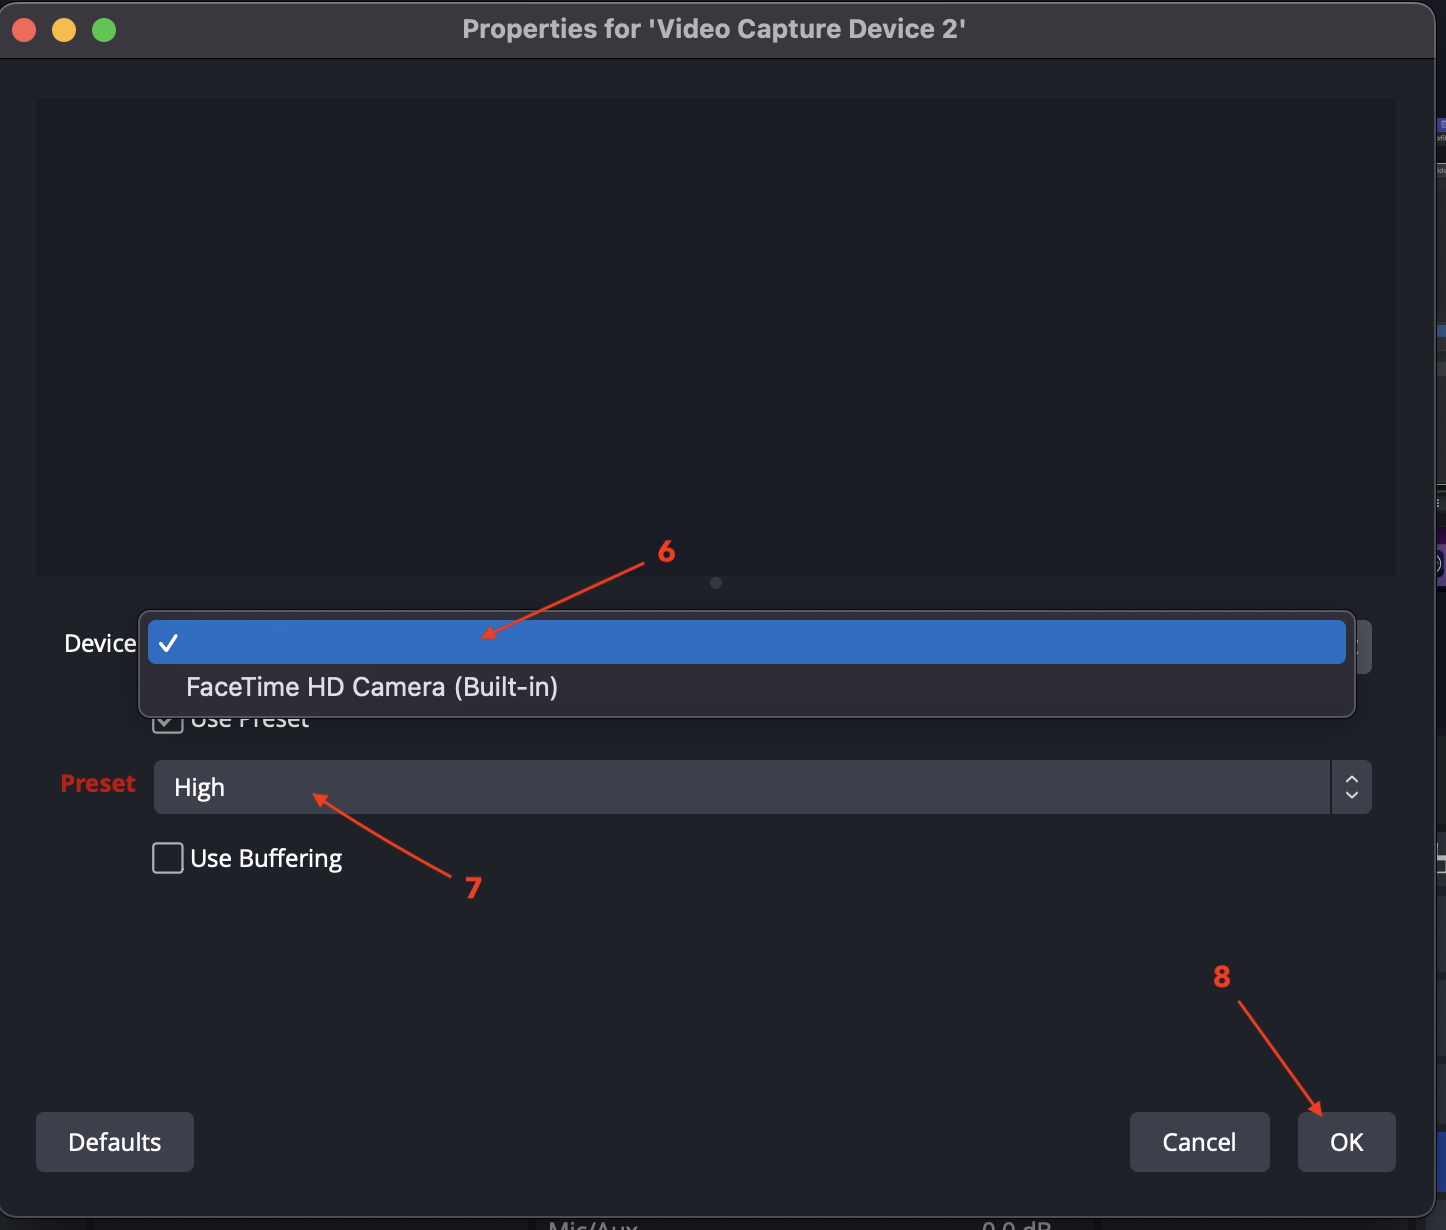
In the next window , select your webcam from the "Device" [6] dropdown (e.g., "FaceTime HD Camera (Built-in)" or your connected webcam).
- Set the "Preset" to "High" [7] for better quality (optional adjustment).
- Leave "Use Buffering" unchecked unless you experience lag (not recommended unless needed).
- Click "OK" [8] to add the webcam feed.
5. Customization
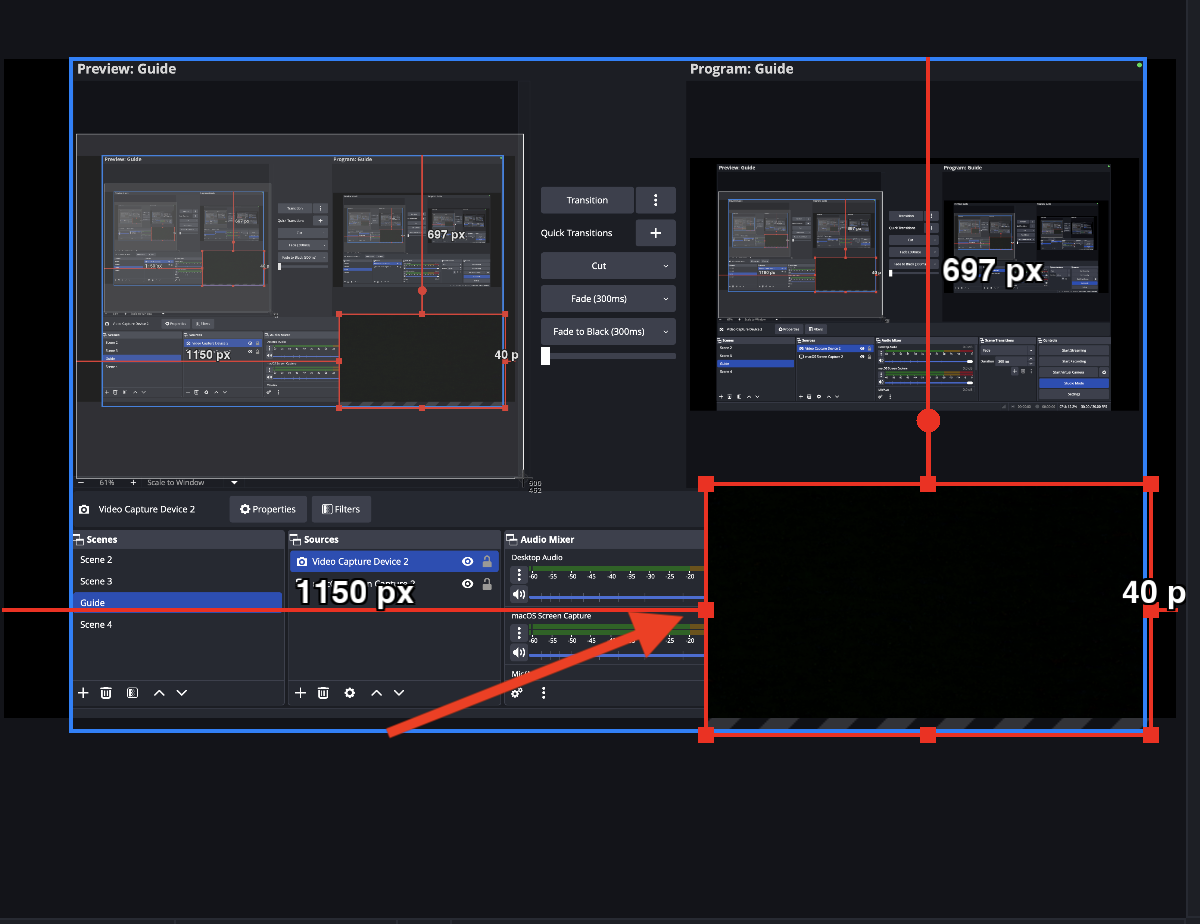
- Adjust Webcam Position and Size:
- In the OBS preview window, use the red dots around the webcam feed to resize or drag it to your preferred position (e.g., bottom-right corner, as adjusted to 777 px width and 45 px height in the example).
- Adjust Microphone Volume:
- Use the audio mixer in OBS to fine-tune your microphone volume as needed.
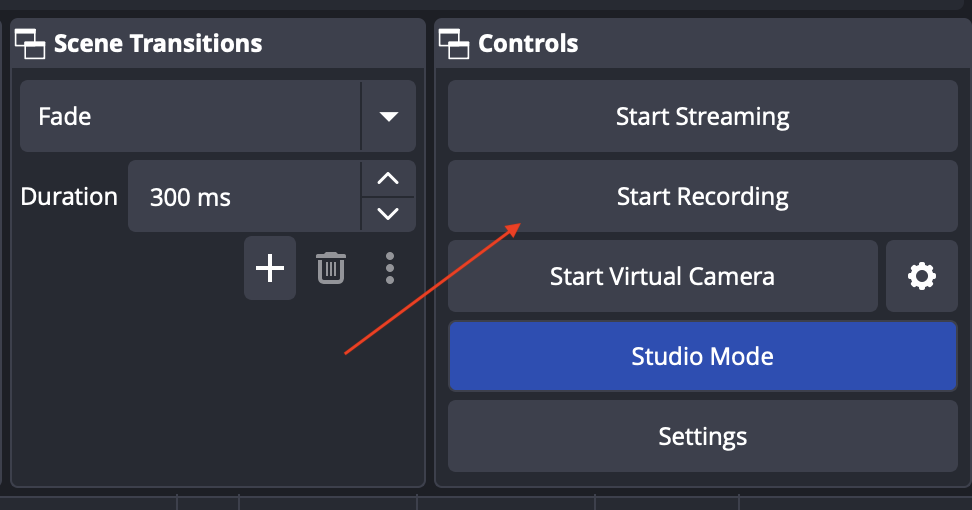
6. Recording
- Start Recording:
- Click "Start Recording" in the bottom-right corner.
- Minimize OBS Studio to record your screen and webcam simultaneously.
- Stop Recording:
- When finished, return to OBS Studio and click "Stop Recording."
- Locate the recorded file in the file path specified in the output settings.