2. Initial Setup
Open OBS Studio:
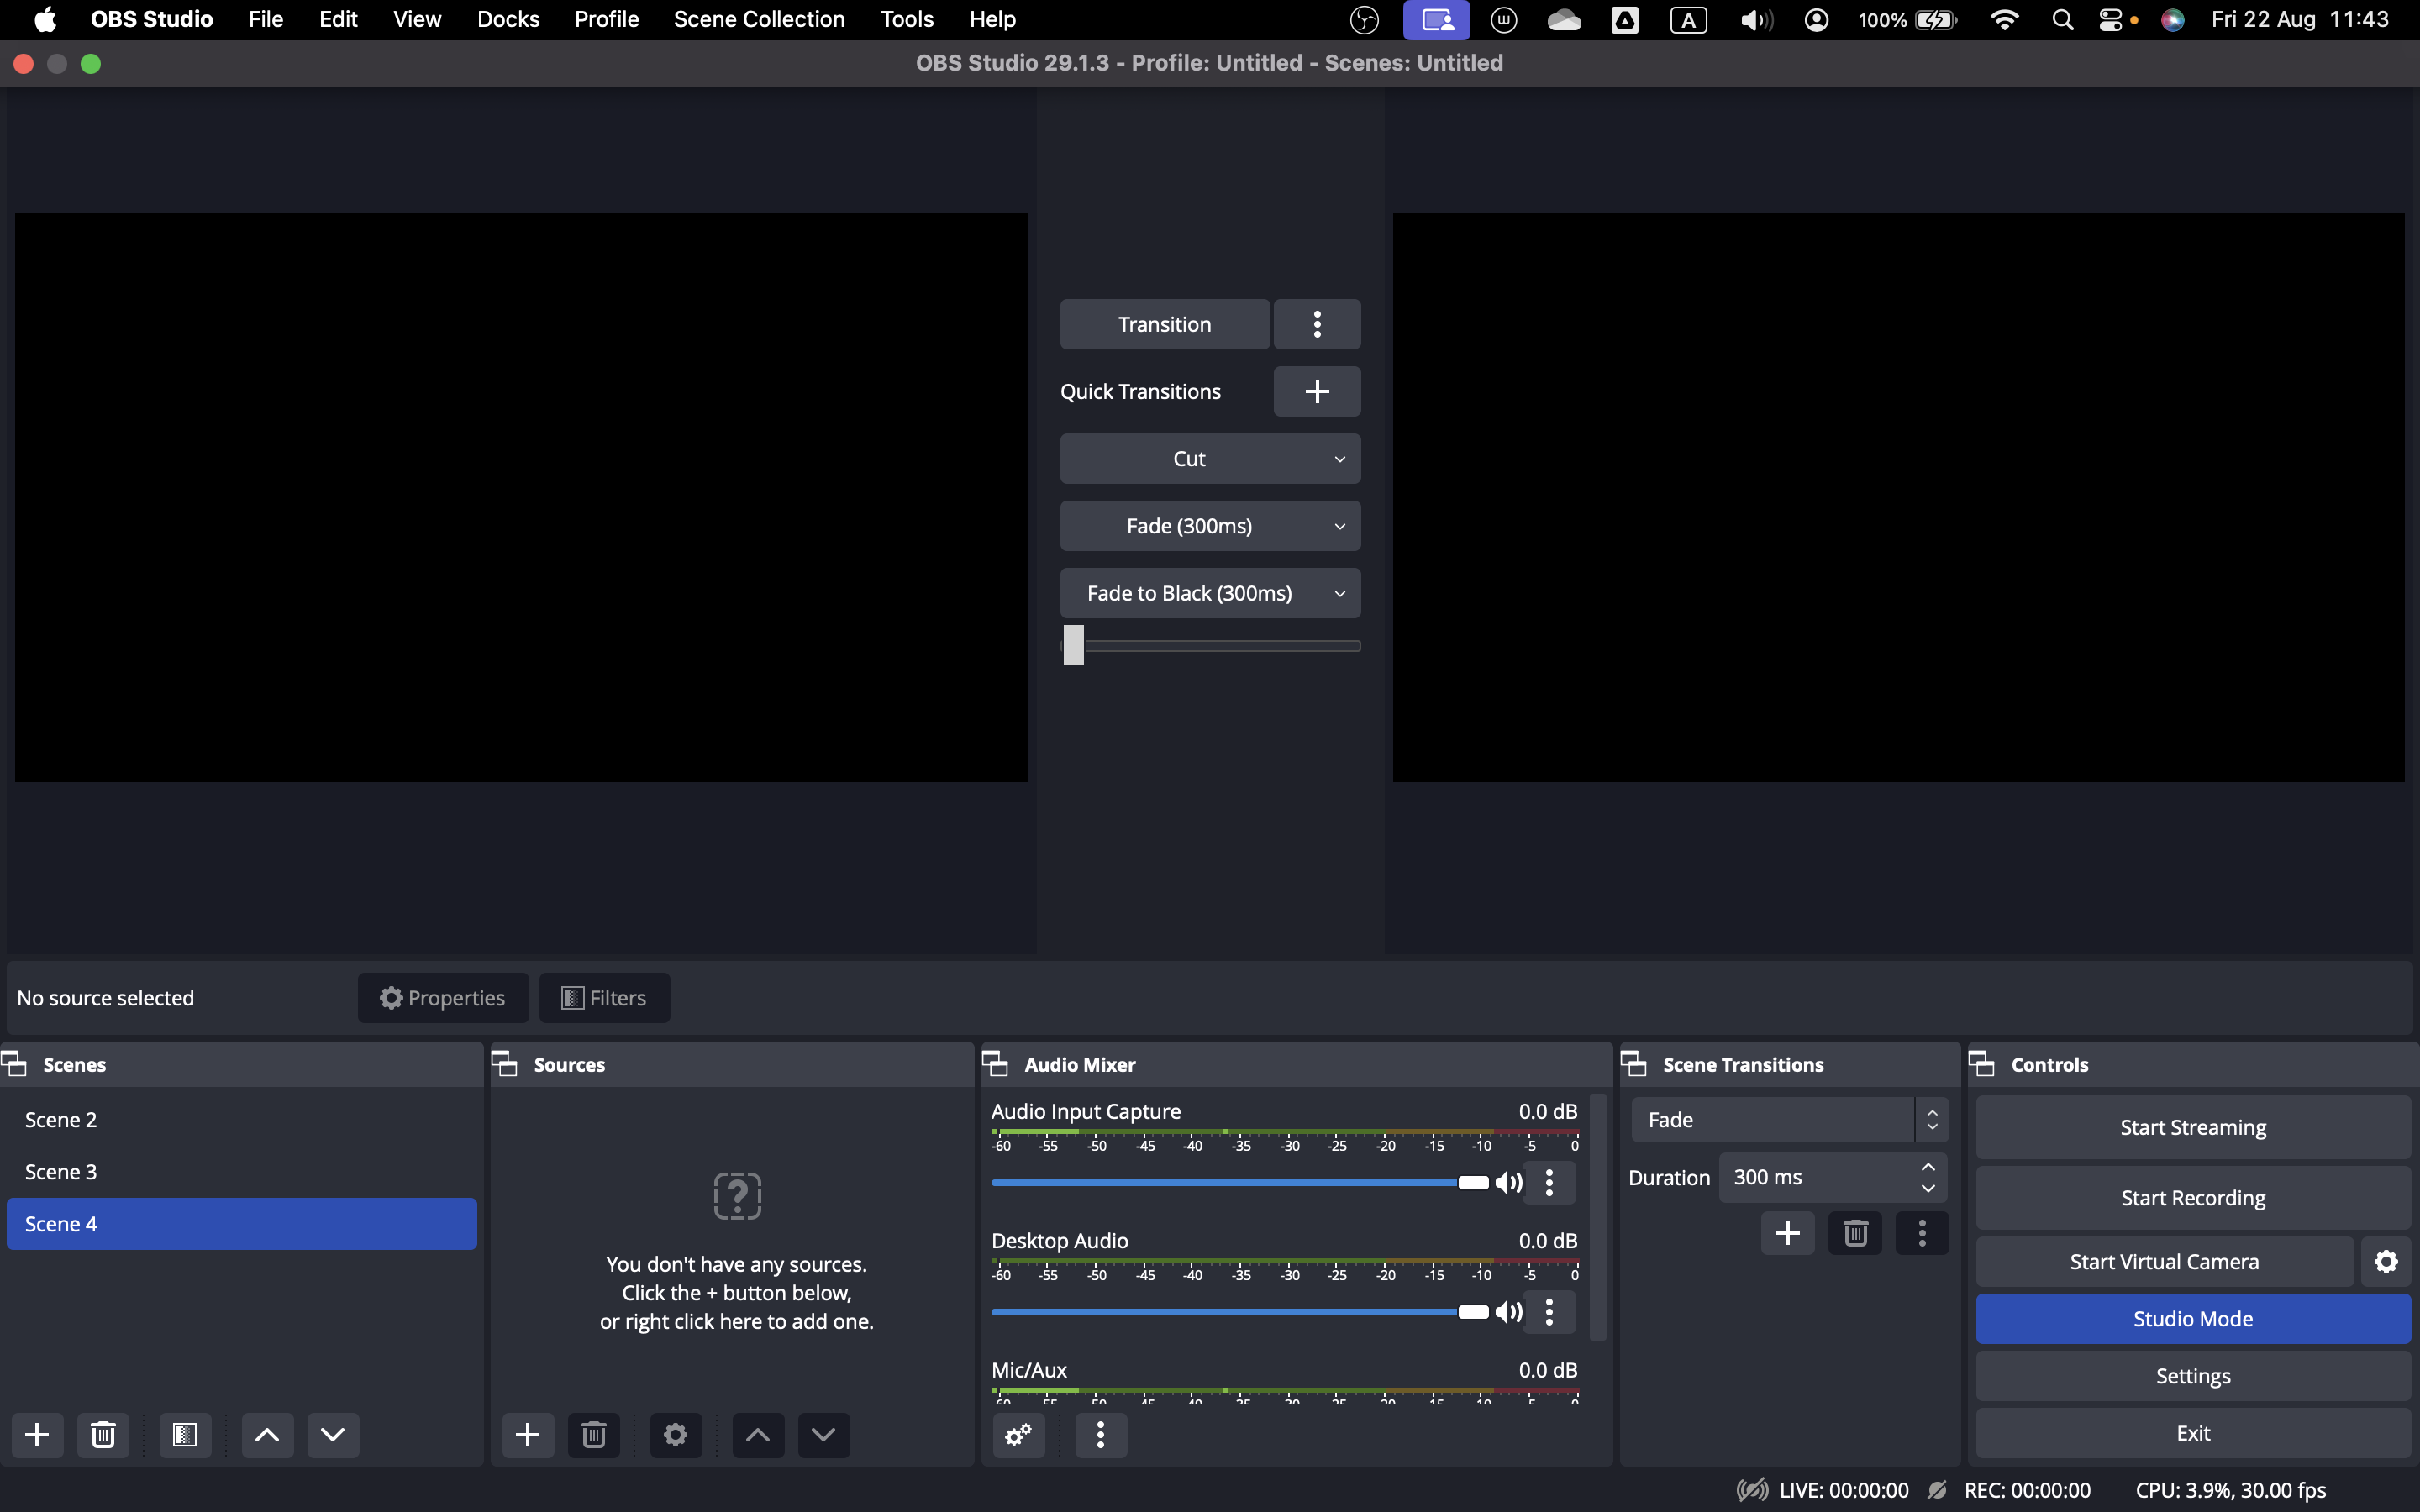
- Launch OBS Studio after installation. If it doesn’t open automatically, find and open it manually.
-
The interface should resemble the one shown in the video.
Create a Scene
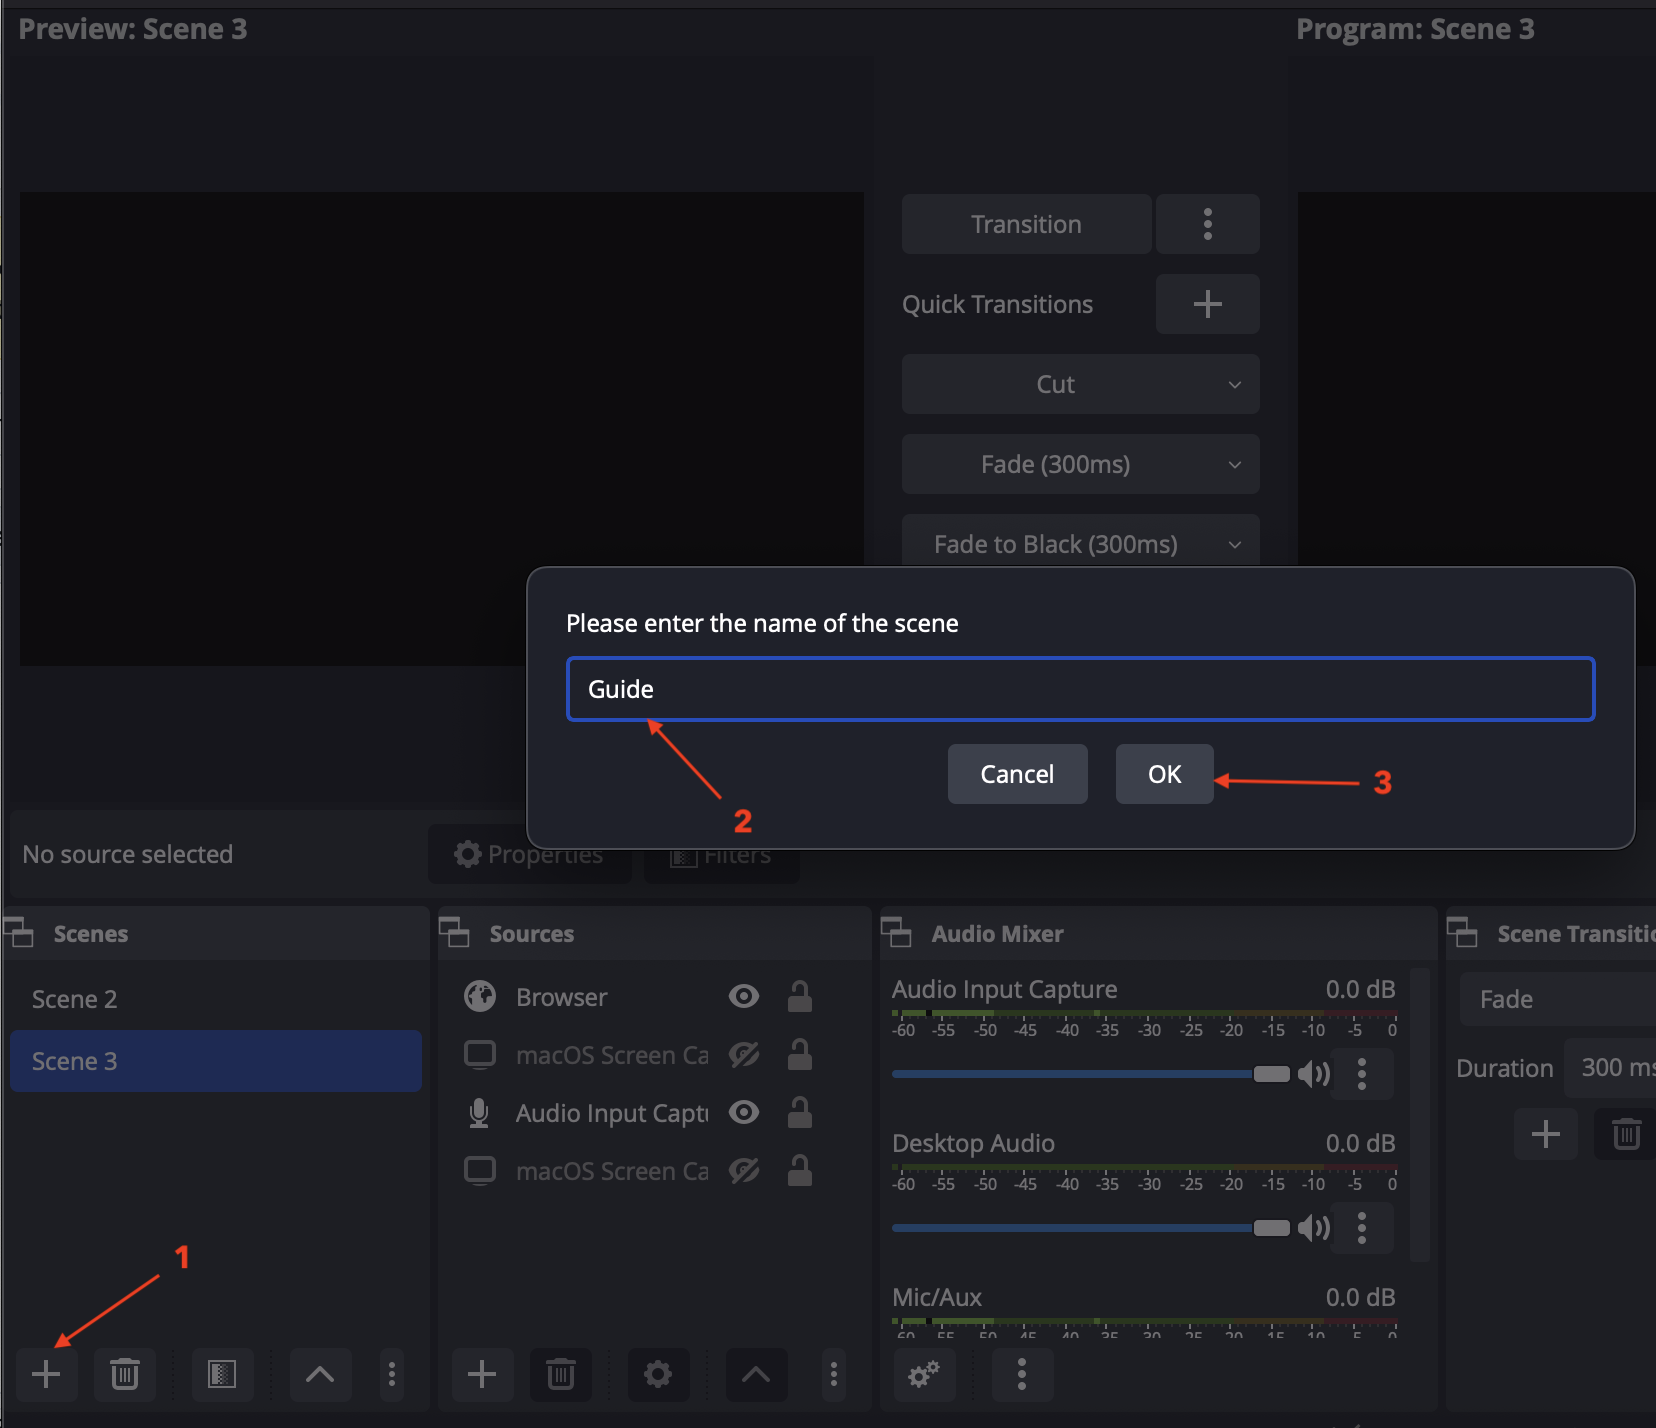
- In the "Scenes" section (bottom-left), click the "+" button to create a new scene.
-
Name the scene (e.g., "Guide") and confirm.
3. Configuration
Configure Settings:
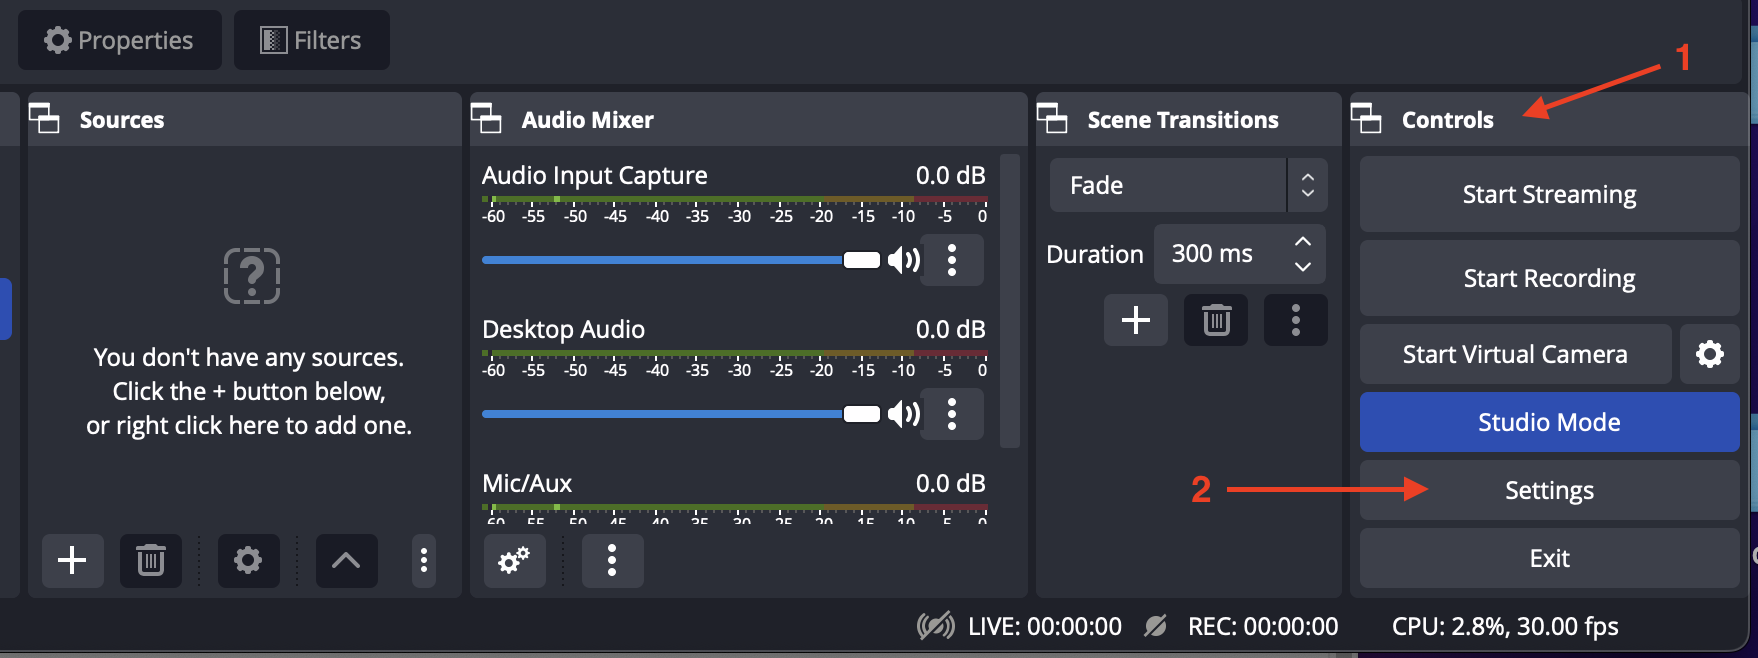
- In the control section [1], click "Settings" [2] in the bottom-right corner.
-
A settings window will pop up; select the "Output" tab.
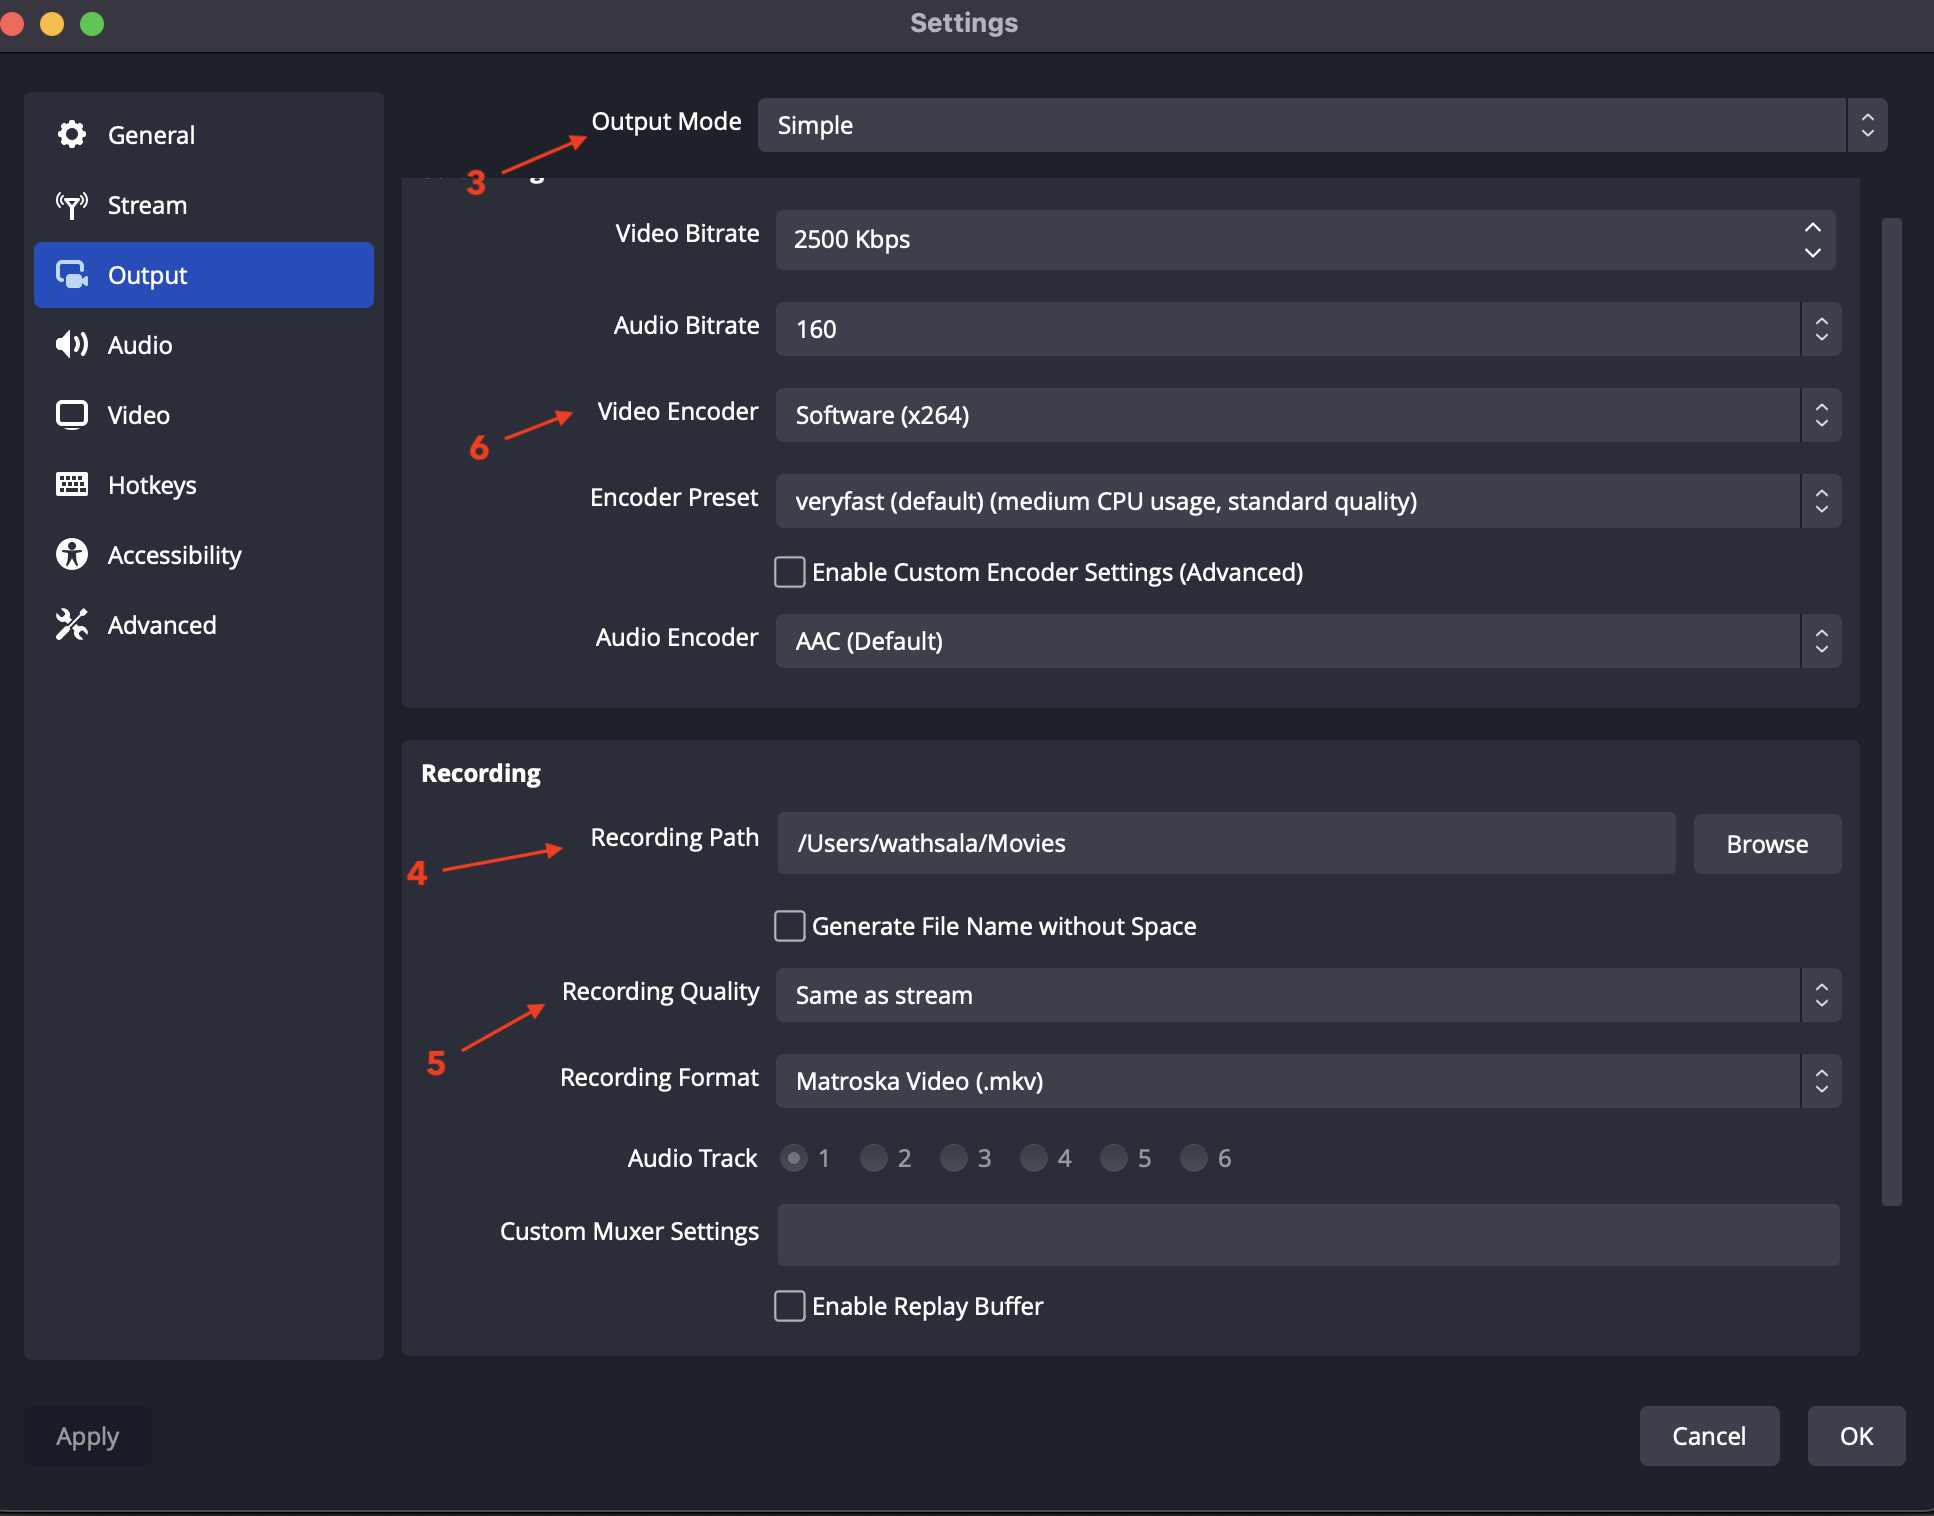
- Output Settings:
- Select "Simple" mode [3].
- Set the recording path [4] (where your files will be saved).
- Choose "High Quality, Medium File Size" [5] for recording quality.
- Select MP4 as the recording format.
-
Encoder [6] (Platform Difference)
-
Choose according to your system:
🪟 Windows:
     * NVIDIA GPU → **NVENC (H.264)**
     * AMD GPU → **AMD Hardware Encoder**
     * Intel GPU → **QuickSync**
     * No dedicated GPU → **x264**
🍎 macOS:
     * Apple Silicon (M1/M2/M3) → **Apple VT H264 Hardware Encoder**
     * Intel Mac → **x264**
-
-
Click "OK" to save settings.
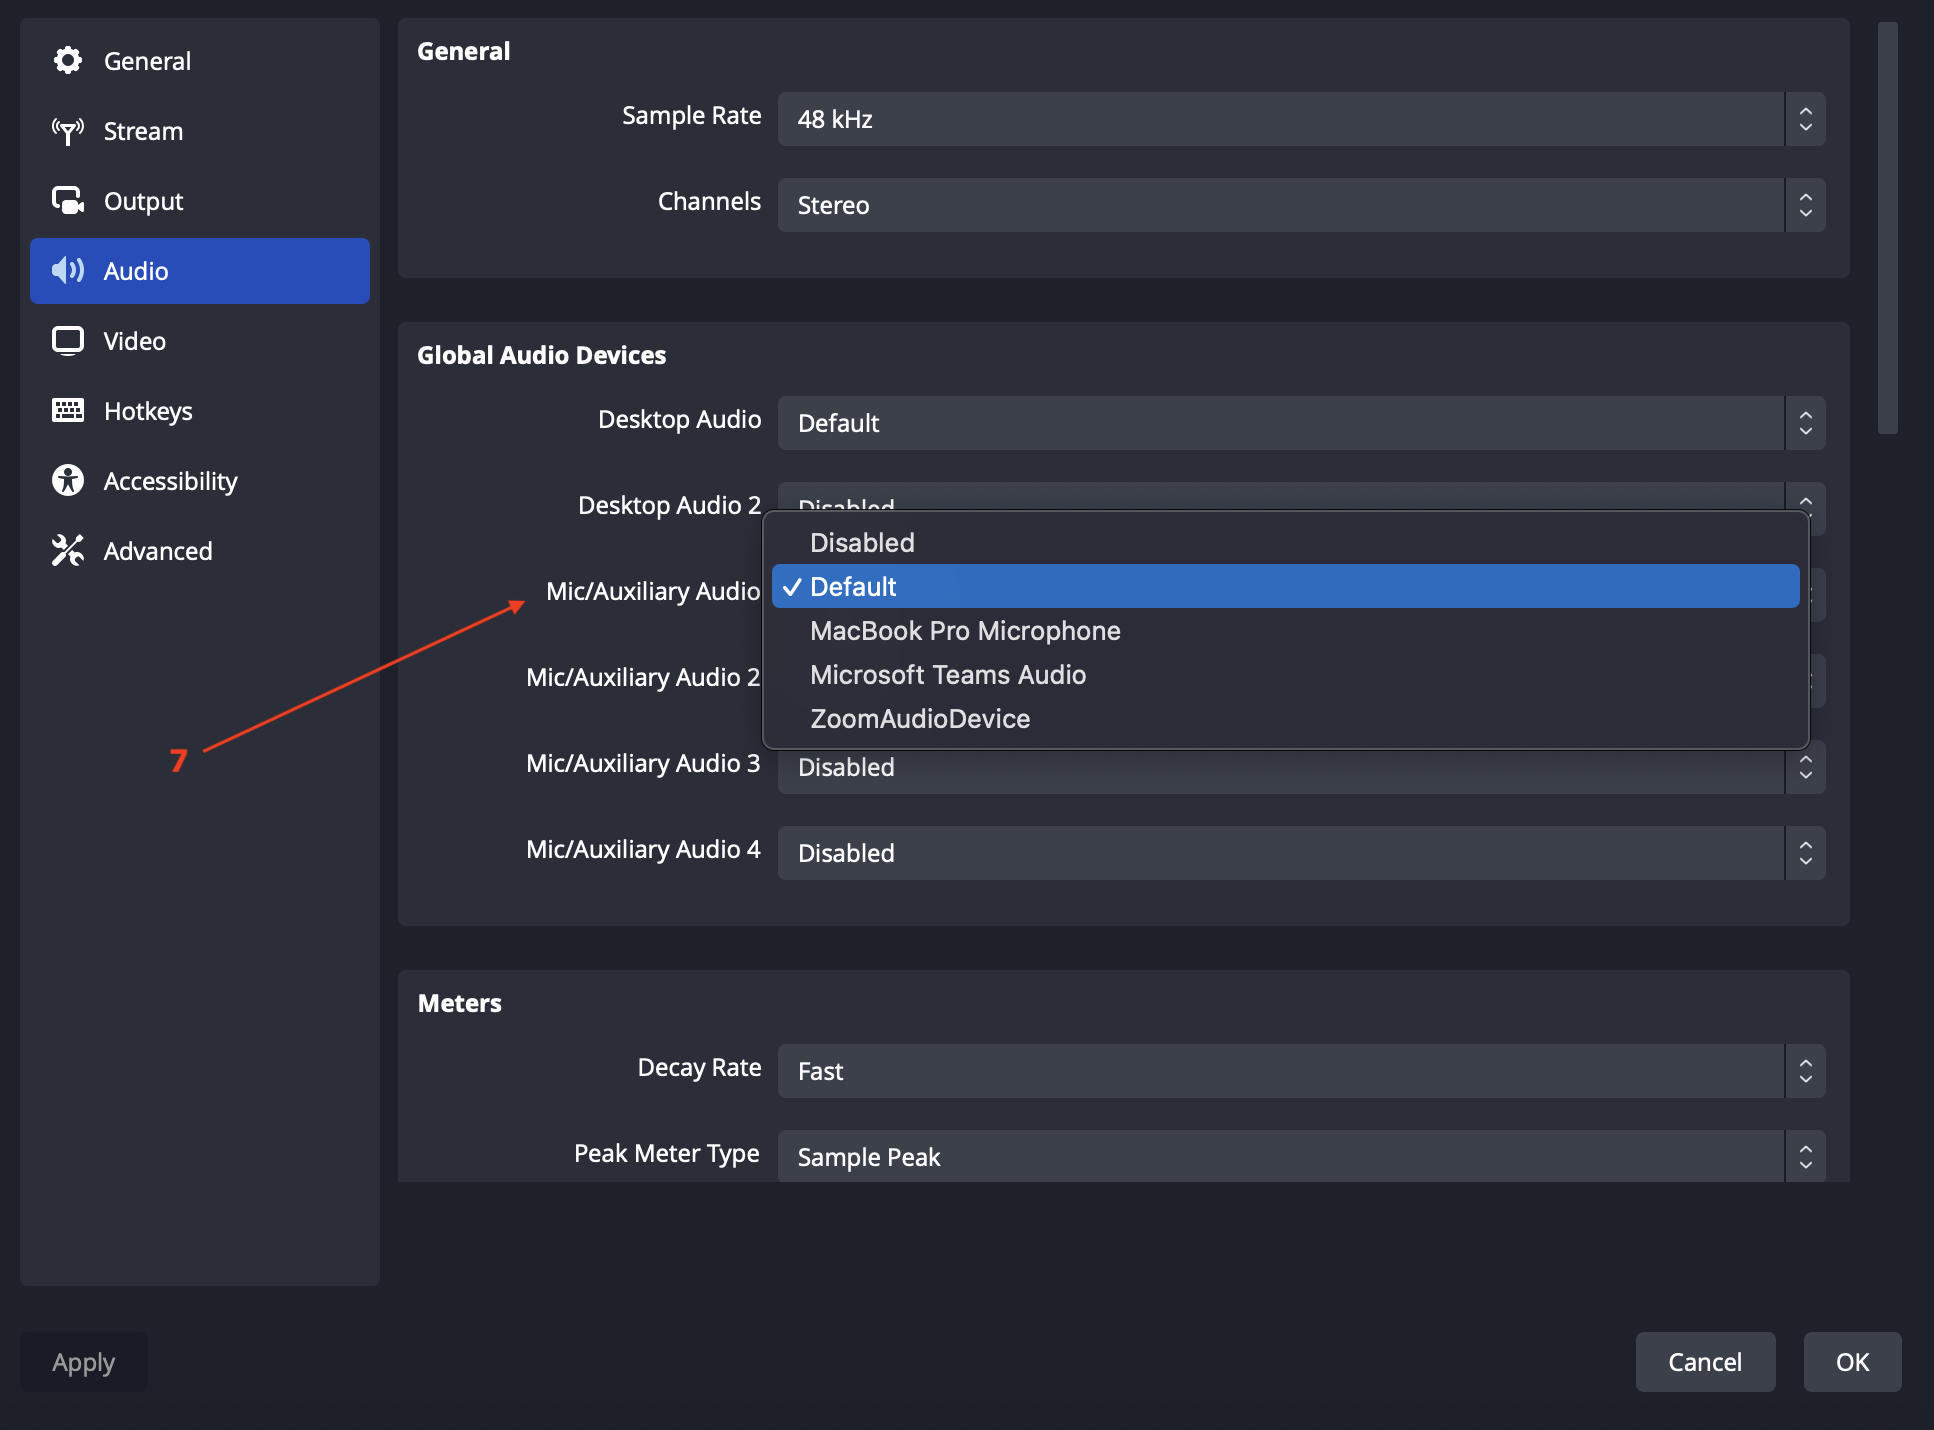
- Configure Audio Settings:
- Navigate to the "Audio" tab and select your microphone under "Mic/Auxiliary. [7]"
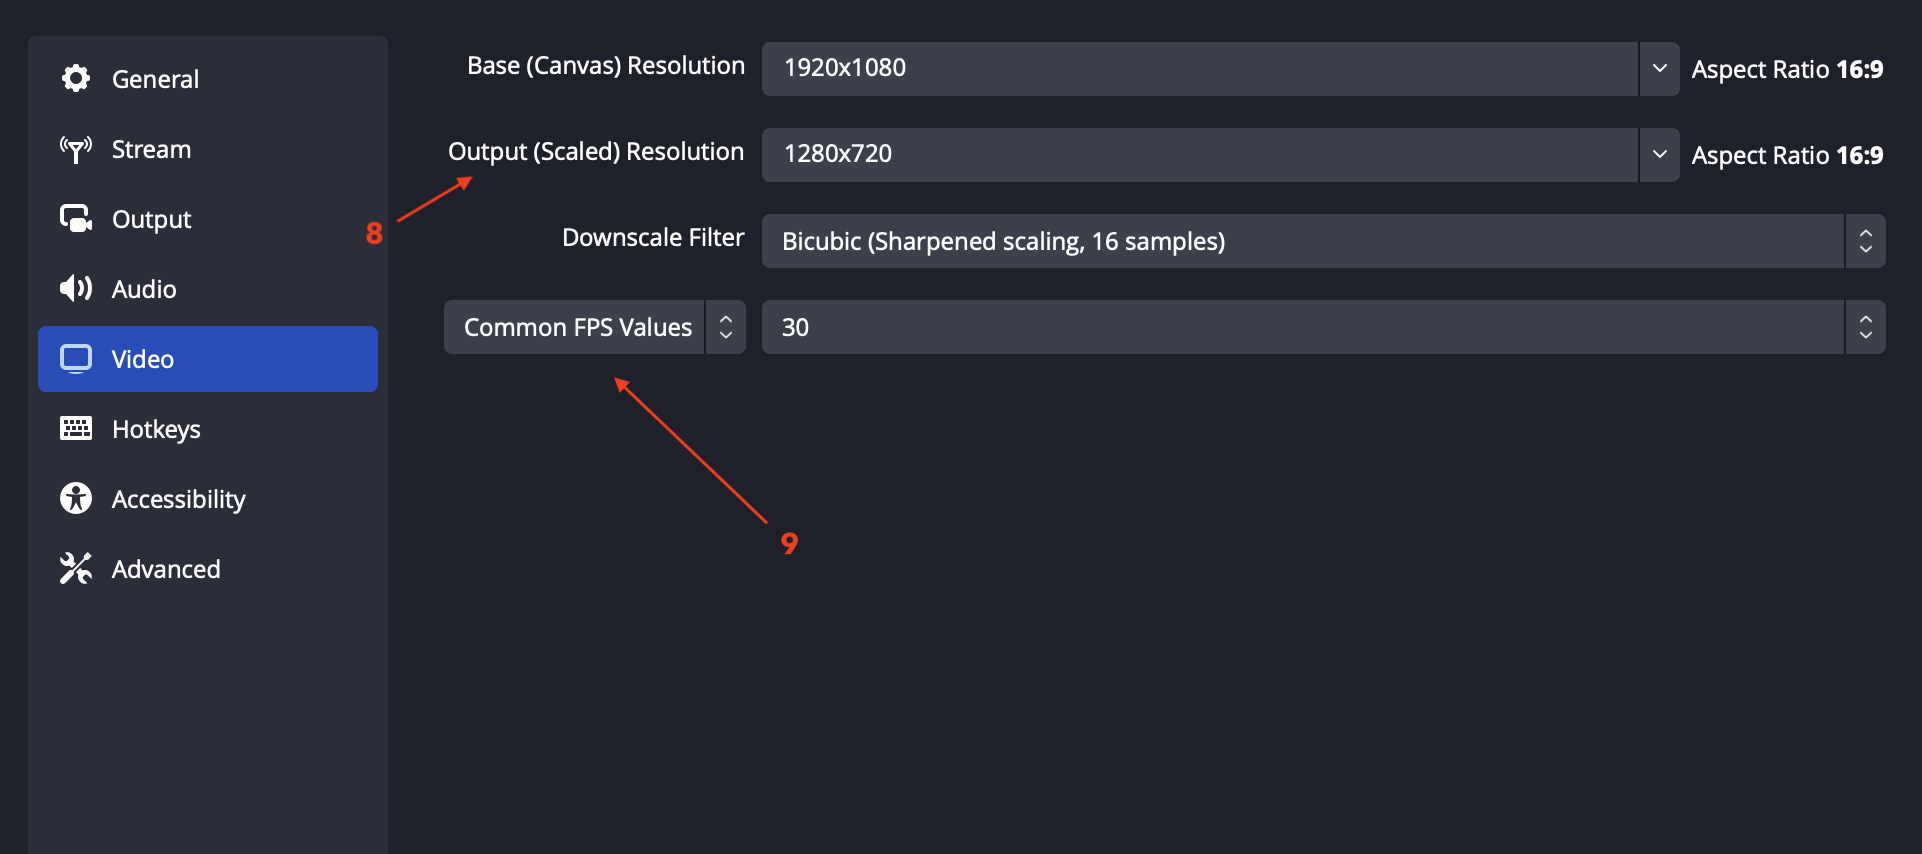
- Configure Video Settings:
- In the "Video" tab, set the resolution (e.g., 1440p or 1080p, based on your monitor) [8].
- Choose the FPS (60 for smoother recording, 30 is sufficient) [9].
- Click "OK" to save all settings.
4. Adding Sources
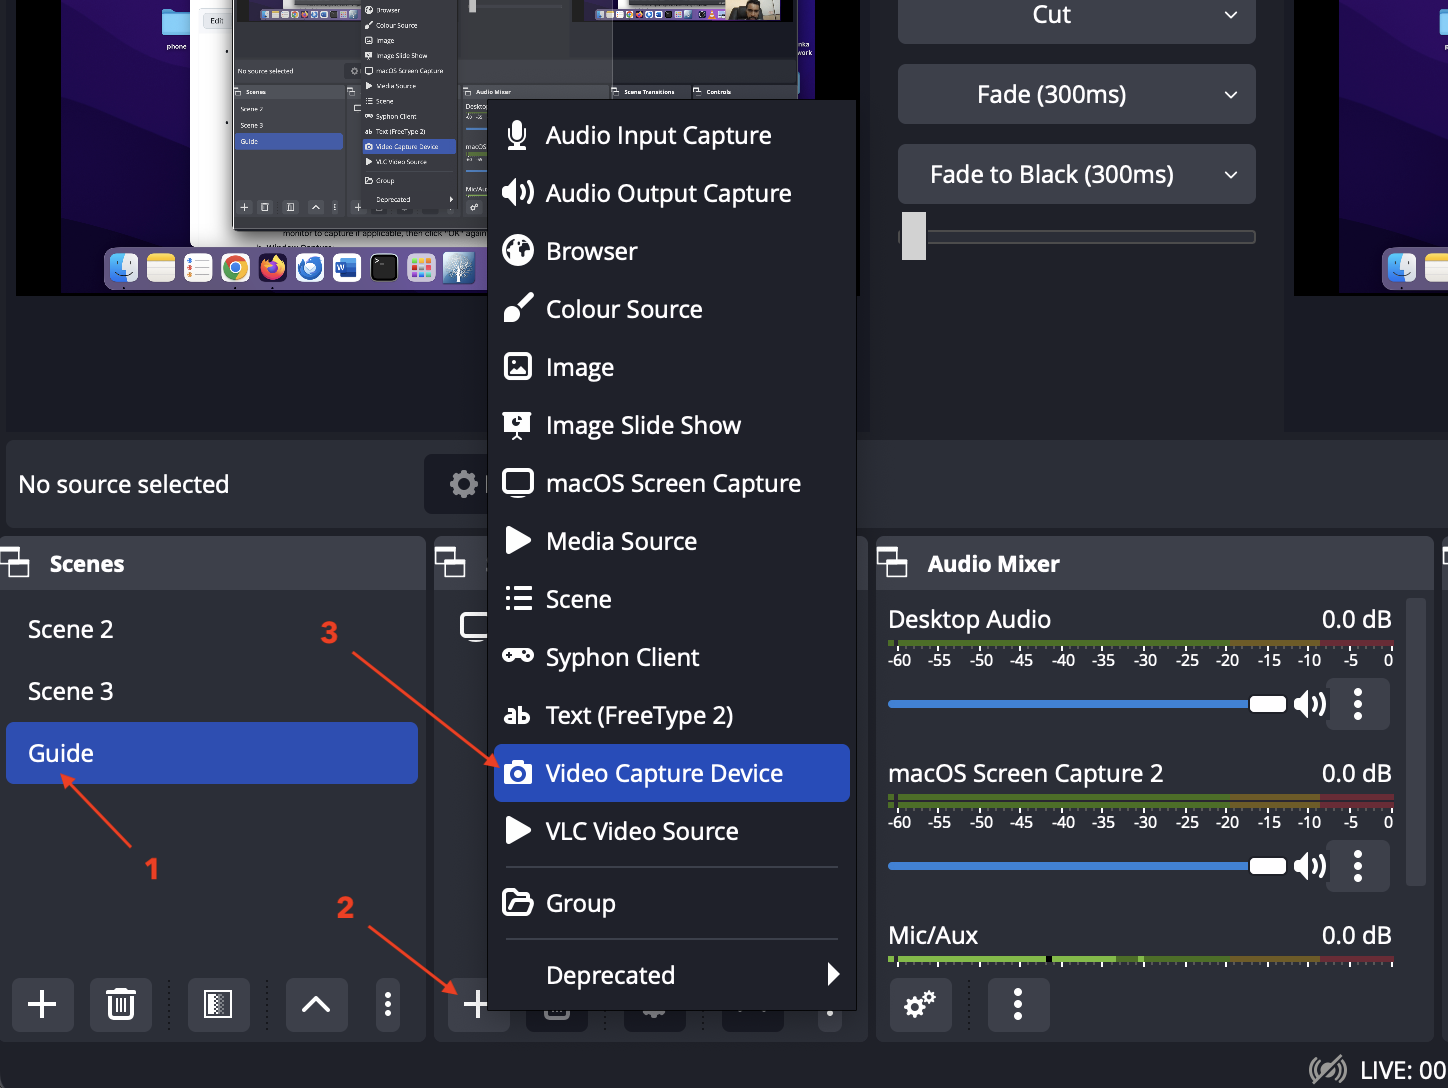
Select Scene
Ensure your created scene is selected (for MAC).
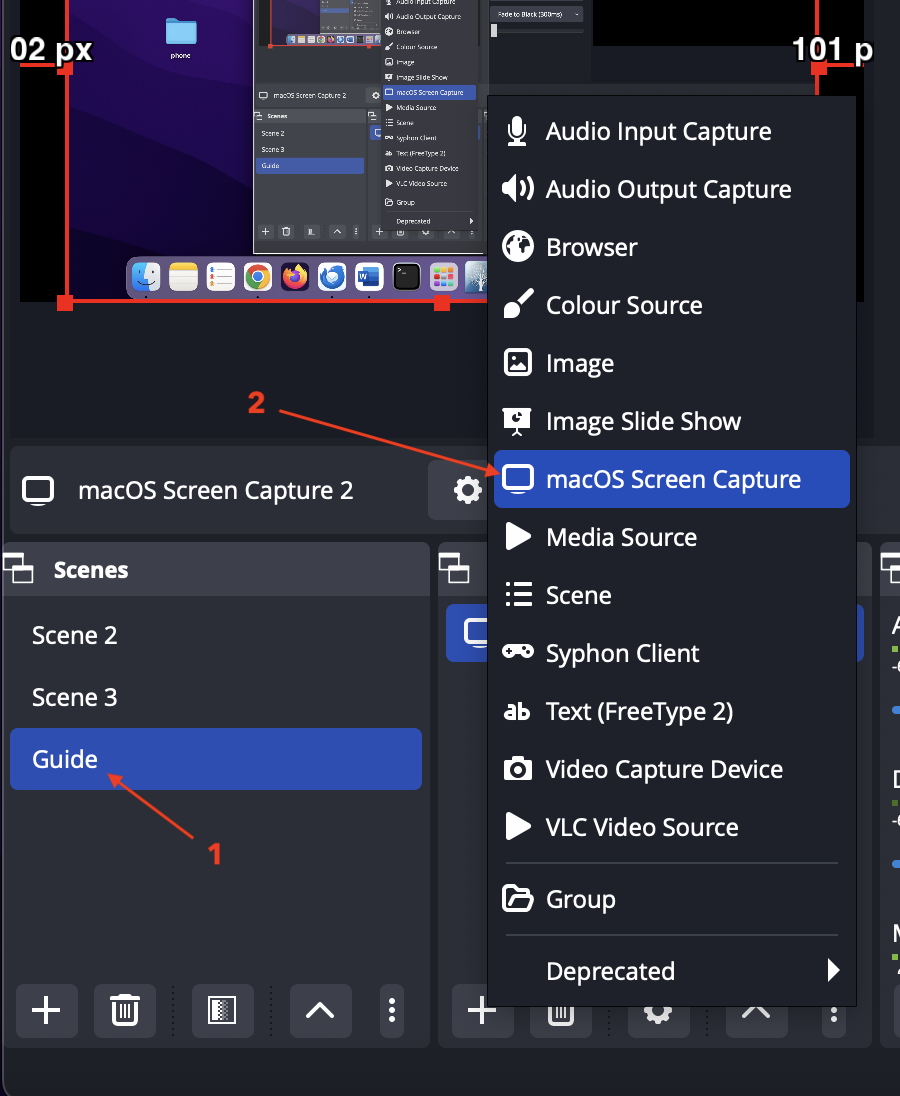
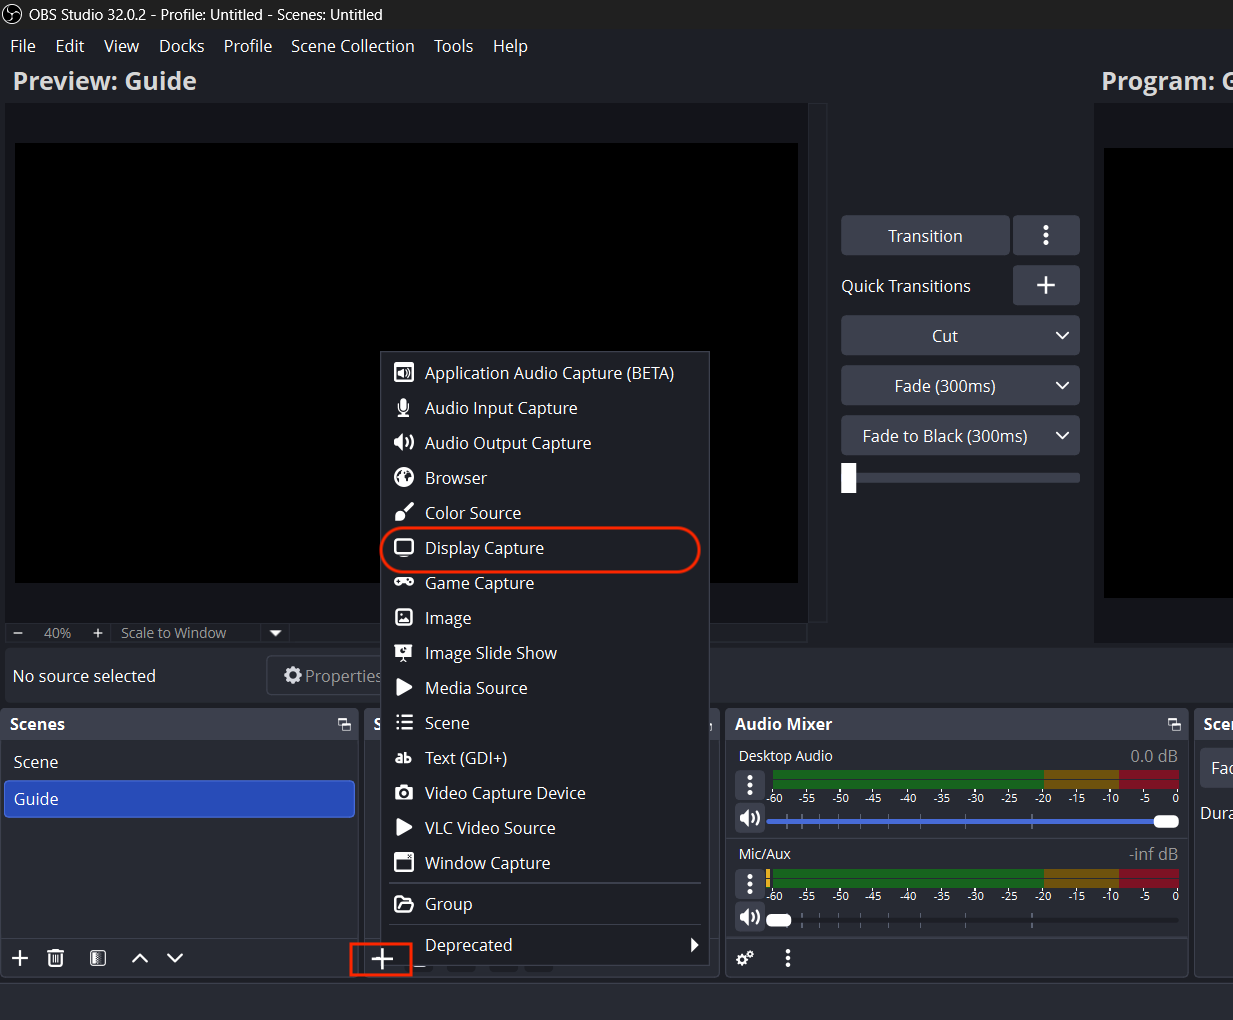
Add Screen Capture (Platform Difference)
Click "+" in the Sources section.
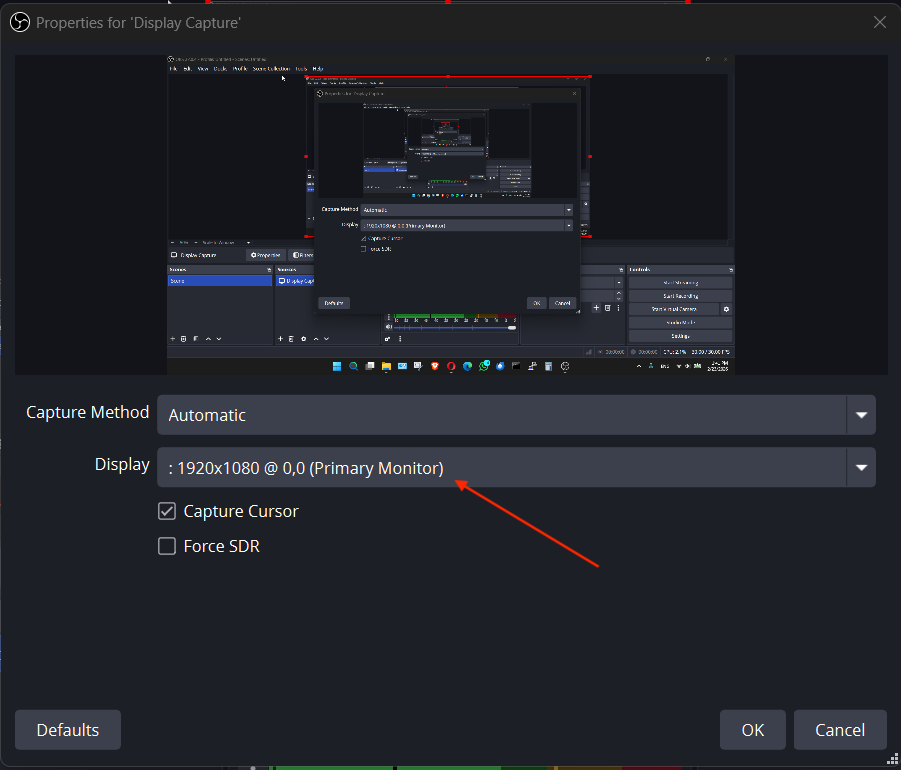
🪟 On Windows:
Select → Display Capture
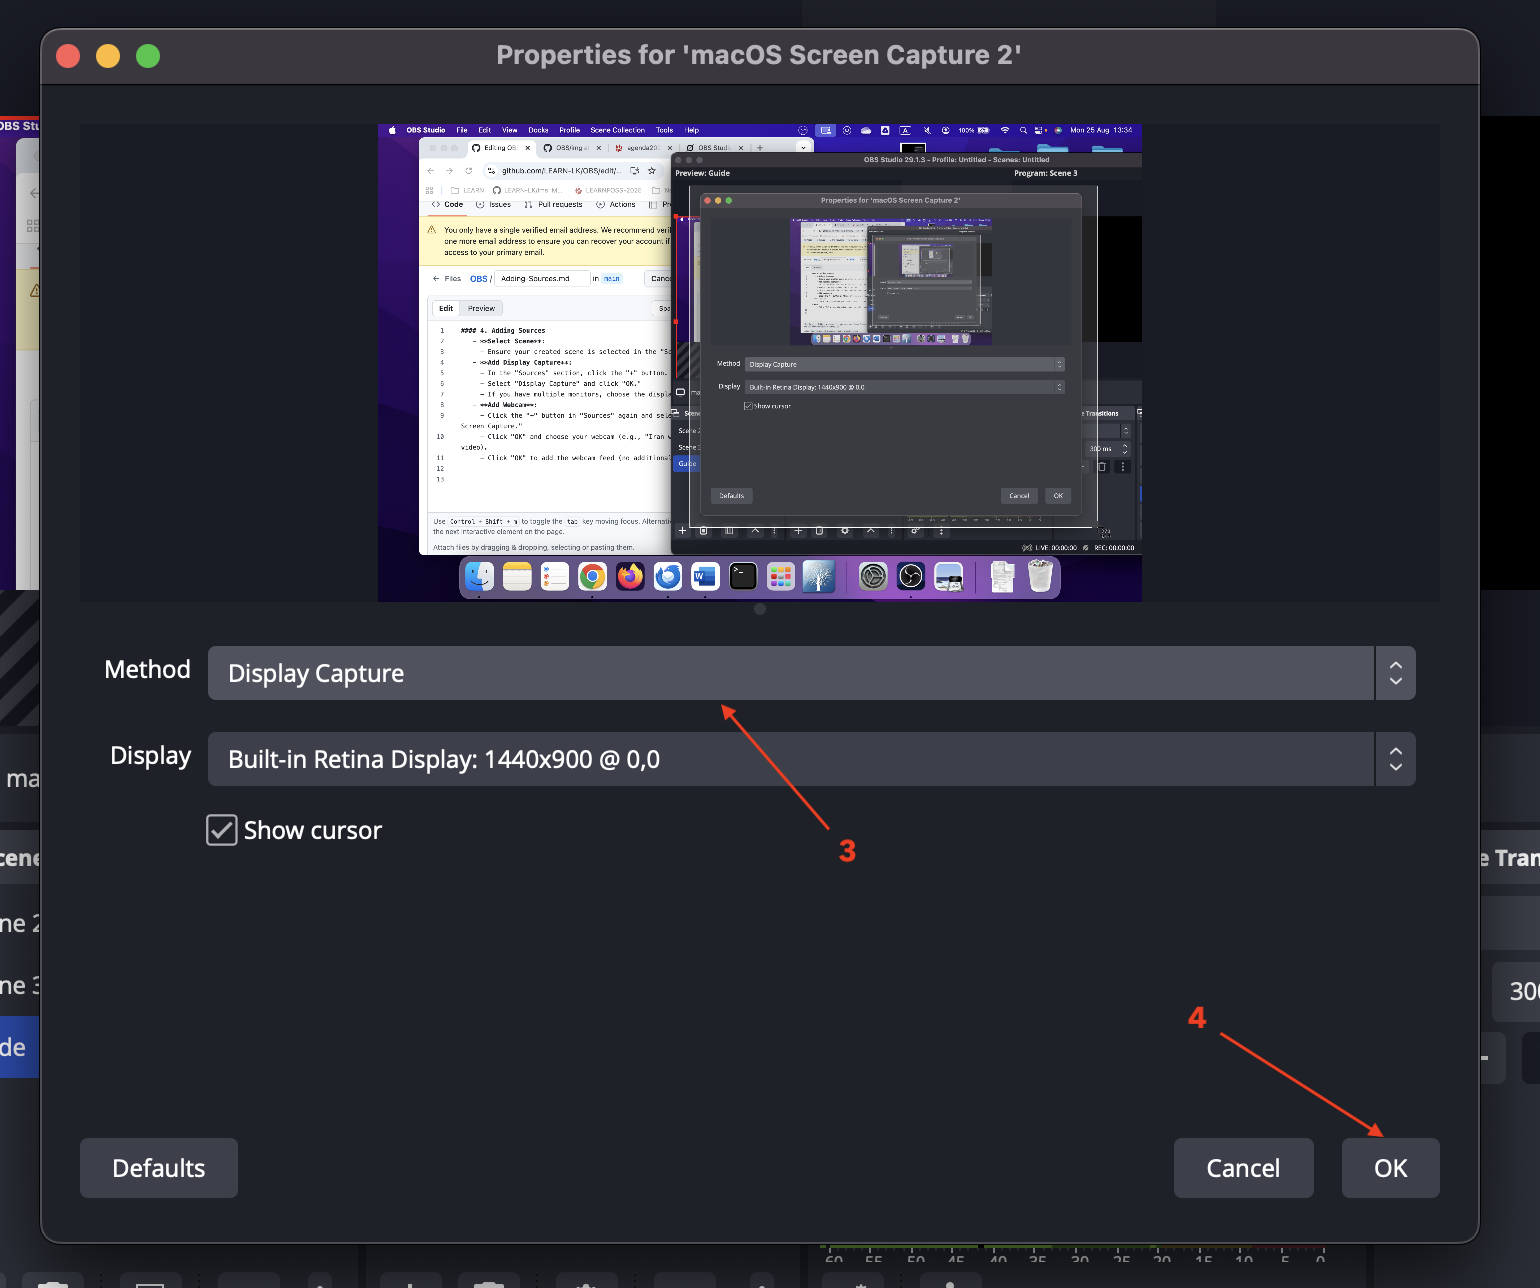
🍎 On macOS:
Select → macOS Screen Capture (Older versions may show as Display Capture)
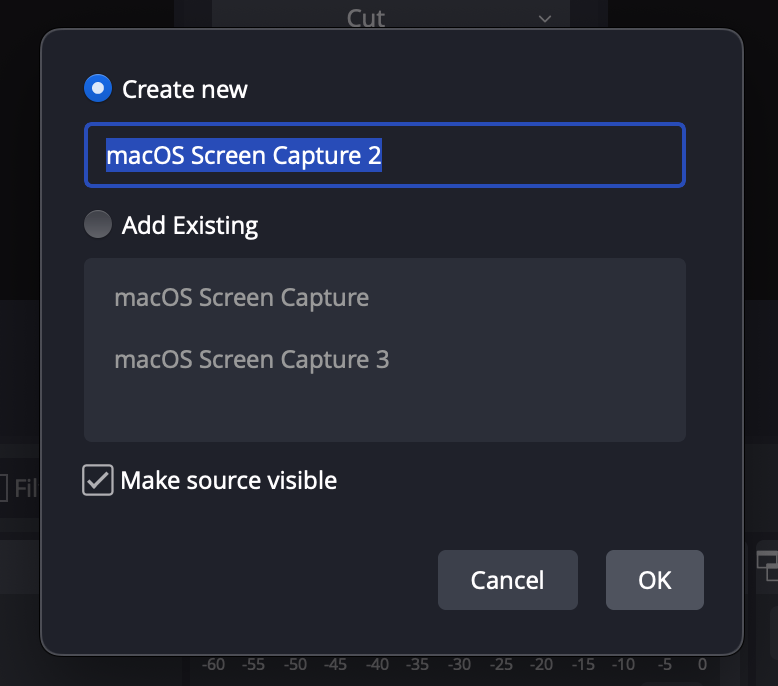
- Select Create New and Click "OK" to proceed.
- In the next window select the capture method:
- Choose Display Capture [3] from the "Method" dropdown to capture the entire screen.
- Leave "Window Capture" or "Application Capture" unselected unless you want to focus on a specific window or application.
- Check "Show cursor" if you want the mouse cursor to be visible in the recording (optional).
- Click "OK" [4] to add the screen capture feed.
- Add Webcam:
- Click the "+" [2] button in "Sources" again.
- Select "Video Capture Device" [3] from the dropdown menu and click "OK."
- A window will appear with the following options:
- Create new [4]: Select this option and name the source (e.g., "Video Capture Device 2").
- Add Existing: Use this if you’ve already created a video capture source and want to reuse it (not applicable here since you’re adding a new one).
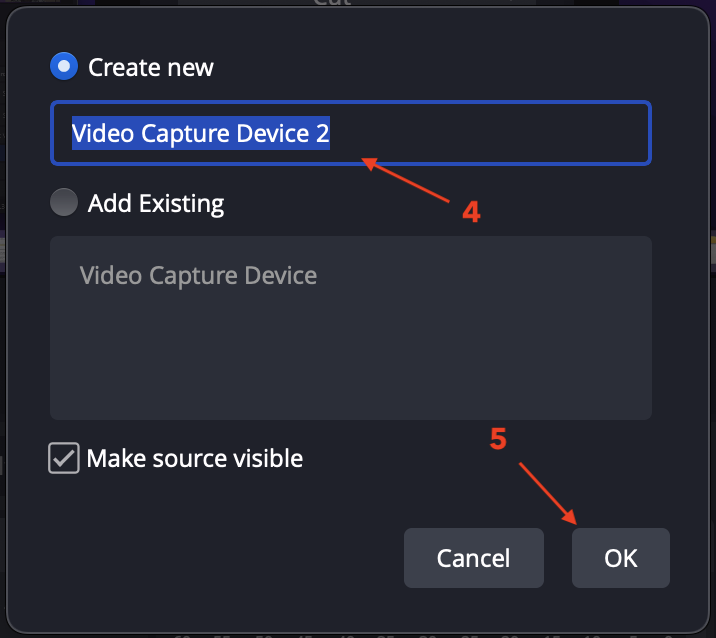
- Ensure "Make source visible" is checked to display the webcam feed immediately.
-
Click "OK" [5] to proceed.
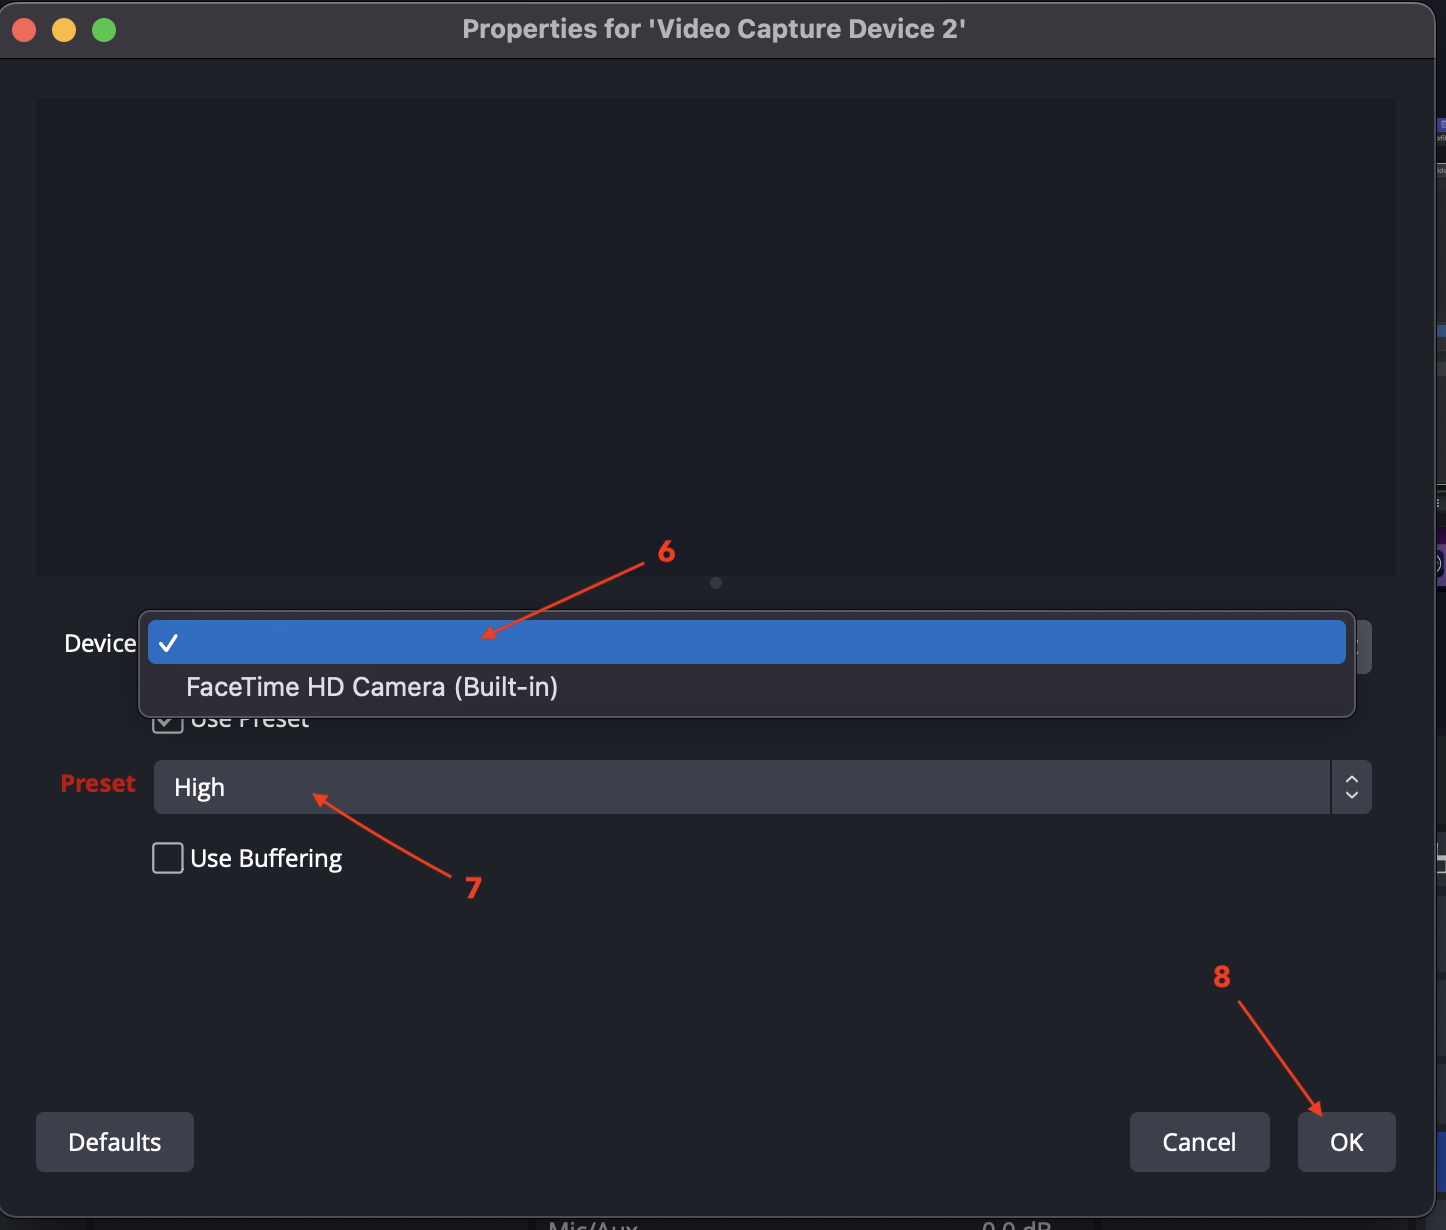
-
In the next window , select your webcam from the "Device" [6] dropdown (e.g., "FaceTime HD Camera (Built-in)" or your connected webcam).
- Set the "Preset" to "High" [7] for better quality (optional adjustment).
- Leave "Use Buffering" unchecked unless you experience lag (not recommended unless needed).
- Click "OK" [8] to add the webcam feed.
5. Customization
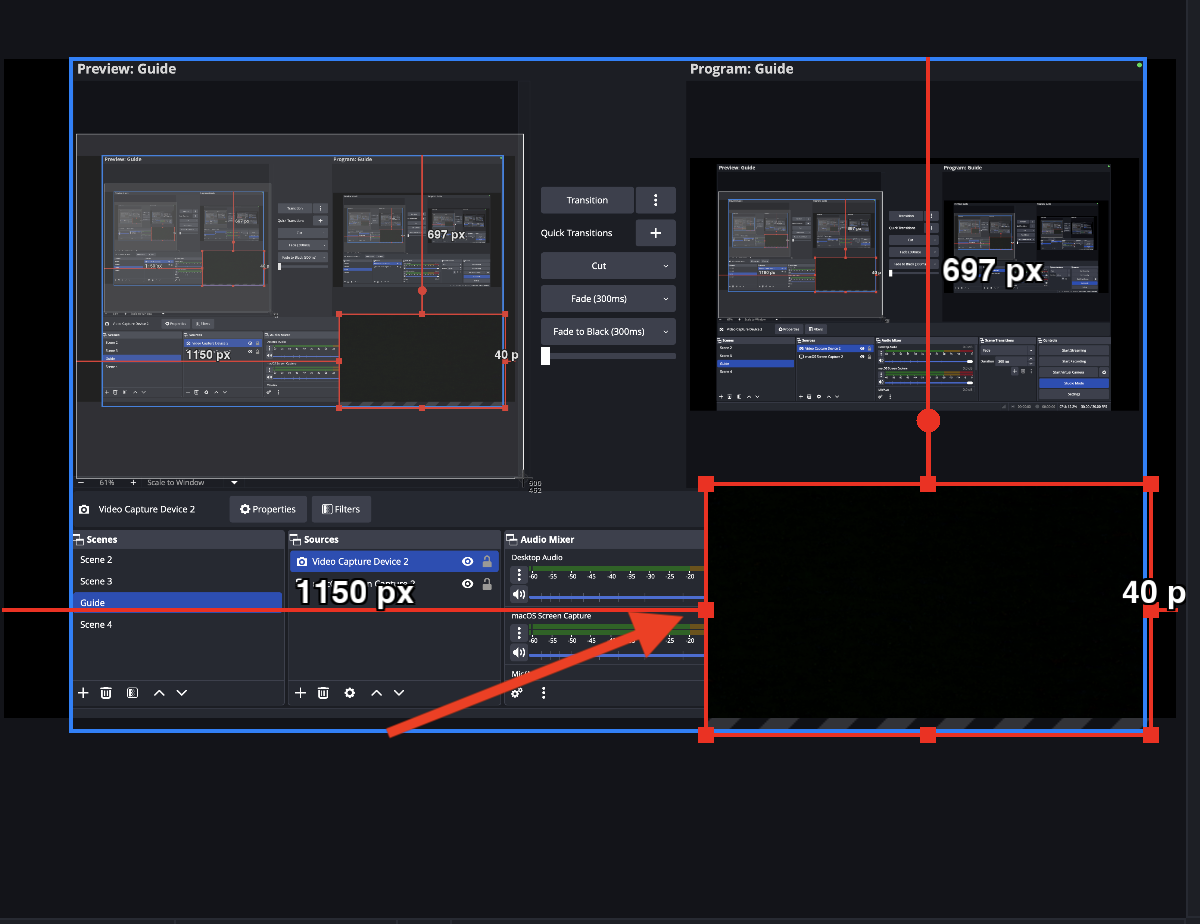
- Adjust Webcam Position and Size:
- In the OBS preview window, use the red dots around the webcam feed to resize or drag it to your preferred position (e.g., bottom-right corner, as adjusted to 777 px width and 45 px height in the example).
- Adjust Microphone Volume:
- Use the audio mixer in OBS to fine-tune your microphone volume as needed.
6. Recording
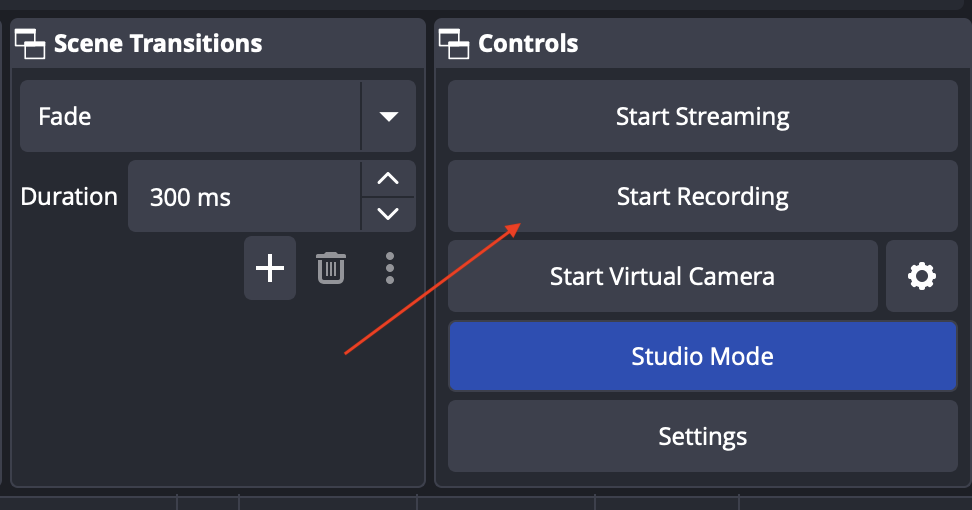
- Start Recording:
- Click "Start Recording" in the bottom-right corner.
- Minimize OBS Studio to record your screen and webcam simultaneously.
- Stop Recording:
- When finished, return to OBS Studio and click "Stop Recording."
- Locate the recorded file in the file path specified in the output settings.
🚀 7. YouTube Live Streaming Guide
Prerequisite – Create a YouTube Channel
Before starting live streaming:
- You must have a YouTube channel
-
If you don’t have one:
-
Go to YouTube
- Sign in with your Google account
- Click your profile → Create a Channel
- Follow the setup steps
Important Note
- New channels cannot stream immediately
- You must enable live streaming
- Activation may take up to 24 hours
After activation, you can access YouTube Studio → Go Live
Step 1: Open YouTube Live
- Go to Profile [1] > Click YouTube Studio [2]
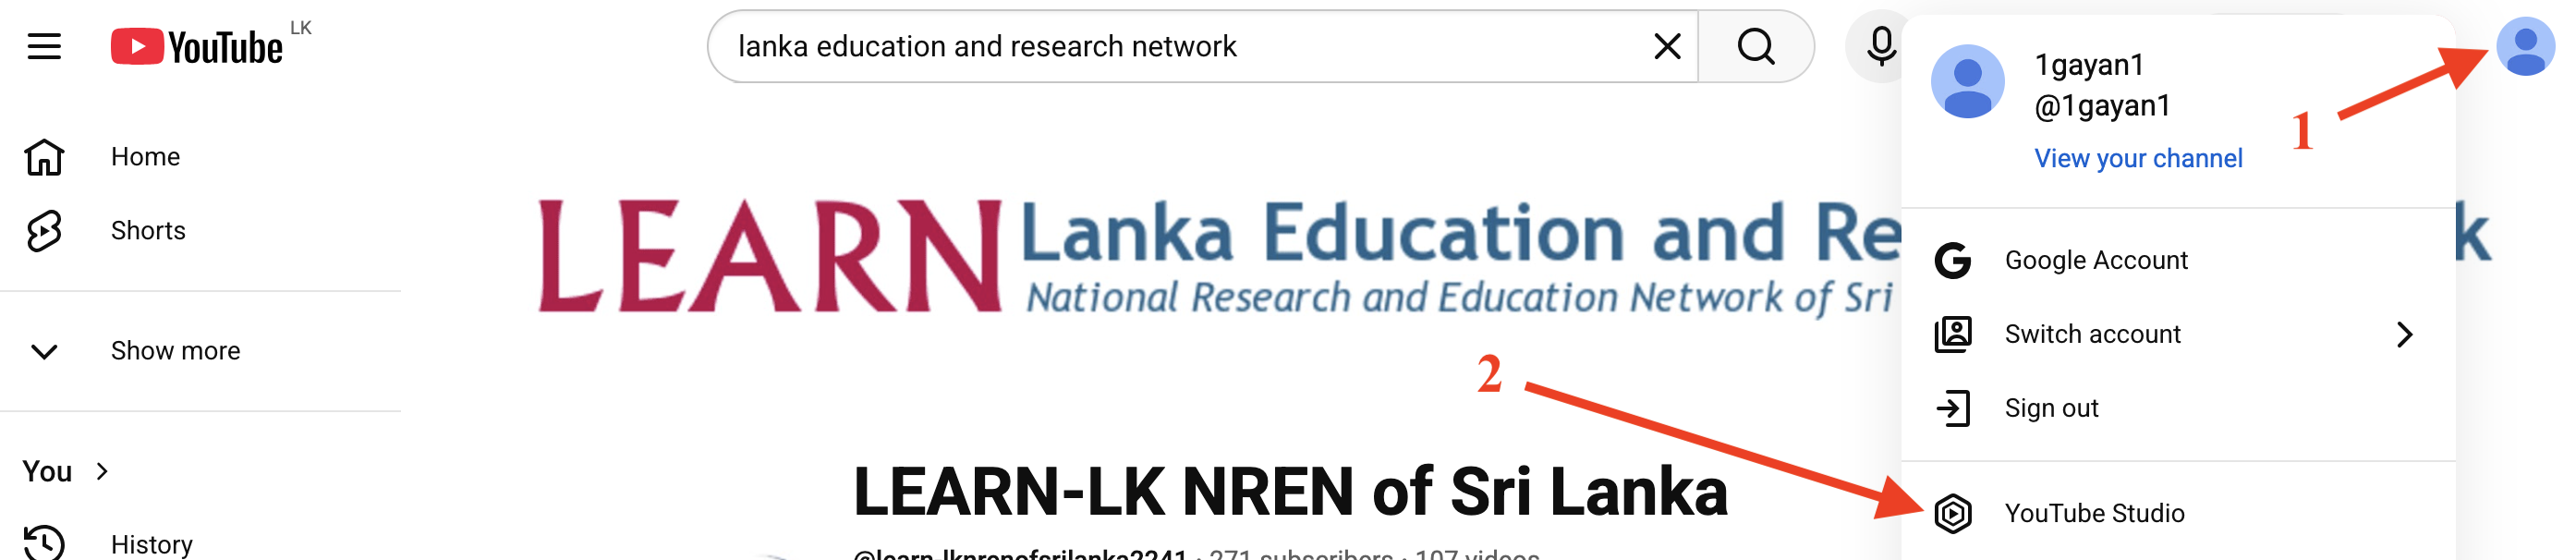
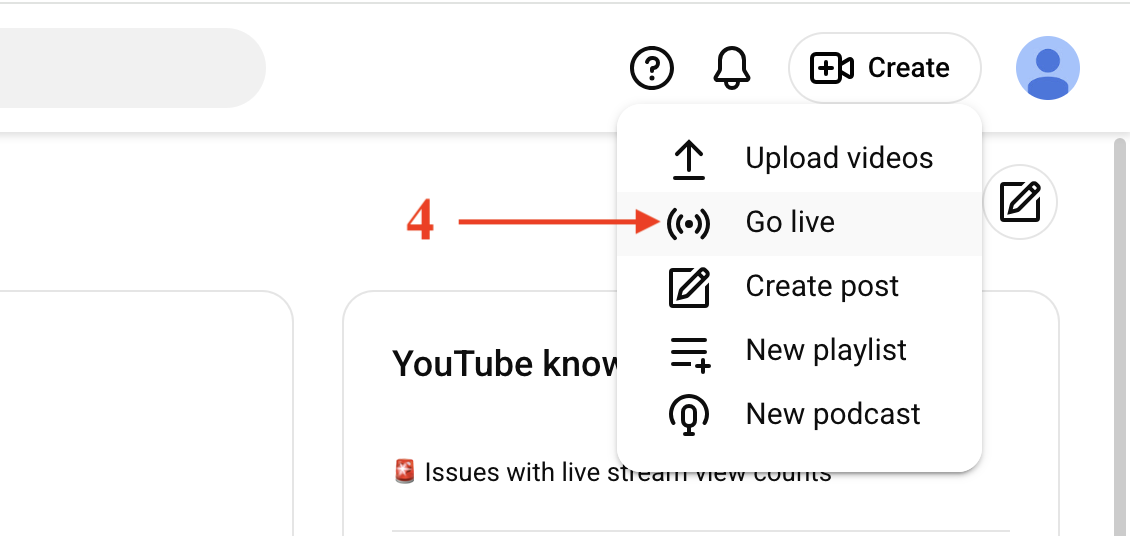
- Click Create [3] → Go Live [4]

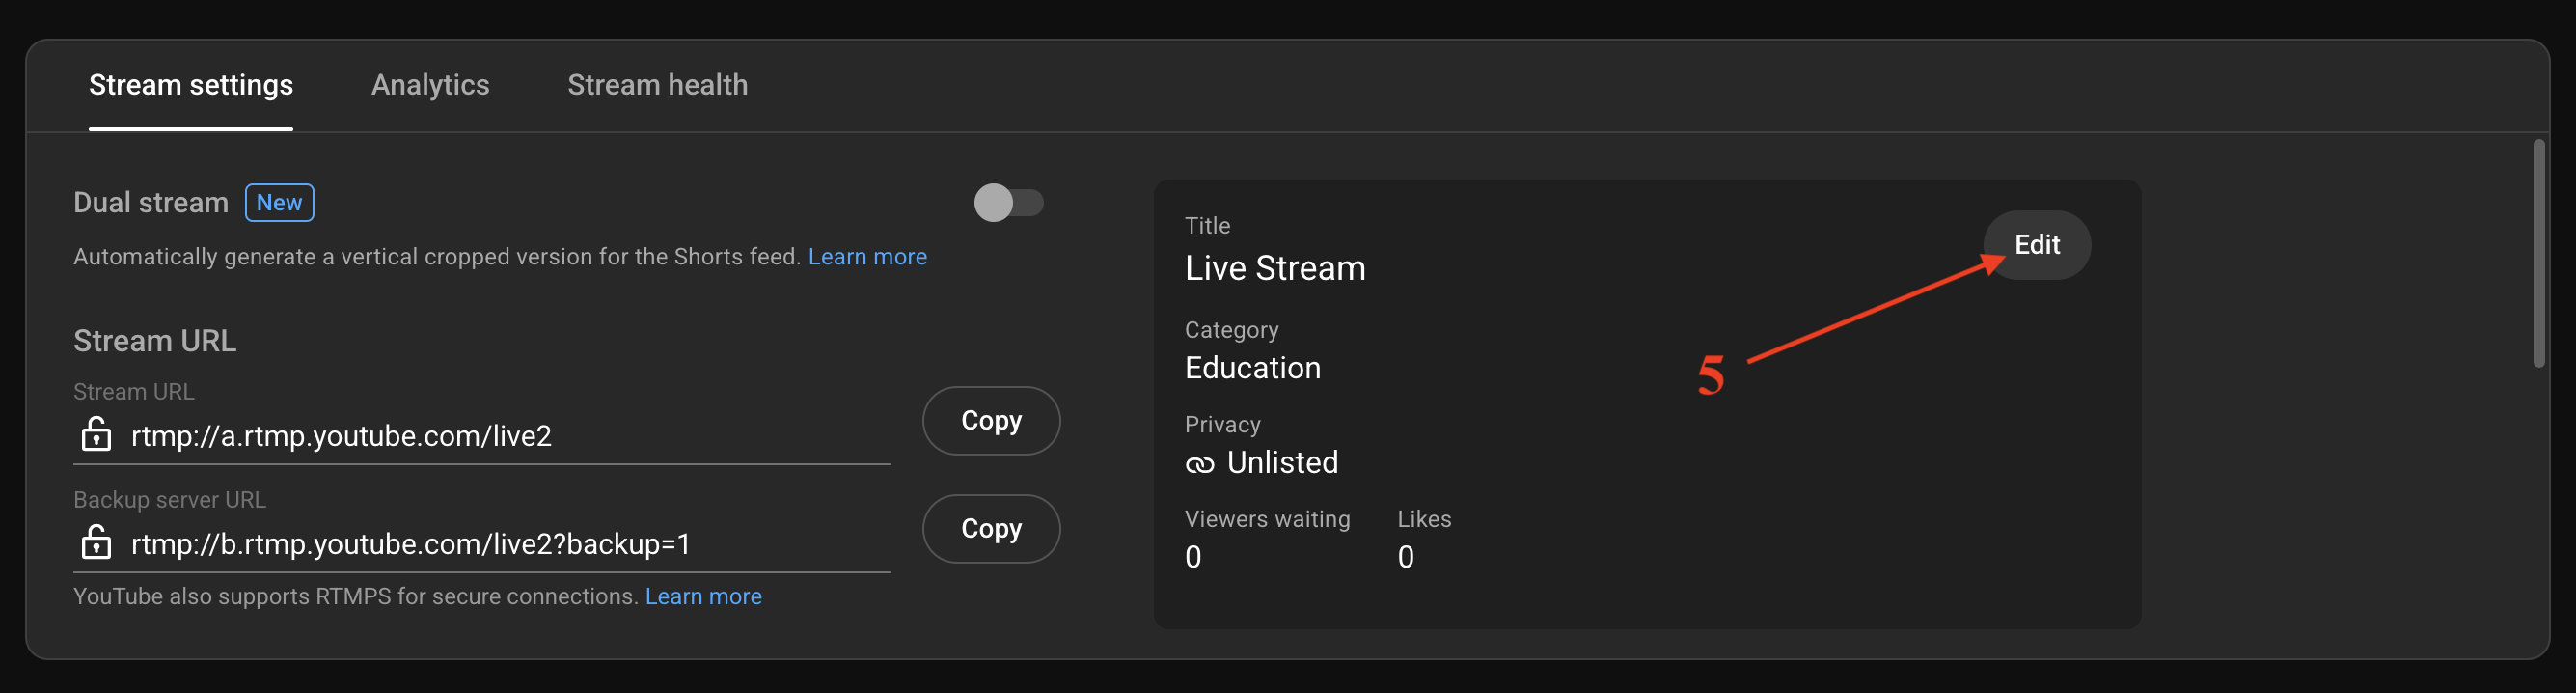
Step 2: Enter Stream Details > Click Edit [5]
- Title
- Description
- Visibility (Public / Unlisted / Private)
Step 3: Create New Stream Key
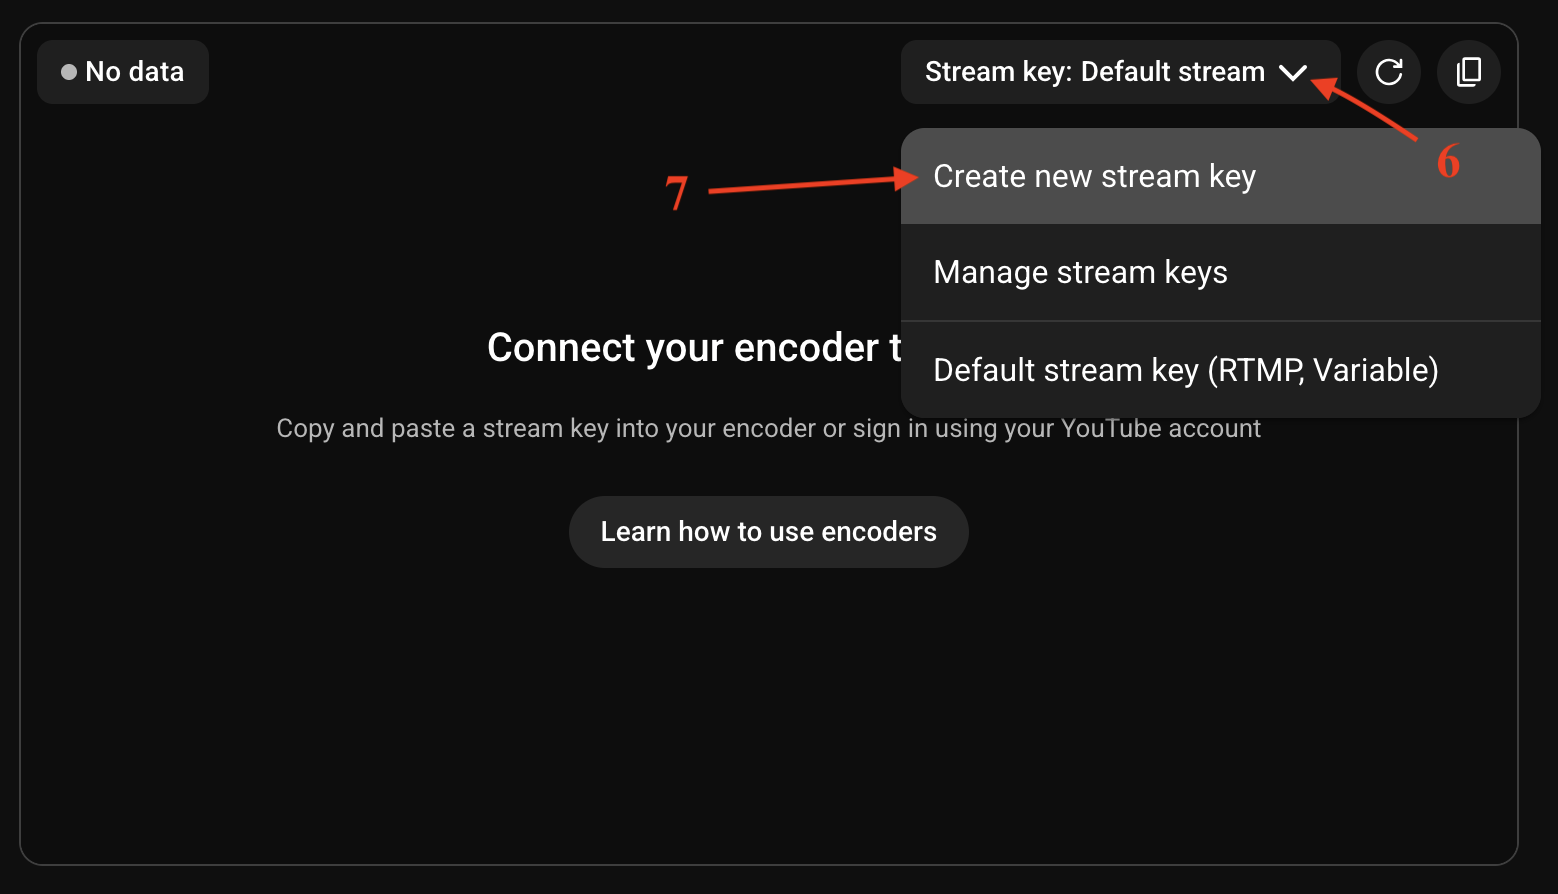
- Click [7] “Create new stream key”
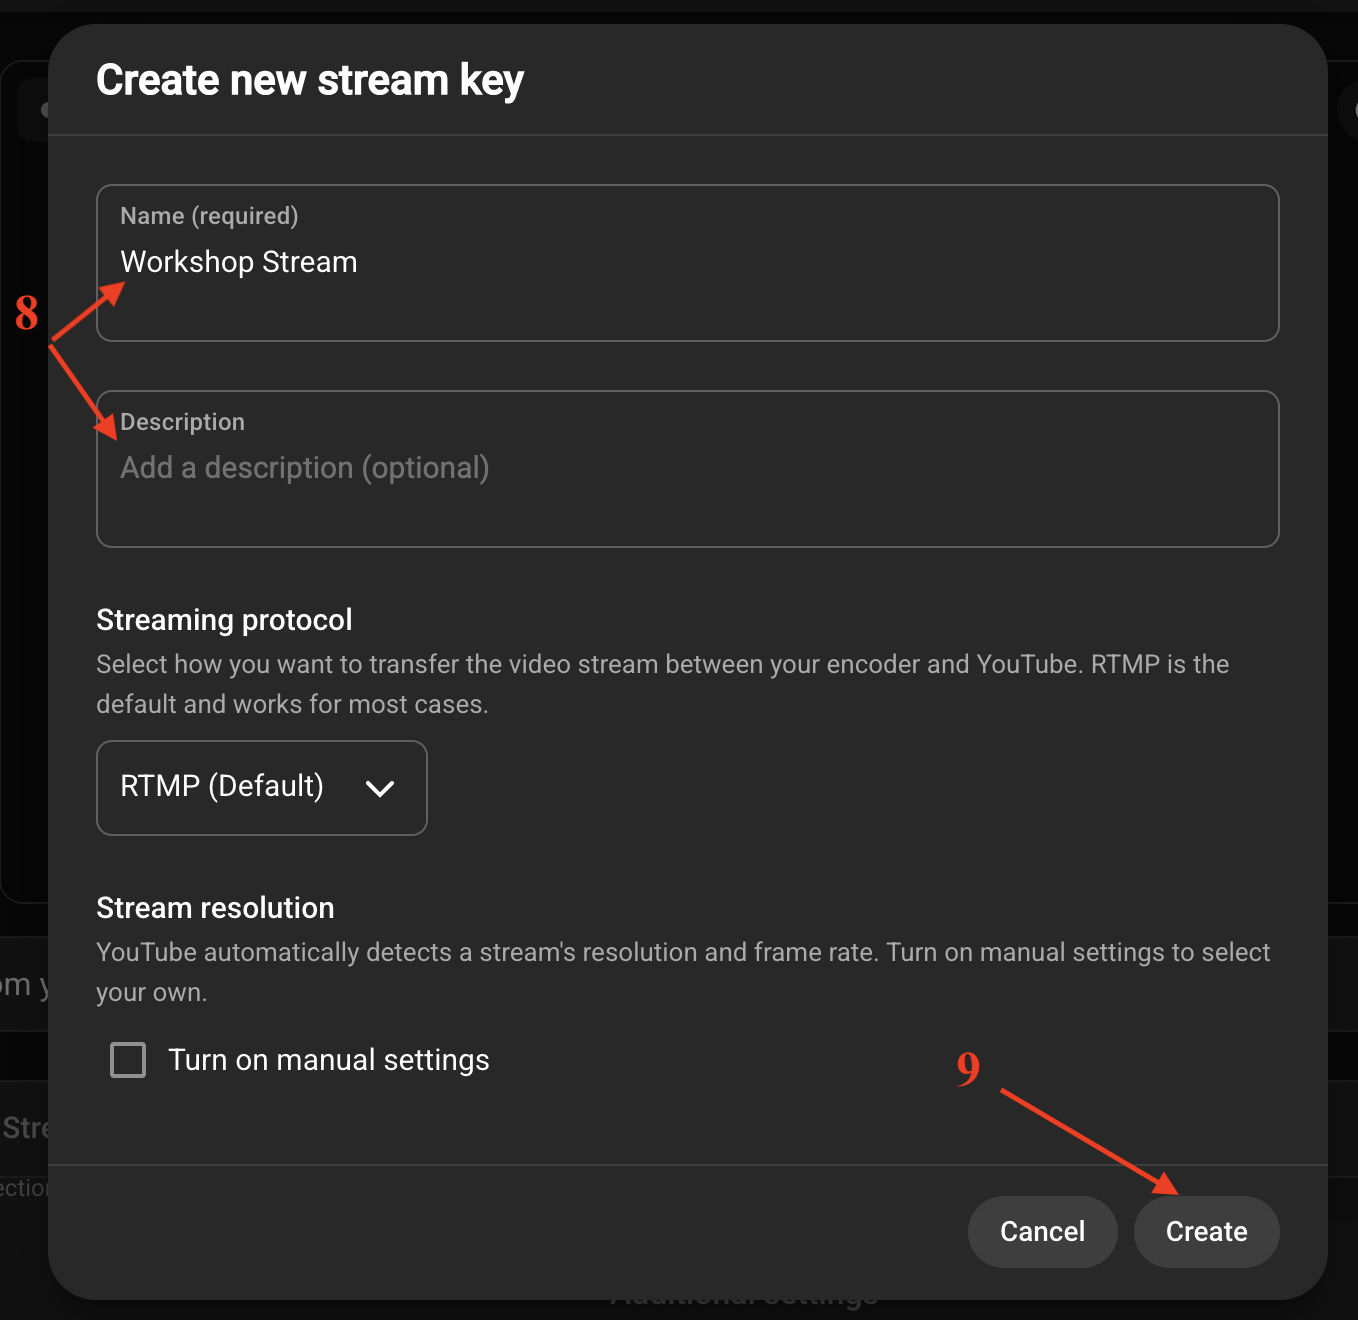
-
Enter:
-
Name (e.g., Workshop Stream, Test Stream)
-
(Optional) Set:
-
Stream latency
- Other advanced settings
- Click [9] Create

- Copy the newly created Stream Key[10]
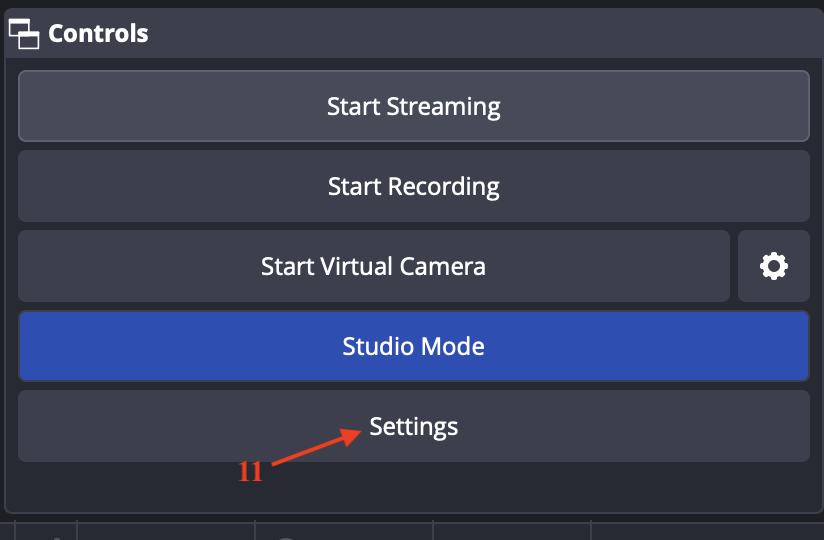
Step 4: Configure OBS
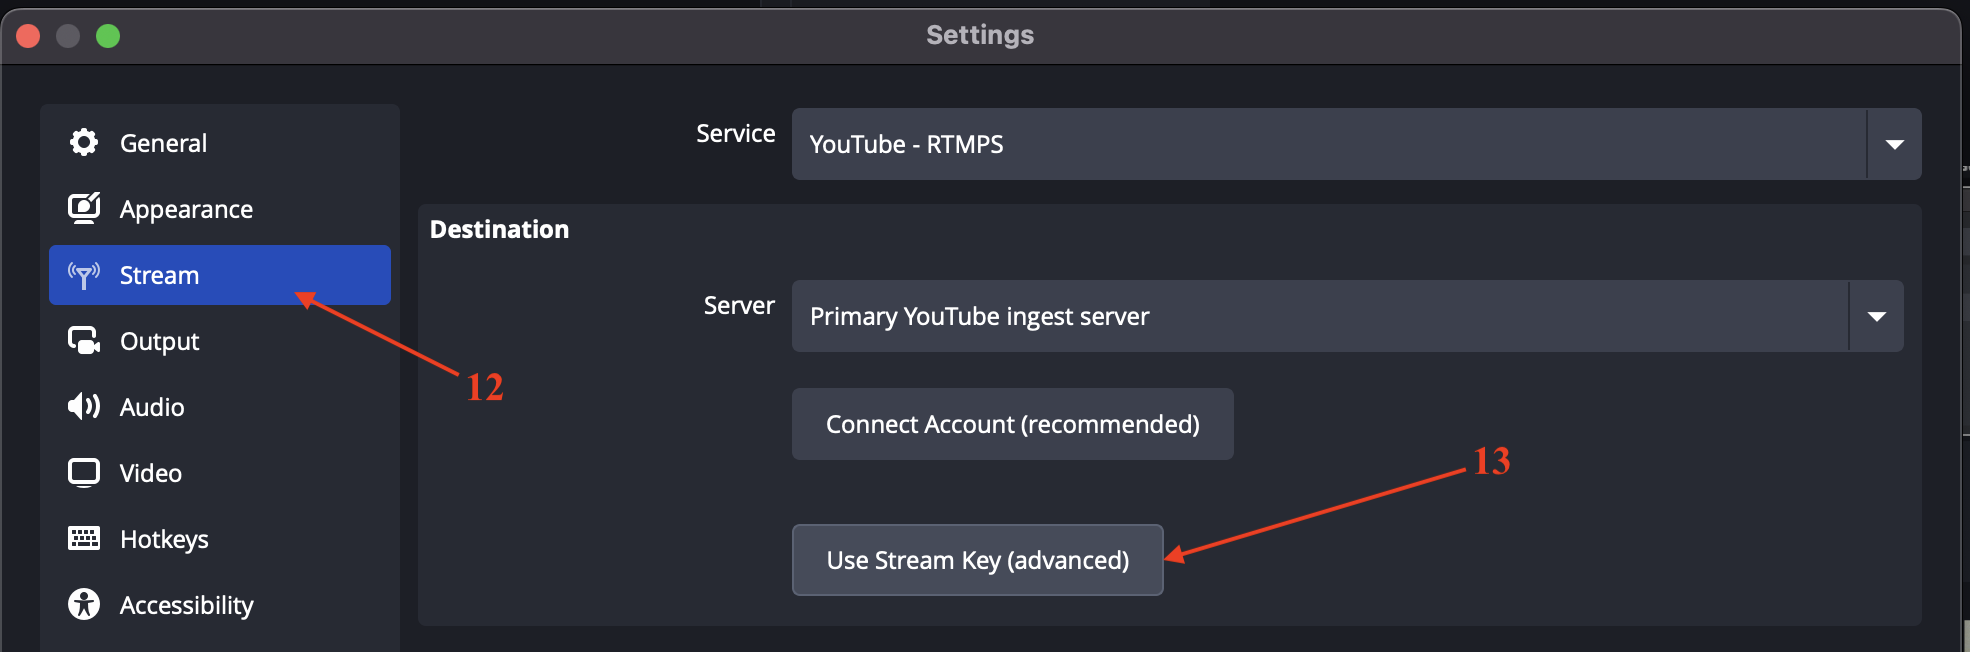
- Go to Settings [11] → Stream [12]
Set:
- Service → YouTube
- Server → Auto
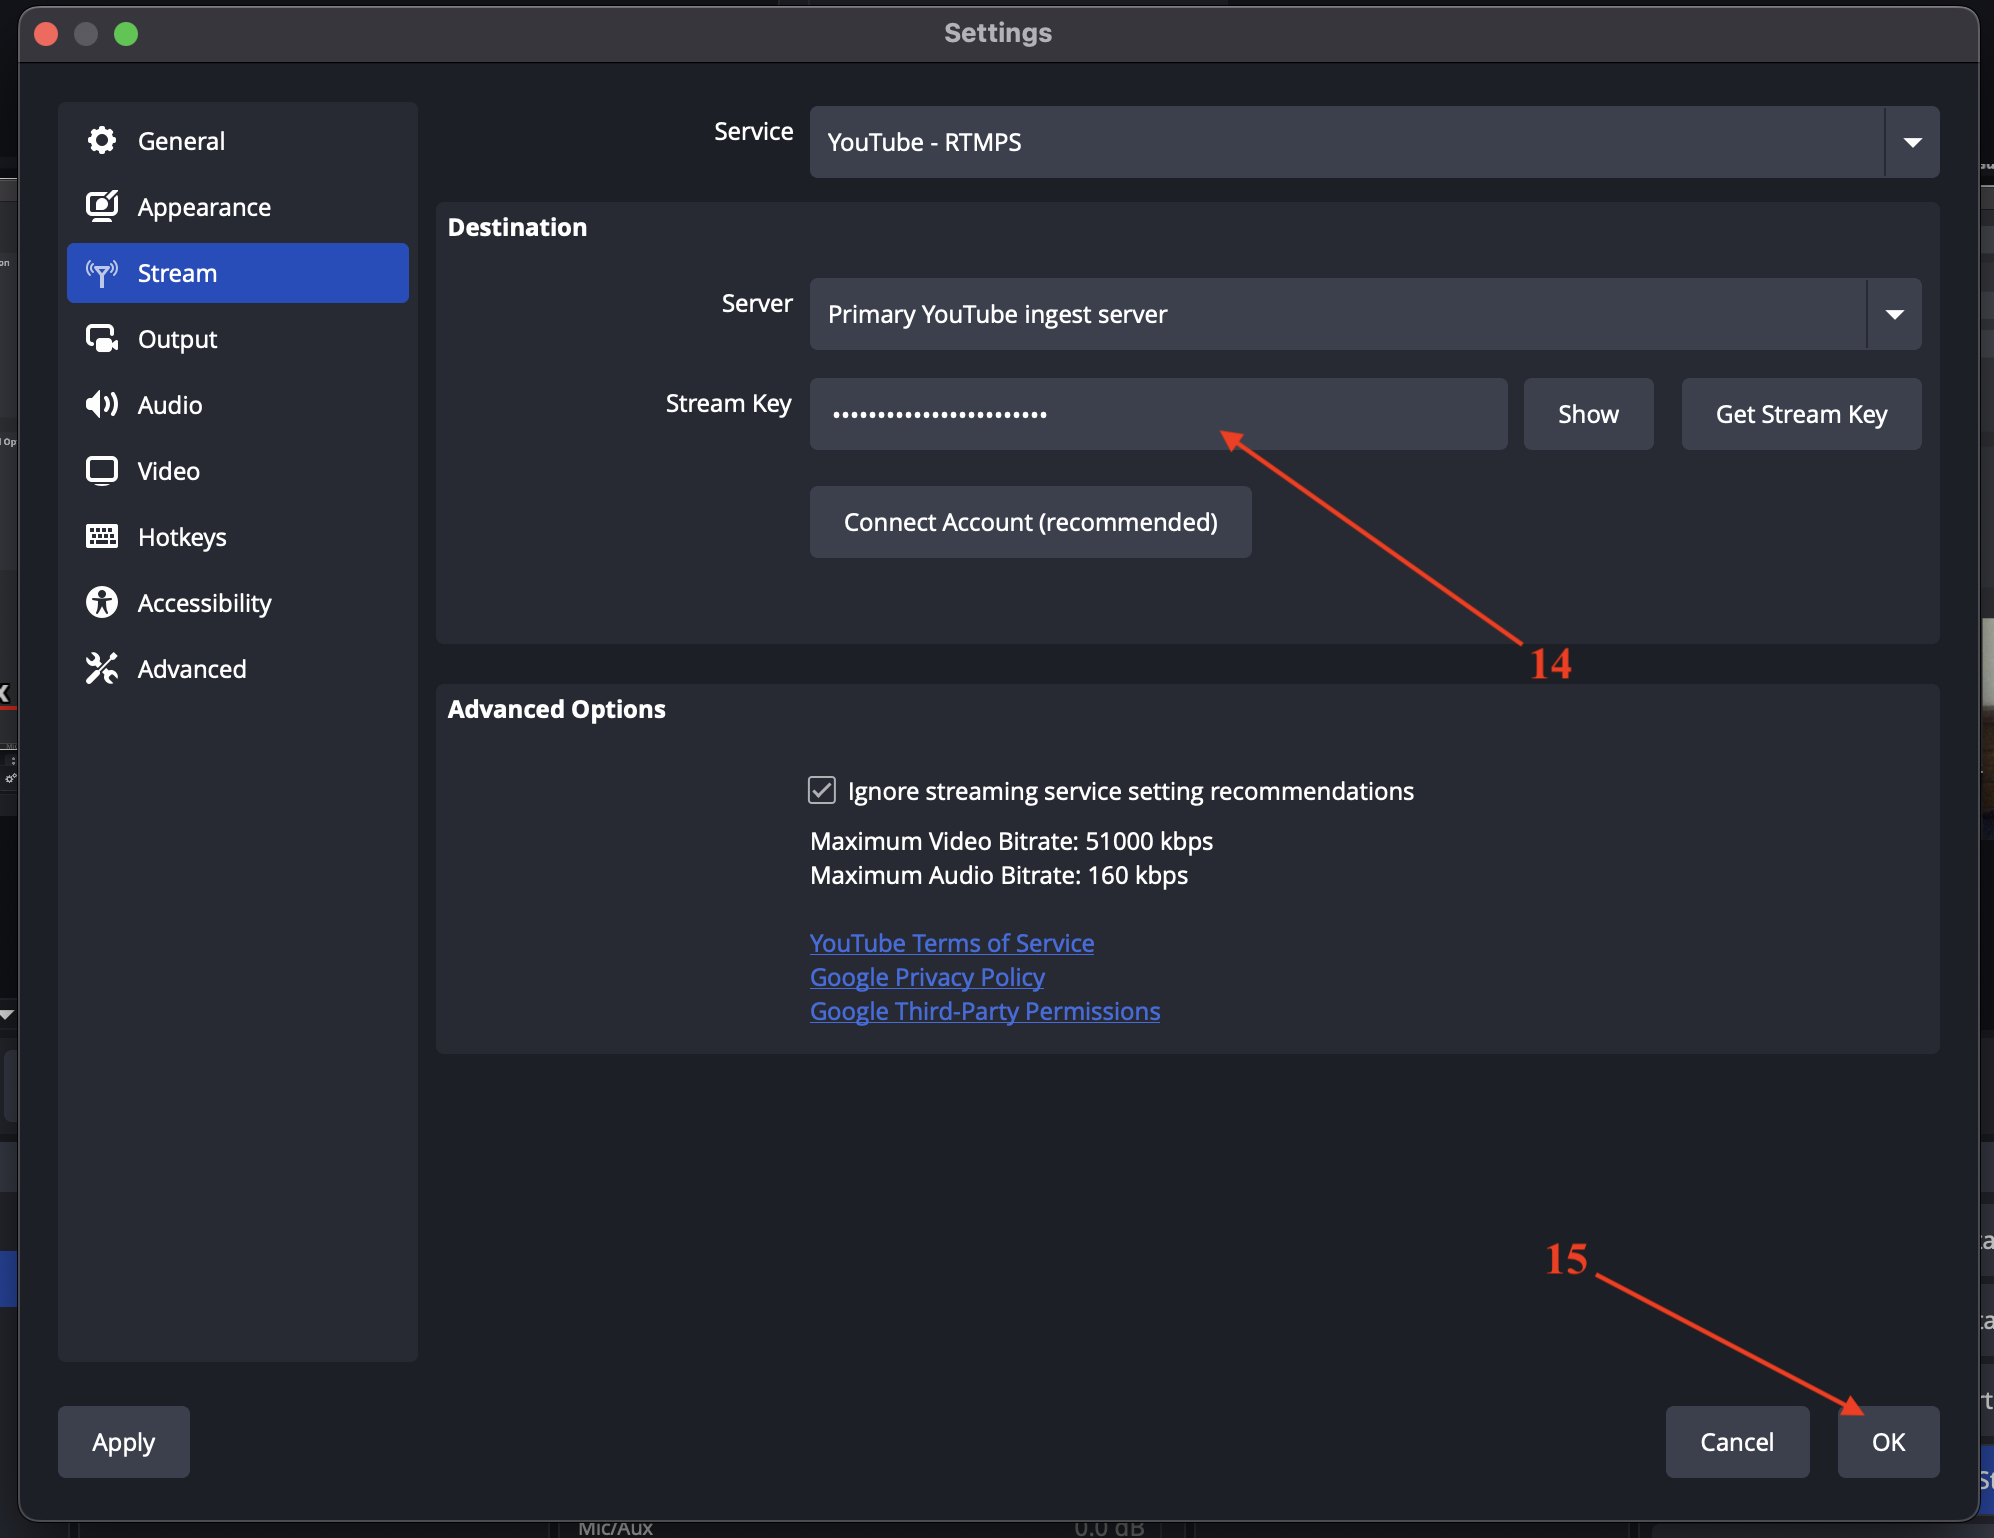
- Click use Stream Key [13] → Paste key [14] → Click OK [15]
Step 5: Start Streaming
- Click Start Streaming [16] in OBS
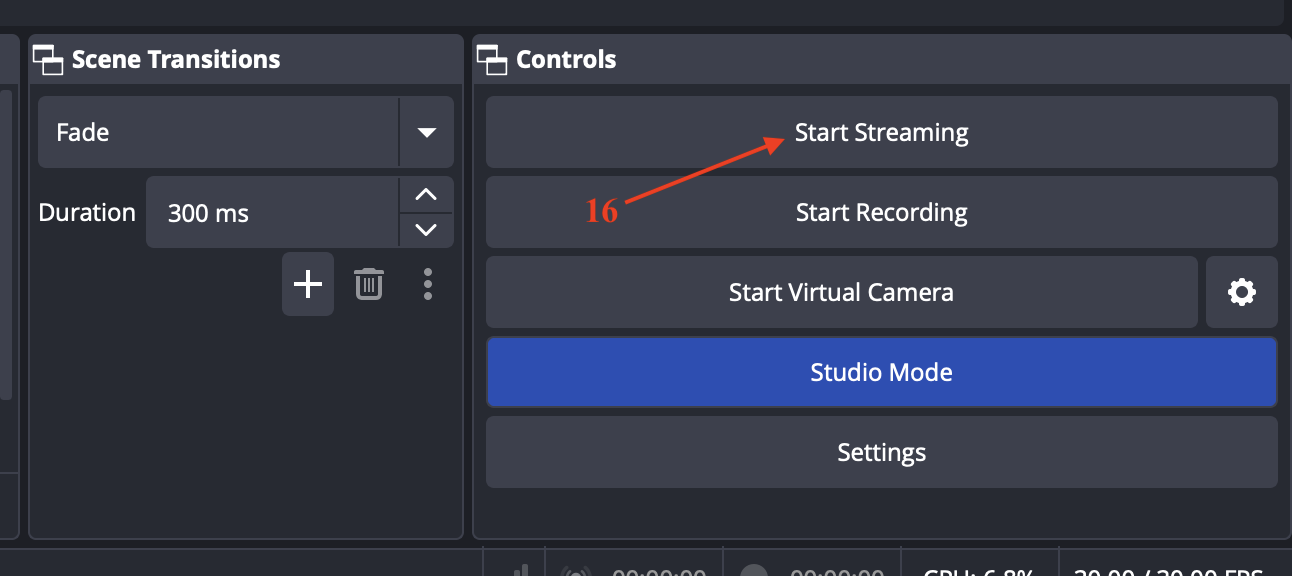
- Then click Go Live in YouTube
Step 7: Stop Streaming
- Click Stop Streaming in OBS
⚠️ Troubleshooting
| Issue | Solution |
|---|---|
| Black screen | Enable macOS screen permission |
| No audio | Check Mic settings |
| Stream not working | Verify Stream Key |
| Lag | Reduce bitrate/resolution |