5. Editing Workflow – Step-by-Step in OpenShot
This section covers the basic editing operations you'll use most often while working on a video project.
A. Add Videos to Timeline
-
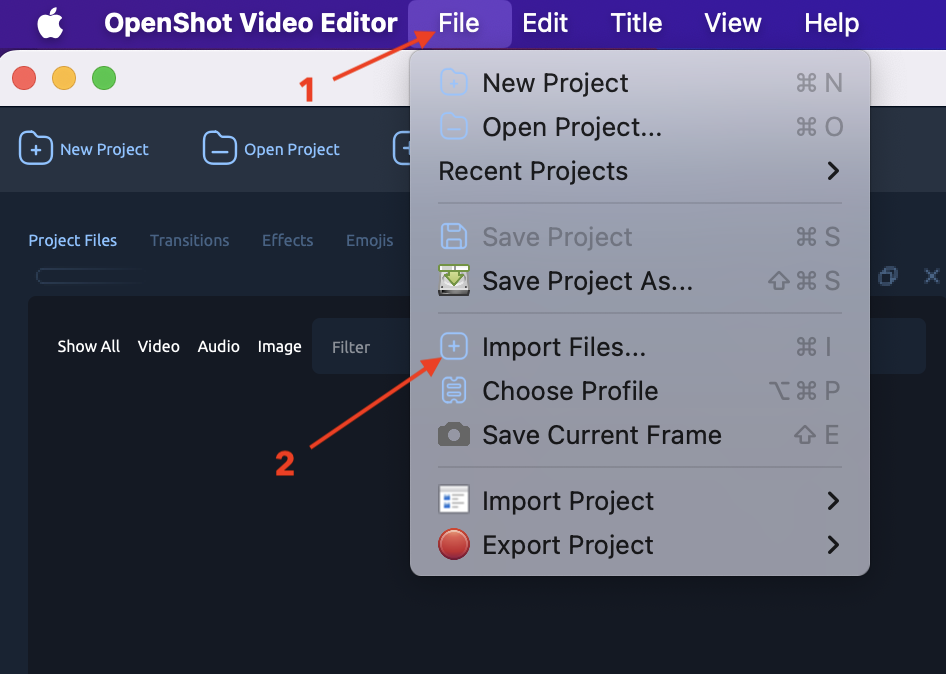
Import your video using Import Files or drag it into the Project Files panel.
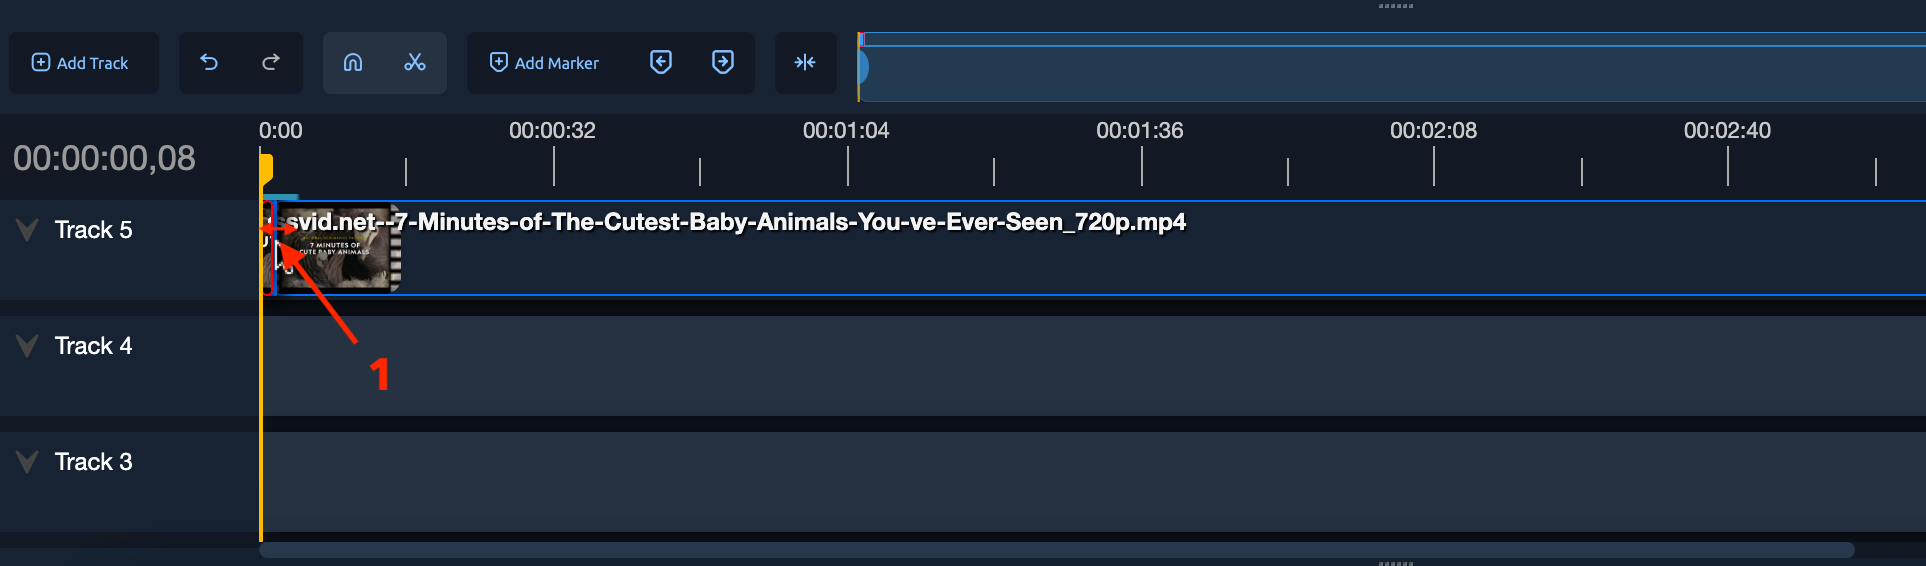
 2. Drag the video from Project Files into a track on the Timeline (e.g., Track 1).
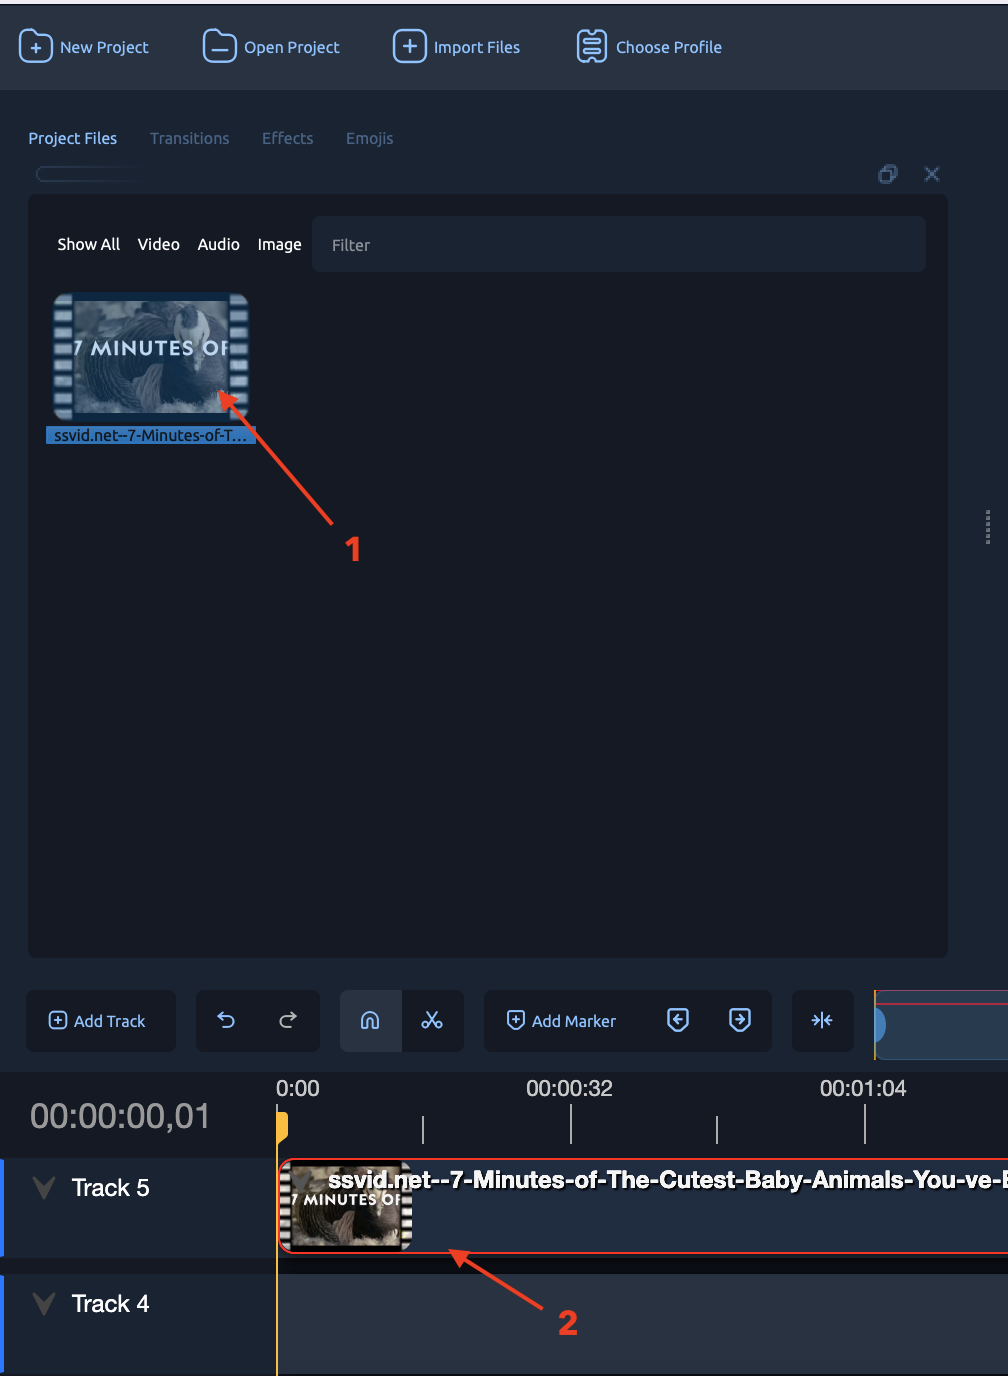 3. You can layer multiple videos on different tracks if needed.
B. Trim or Clip a Video
Method 1: Trim by dragging
- Hover over the start or end [↔] of a video clip.
 * Click and drag inward to shorten the clip (trim the edges).
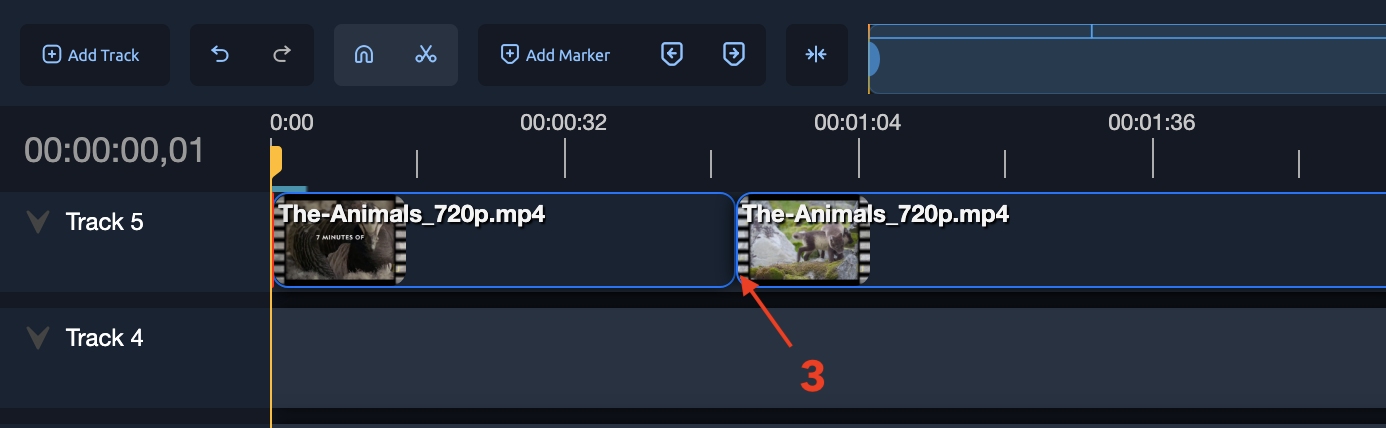
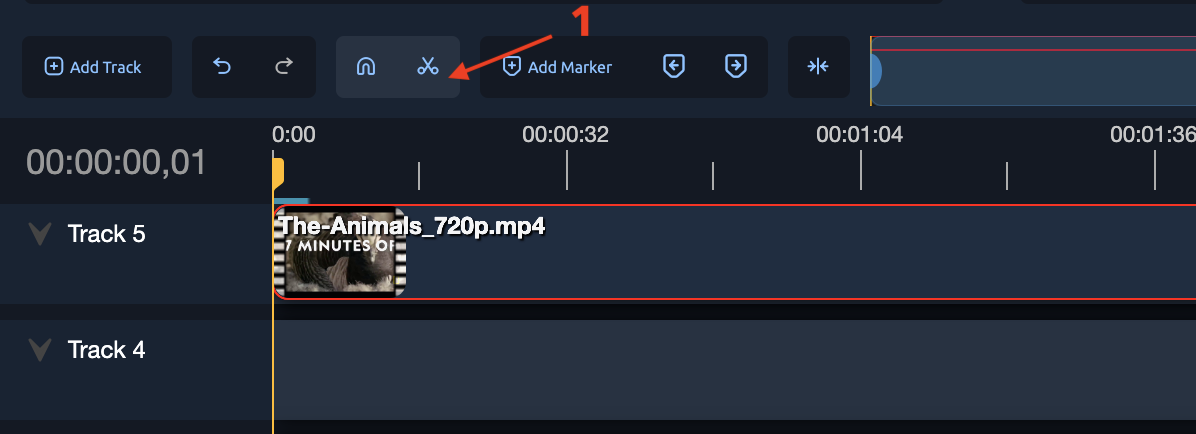
Method 2: Clip using Razor Tool
- Select the Razor Tool (scissors icon) from the toolbar.
 * Click on the video clip at the point where you want to split it.
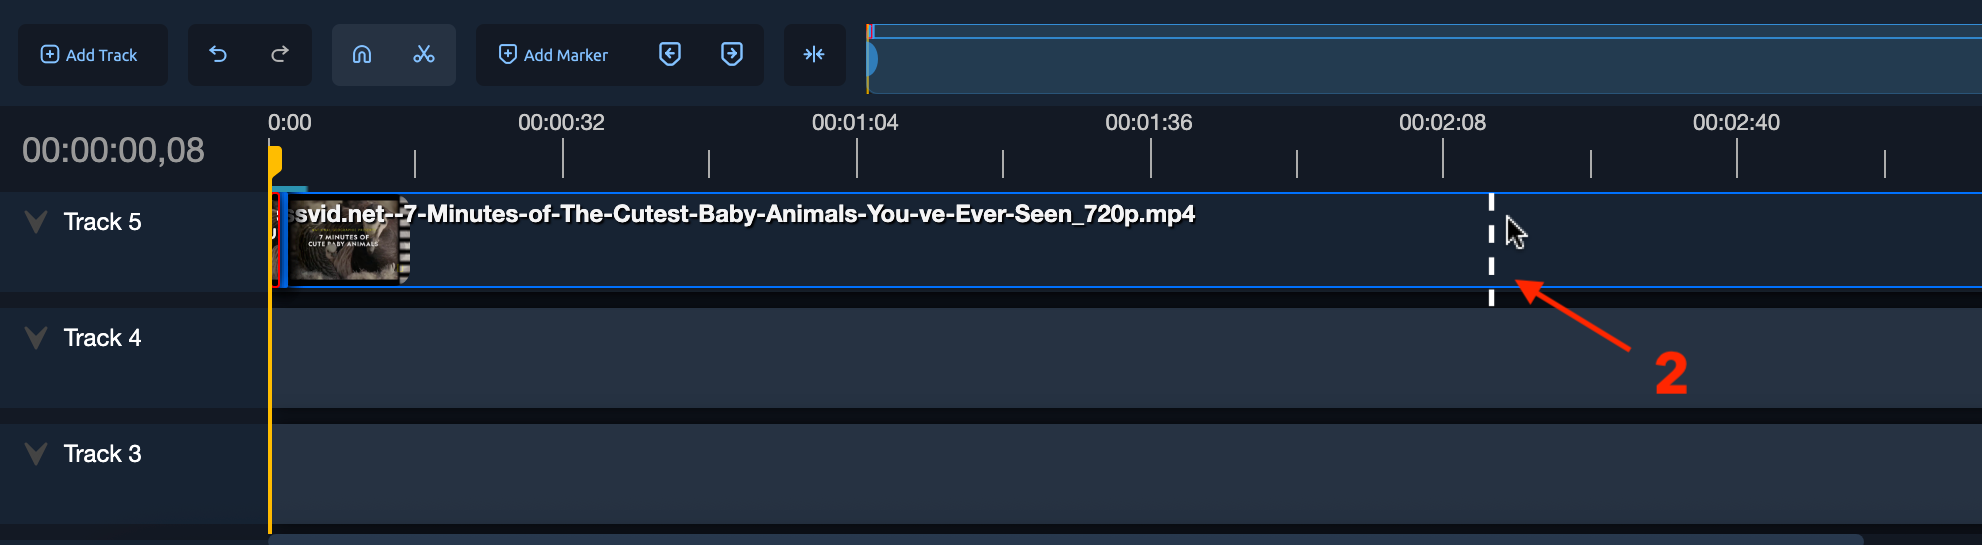
- You can delete or move each segment individually.
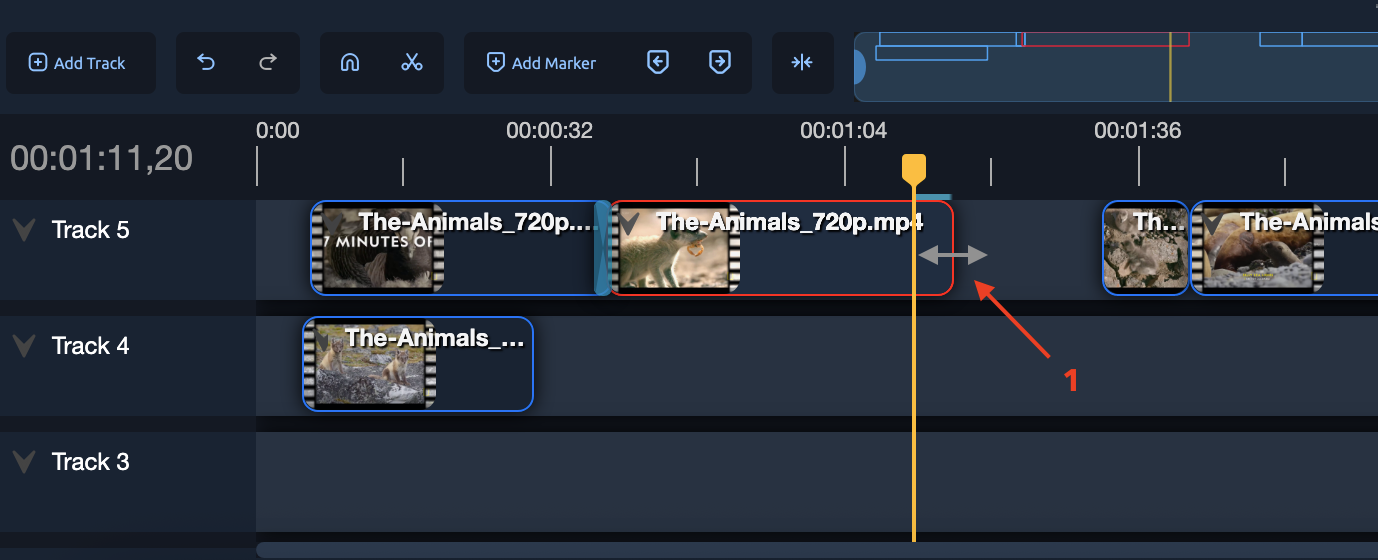
C. Reposition Clips
- Click and drag any clip along the timeline to move it.
- You can drag clips between tracks (e.g., move from Track 2 to Track 1).

D. Adjust Clip Length
- Hover over either edge of a clip.
- Drag left or right to shorten or extend the duration of that clip on the timeline.
E. Add Effects to Clips
- Go to
View > Views > Effectsor use the Effects tab [1].
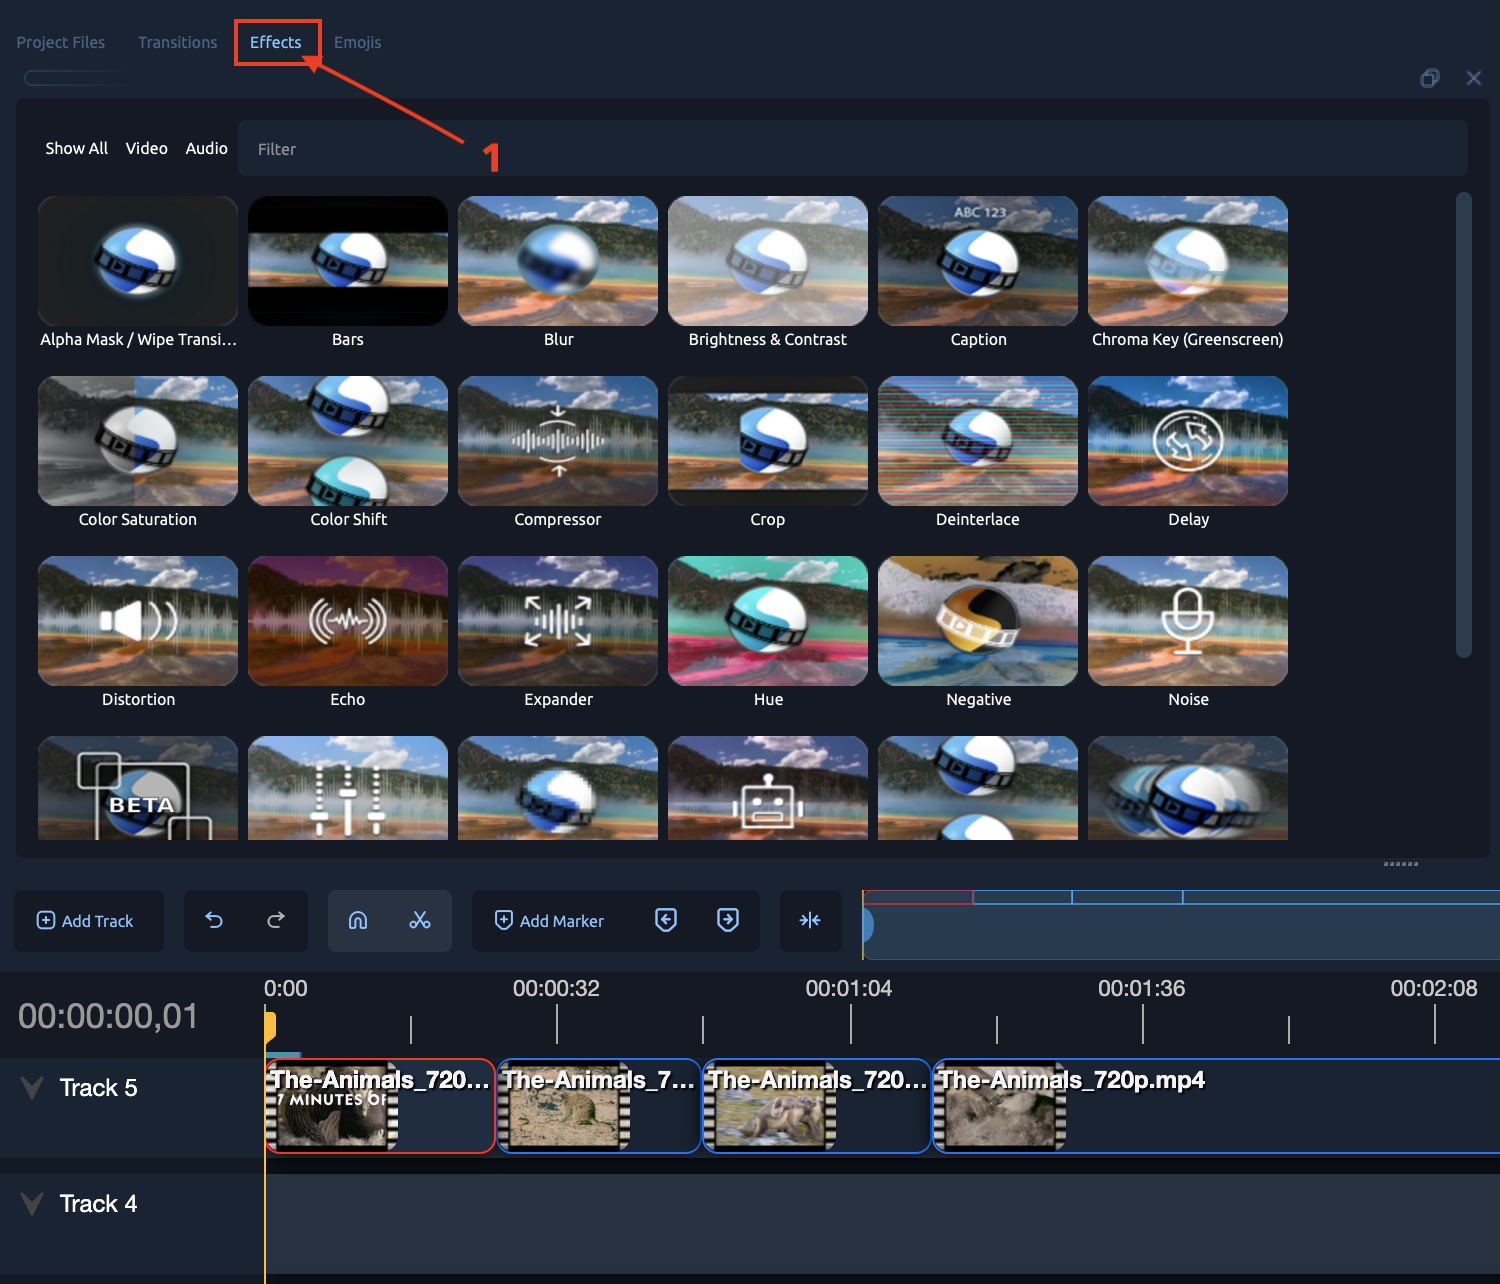
- Drag an effect (e.g., Blur, Brightness, Chroma Key [2]) onto a video or image clip.
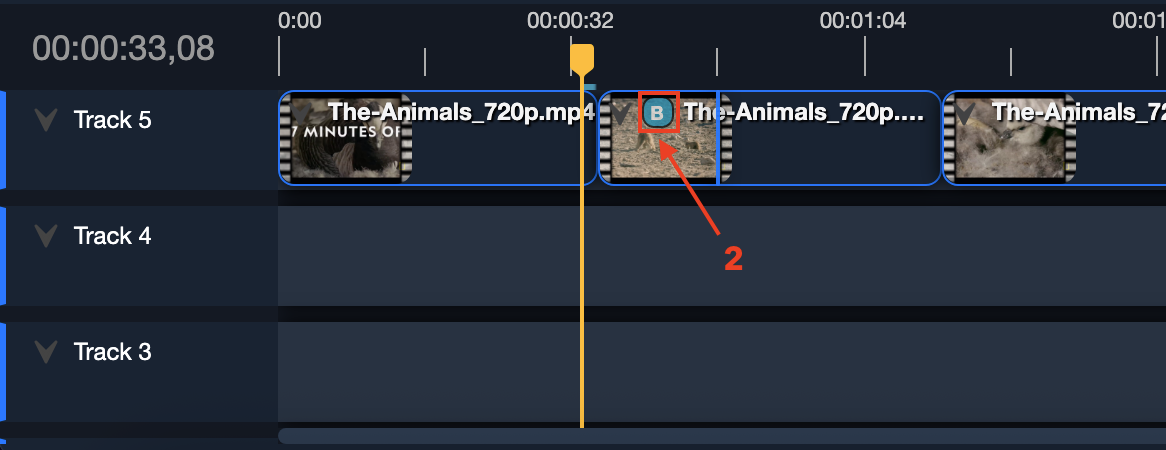
- Right-click the clip [3] [4] > Properties [5] to tweak the effect parameters.
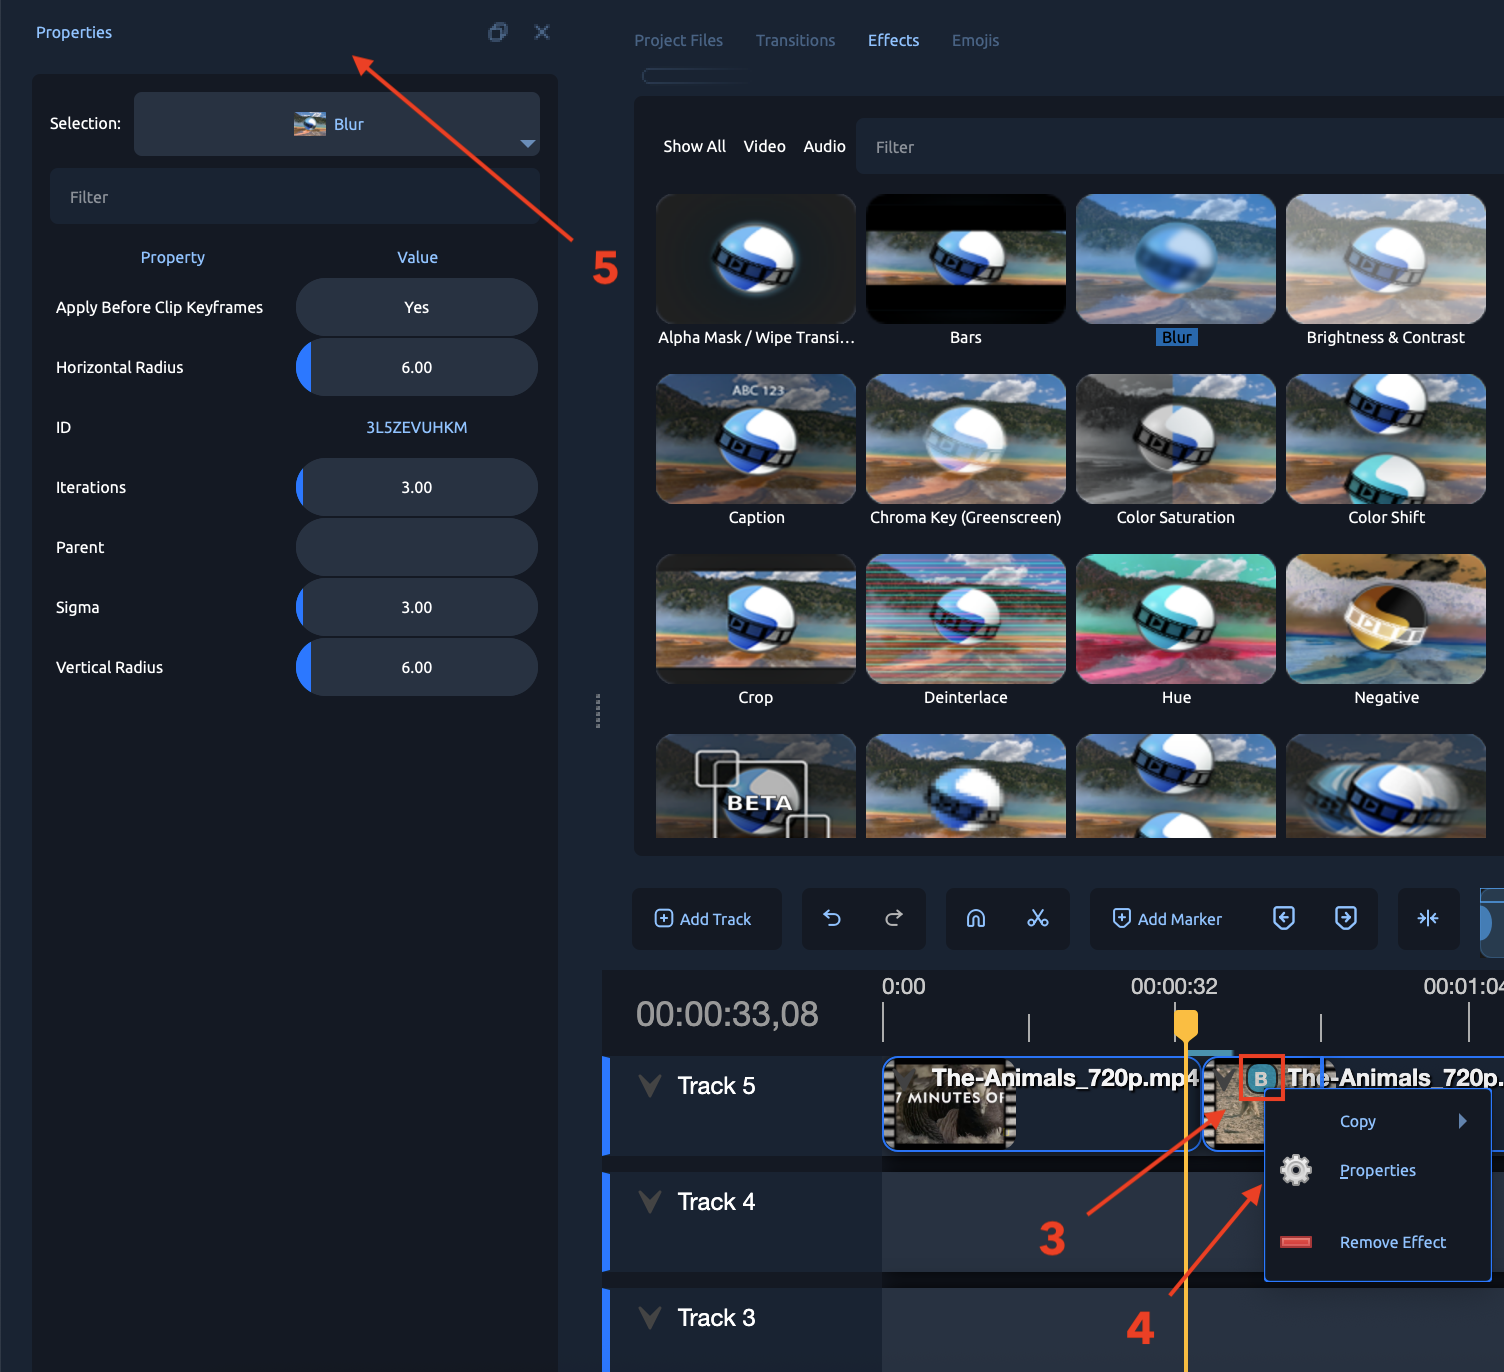
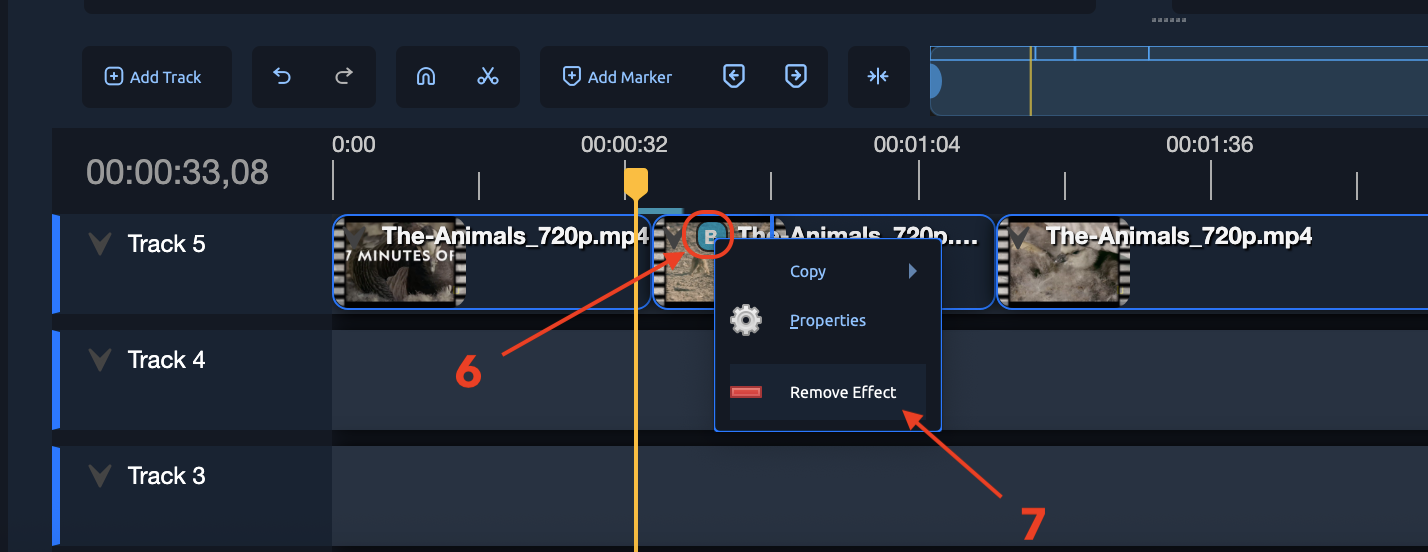
- To remove an effect, right-click [6] > Remove Effect [7].
F. How to Add Multi-Subtitles (Captions) in OpenShot
Add the First Caption Effect (e.g., English Subtitles):
Step 1: Import and Place Your Video
- Open your video project in OpenShot.
- Import your video file if you haven't already, then drag it onto the timeline.
* Show Audio Waveform for Timing:
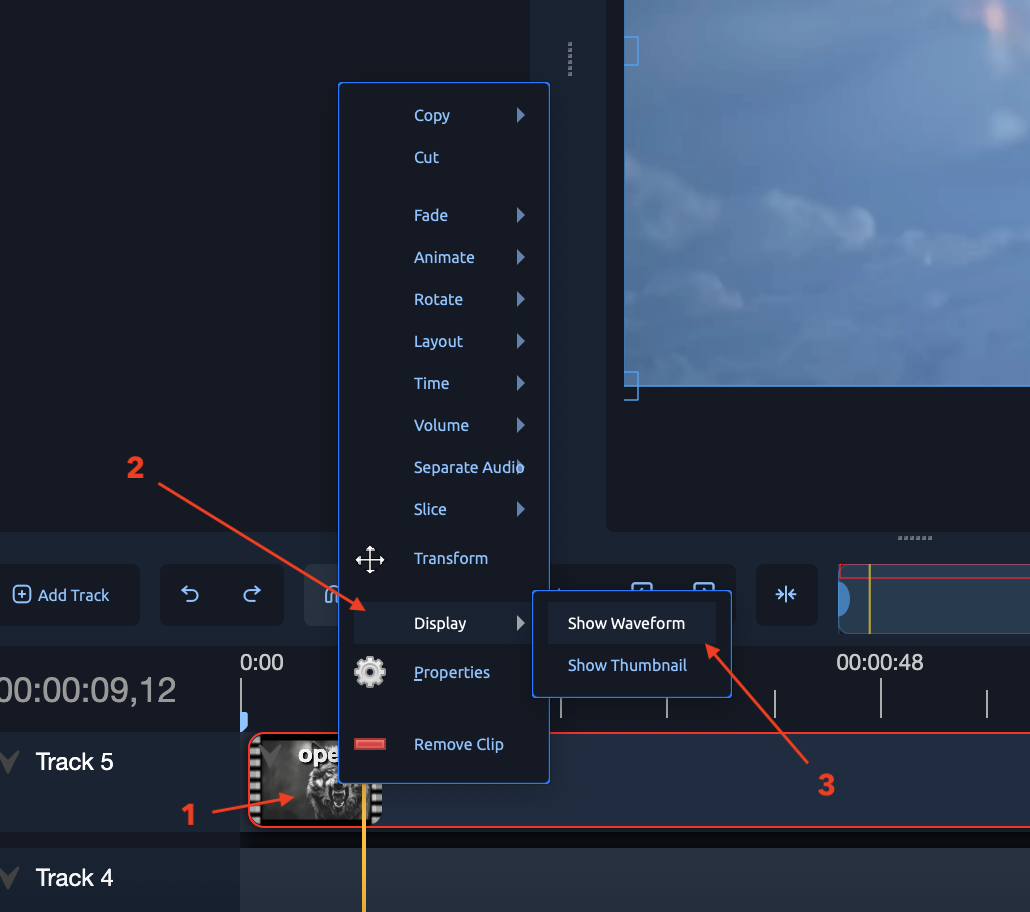
- Right-click your video clip [1] in the timeline.
- Select Display [2] > Show Waveform [3] to see the audio waveform, helping you time subtitles accurately.
Step 2: Apply the Caption Effect
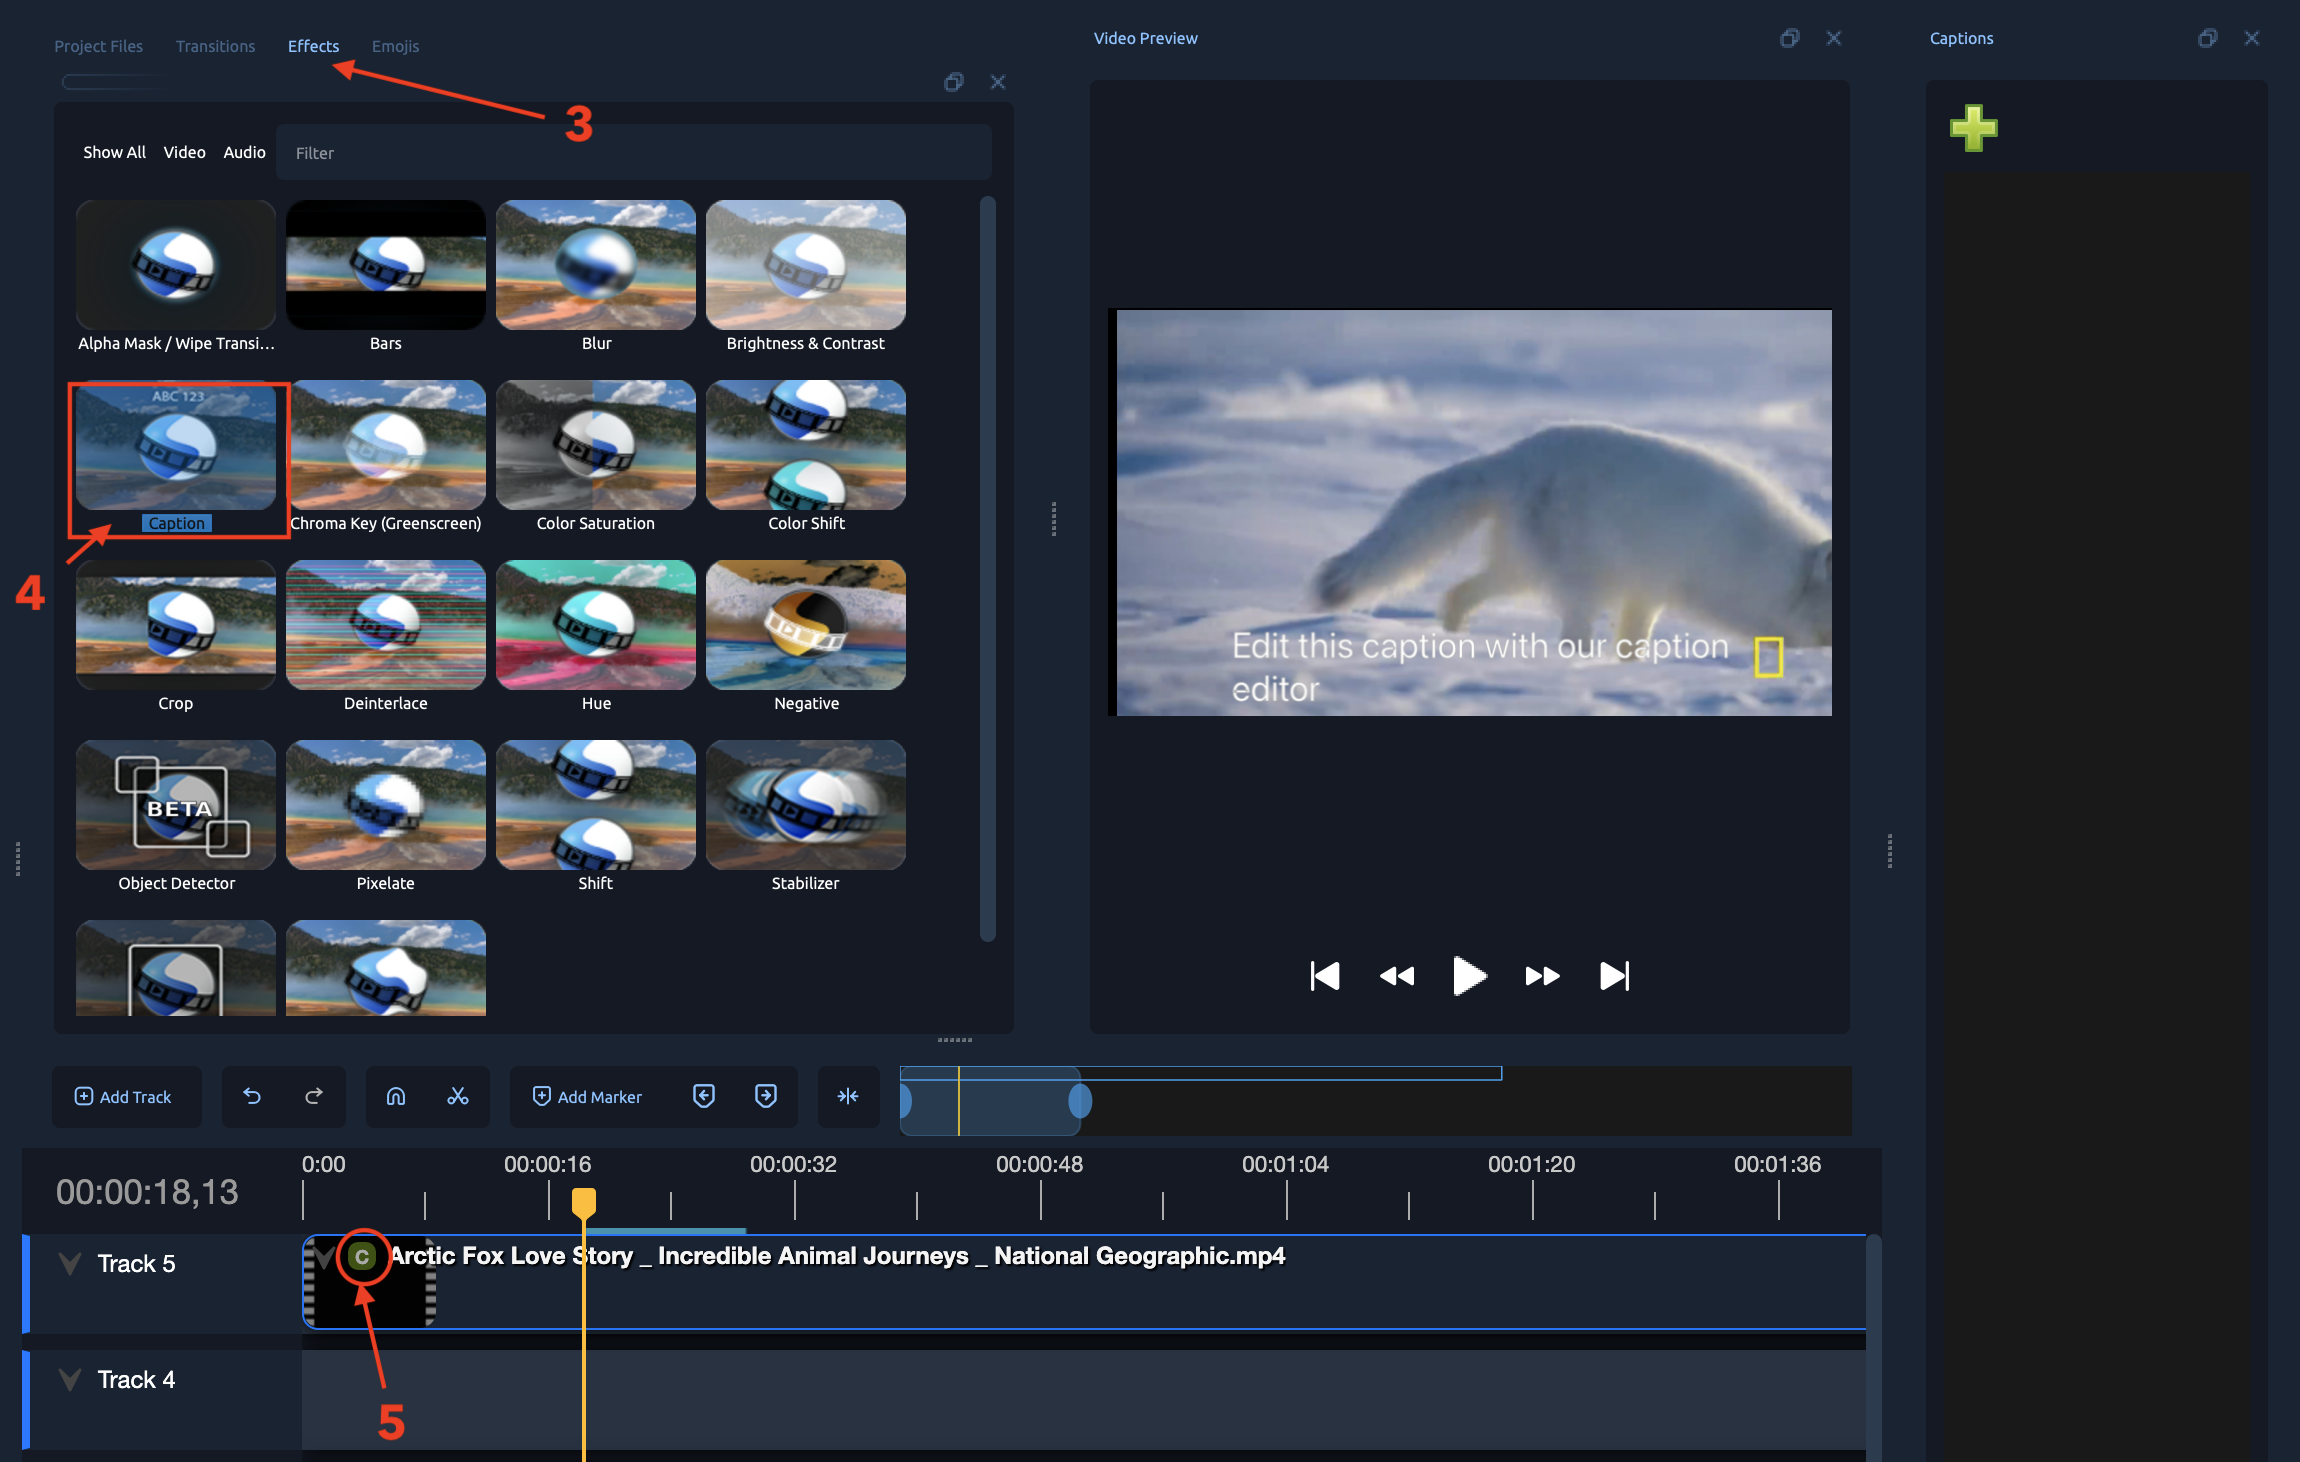
- Open the Effects [3] panel (if not visible, enable it via
View > Views > Effects). - Locate the Caption [4] effect and drag it onto your video clip / audio waveform [5] on the timeline.
Step 3 – Open and Edit the Caption Text (with Accurate Timing)
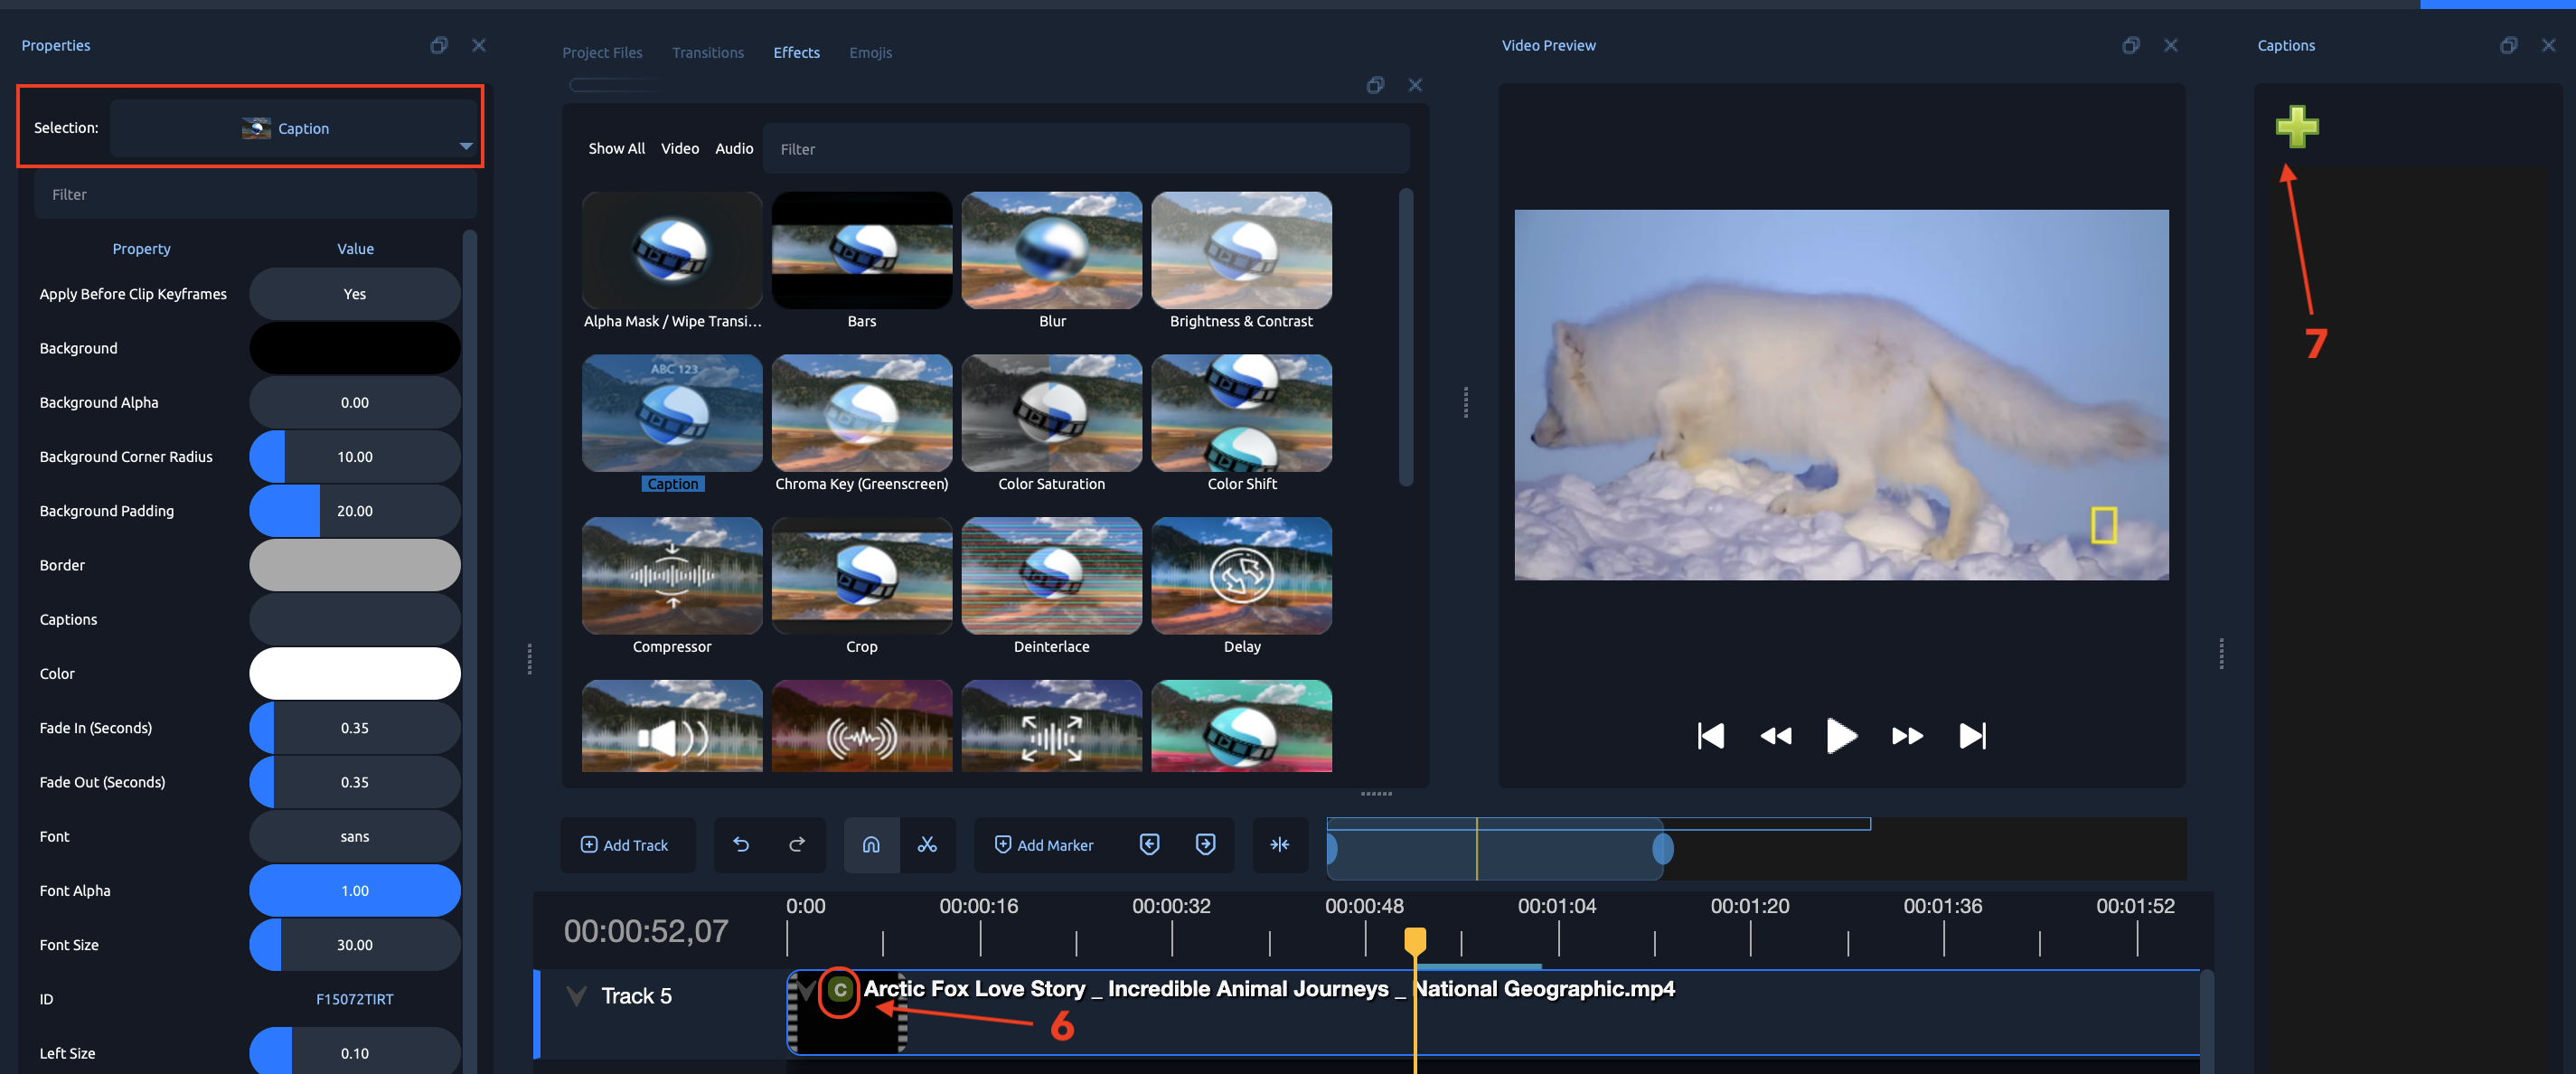
- Right-click on the video clip/audio waveform that has the Caption effect applied.
- Select Edit Caption (or a similar option depending on your OpenShot version).
-
A caption editor [7] will open where you can type in your subtitle or caption text.
-
To create subtitles:
-
Carefully listen to the video and note the start and end times for each line of dialogue or narration.
- Type the subtitle text for the first line.
- Click the “+” icon [7] in the caption editor to add another time slot for the next subtitle.
- Play the video and identify the start and end time for the next line of speech.
- Enter the subtitle text and adjust the start/stop times [8] precisely.
- Repeat this process for all lines until your video is fully captioned.
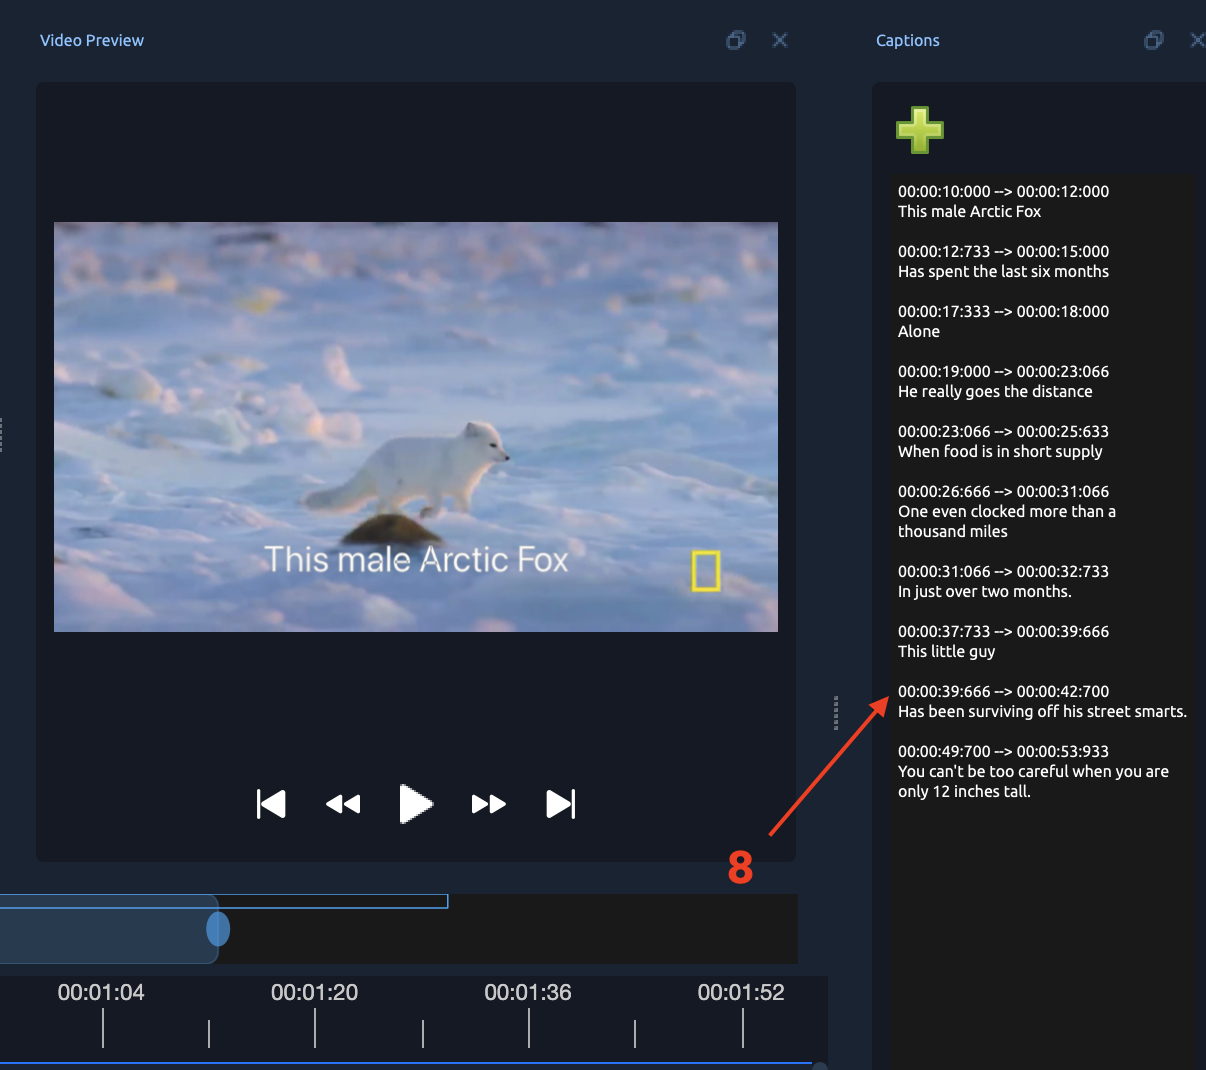
Example: Provided Video Timing & Subtitles
Here’s an example timecoded subtitle sequence based on the reference video:
00:00:10:000 --> 00:00:12:000
This male Arctic Fox

00:00:12:733 --> 00:00:15:000
Has spent the last six months

00:00:17:333 --> 00:00:18:000
Alone

00:00:19:000 --> 00:00:23:066
He really goes the distance

00:00:23:066 --> 00:00:25:633
When food is in short supply

00:00:26:666 --> 00:00:31:066
One even clocked more than a thousand miles

00:00:31:066 --> 00:00:32:733
In just over two months.

00:00:37:733 --> 00:00:39:666
This little guy

00:00:39:666 --> 00:00:42:700
Has been surviving off his street smarts.

00:00:49:700 --> 00:00:53:933
You can't be too careful when you are only 12 inches tall.
Add the Second Caption Effect (e.g., Tamil Subtitles):
- Add a Second Caption Effect (e.g., Tamil Subtitles):
- Drag another Caption effect onto the same video clip. A second “C” icon appears.
- Click the new “C” icon, ensuring the playhead is at the clip’s start.
- Style differently to distinguish (e.g., blue text, white background, Top Size of 0.7 to place above English subtitles).
- In the Captions Editor, copy the timestamps from the English captions (to match timing) and replace the text with translations .
- Repeat for all dialogue lines
00:00:10:000 --> 00:00:12:000
இந்த ஆண் ஆர்க்டிக் நரி
00:00:12:733 --> 00:00:15:000
கடந்த ஆறு மாதங்களை கழித்துள்ளது
00:00:17:333 --> 00:00:18:000
தனியாக
00:00:19:000 --> 00:00:23:066
அவர் உண்மையில் தூரம் செல்கிறார்
00:00:23:066 --> 00:00:25:633
உணவு பற்றாக்குறை இருக்கும்போது
00:00:26:666 --> 00:00:31:066
ஒருவர் ஆயிரம் மைல்களுக்கு மேல் பயணம் செய்தார்
00:00:31:066 --> 00:00:32:733
வெறும் இரண்டு மாதங்களுக்கும் மேலாக.
00:00:37:733 --> 00:00:39:666
இந்தச் சின்னப் பையன்
00:00:39:666 --> 00:00:42:700
அவரது தெரு புத்திசாலித்தனத்தால் தப்பிப்பிழைத்து வருகிறார்.
00:00:49:700 --> 00:00:53:933
நீங்கள் 12 அங்குல உயரம் மட்டுமே இருக்கும்போது மிகவும் கவனமாக இருக்க முடியாது.
Preview:
Play to ensure subtitles appear at the correct times and positions.
Workaround 2: Use External Tools for Selectable Subtitles
Export Subtitles as SRT Files:
OpenShot doesn’t directly export SRT files from the Caption effect, but you can manually copy timestamps and text from the Captions Editor into a text editor. Format as SRT (example):1
00:00:10:000 --> 00:00:12:000
This male Arctic Fox

00:00:12:733 --> 00:00:15:000
Has spent the last six months

00:00:17:333 --> 00:00:18:000
Alone.
Save as “English.srt”. Repeat for German subtitles (e.g., “Tamil.srt”).
- Export Video Without Subtitles:
- Remove all Caption effects or title clips from the timeline.
- Export the video as described above (e.g., “Video_NoSubtitles.mp4”).
Tips:
- Keep each subtitle short and readable (usually 1–2 lines max).
- Give viewers at least 1–1.5 seconds to read each caption.
- Adjust timing so that subtitles appear just before the speech starts and disappear right after it ends.
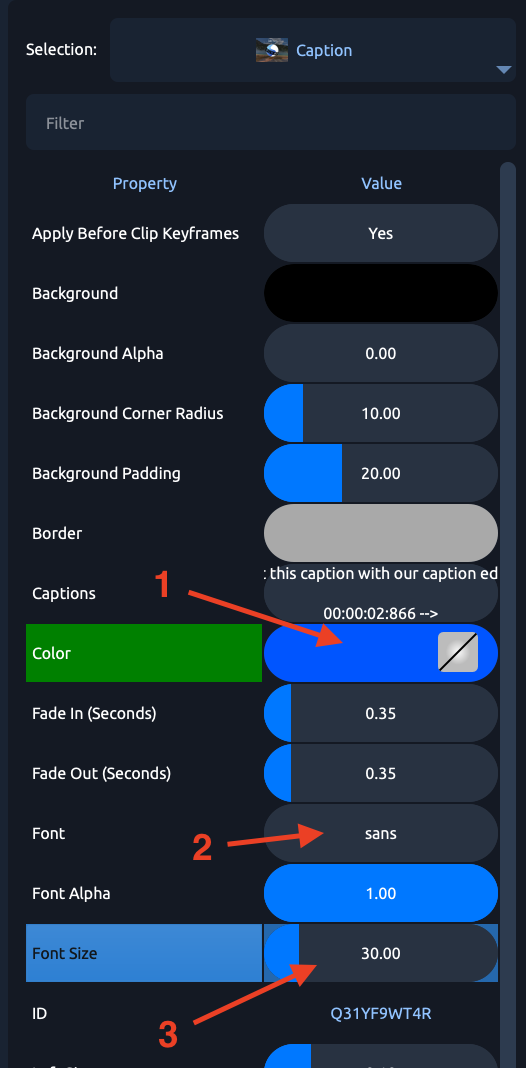
Step 4: Customize Font, Size & Color
-
Within the Caption editor, adjust:
-
Font type [2]
- Font size [3]
- Font color [1]
- These settings will apply to the entire caption block.
Step 5: Adjust Timing for Each Caption
- Set the start and end times so that the caption appears at the right moment in your video.
- If you need different style elements (e.g. color, font) for separate lines, add multiple Caption effects—each with its own timing and properties.
Tips
“There is a Caption effect in the Effect tab that you can drag and drop on your video clip to add Captions.”
“If you would like to change the color, font, etc., in different spots in your video, you can add multiple Caption effects to the same clip. You just have to manage the times and content of each Caption separately.” )
Summary Table
| Step | Action |
|---|---|
| 1 | Import your video and add it to the timeline. |
| 2 | Apply the Caption effect from the Effects panel. |
| 3 | Right-click → Edit Caption and enter your text. |
| 4 | Customize font, size, and color for the subtitle block. |
| 5 | Set correct timing for appearance on the timeline. |
| 6 | For stylistic variations, use multiple Caption effects. |
G. Add Images to Video
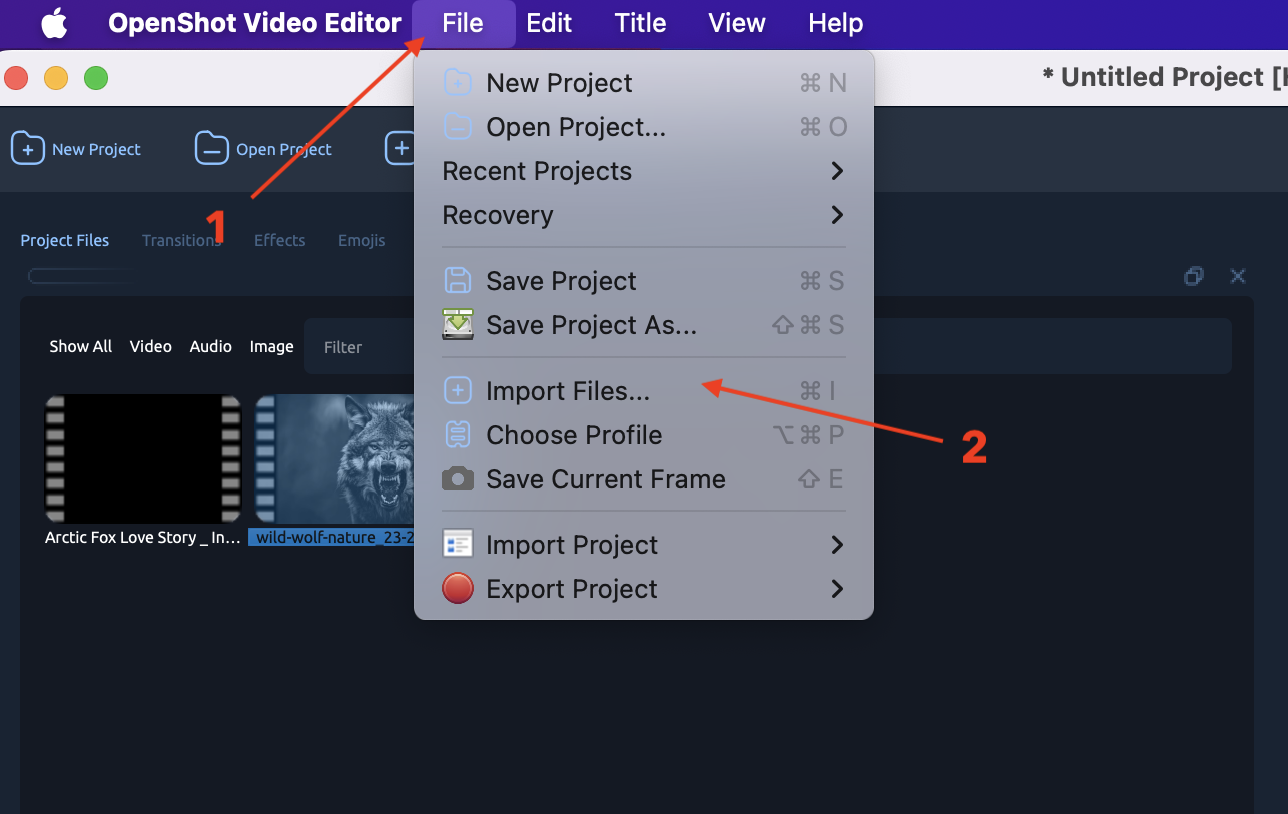
Import and Add Images
- Import Images – Use the file [1] > Import Files [2] button to bring in PNG or JPG images.
- Place on Timeline ** – Drag the image [3]** onto the timeline, usually on a track above the video (e.g., Track 2 or Track 3).
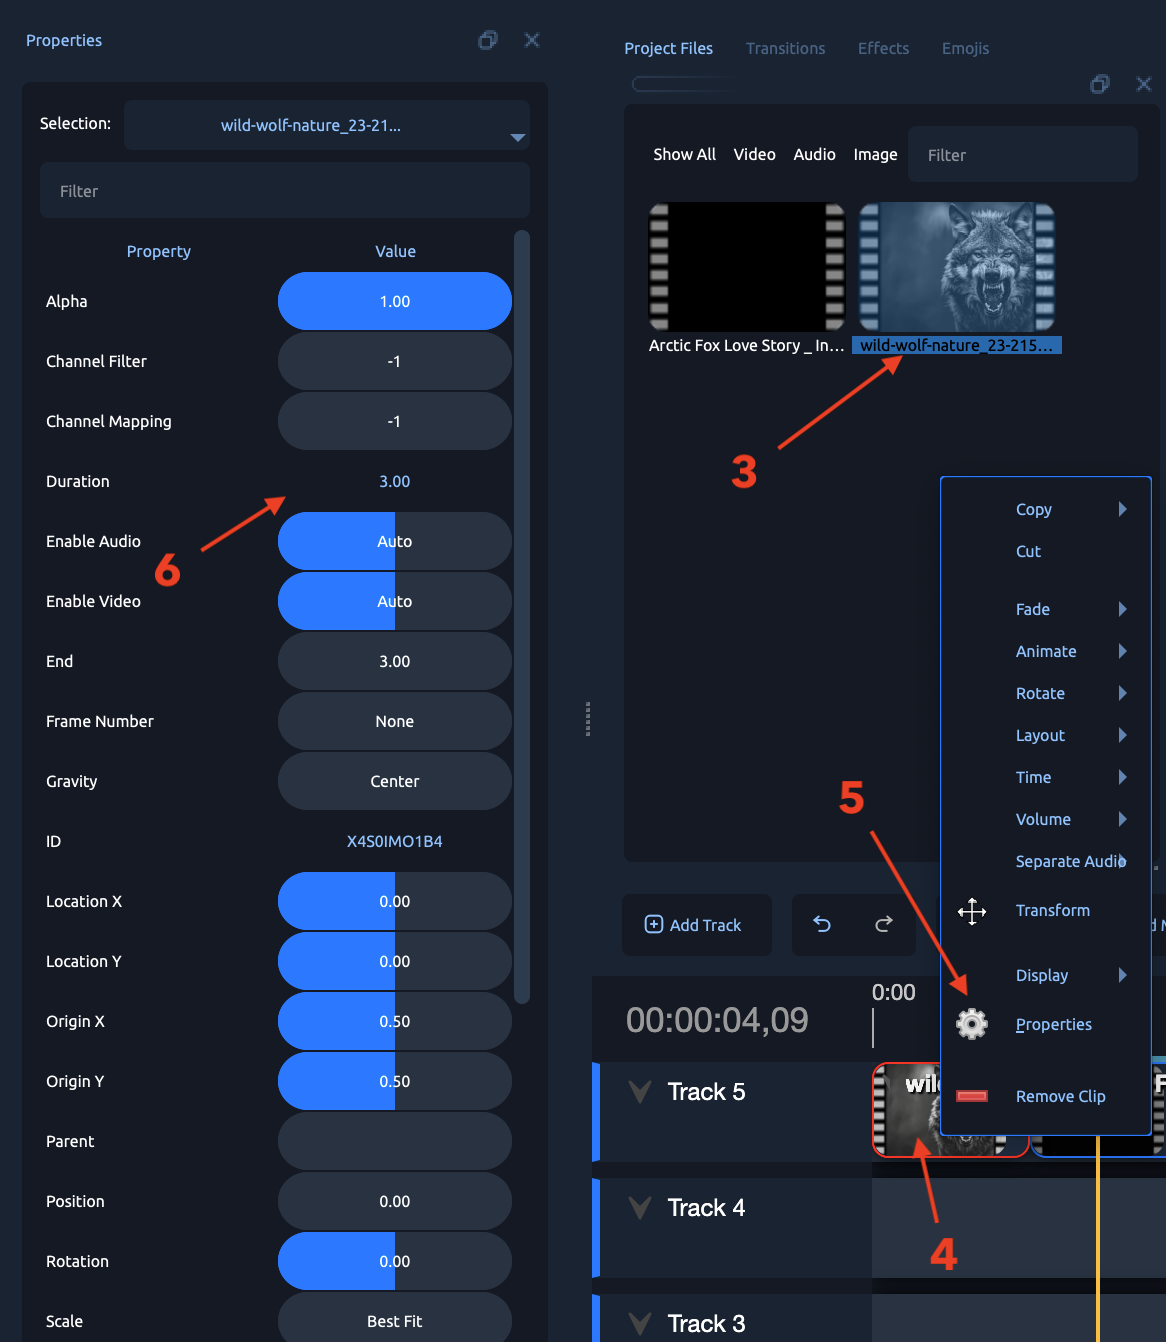
- Adjust Duration – Right-click on the image [4] → Properties [5] → Duration [6], then edit the length of time the image is shown.
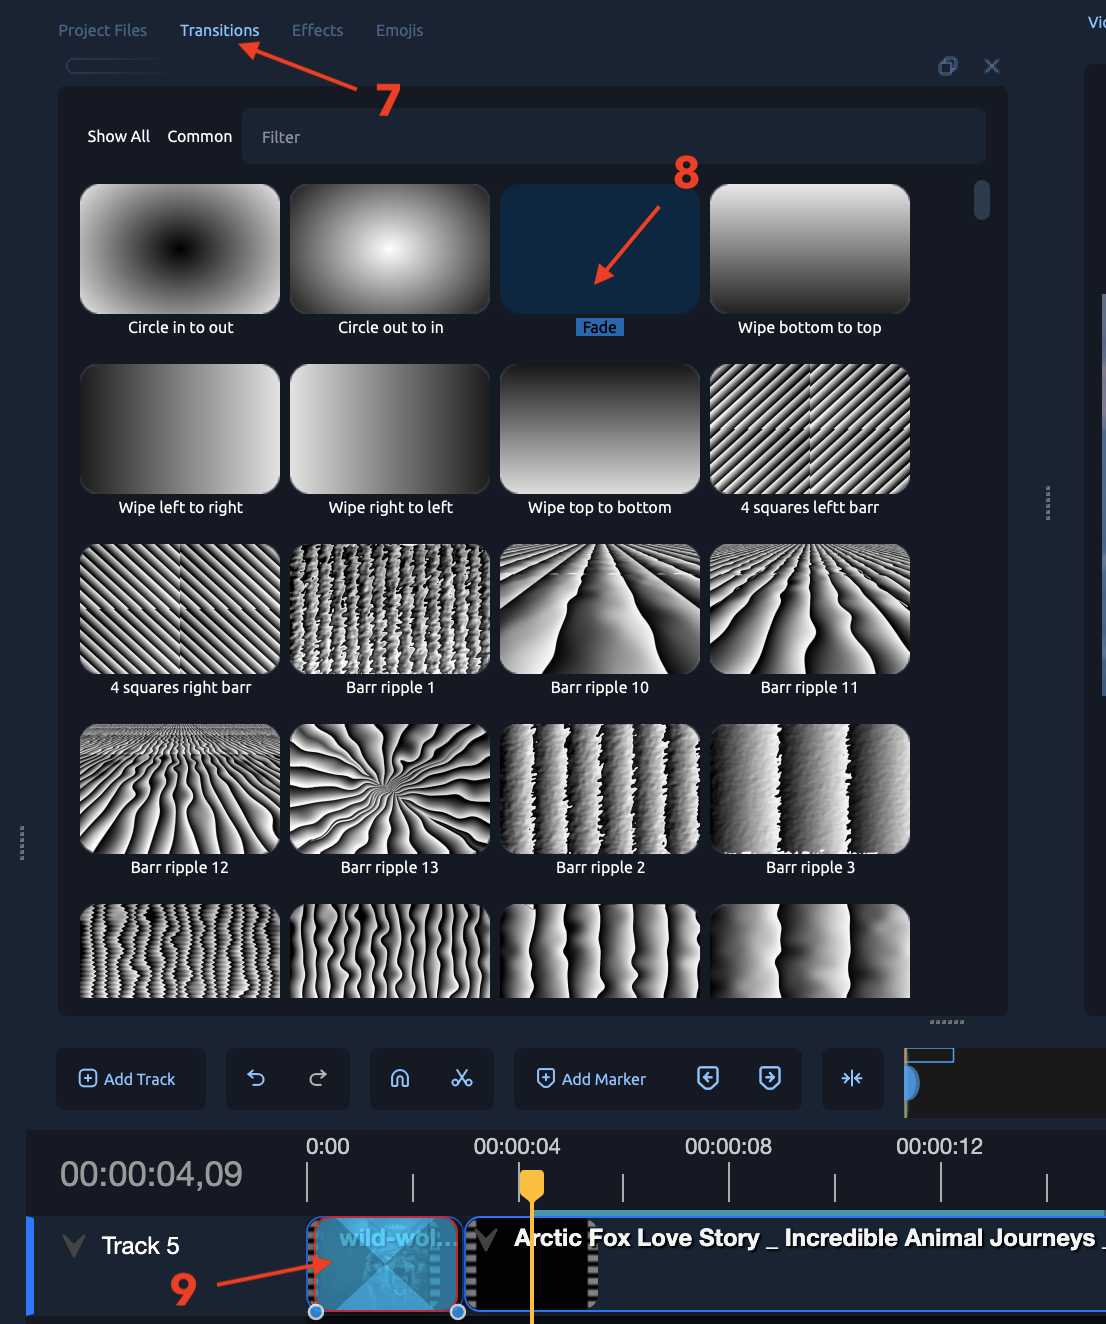
- Add Transitions [7] – Open the transitions panel, select a transition (e.g., Fade [8]), then drag it onto the beginning or end of the image clip [9].
H. Adjust Audio in OpenShot
1. Access Audio Properties
-
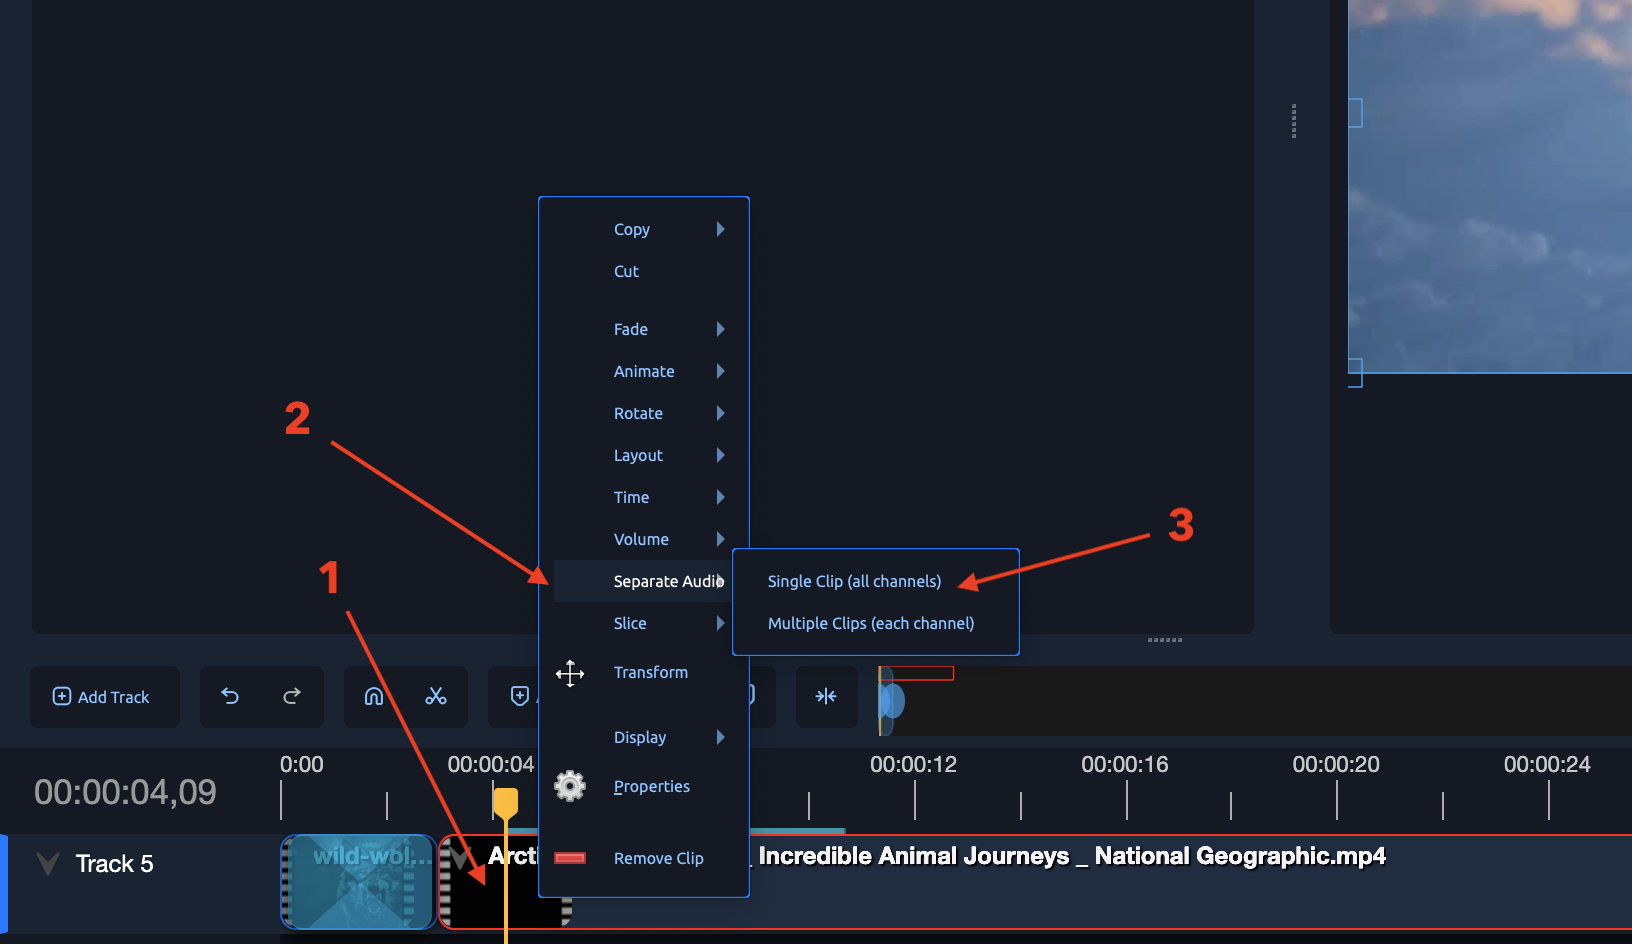
In the Timeline [1], right-click either:
-
The separate audio track ,[2] or
- Single Clip (all channerls) [3]
- A video clip that contains audio.
- From the menu, choose Properties.
- The Properties panel will appear (usually on the left side).
2. Change Volume
- In the Properties panel, look for Volume (Percent) [5].
- Default is 1.0 (100%).
- To increase volume: Enter a value above
1.0(e.g.,1.5for 150%). - To decrease volume: Enter a value below
1.0(e.g.,0.5for 50%).
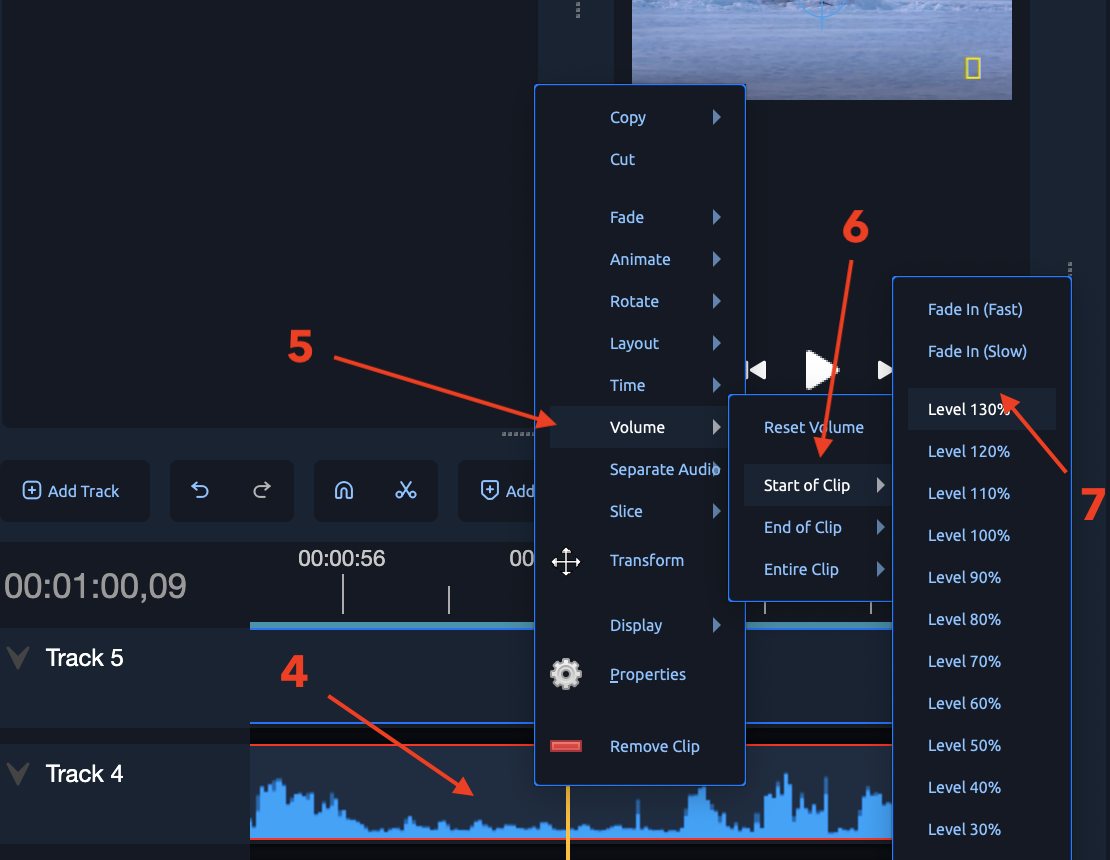
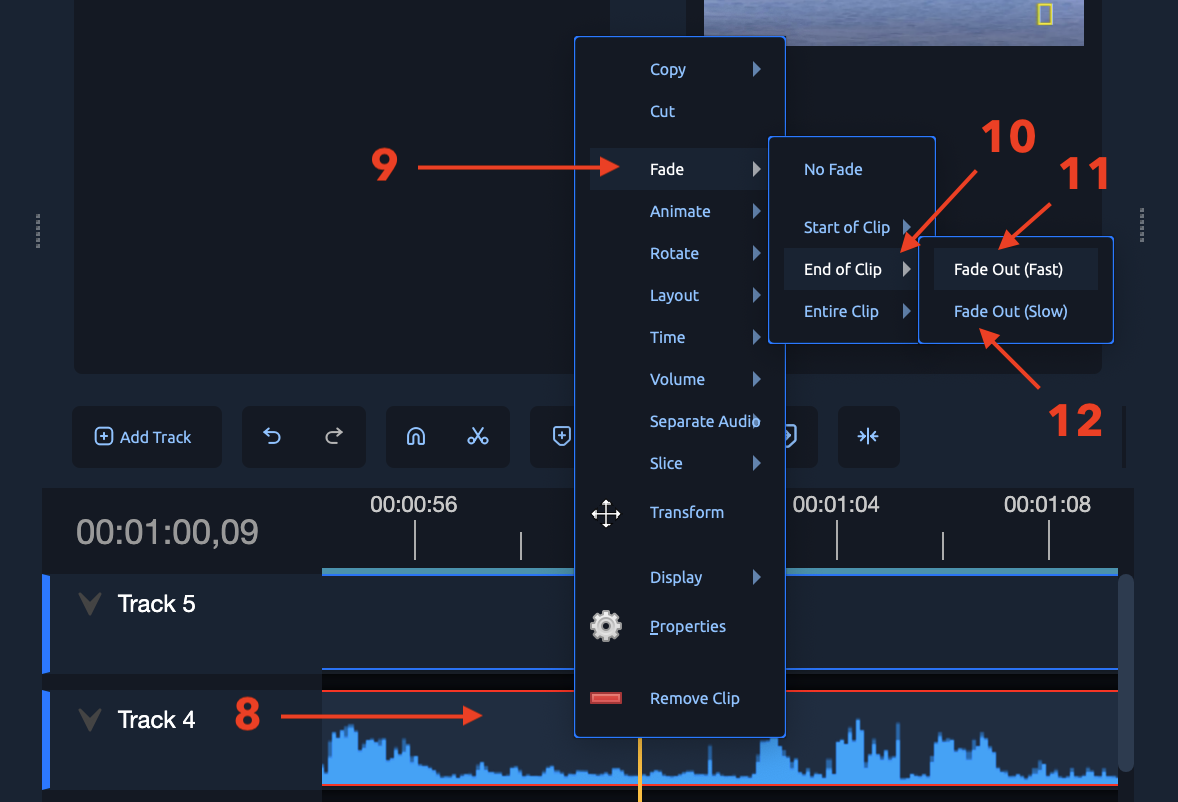
3. Add Fade In / Fade Out
Using Properties Panel
-
- In the Timeline [8], right-click
- Select fade [9]
- Select start of Clip/End of Clip [10]
- Fade In (Seconds) [11] – Set how long the sound takes to start from silence.
- Fade Out (Seconds) [12] – Set how long the sound fades to silence at the end.