Use Auto Captions (Speech-to-Text)
Steps to Use Auto Captions (Auto Audio Transcription)
Step 1: Start the Room
- Log into your LEARN vCR Room.
- Click Start to enter the session.
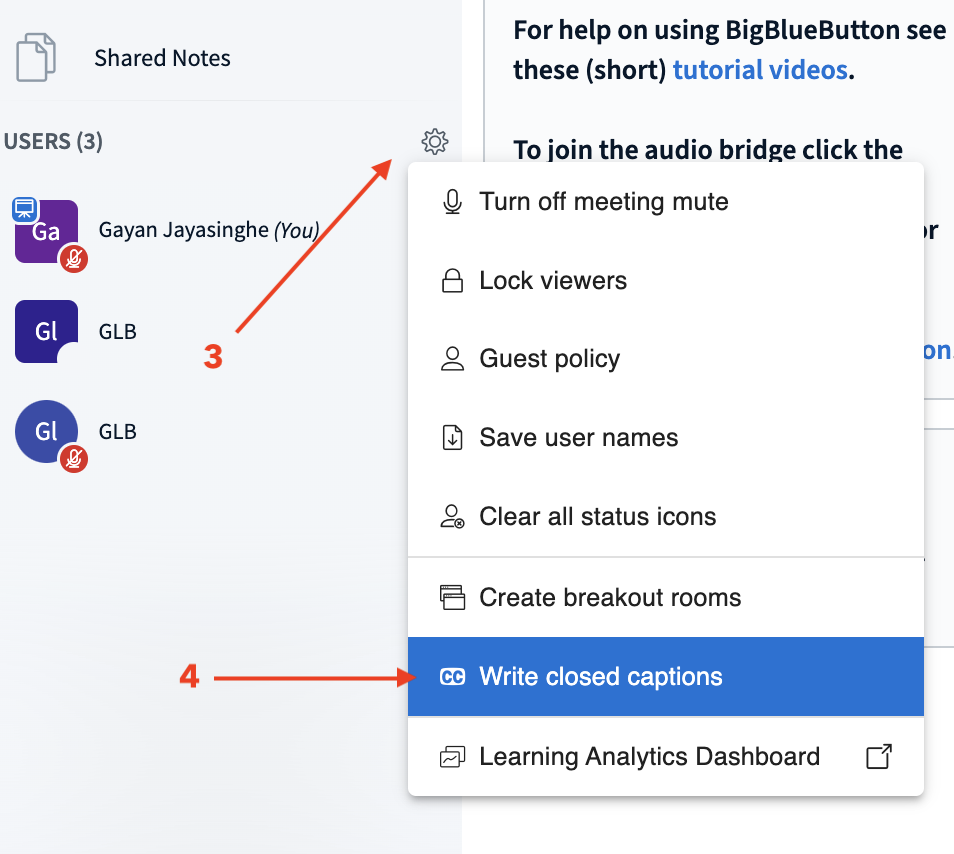
Step 2: Start Closed Captions
- Click the gear icon (⚙️) next to the USERS title (left panel).
- Select “Write Closed Captions” from the menu.
- A caption sub-window will open.
Step 3: Enable Auto Captions (Speech-to-Text)
- In the caption sub-window, click the blue “Start Dictation” button at the top-left corner.

Step 4: Grant Permission for Speech Recognition
- Your browser (e.g., Chrome) may prompt you to allow microphone access for speech recognition.
- Click “Allow” when asked.
-
On some systems (like macOS), you may also need to enable:
-
System Preferences > Security & Privacy > Microphone
- And/or Speech Recognition
Step 5: Speak and Transcribe
- As you speak, your words will automatically be transcribed into live captions in the caption box.
- Participants can view them by clicking the “CC” button at the bottom of the Room interface.
To Stop Auto Captions
- Click the “Stop Dictation” button in the caption sub-window.

Notes:
- This feature relies on your browser’s speech recognition API (best in Chrome).
- Accuracy depends on microphone quality, background noise, and speech clarity.
- Works best for English (other languages may vary).