How to Upload a Presentation in vCR
🔁 You Can Upload in Two Ways:
- Before starting the Room
- During a live session
Option 1: Upload Before Starting the Room
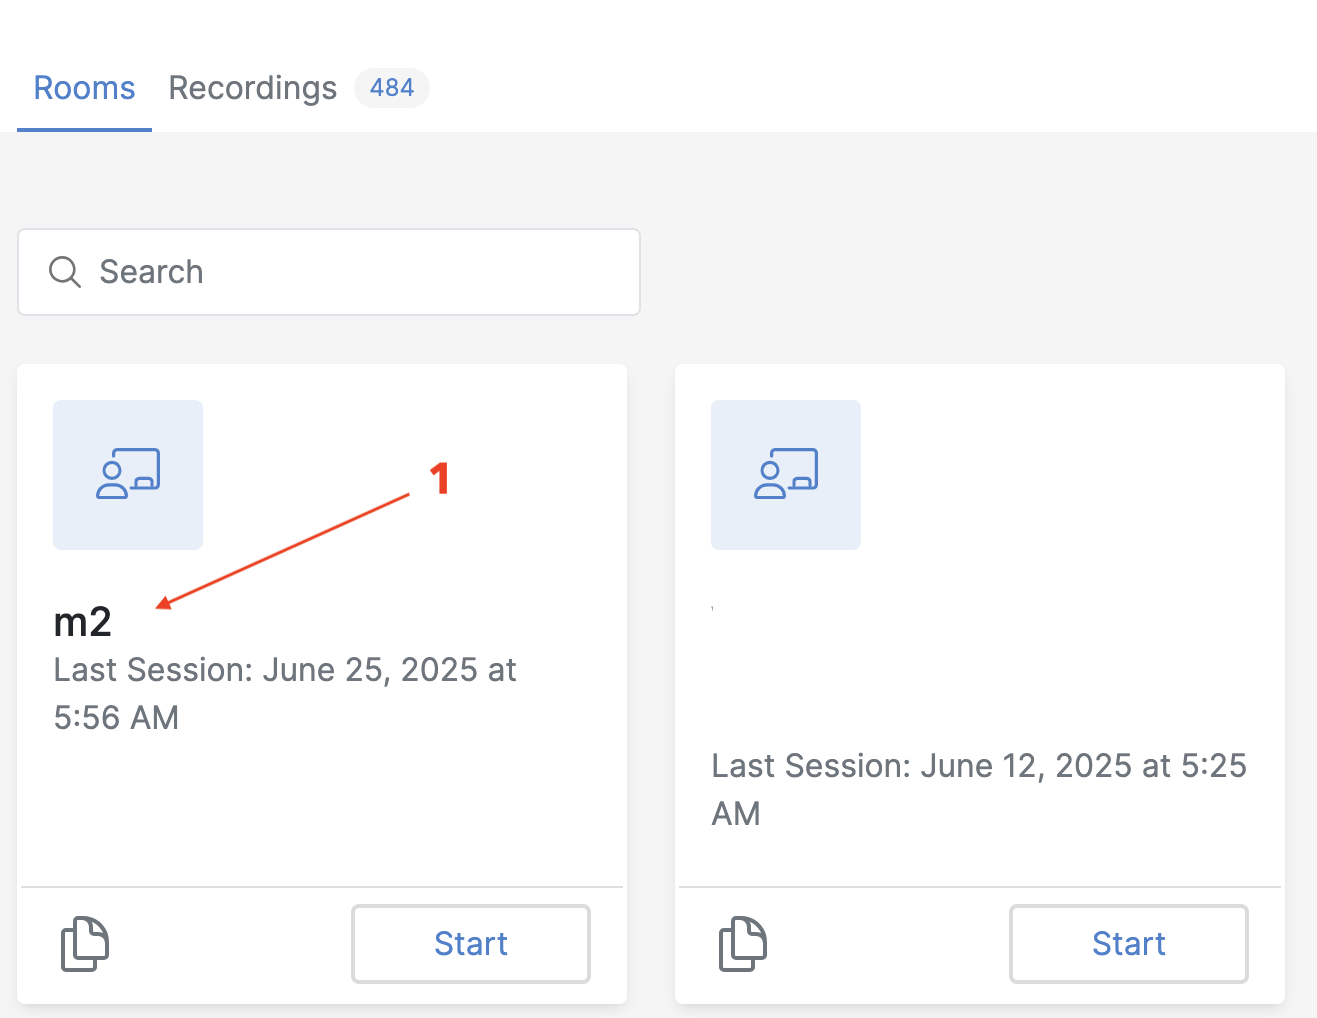
- Go to Your Dashboard Locate the Room you want to use.
-
Click on the Room Name [1] This opens the Room Details Page.
-
Click the “Presentation [2]” Tab

- You’ll see an option to upload files in PDF format.
-
Click Choose File, then Upload [3].
-
Upload Notes:
-
Only PDF files are supported.
- Maximum file size: 10 MB.
- Avoid high-resolution images to reduce file size for faster loading.
Option 2: Upload During the Session
-
Start Your Room Click the Start button from the dashboard to enter the session.
-
Click the Blue “+” Button [1] Located at the bottom center of the Room interface.

-
Select “Upload/Manage Presentation [2]”
-
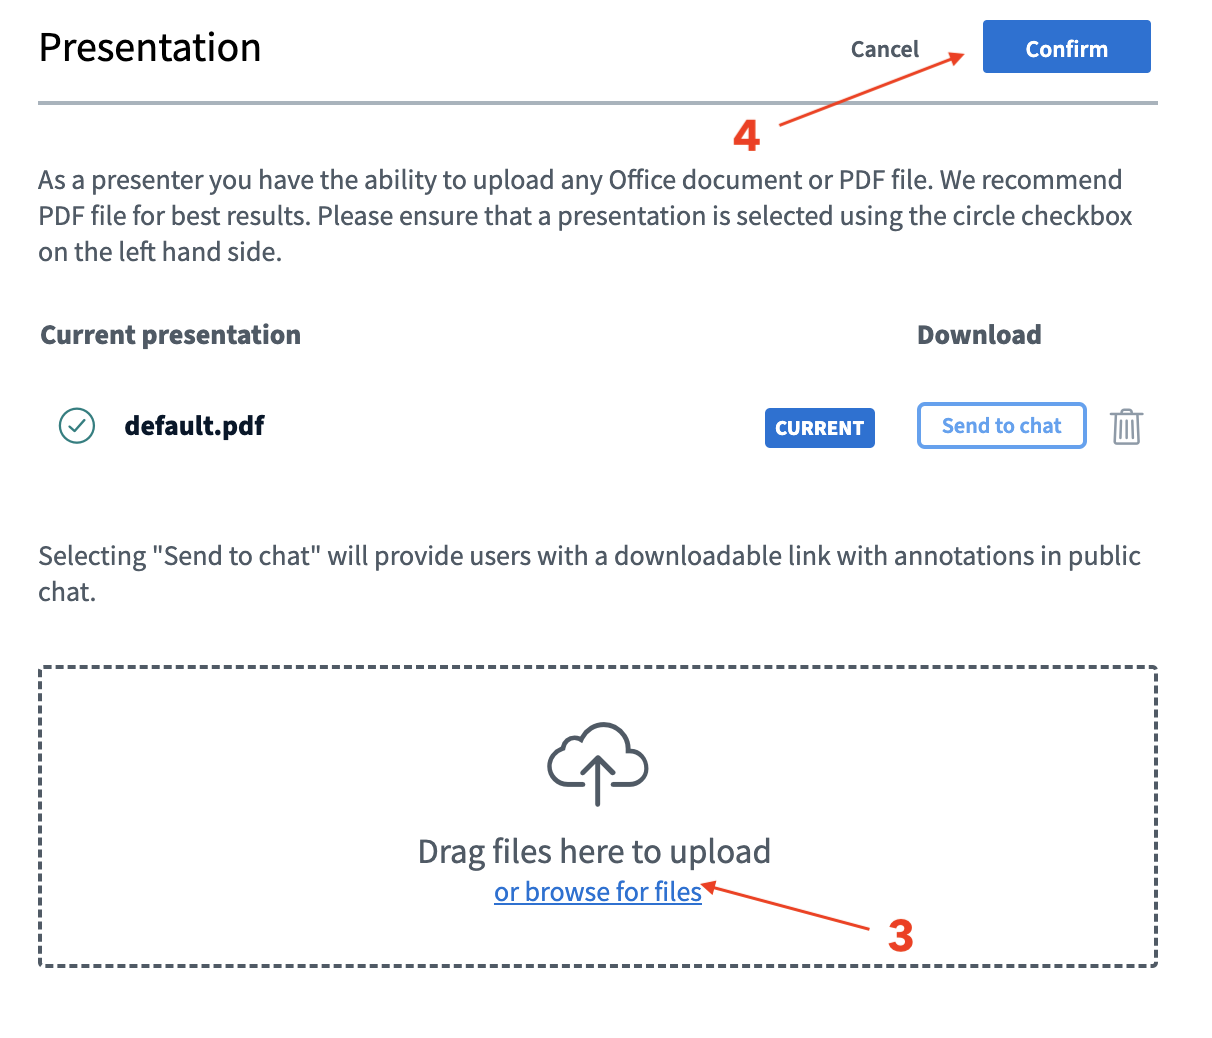
Choose Your PDF File
-
Click “Browse” or drag and drop [3] your file.
-
Upload multiple files if needed.
-
Click “Confirm” to Upload[4] Once uploaded, your slides will appear in the center.
-
Switch Between Presentations
-
Open the blue “+” menu again.
- Choose another uploaded file to switch presentations.
⚠ Important Notes
- Do NOT share your screen or PowerPoint window directly — this reduces performance and room size.
- Always convert PowerPoint slides to PDF before uploading.
Here is a clear step-by-step guide for Sharing Your Screen in the LEARN vCR (BigBlueButton) platform:
How to Share Your Screen in vCR
Important Note: Screen sharing is not recommended for presentations, as it reduces the Room size and may cause performance issues. Always prefer using uploaded PDF slides. Use screen sharing only when absolutely necessary.
Steps to Share Your Screen
-
Start the Room
-
Log in to the platform and click Start on your Room to enter the session.
-
Use Google Chrome Browser
-
Ensure you're using Google Chrome, as it supports the screen sharing feature reliably.
-
Click the Screen Sharing Icon
-
At the bottom center of the Room interface, find and click the computer screen icon [1] (next to the camera icon).

-
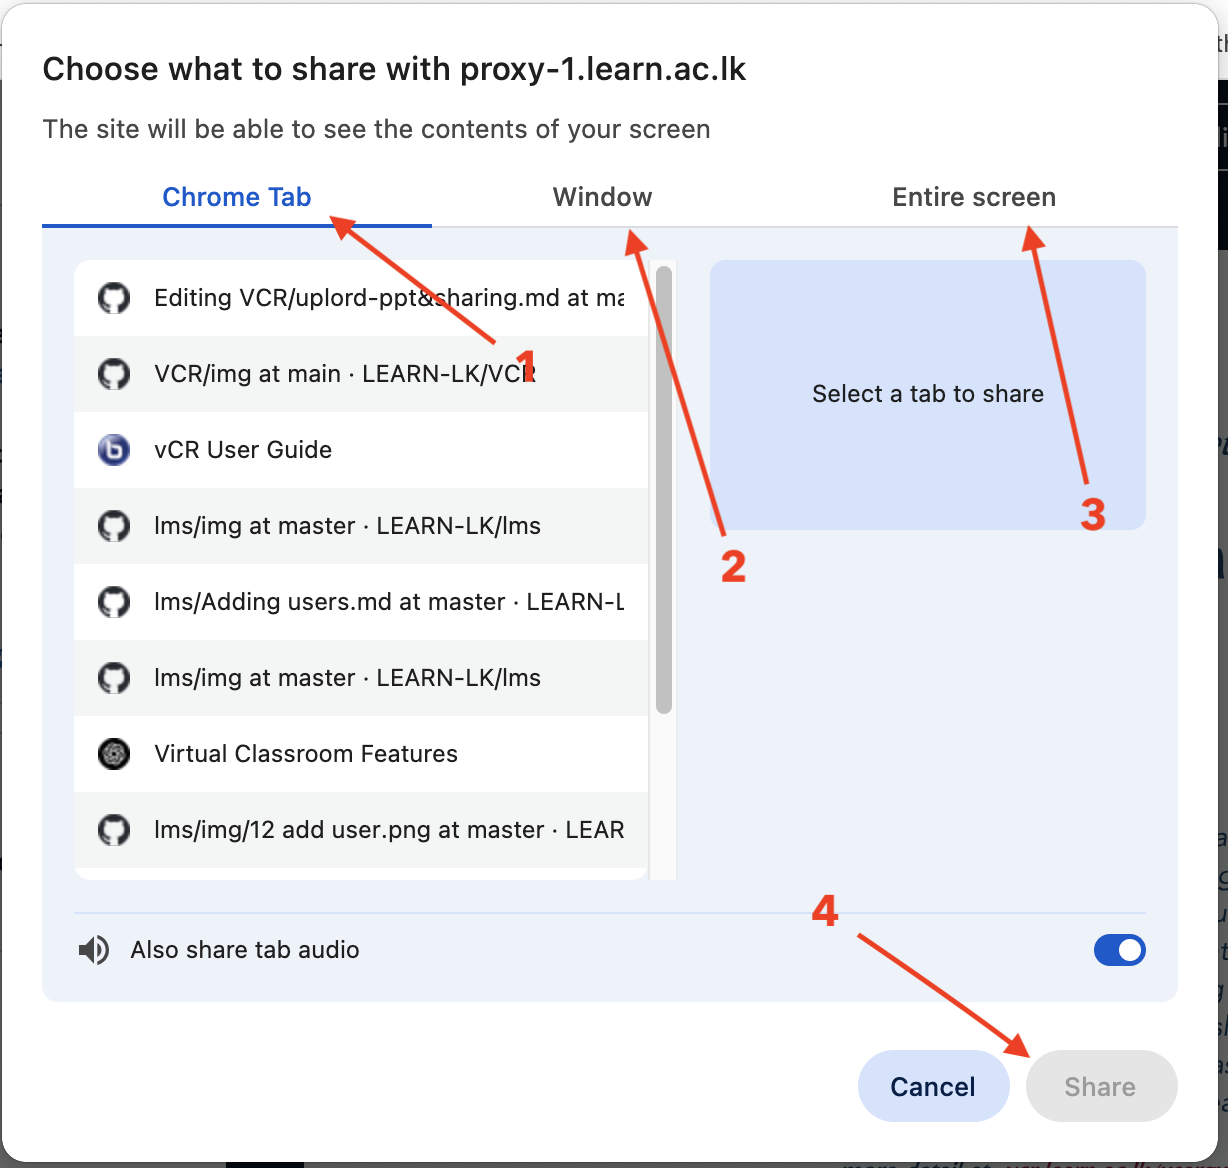
Select What to Share A new pop-up window will appear with three tabs:
-
Entire Screen [3]
- Window [2]
-
Chrome Tab [1] (if applicable)
-
Choose Your Option
-
Click the preview of the screen or window you want to share.
-
Click the “Share [4]” button.
-
Screen Now Visible to All
-
Participants will now see what you're sharing.
-
A banner or icon may indicate that screen sharing is active.
-
To Stop Sharing [5]
-
Click the screen sharing icon again or stop it via your browser's share indicator.

Before You Begin: Enable Screen Sharing
Make sure:
- You have granted browser permission to share your screen.
- Pop-ups are not blocked.
- Your system allows screen recording (on macOS, check System Preferences > Security & Privacy > Screen Recording).