Lock Viewer Features (e.g., private chat, mic, webcam, screen sharing)
How to Lock Viewer Features (Webinar Style Room)
-
Start Your Room Enter the Room by clicking the “Start” button on your dashboard.
-
Open Lock Settings
-
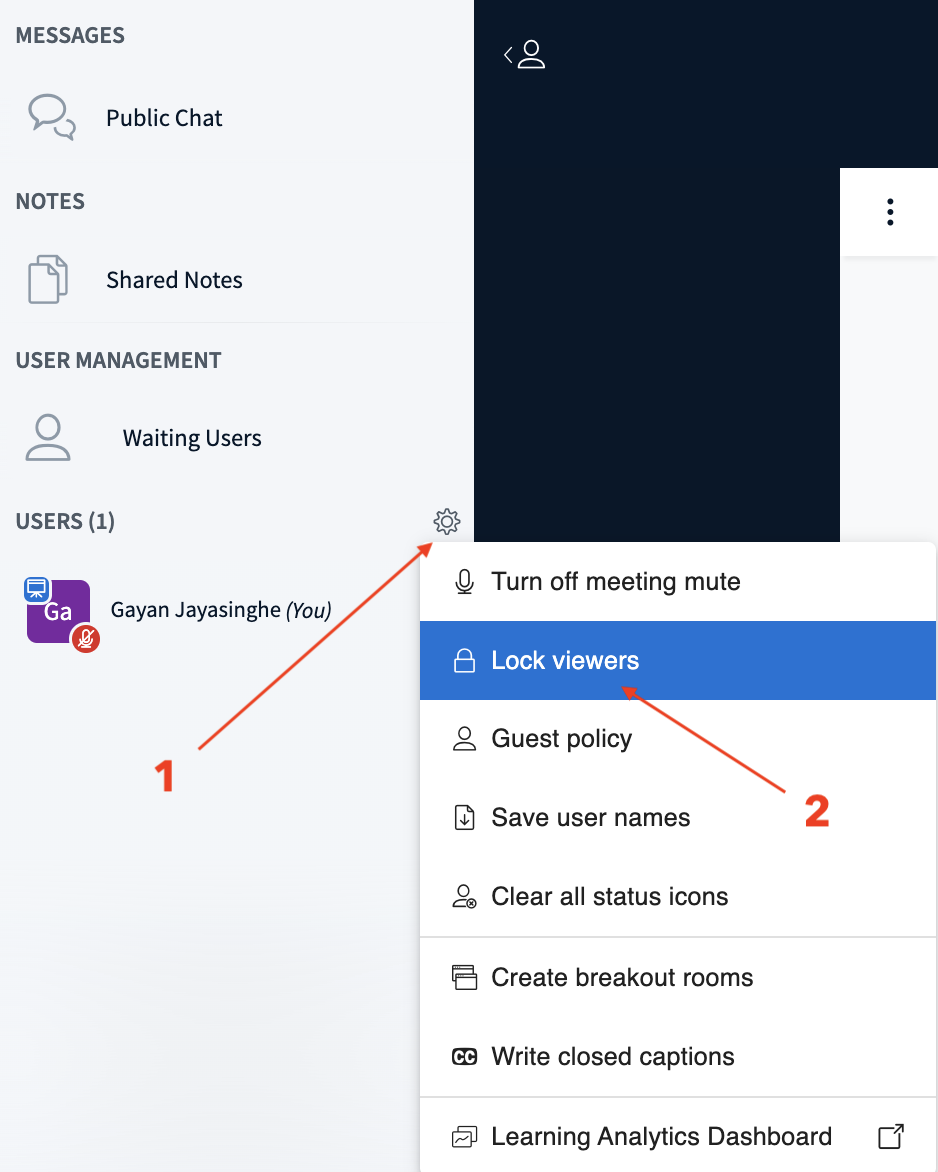
On the left side of the Room interface, locate the “USERS” section.
-
Click the gear icon (⚙️) [1] next to the “USERS” label.
-
Select “Lock viewers” From the dropdown menu, click on “Lock viewers”[2].
-
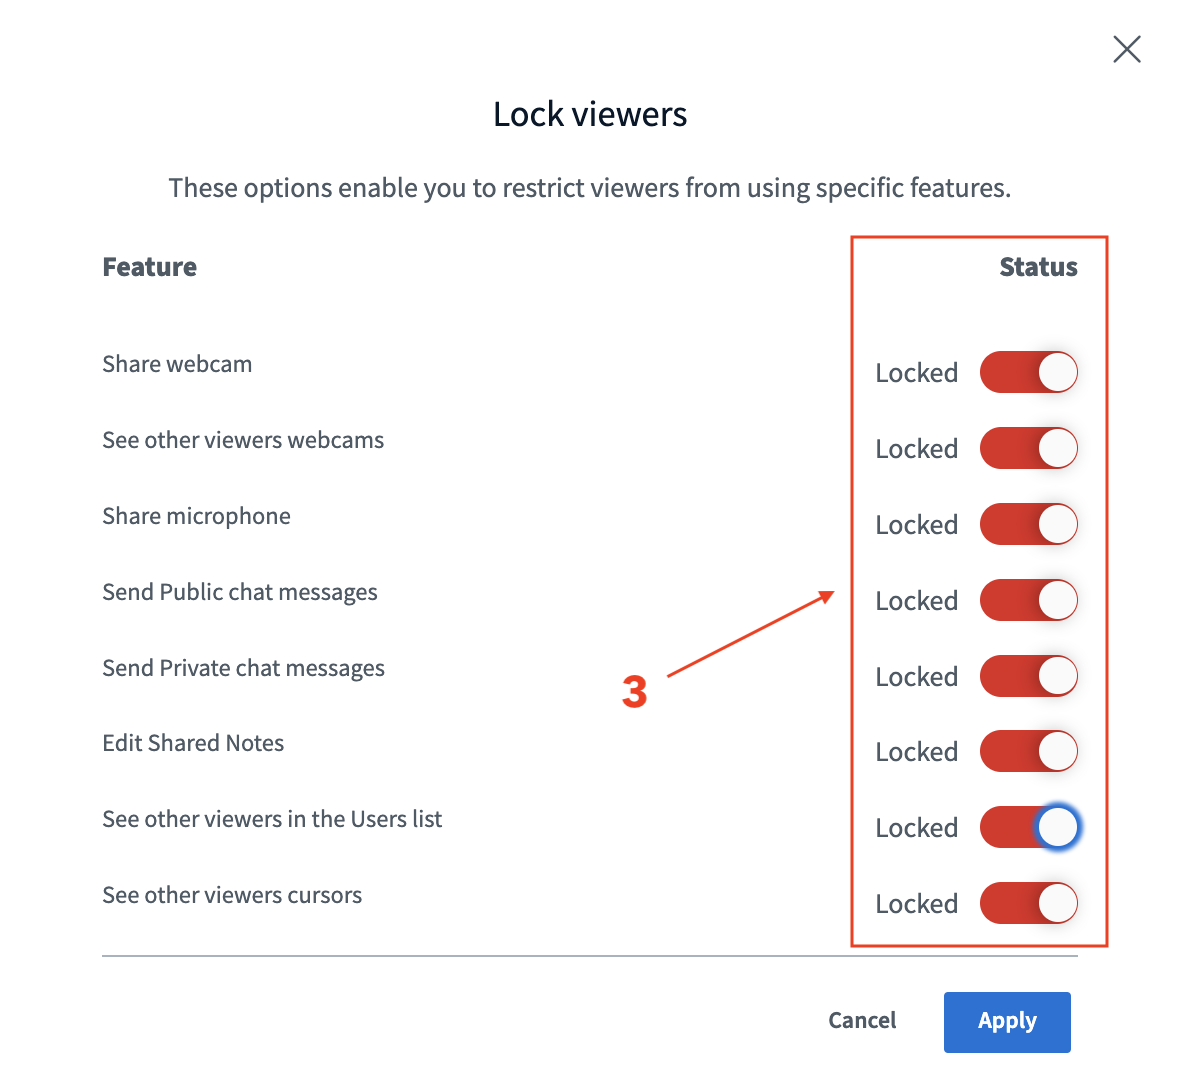
Customize Viewer Restrictions A new window will appear showing a list of viewer permissions (e.g., microphone, webcam, chat, etc.).
-
By default, all features are enabled for viewers.
-
Turn off the features [3] you want to restrict (e.g., microphone, webcam, private chat, etc.).
-
Create Webinar Style Room
-
To make it a Webinar style, **turn off all features [3] ** for viewers.
- This ensures attendees can only watch and listen, not interact unless allowed.
How to Convert a Room to a Webinar
-
Upload Your Presentations
-
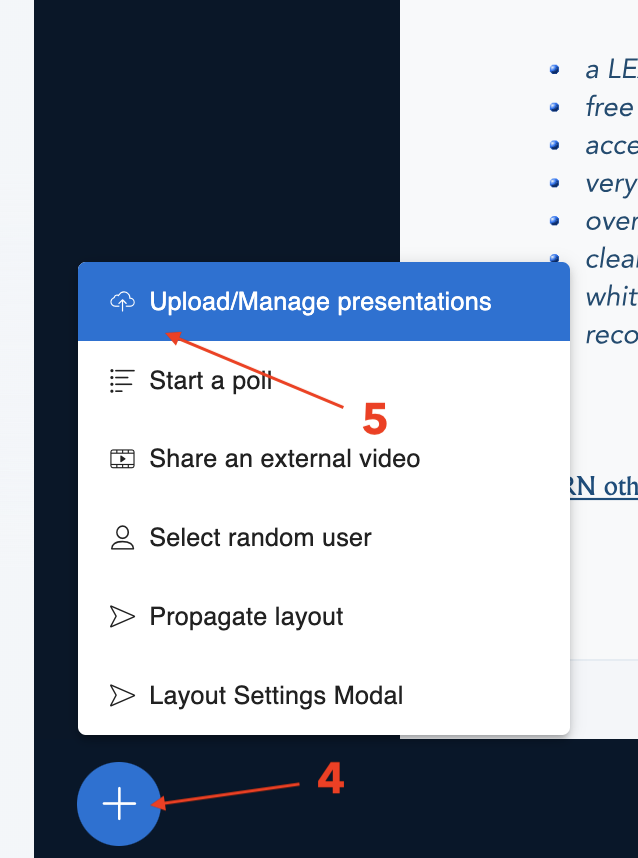
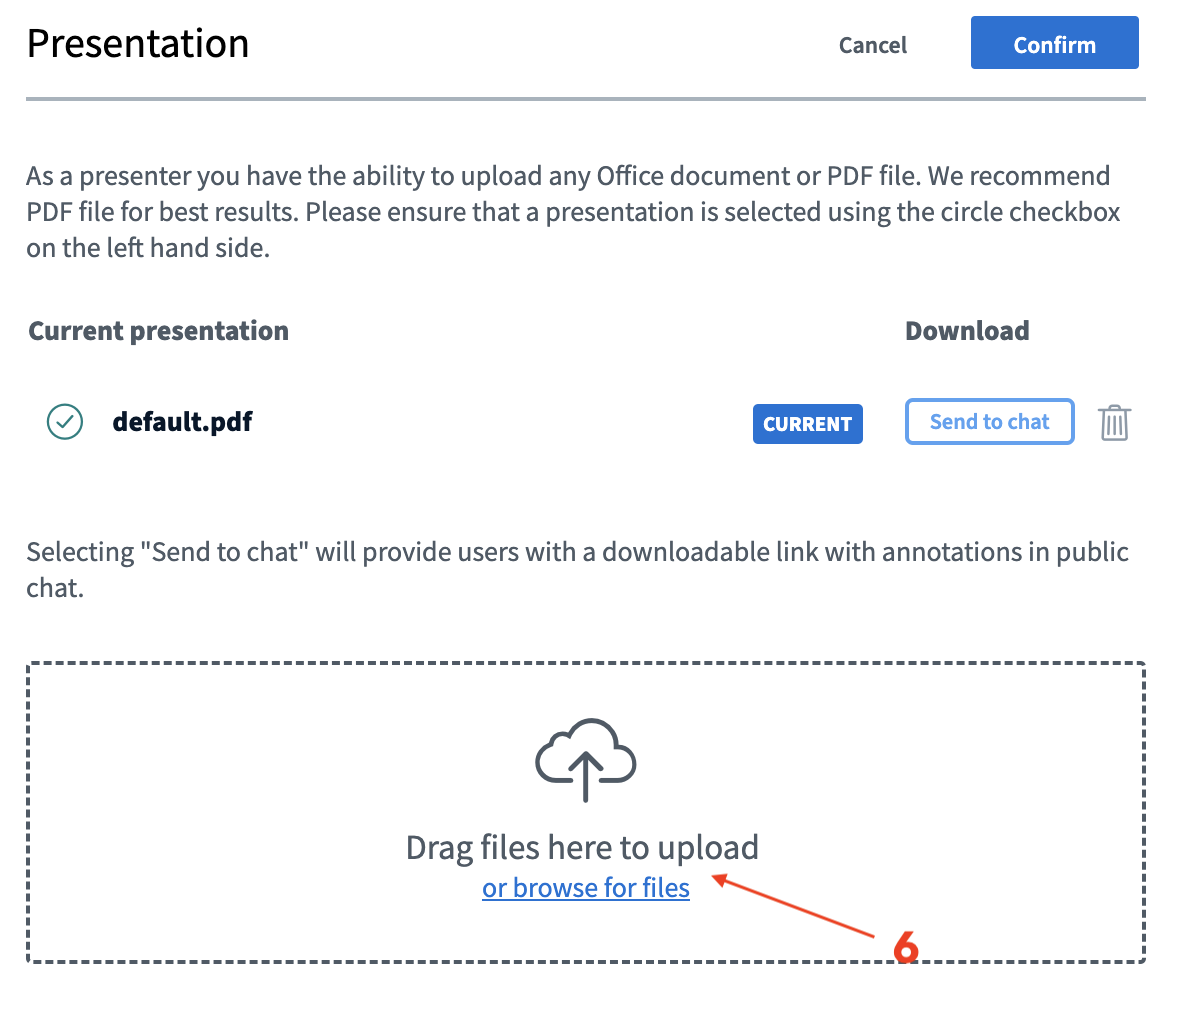
Use the “+” button [4] at the bottom left to upload your presentation slides or documents.
-
Lock Viewer Features
-
Follow the steps above to disable all viewer permissions using the Locking Viewer settings.
-
Run as Webinar Your Room is now in Webinar mode, suitable for large classes or one-way delivery sessions.
Note: Only moderators/presenters will be able to interact freely. Viewers will remain passive until permissions are manually unlocked.