Visual Assessment
How to Conduct a Visual Assessment in vCR
Visual assessments allow students to interact with slides (e.g., identify a location, mark an answer) while not seeing each other's cursors. This is useful for quick understanding checks or geography/map-based tasks.
Step-by-Step Instructions
1. Start the Room
- Log in and click Start to enter your vCR Room session.
2. Upload a Slide for Interaction
- Use a slide with visual content (e.g., a map, diagram, or chart).
- Upload it by clicking the blue “+” button at the bottom center → Upload Presentation.
3. Lock Viewer Cursors
- On the left side, click the gear icon (⚙️) [1] next to the “Users” label.\
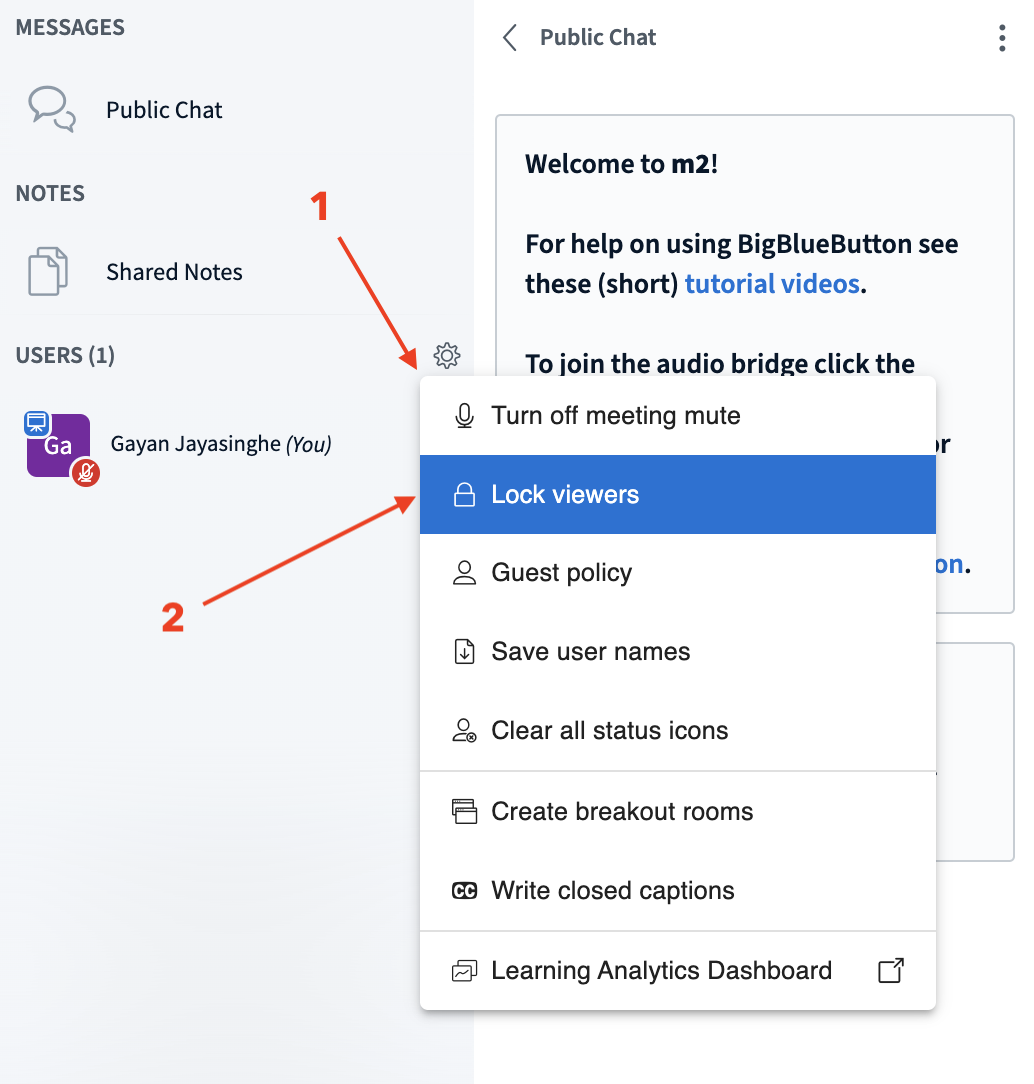
- Choose “Lock Viewers [2]”.
- In the lock settings window, disable "See other viewers' cursors".

Click Apply* to enforce the setting.
4. Enable Multi-User Whiteboard
- Below the slide (in the center of the screen), find the multi-user whiteboard icon (small icon showing multiple pens or users).
- Click to enable multi-user mode [1].
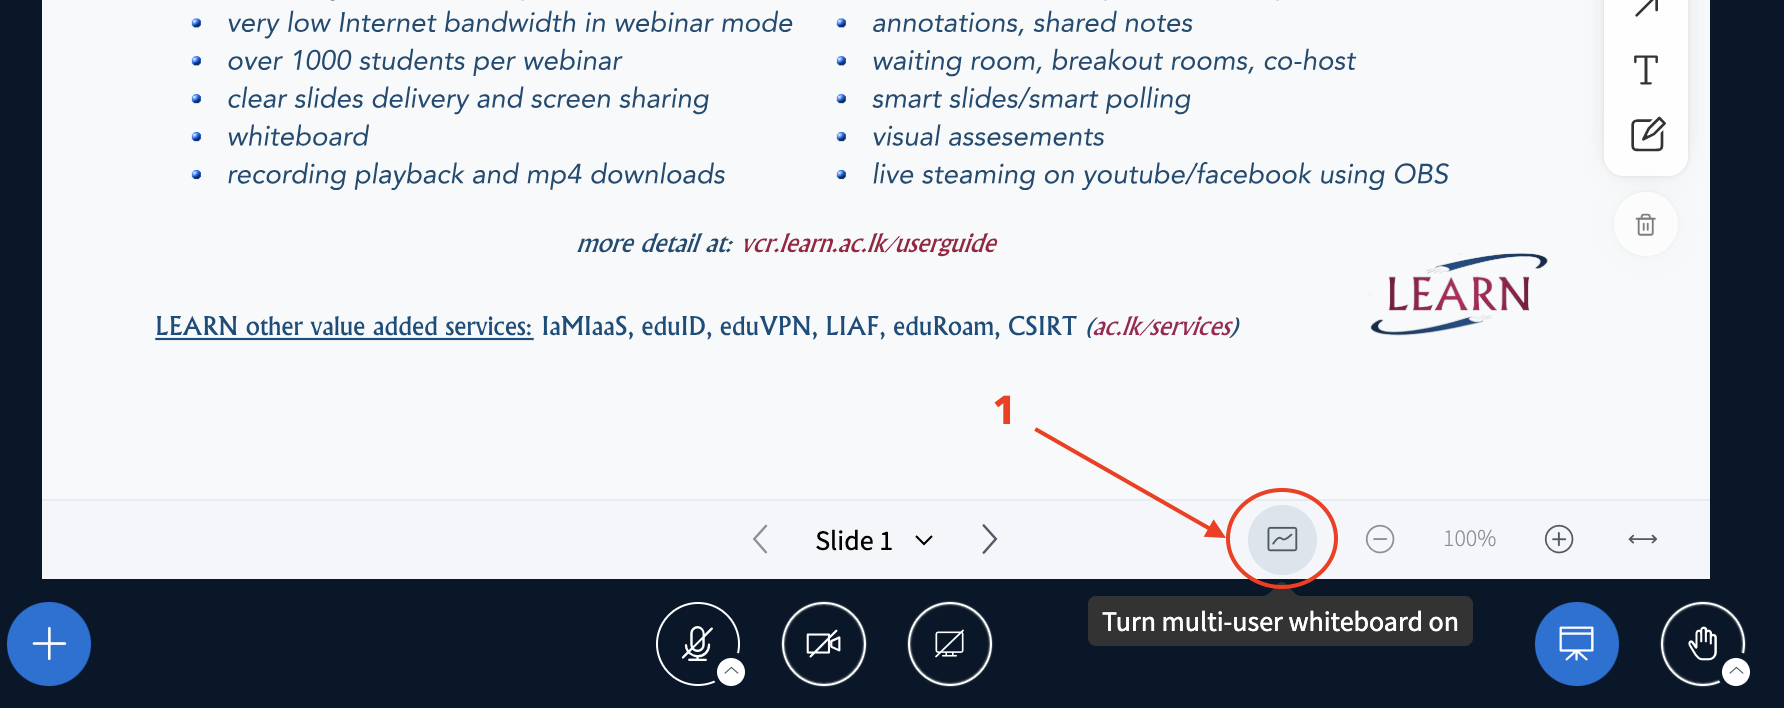
Now, all students can interact with the slide, but they won’t see each other’s cursors*.
5. Give Instructions
- Ask students to:
“Click on where you think the Netherlands is on this map,” or “Circle the correct organ on this diagram.”
6. Observe Student Input
- As a moderator, you can see each student’s cursor or mark, but they cannot see each other's responses.
- Use this to assess comprehension individually without peer influence.
7. End the Activity
-
To stop the activity:
-
Click the multi-user whiteboard icon again to disable it.
- Use the clear annotations button (trash icon) to wipe the slide.
Use Cases for Visual Assessment
- Geography: Identify countries, regions, etc.
- Science: Label parts of a diagram (e.g., heart, atom)
- Math: Mark coordinates on a graph
- Language: Match words to images