Create a vCR Room
How to Create a vCR Room via LEARN IdP
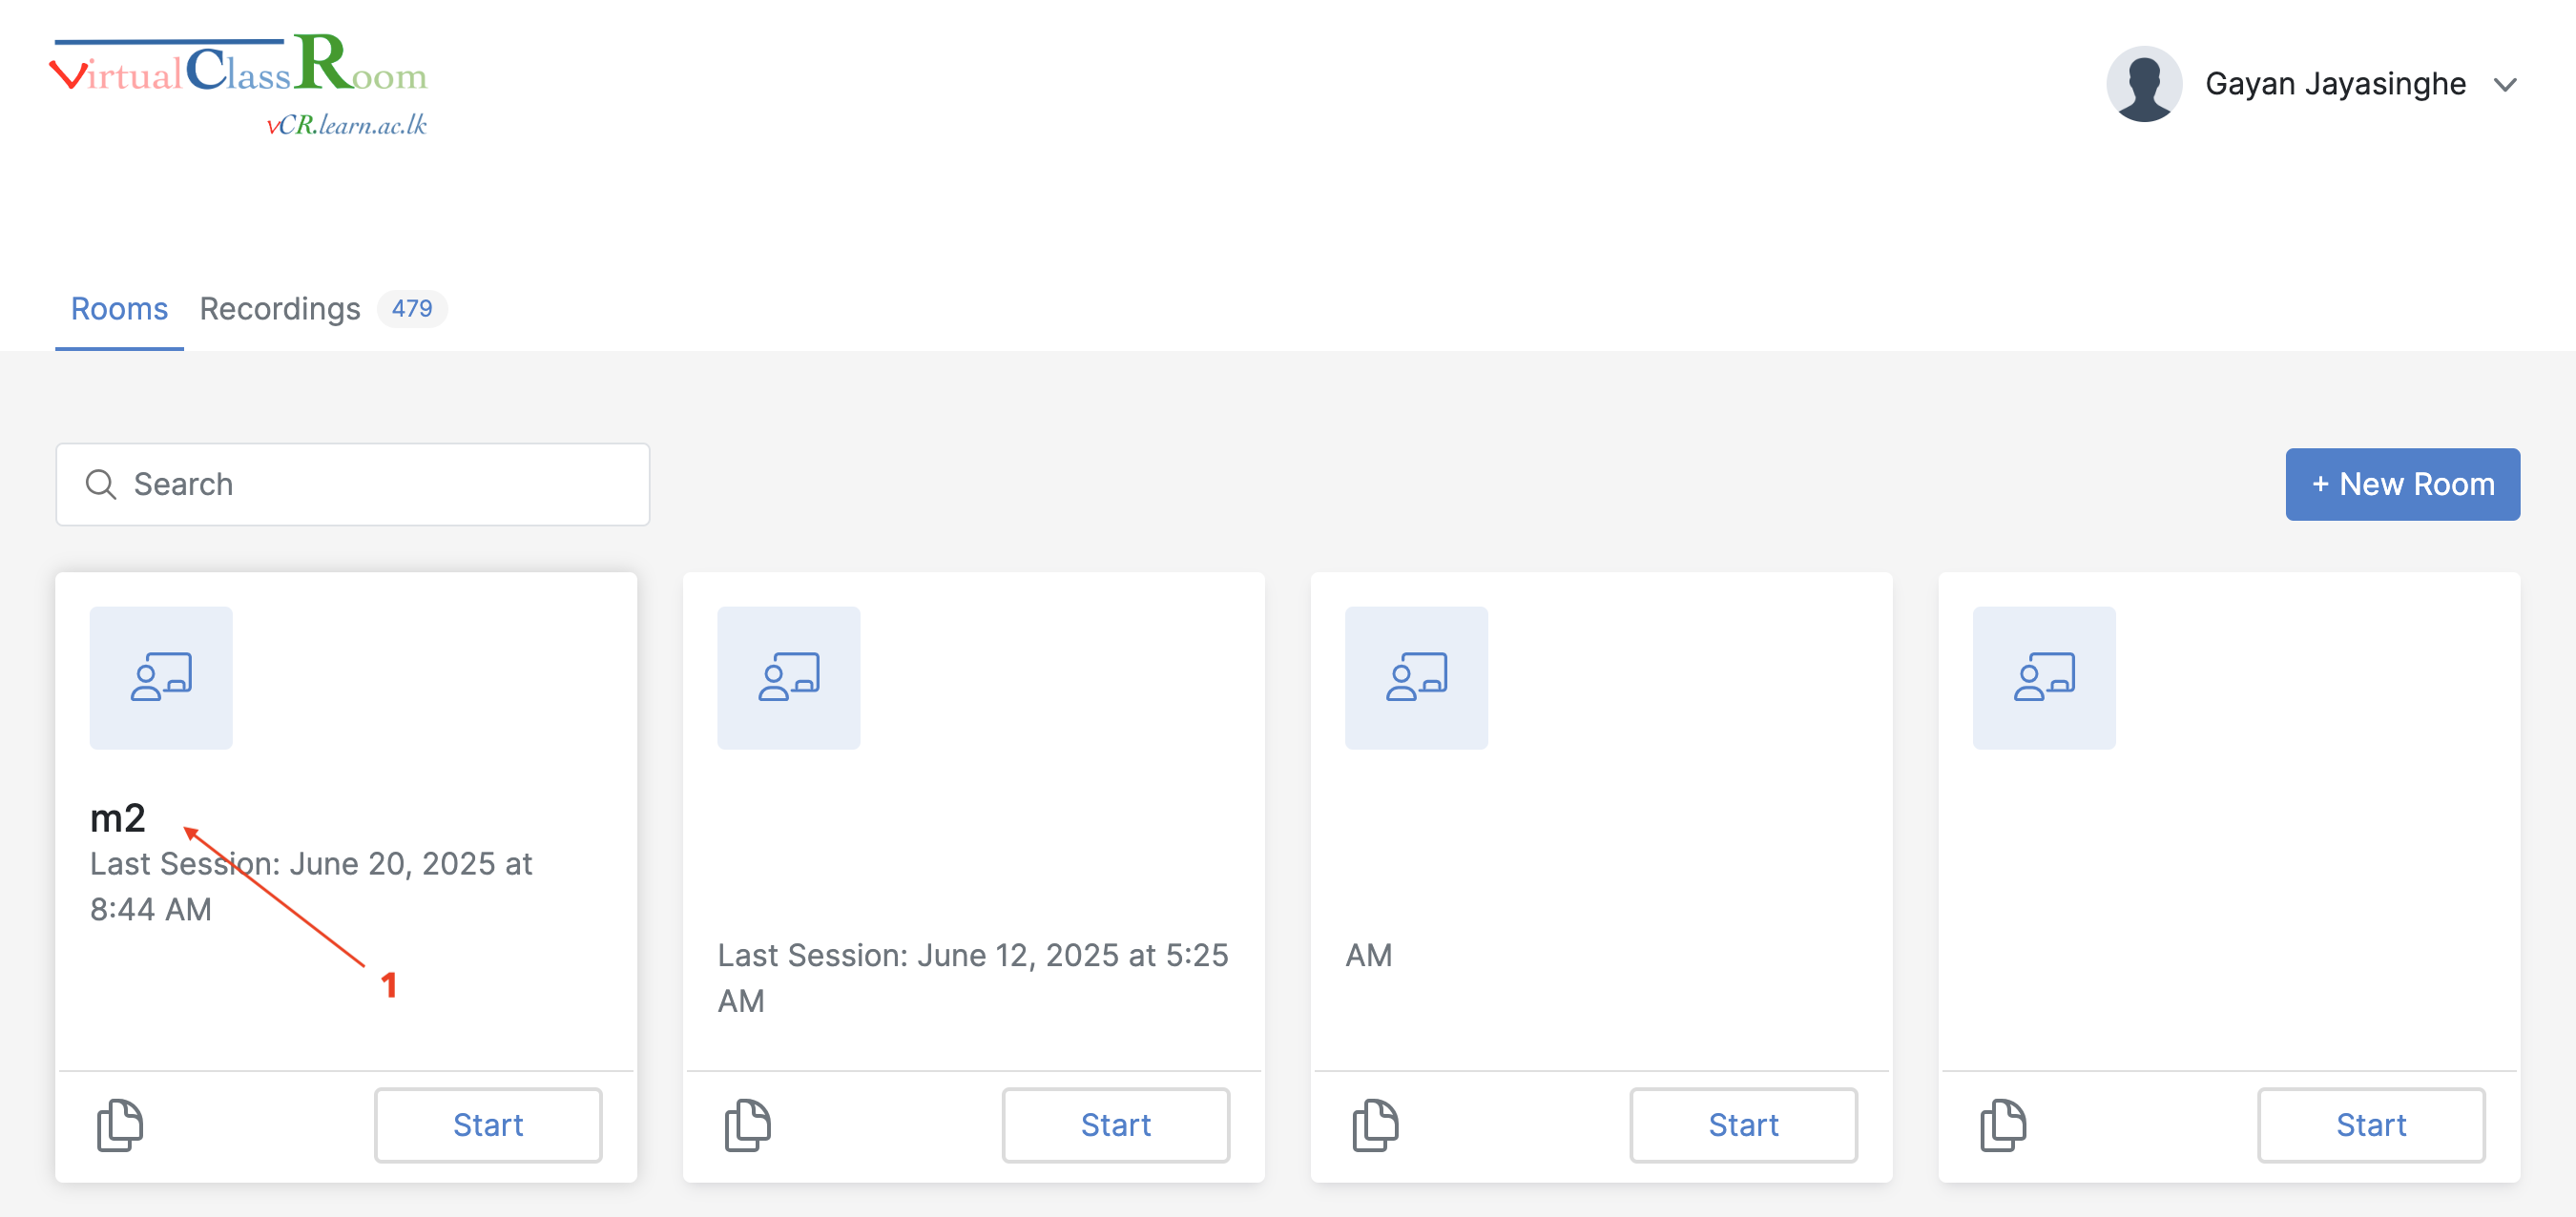
Step 1: Access Your Dashboard
- After login, you’ll be taken to your vCR dashboard.
- This shows a list of your existing rooms[2] and options to create new ones[1].
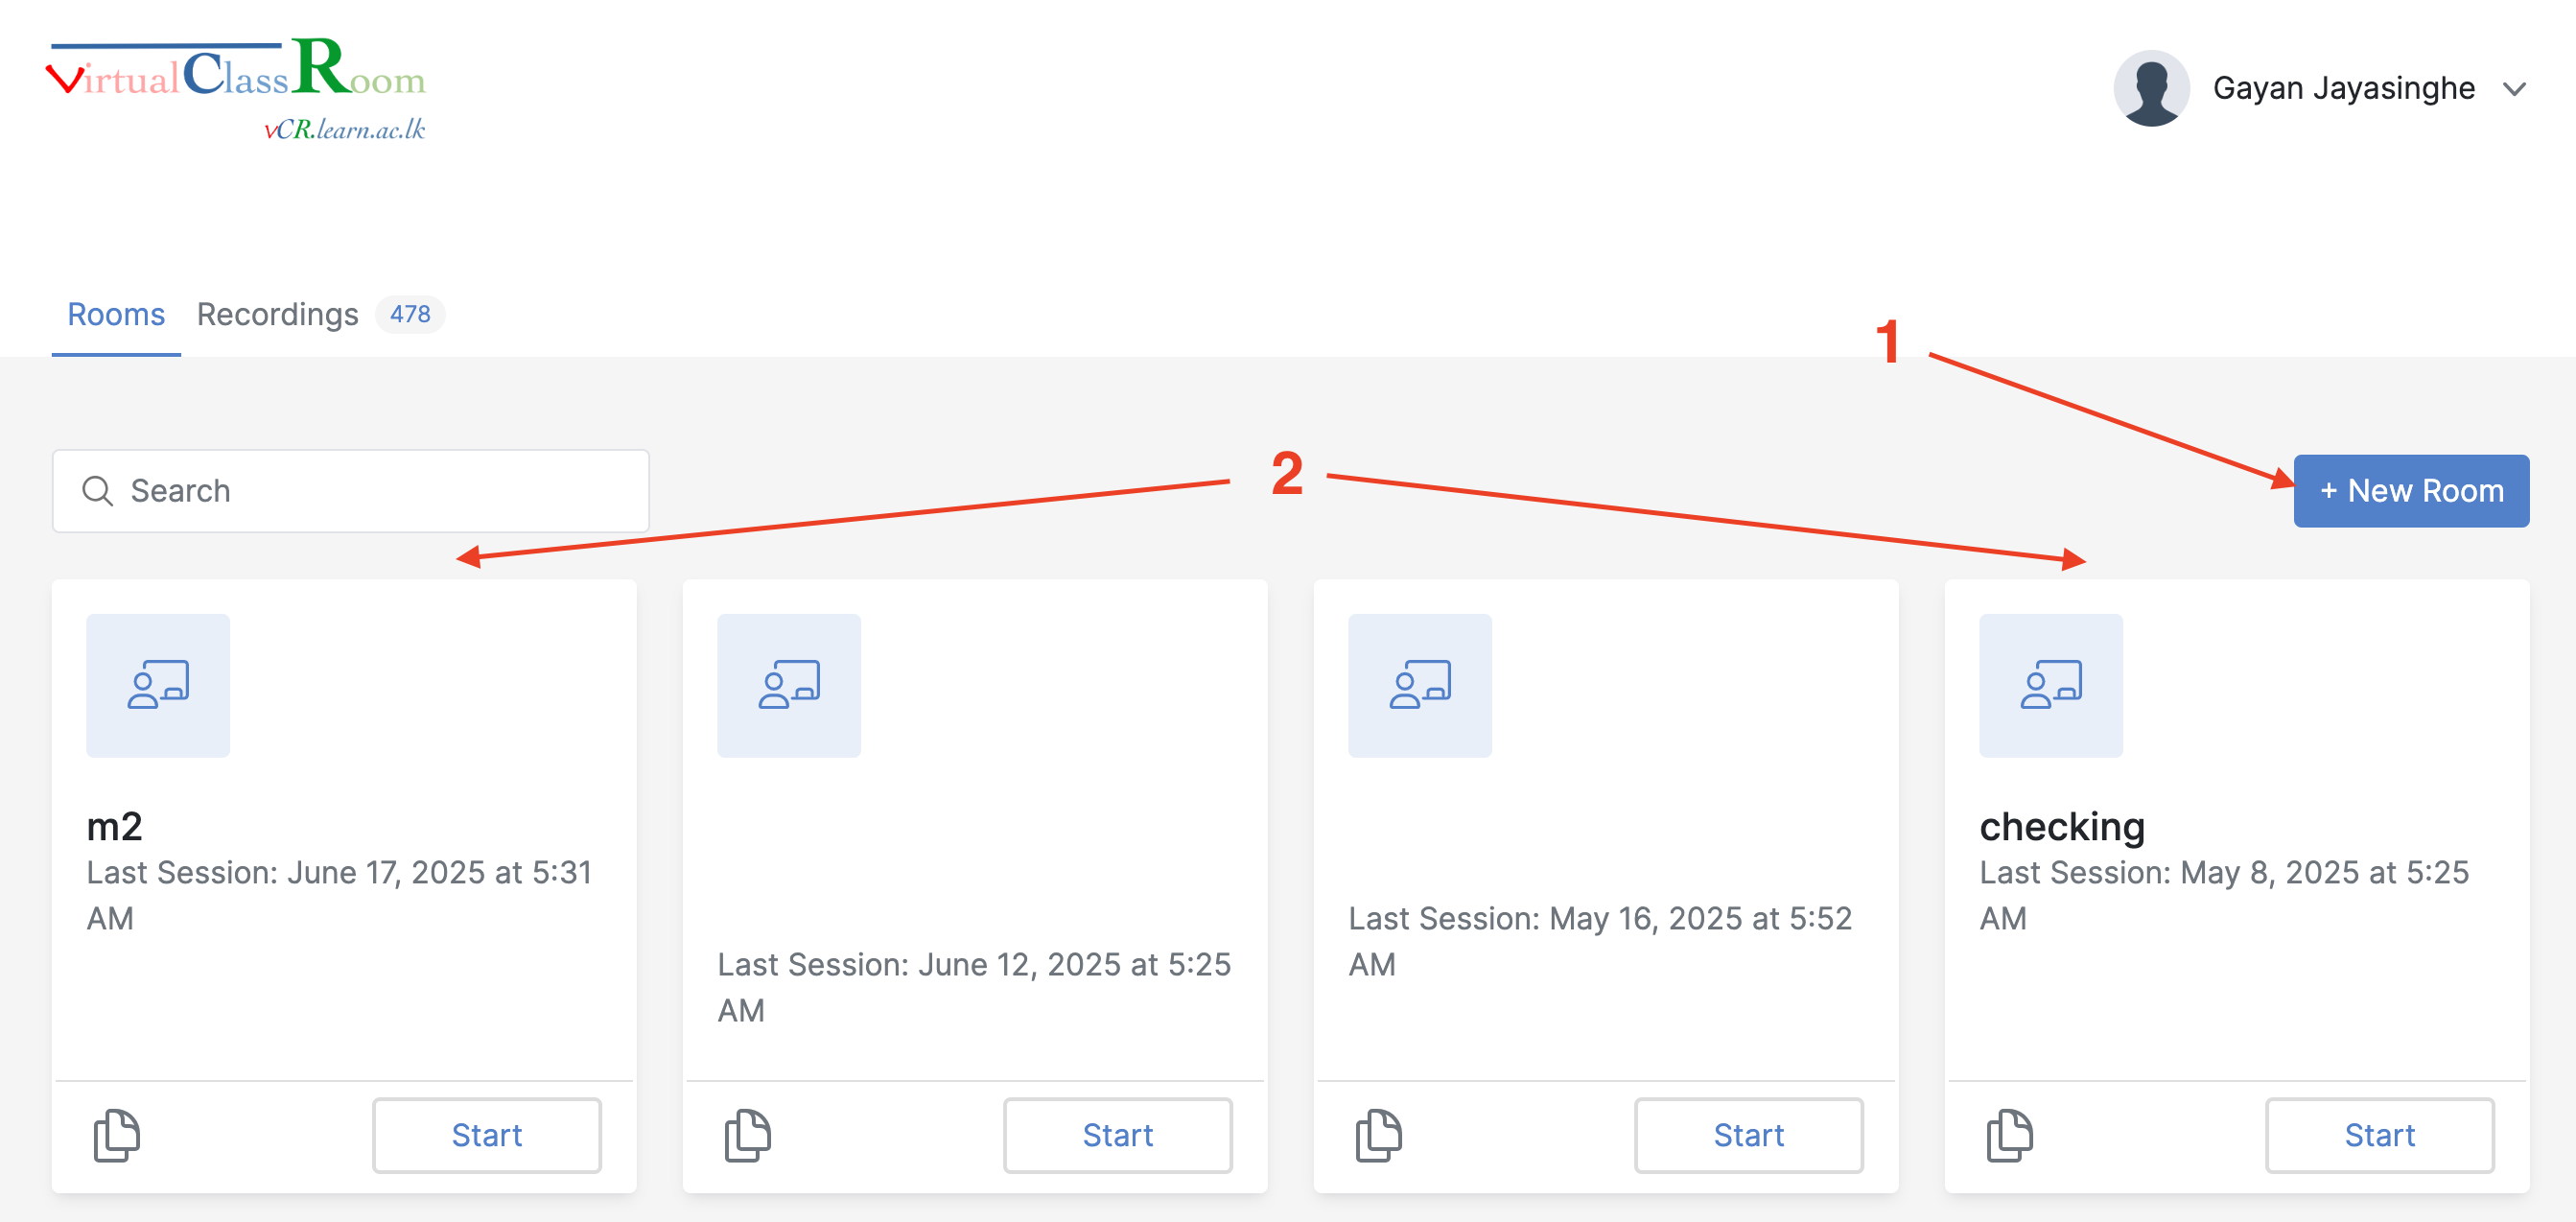
Step 2: Create a New Room
- Click on the “Create Room” or “+ New Room” button.
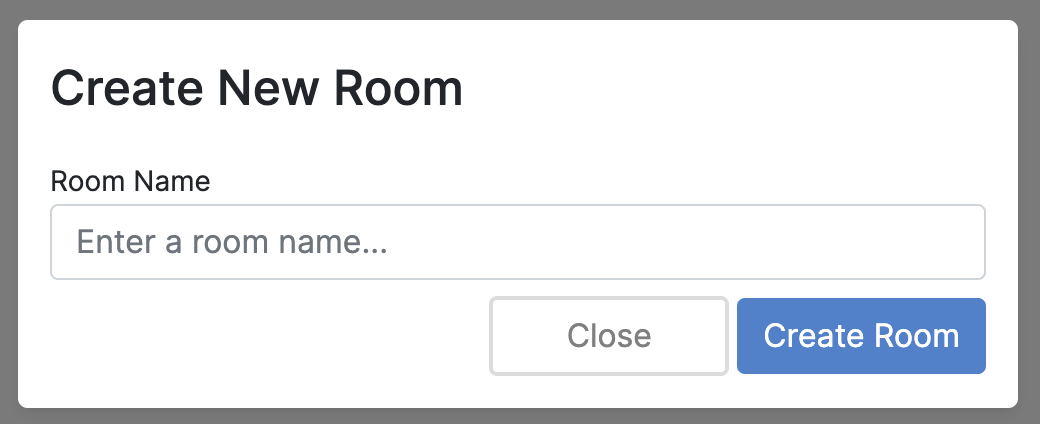
Step 3: Fill in Room Details
- Room Name: e.g., “Math 101 – Week 2”
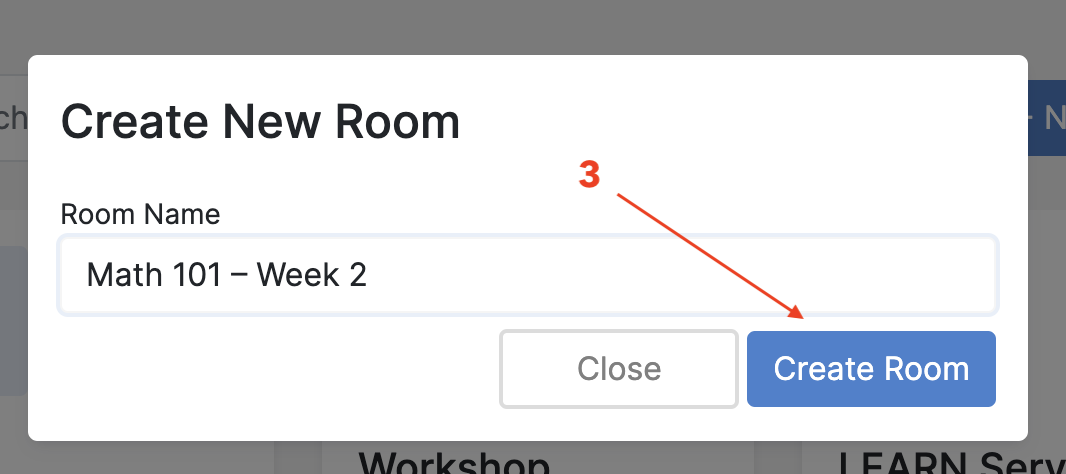
- Click “Create Room” [3].
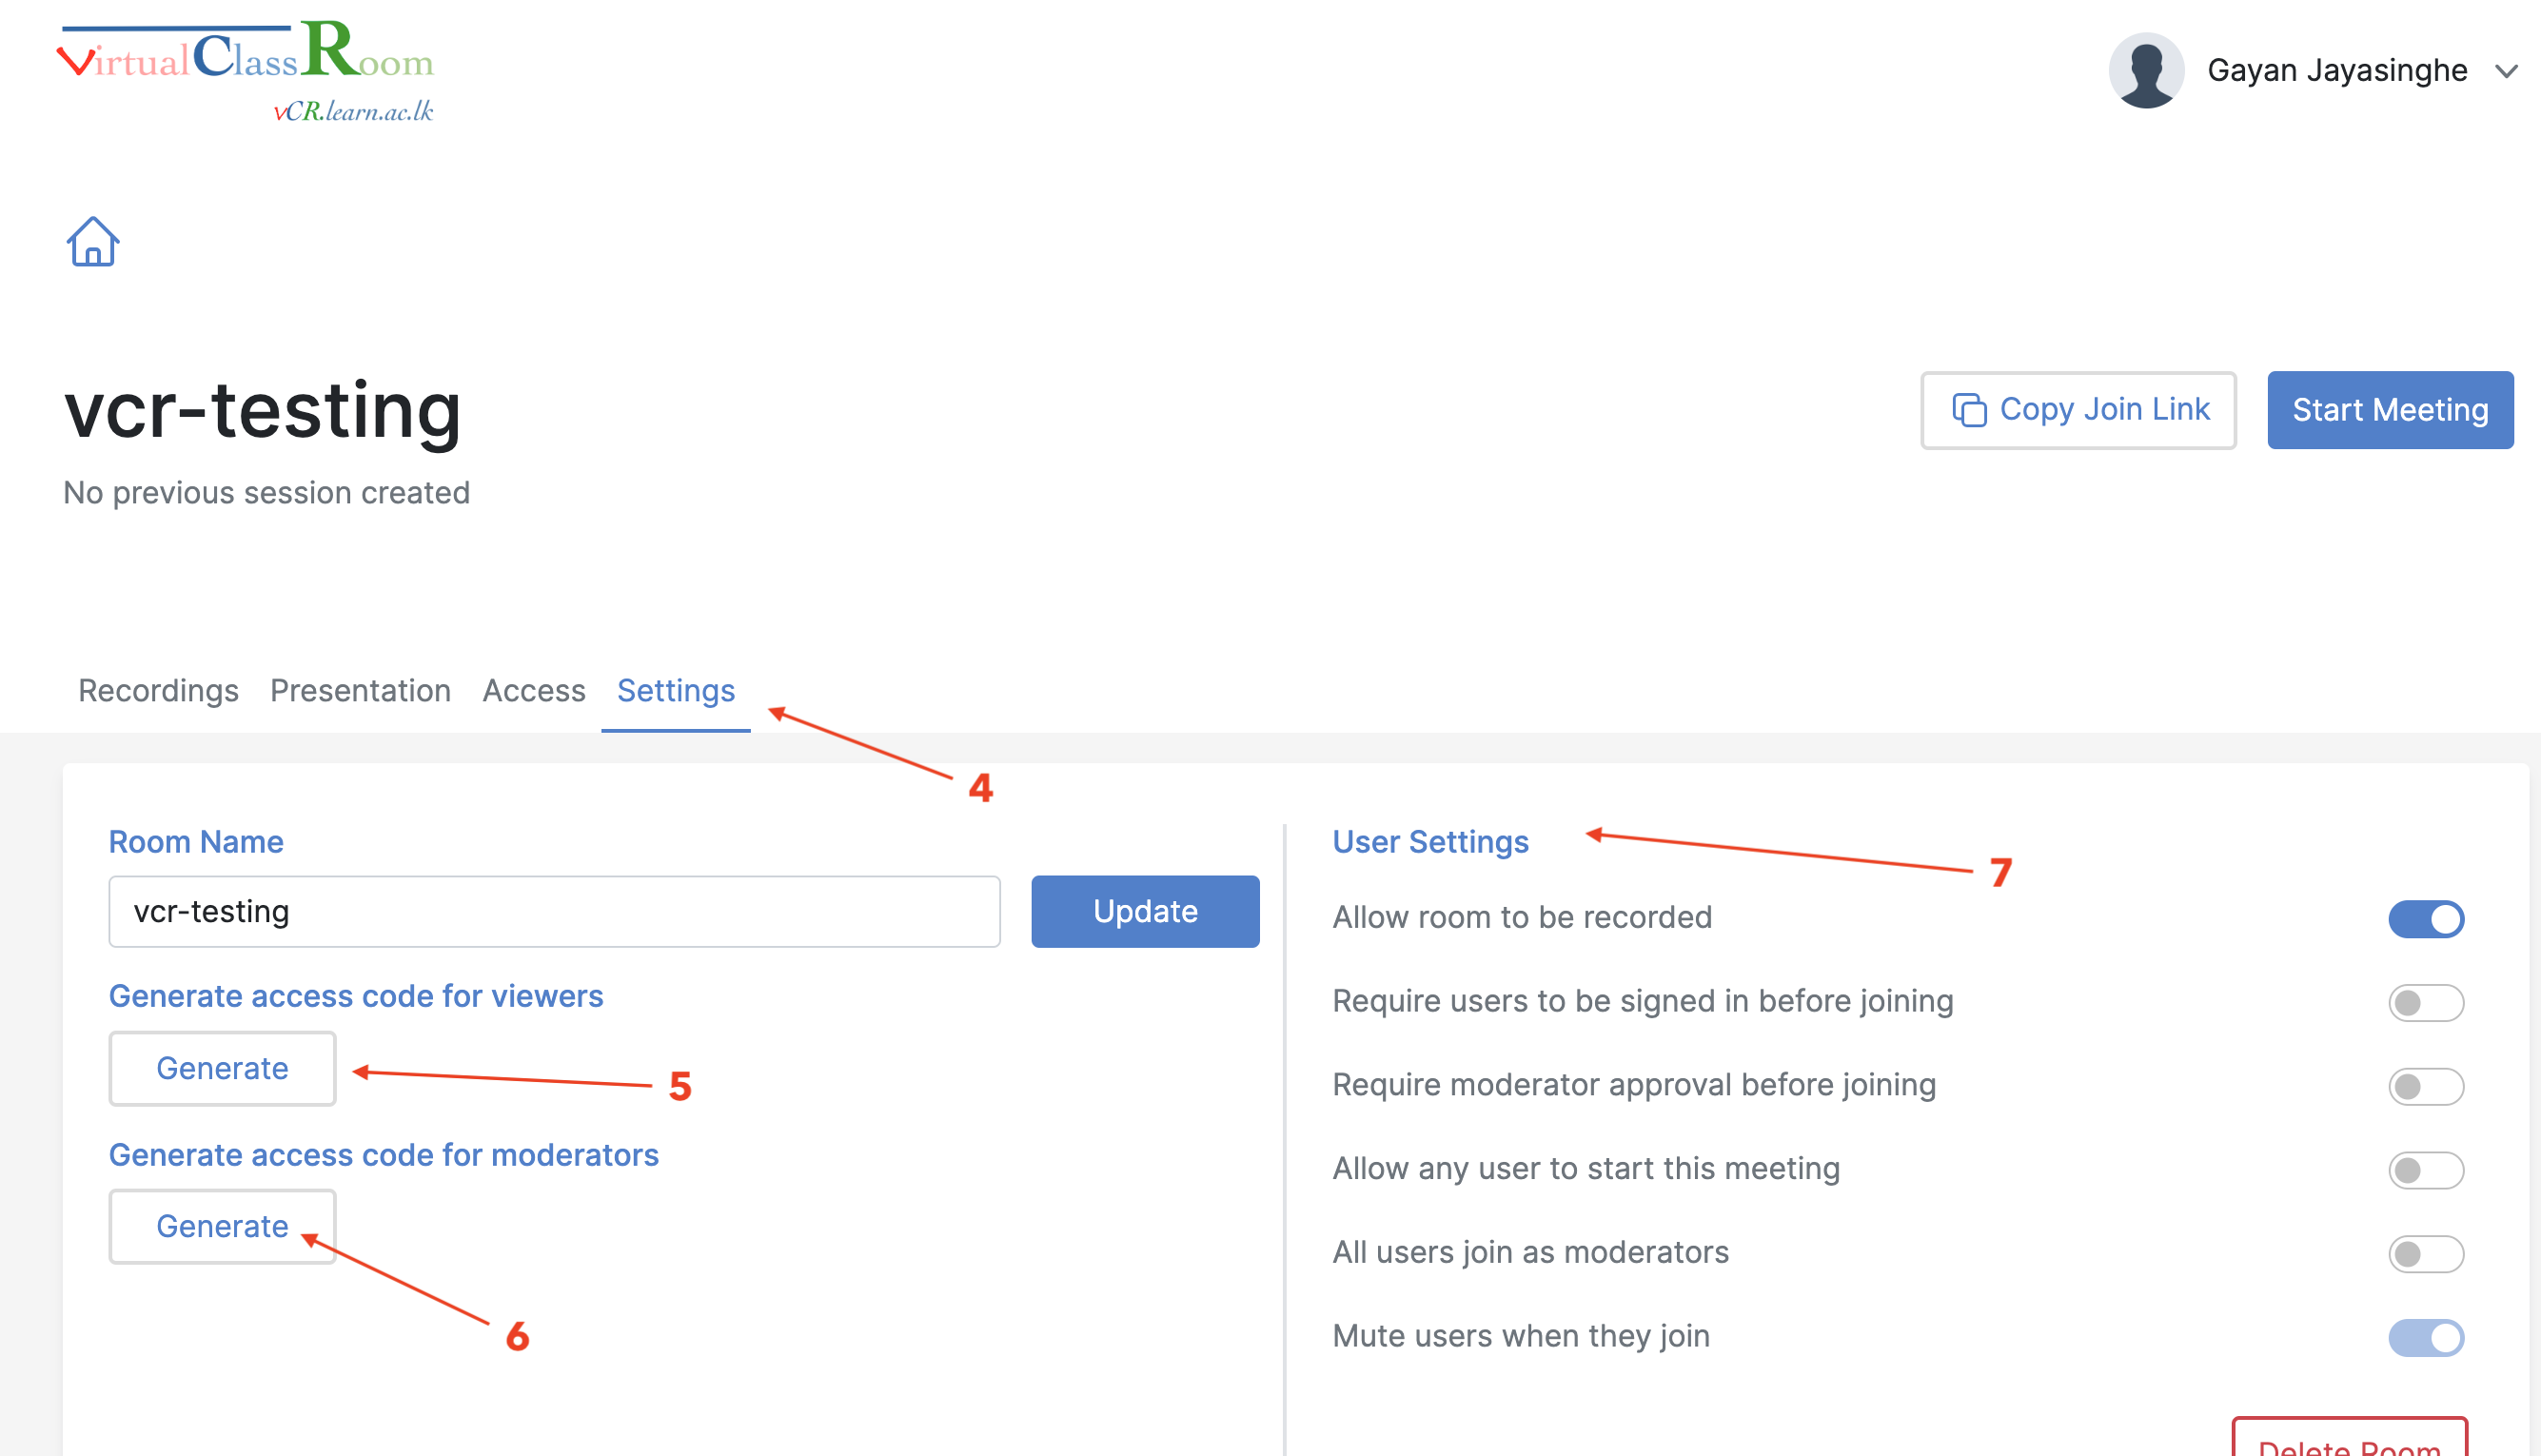
Step 4: Manage Room Settings
- After creating, your room will now appear on the dashboard.
- Click on the room name to open the Room Settings [4] panel.
Here you can configure:
Access Control
- Generate Access Code for Viewers [5] – Share with students.
- Generate Access Code for Moderators [6] – For teachers/co-hosts.
User Settings [7]
- Allow room to be recorded
- Require users to be signed in before joining
- Require moderator approval before joining
- Allow any user to start the meeting
- All users join as moderators
- Mute users when they join
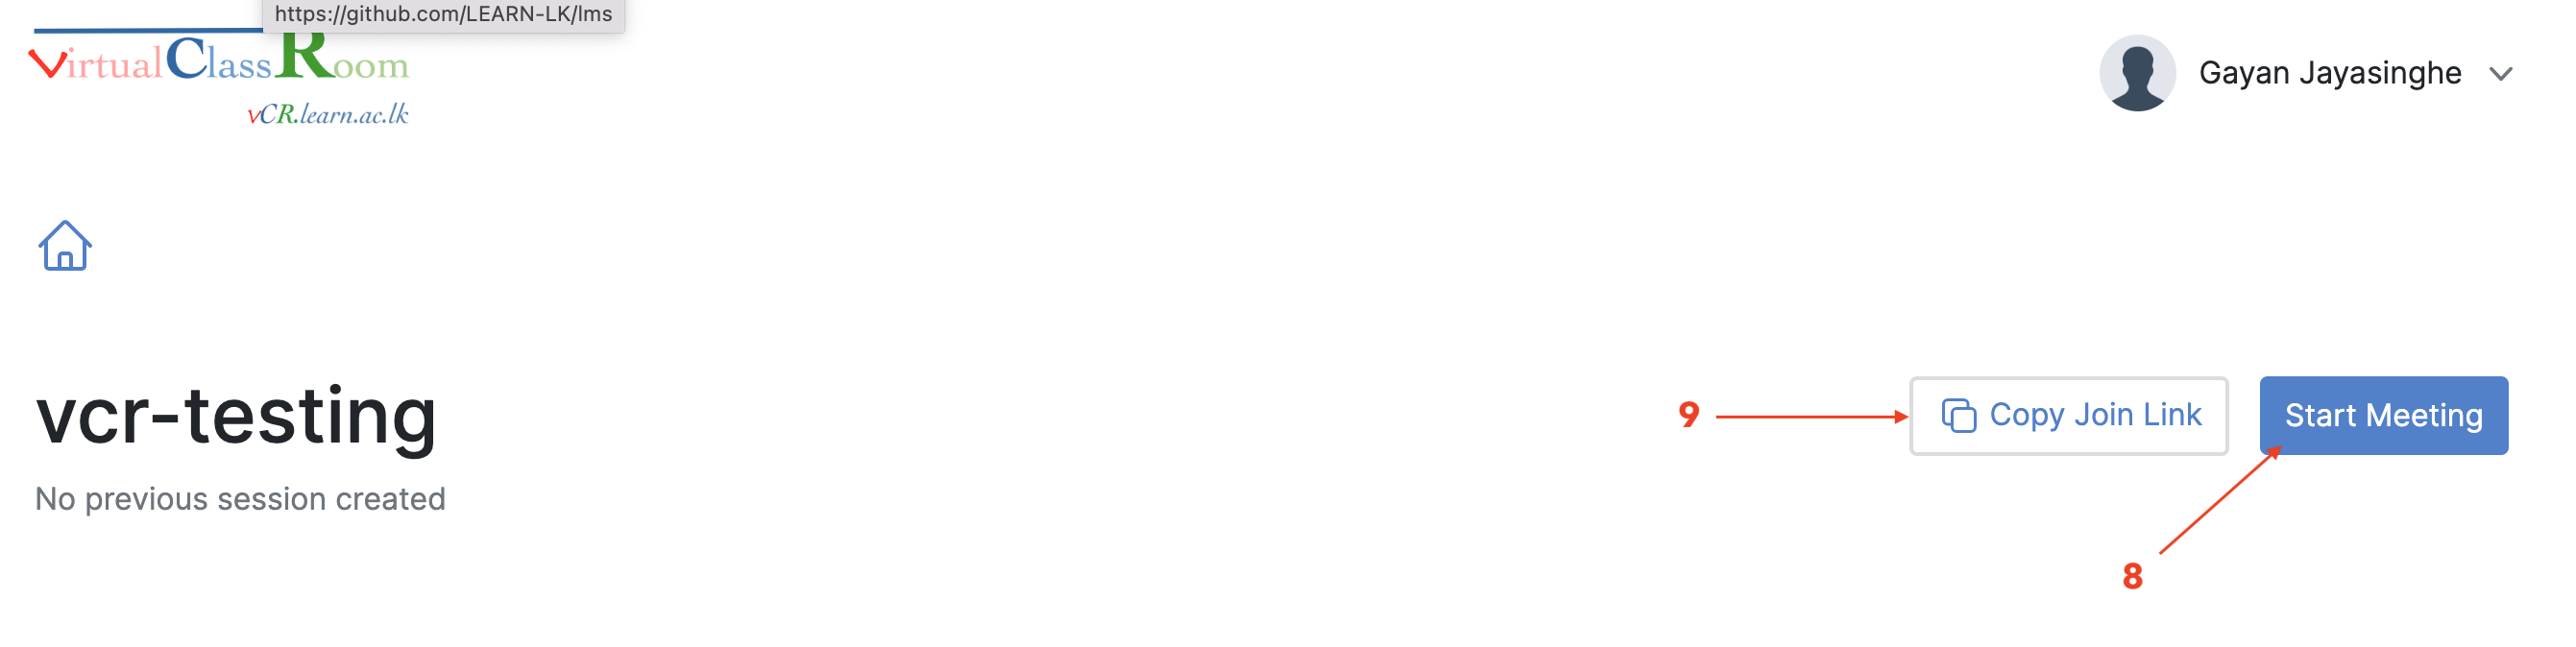
Step 5: Start or Share the Meeting
- Click “Join Room” to start the session.
- Copy the room link and share it with participants via email, LMS, or chat.
Optional: Reuse or Edit Room
- You can reuse the same room for recurring sessions.
- To edit details later, go back to the dashboard and click on the room.
How to Delete a vCR Room
Step 1: Open the Room and Go to Settings
- On your dashboard, click on the room name to open it.
- Then go to the Settings tab (usually on the side or top menu).
- Scroll down to the bottom of the User Settings section.
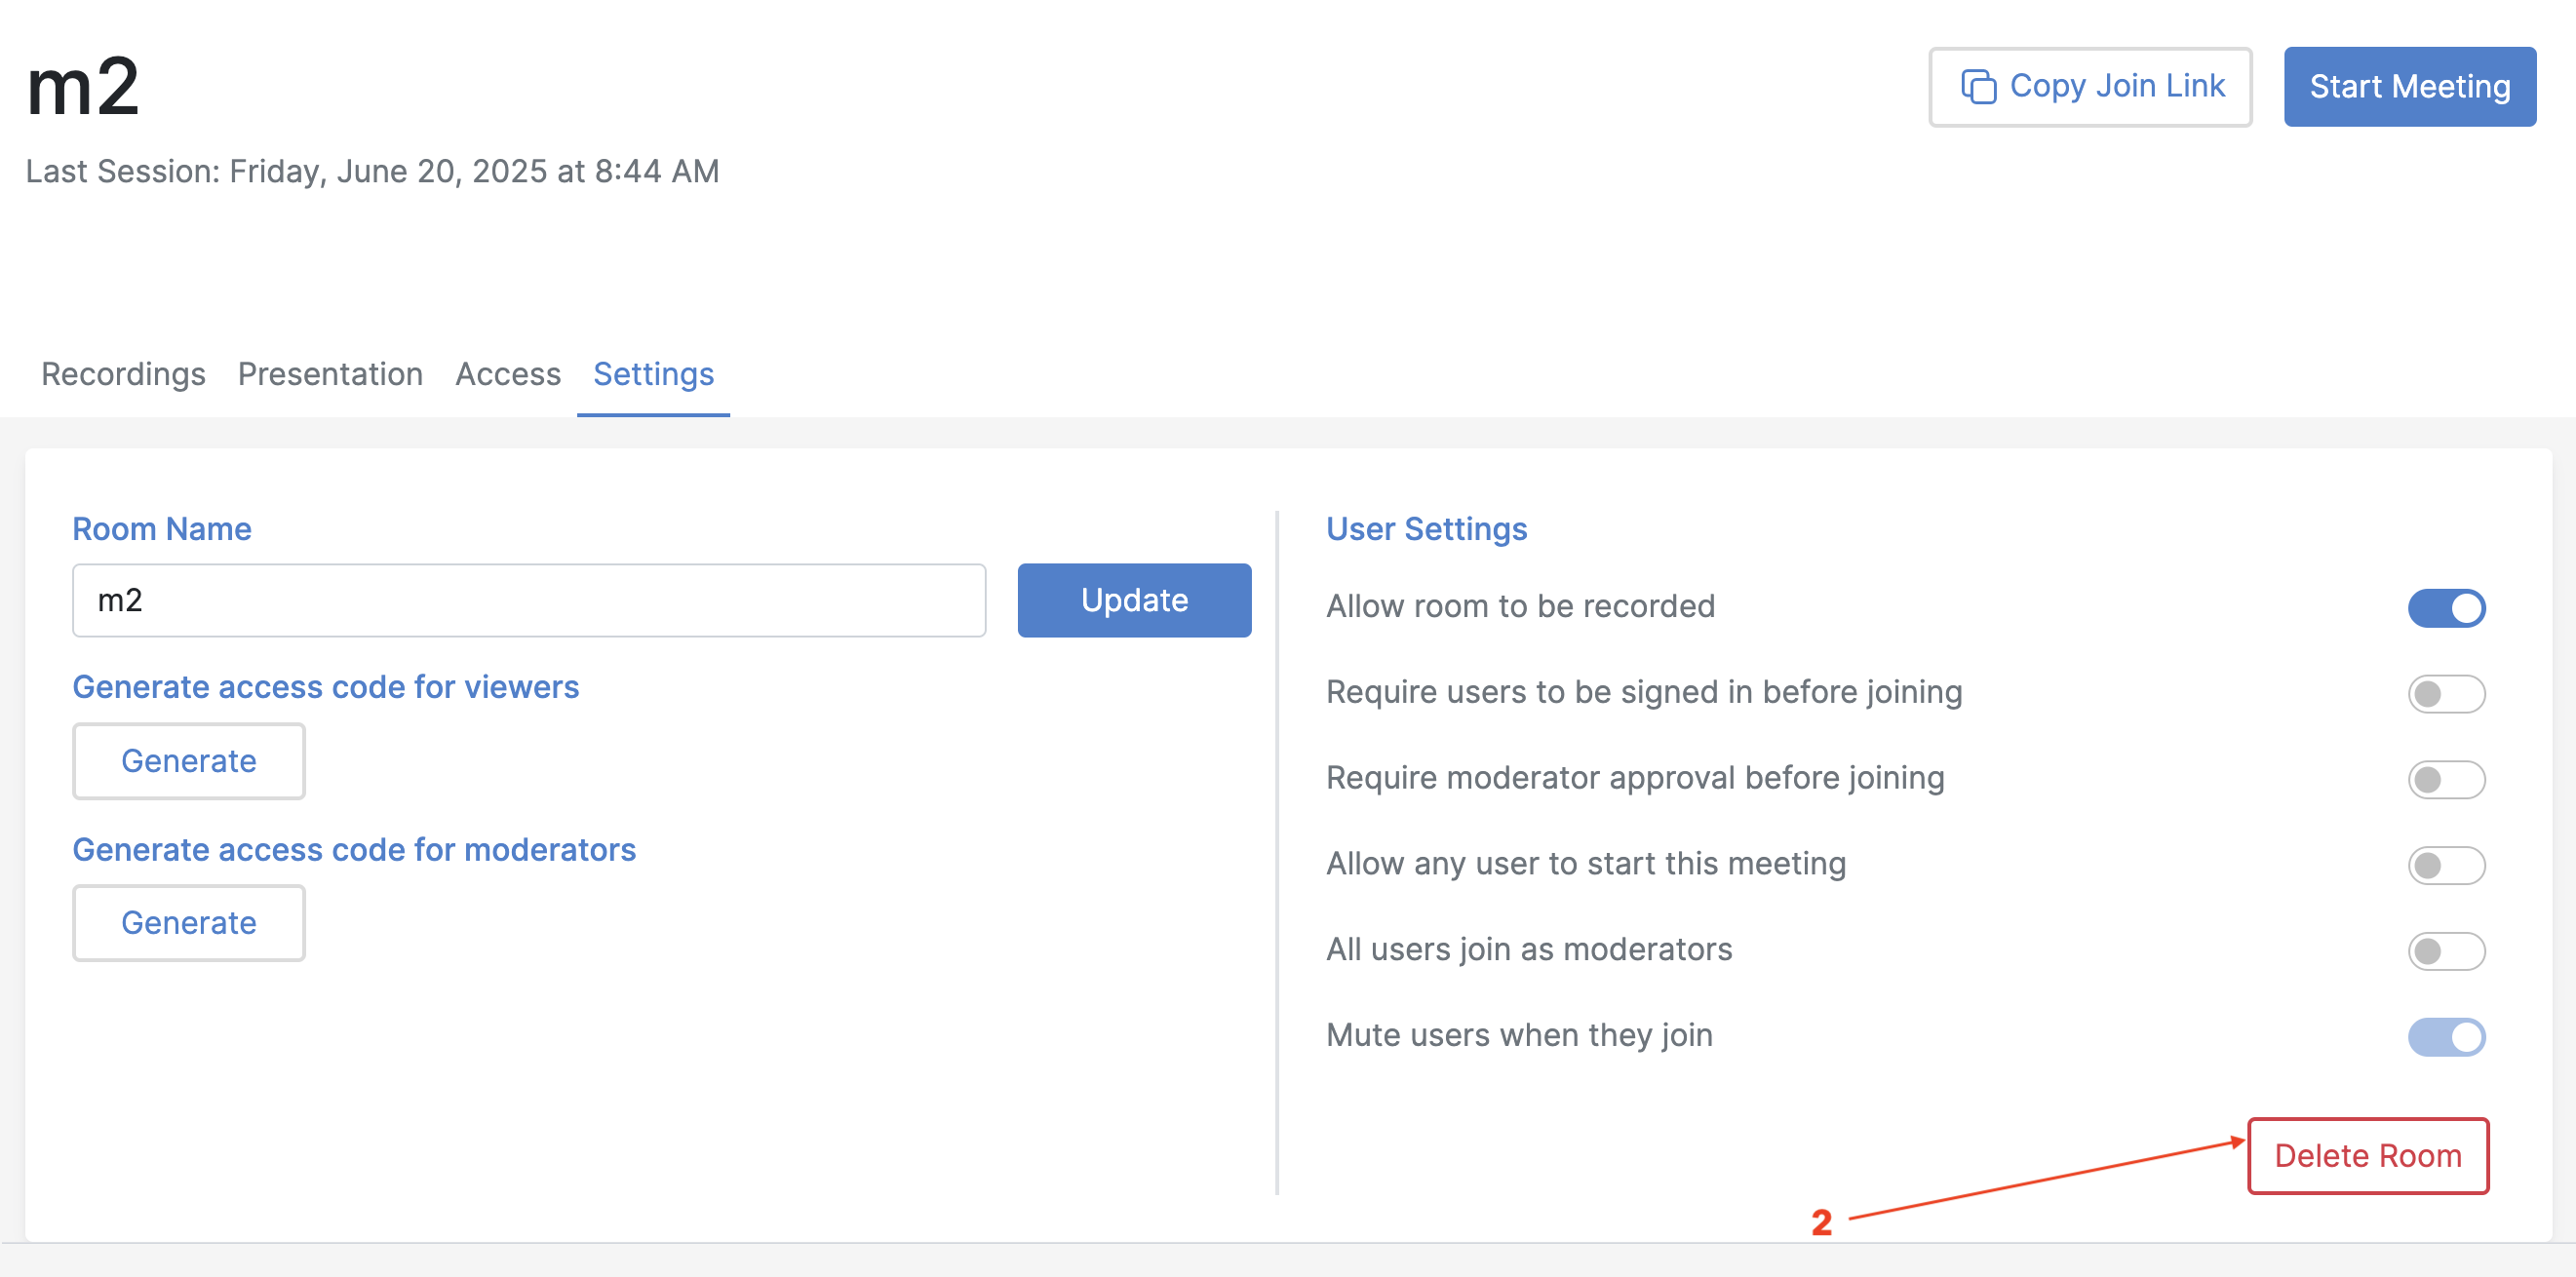
- You will see the “Delete Room” button.
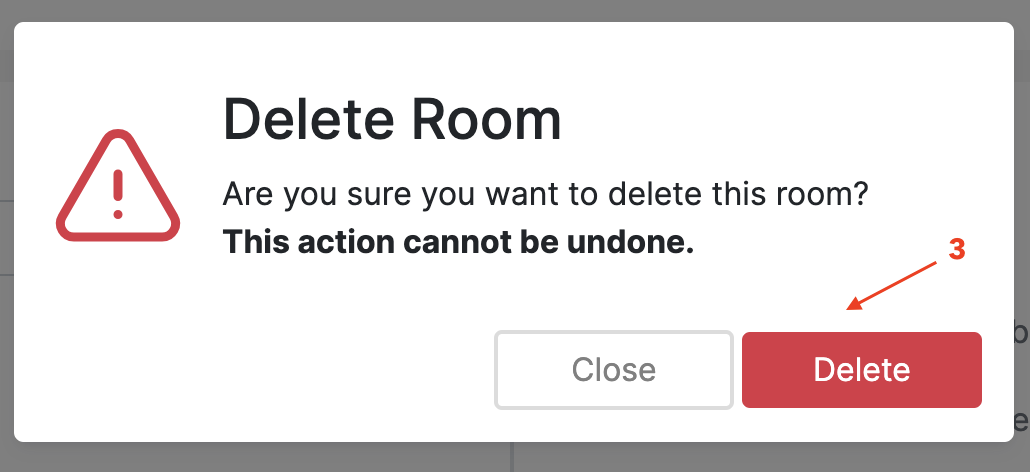
Step 2: Confirm Room Deletion
- Click the “Delete Room” button.
- A popup message will appear:
"Are you sure you want to delete this room? This action cannot be undone." * Click “Delete” to confirm.