Site-Backup & Restore
Move Your WordPress Site Easily with UpdraftPlus.
So you’re shifting your WordPress site — maybe from a test domain like mywordpress.test.learn.ac.lk to a new server or IP address like 192.###.##.###. Whether you're changing hosts or just switching IPs, UpdraftPlus makes the move smooth.
What You Need Before You Start
- Access to both the old site (source) and new site (destination)
- UpdraftPlus plugin installed on both sites
First: Install UpdraftPlus Plugin
You’ll need this plugin on both the old site and the new one.
On Both Old and New WordPress Sites:
-
Log in to your WordPress Dashboard Example:
http://your-site/wp-admin -
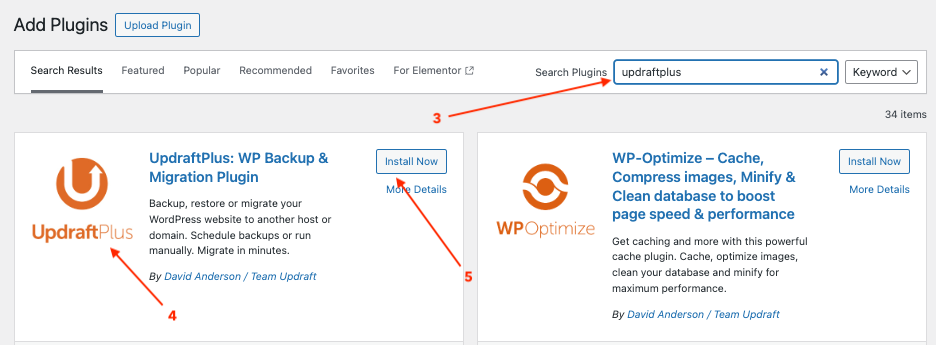
Go to: Plugins [1] → Add New [2]

- In the search bar, type [3]:
UpdraftPlus
-
Find “UpdraftPlus WordPress Backup Plugin” and click: Install Now [5]
-
Once installed, click: Activate[6]
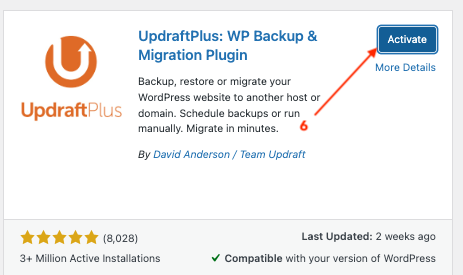
You’re now ready to start the backup and migration process!
Step 1: Pack Up Your Old Site (Create a Backup)
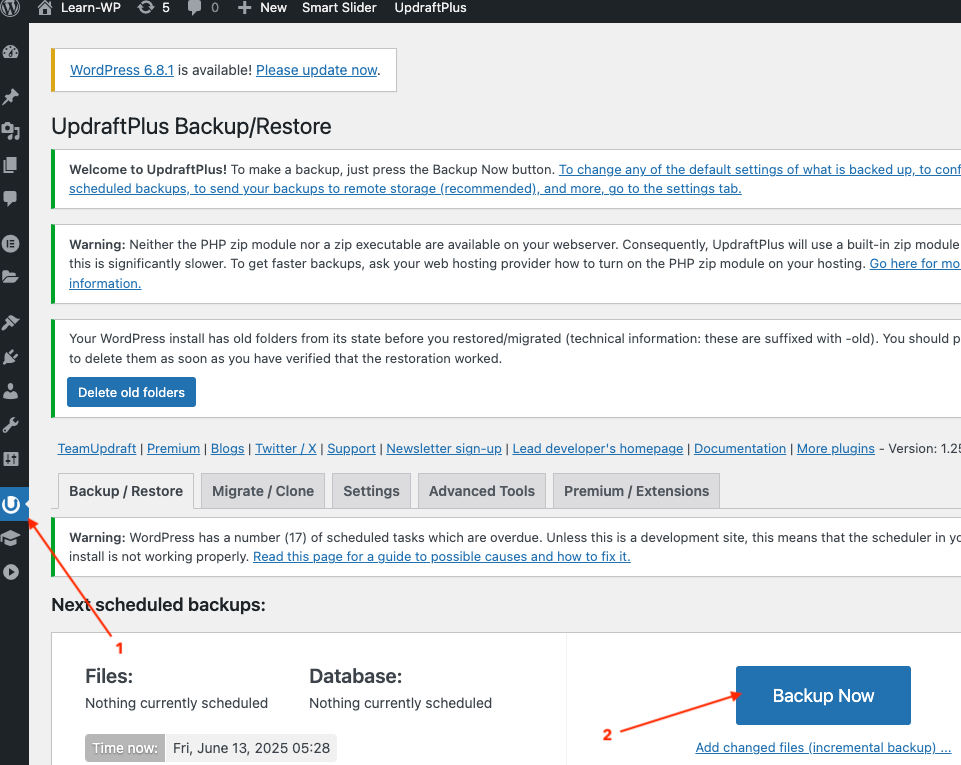
- Go to: Settings → UpdraftPlus Backups
-
Click Backup Now [2]
 3. In the popup, check [3]:
 -
Include your database
- Include your files
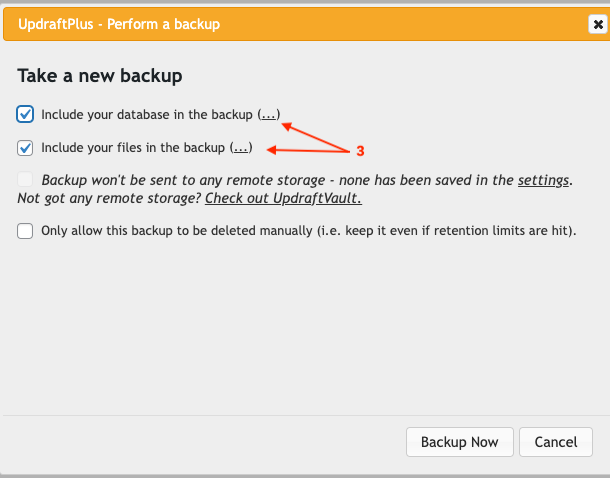
- Click Backup Now again and wait
When it’s done, you’ll see your backup listed under Existing Backups.
-
Click on each item to download [4]:
-
Database PluginsThemesUploads-
Others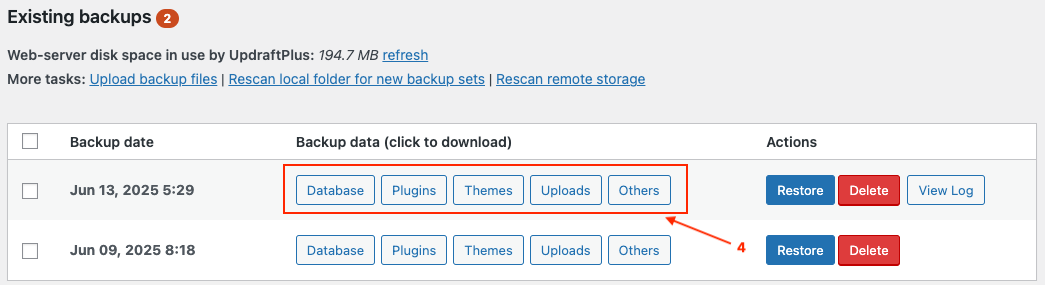
Save these files to your computer — they are your complete website.
Step 2: Prepare the New Site
Now let’s get your new WordPress site ready.
-
Install WordPress on your new server or IP address Example:
http://192.248.##.### -
Log in to your new site’s dashboard
-
Just like before, install the UpdraftPlus plugin:
-
Go to: Plugins → Add New
- Search for
UpdraftPlus -
Click Install Now, then Activate
-
Once activated, go to: Settings → UpdraftPlus Backups
Step 3: Bring In the Backup
Now it’s time to “unpack” your old site.
-
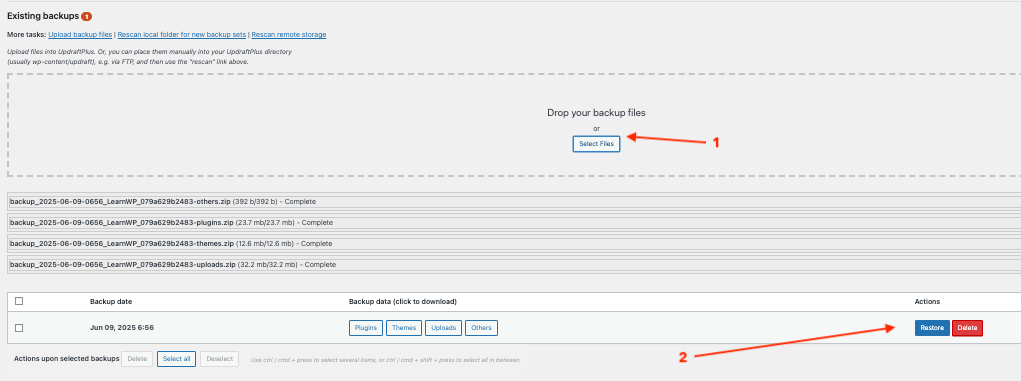
In UpdraftPlus, scroll down to the section labeled “Upload backup files”
-
Drag and drop the five backup files you downloaded earlier (from Step 1)
-
Once uploaded, they will show up under Existing Backups
Step 4: Restore the Site on the New Server
-
Click the Restore button next to the uploaded backup
-
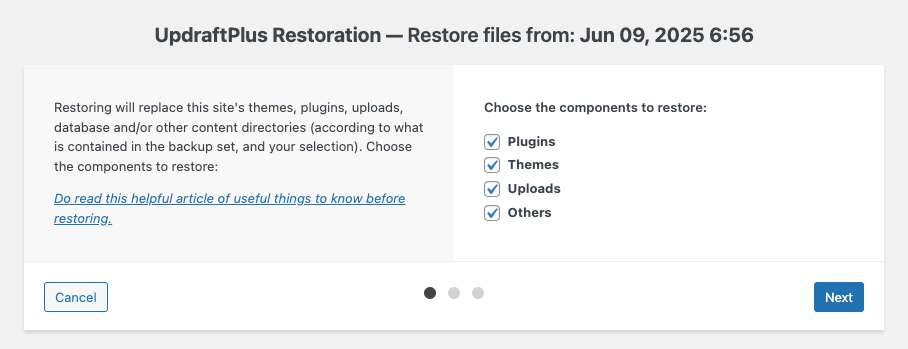
Choose what to restore:
-
Plugins
- Themes
- Uploads
- Others
-
Database
-
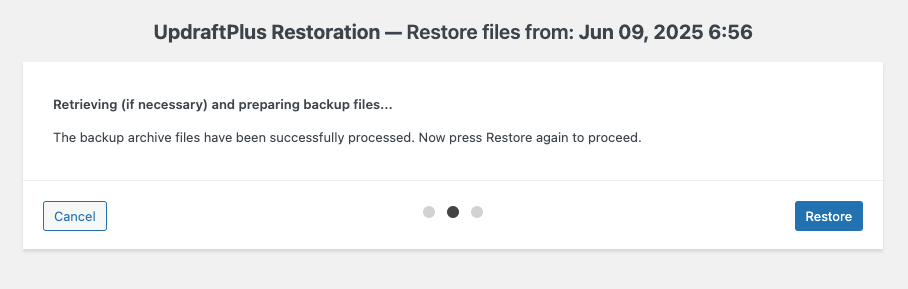
Click Next, then click Restore again
It's Take a short tike — UpdraftPlus will rebuild your entire site exactly as it was.

Step 5: Update the Website Address (If It Changed)
-
Log in to the new site admin (after the restore): Example:
http://192.248.4.55/wp-admin -
Go to: Settings → General
-
Update these two fields:
-
WordPress Address (URL)
- Site Address (URL) Change them to:
http://192.248.##.###
- Click Save Changes
You may get logged out — that’s normal. Just log back in using the new address.
Step 6: Refresh the Links (Permalinks)
This fixes any 404 “Page Not Found” issues that might show up after the move.
-
Go to: Settings → Permalinks
-
Without changing anything, scroll down and click Save Changes
Done! Your site’s internal links and navigation should now work properly.
Tip: Automate Backups (Optional but Recommended)
Now that you’ve installed UpdraftPlus, you can:
- Set up automatic weekly or daily backups
- Save backups to Google Drive, Dropbox, OneDrive, etc.
- Be prepared in case something ever goes wrong