ORCID Sandbox + DSpace Integration Steps
This guide explains how to create an ORCID Sandbox account, verify the registered email address using Mailinator, and connect the Sandbox ORCID iD to DSpace for testing.
Step 1: Create an ORCID Sandbox Account (For Testing)
To test ORCID integration without using a production ORCID account, first create an ORCID Sandbox account.
1. Visit the Registration Page
Open the ORCID Sandbox registration page:
https://sandbox.orcid.org/register
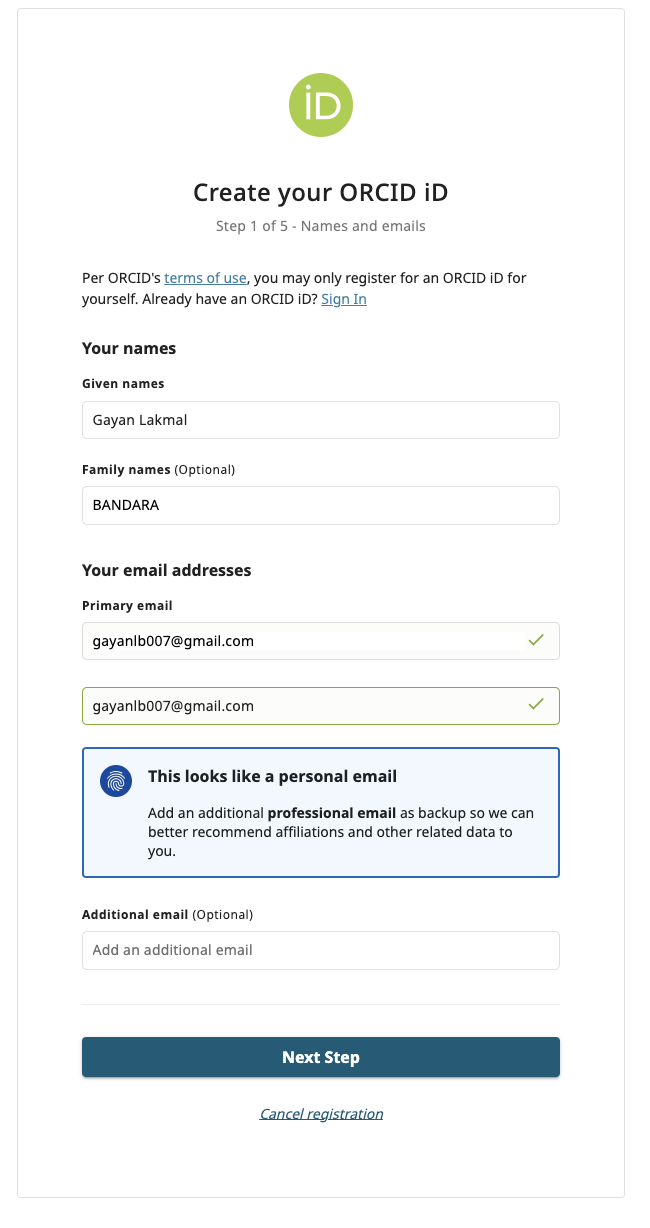
2. Fill in Your Details
Enter your name and other required information.
Important – Primary Email Address:
For this tutorial, use a Mailinator email address as your Primary email.
For example:
glb@mailinator.com
Replace glb with your preferred Mailinator inbox name.
- Primary email: Use your Mailinator address, such as
glb@mailinator.com. - Additional email: You may add your personal email address as an additional email address if the registration form provides this option.
ORCID Sandbox verification messages for this workflow will be accessed through the Mailinator Public Inbox.
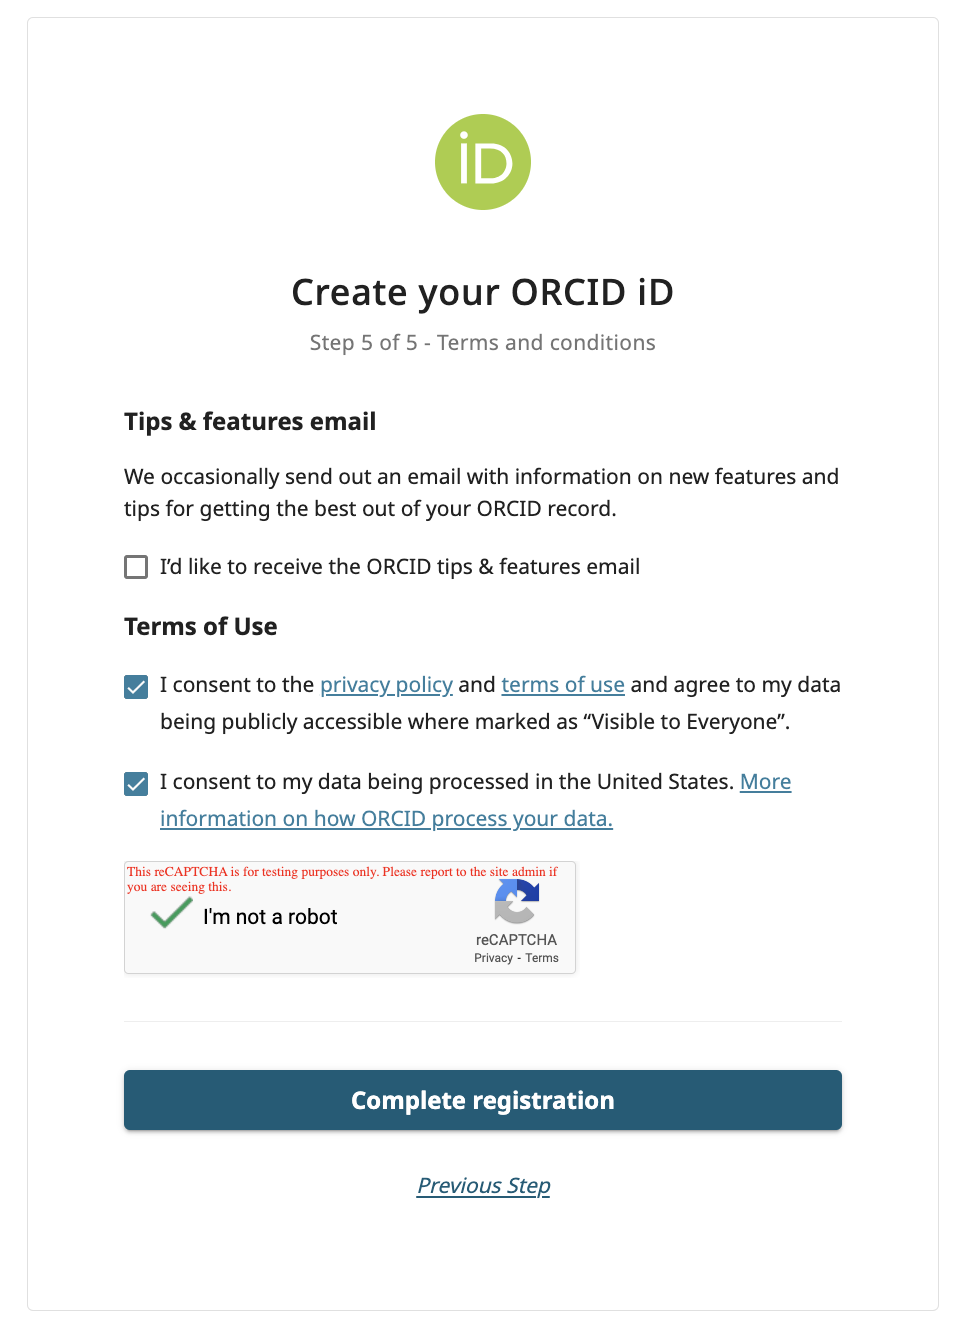
3. Complete the Registration Form
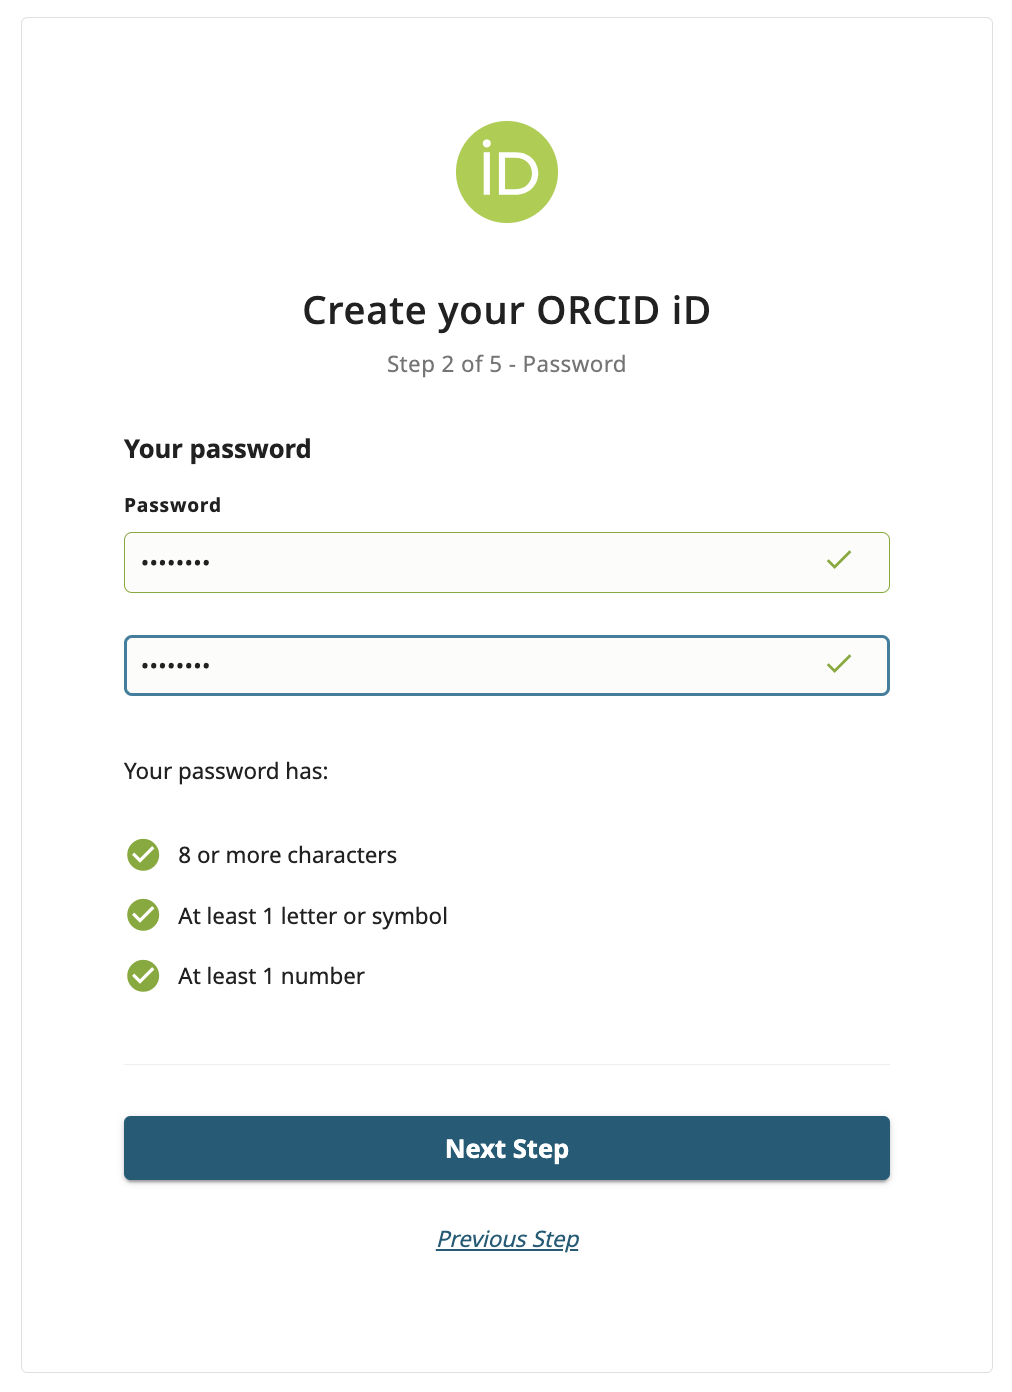
Enter the remaining required details, create a password, and submit the registration form.
Follow any additional instructions displayed by ORCID Sandbox.
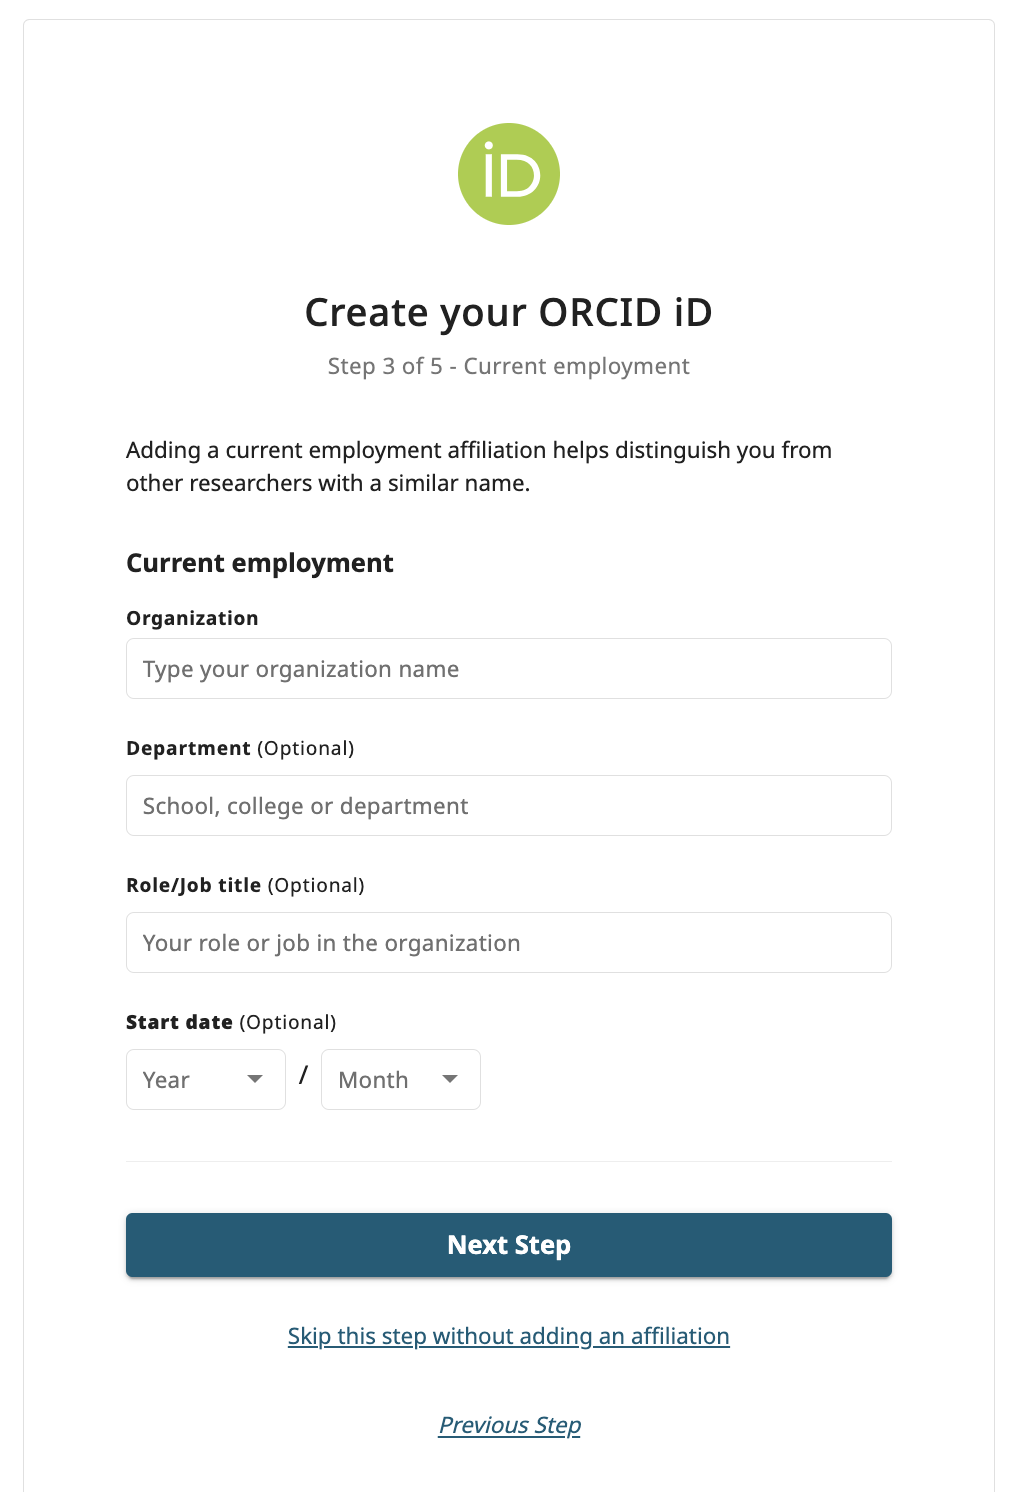
4. Skip the Employment Information (Optional)
If your organization is not listed, for example, LEARN, click Skip this step without adding an affiliation.
5. Set Visibility Preferences
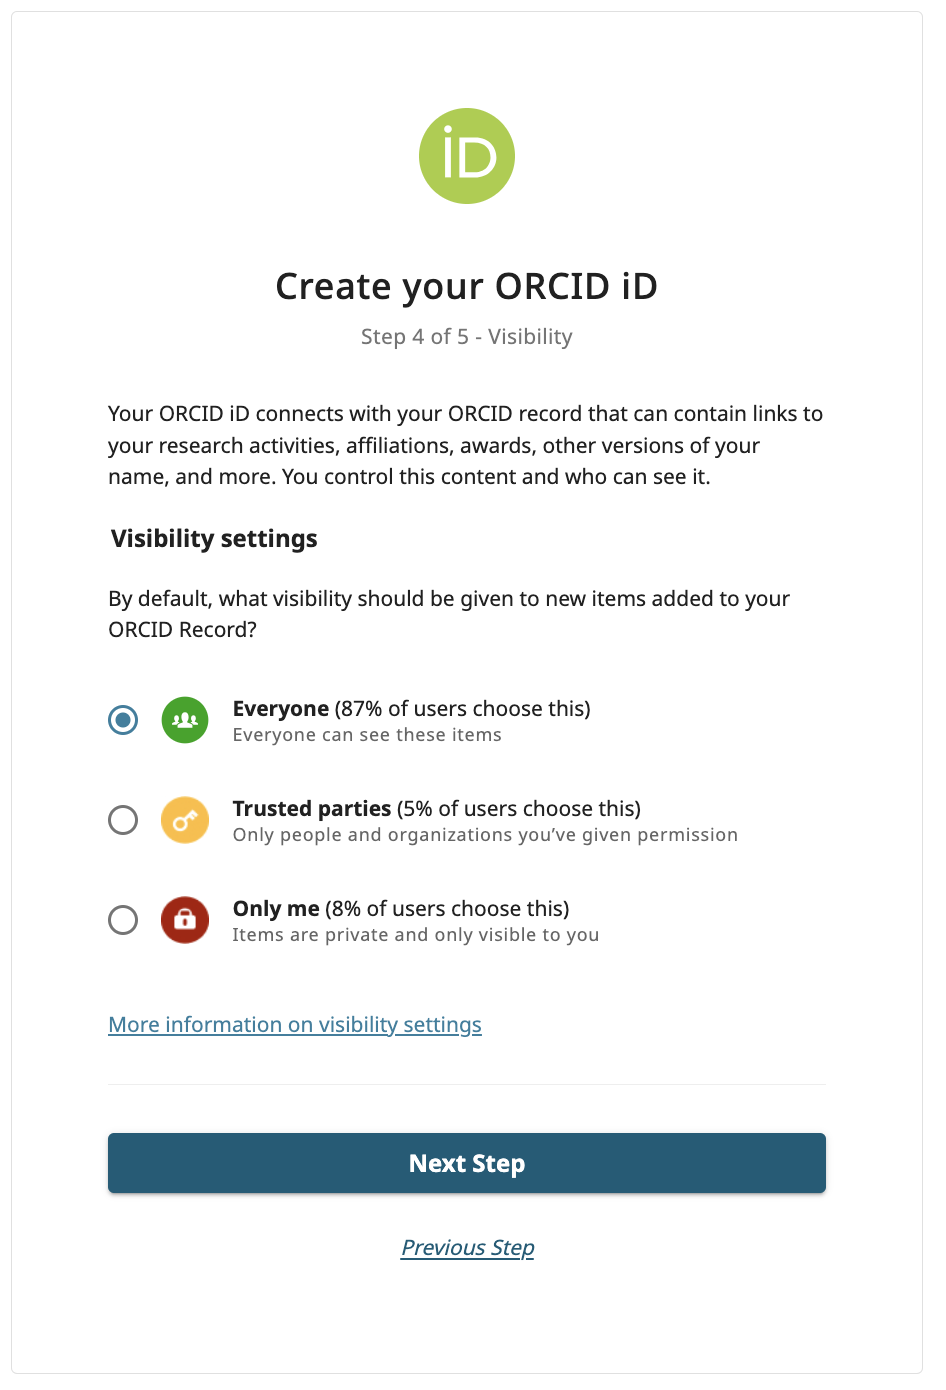
Choose who can see your ORCID profile information.
Available options may include:
- Everyone – Publicly visible information.
- Trusted parties – Information visible to authorized trusted parties.
- Only me – Private information visible only to you.
For testing, select the appropriate visibility option for your demonstration.
Step 2: Verify Your ORCID Sandbox Email Using Mailinator
Important: For this tutorial, the verification email is retrieved from Mailinator's Public Inbox rather than your personal email inbox.
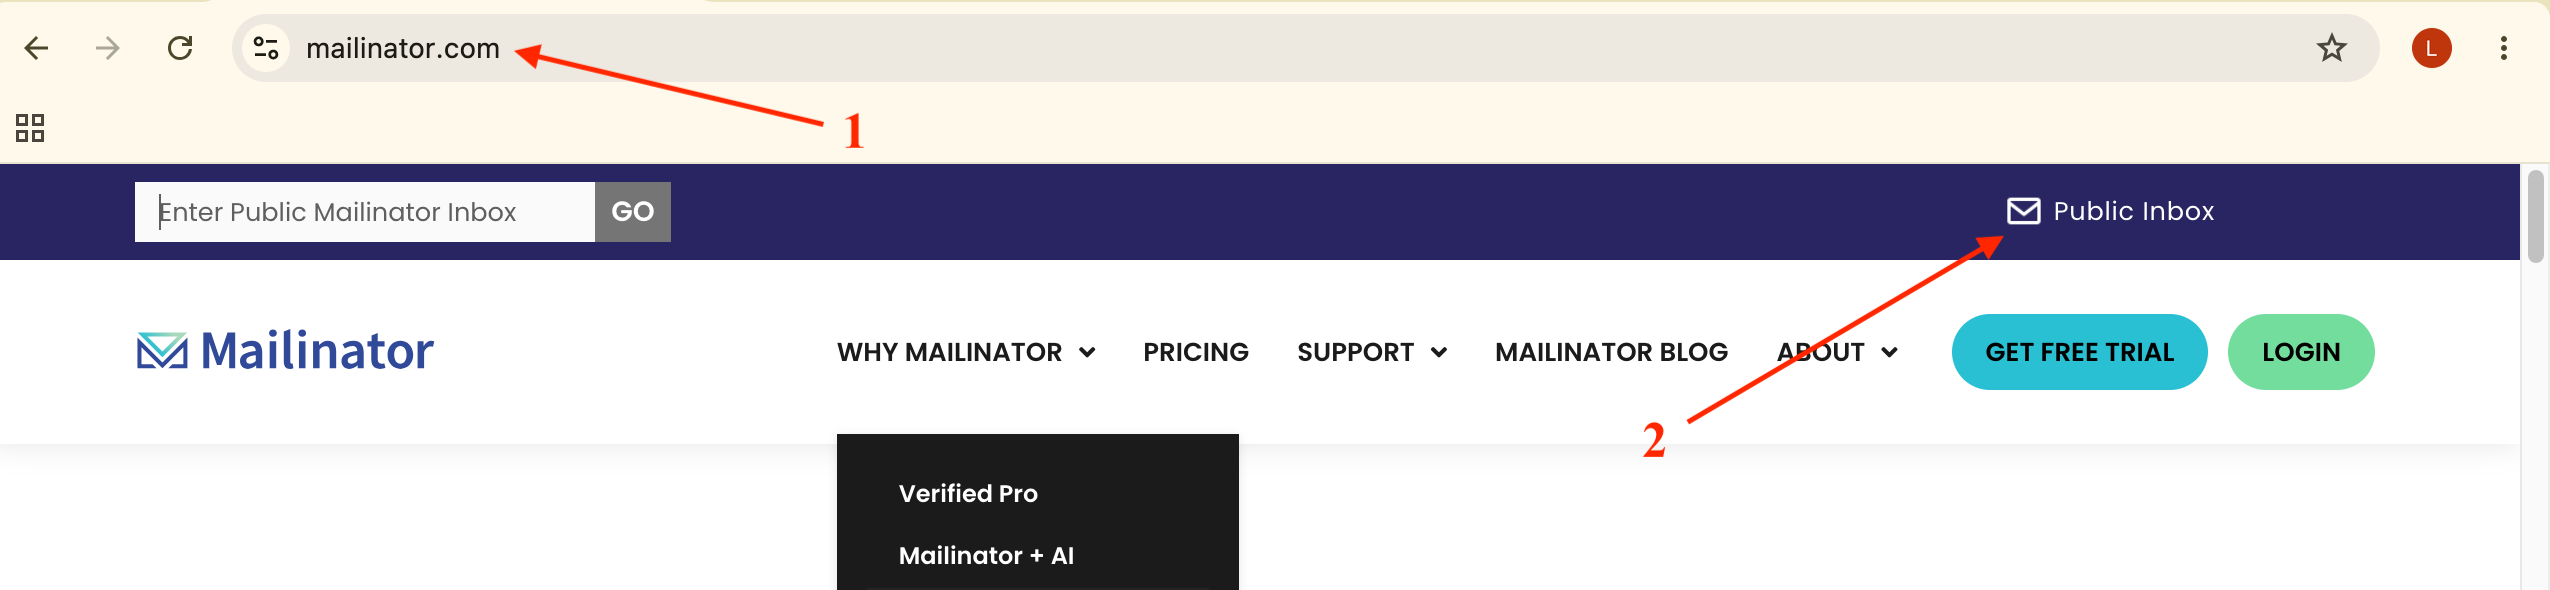
1. Open Mailinator
Visit the Mailinator website [1]:
2. Open the Public Inbox
Click Public Inbox [2] in the top-right corner of the website.
Alternatively, open the Public Inbox directly:
https://www.mailinator.com/v4/public/inboxes.jsp
3. Open Your Mailinator Inbox [3],[4]
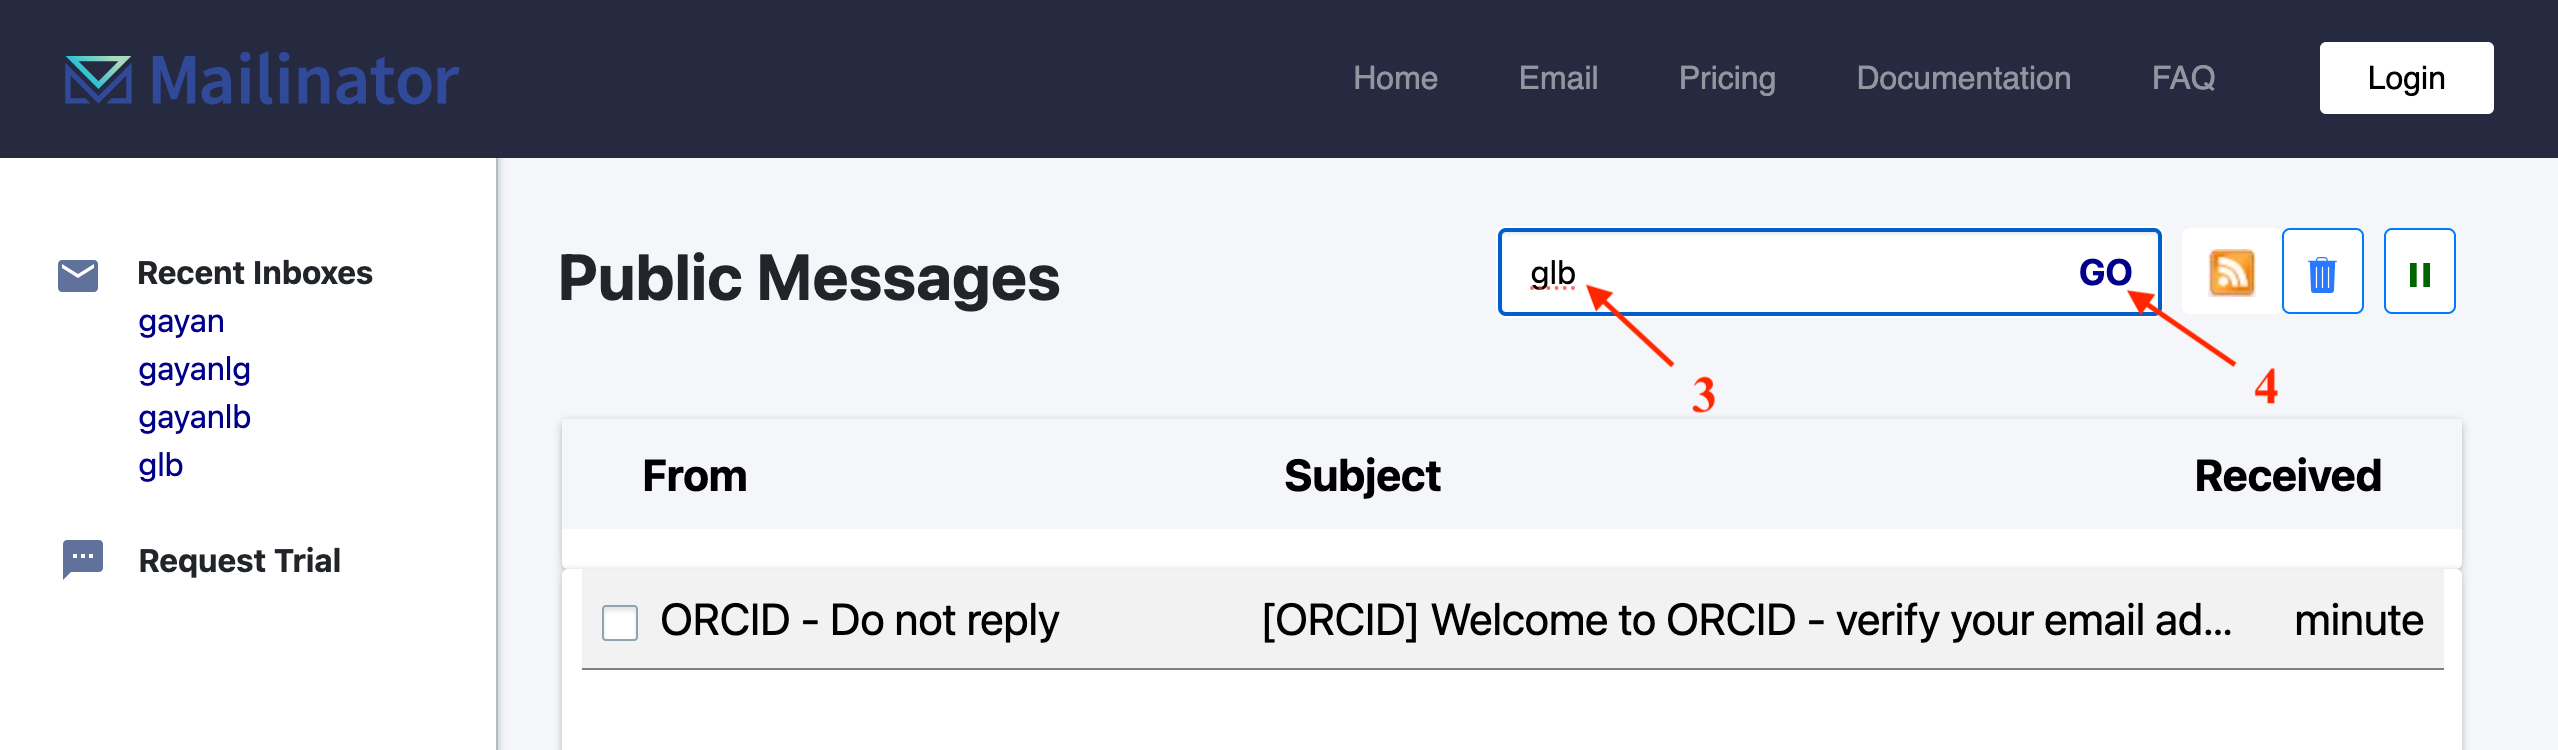
Enter the inbox name that matches the primary email address used during registration.
For example, if you registered using:
glb@mailinator.com
Open the public inbox named:
glb
4. Find the ORCID Verification Email
Locate the verification email sent by ORCID Sandbox.
If the message does not appear immediately, refresh the inbox and check again.
Make sure that the inbox name matches the email address you entered during registration.
5. Verify Your Email Address
- Open the ORCID Sandbox verification email.
- Locate the Verify your email address link.
- Click the link [5].
- Follow the instructions displayed by ORCID Sandbox.
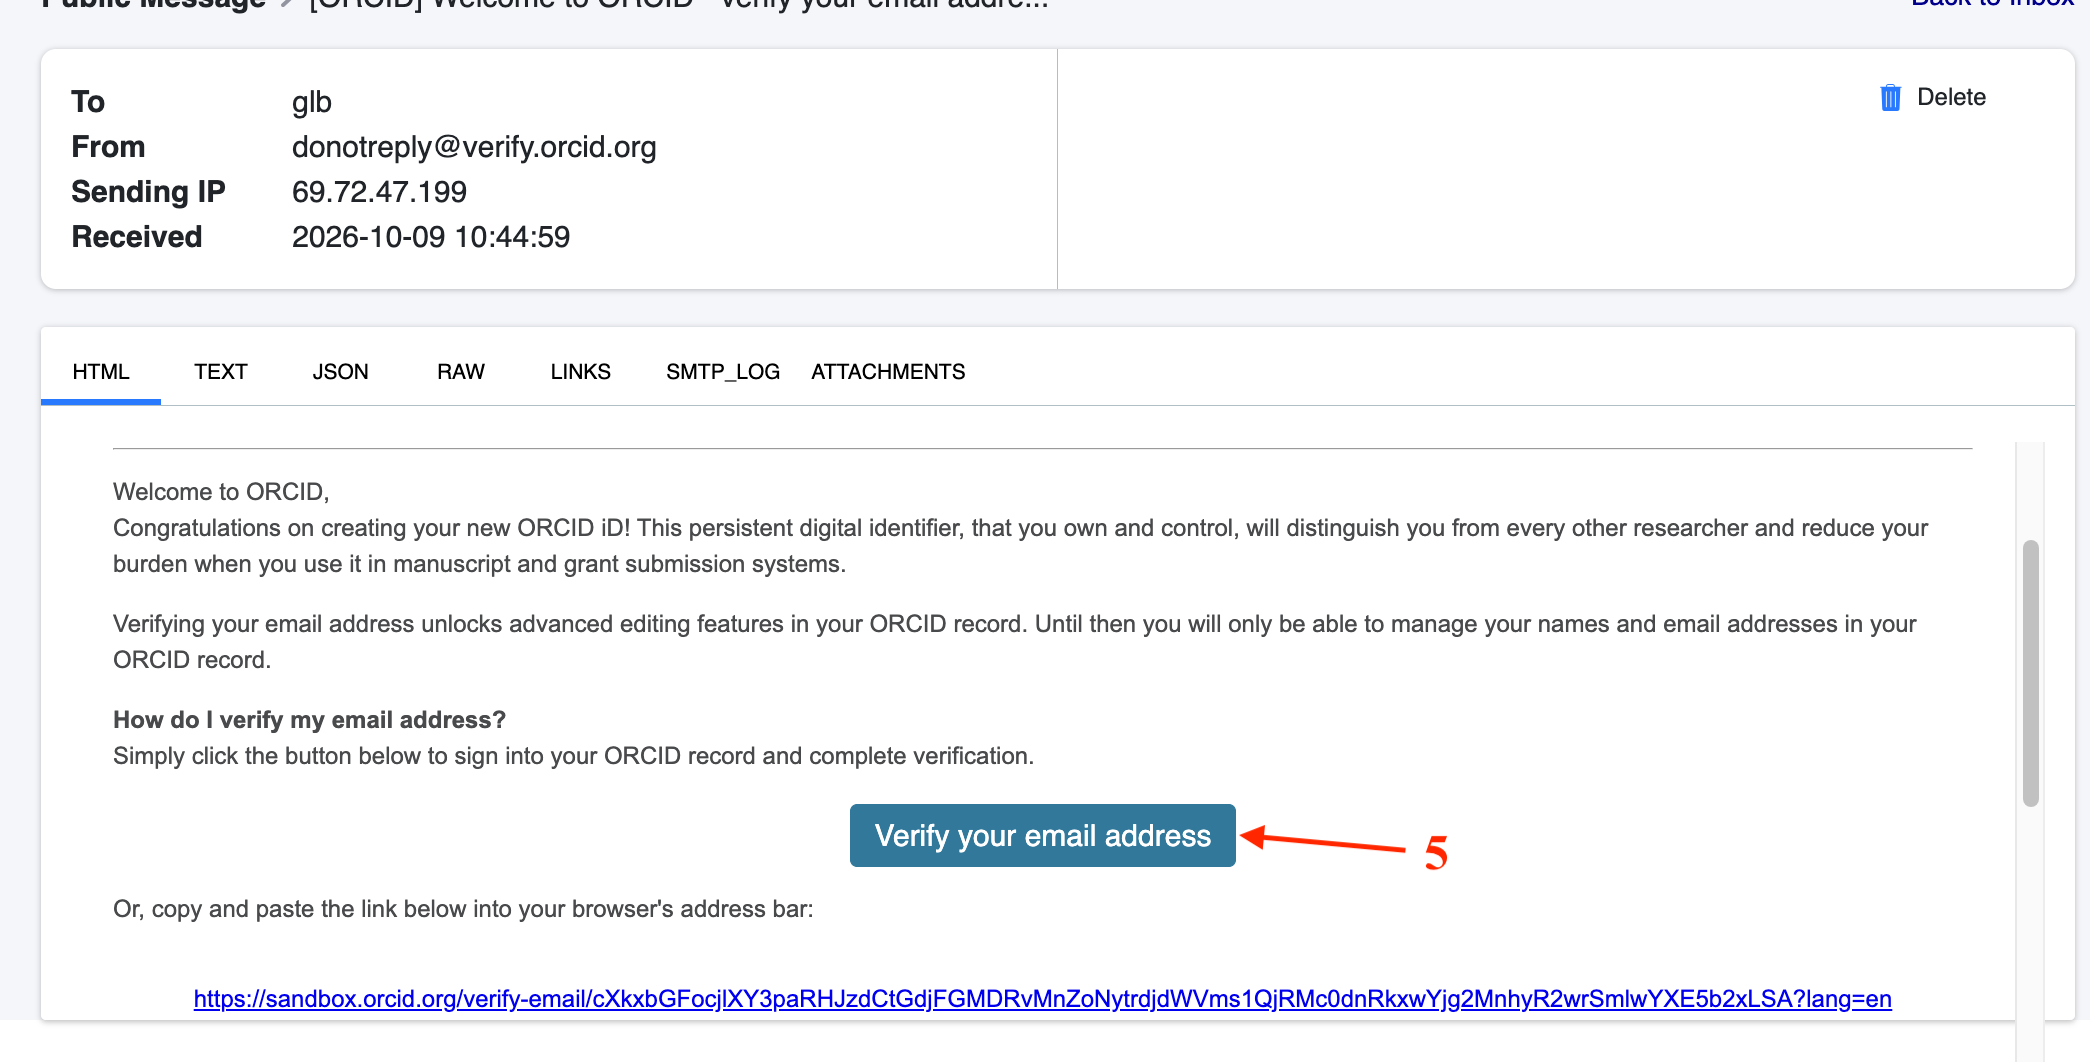
After successful verification, return to the ORCID Sandbox website and continue with your account.
Security note: Mailinator Public Inbox messages are publicly accessible. Anyone who knows the inbox name may be able to read its messages. Use this method only for testing, and never use a public inbox for passwords, confidential information, or sensitive personal data.
Step 3: Access Your ORCID Sandbox Account
- Visit https://sandbox.orcid.org/.
- Sign in using the credentials created during registration.
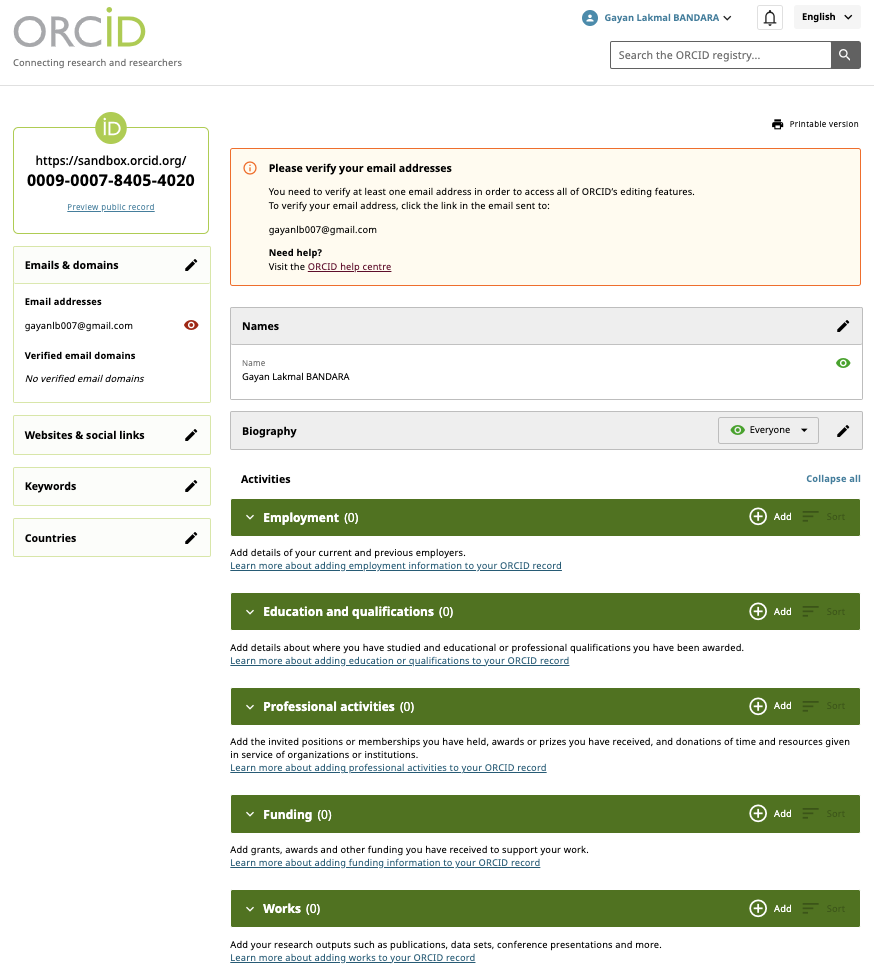
- Confirm that your ORCID Sandbox profile is accessible.
- Locate your Sandbox ORCID iD for use during the DSpace integration test.
Note: A Sandbox ORCID iD is intended for testing and is separate from a production ORCID iD.
Step 4: Link Your ORCID iD with DSpace (Demo Site)
1. Log In to Your DSpace Portal
- Open your institution's DSpace website: https://dspace.ac.lk/
- Log in using your institutional credentials, where applicable, for example, your LEARN institutional account.
- Complete any required institutional authentication steps.
2. Go to Your Profile
Once logged in, click your name or profile icon at the top of the page and select Profile → Update Profile.
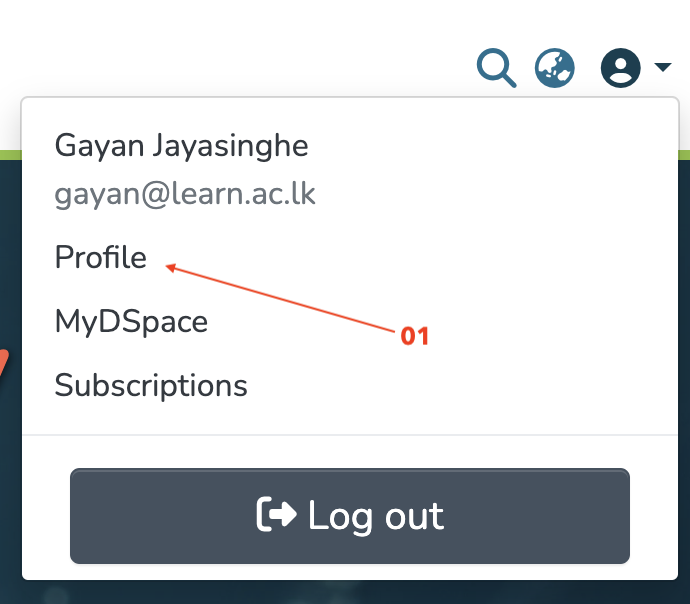
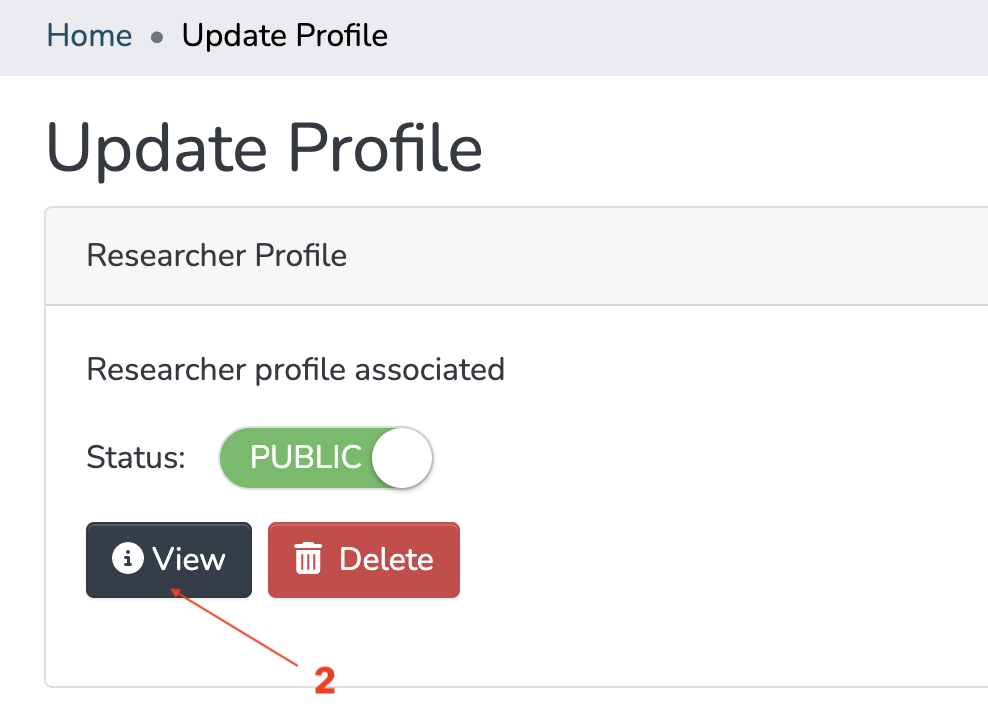
2.1 in a Researcher Profile > Click "Create new"
3. Open ORCID Settings
On your profile page, locate the Click on View button and click it to open the ORCID settings.
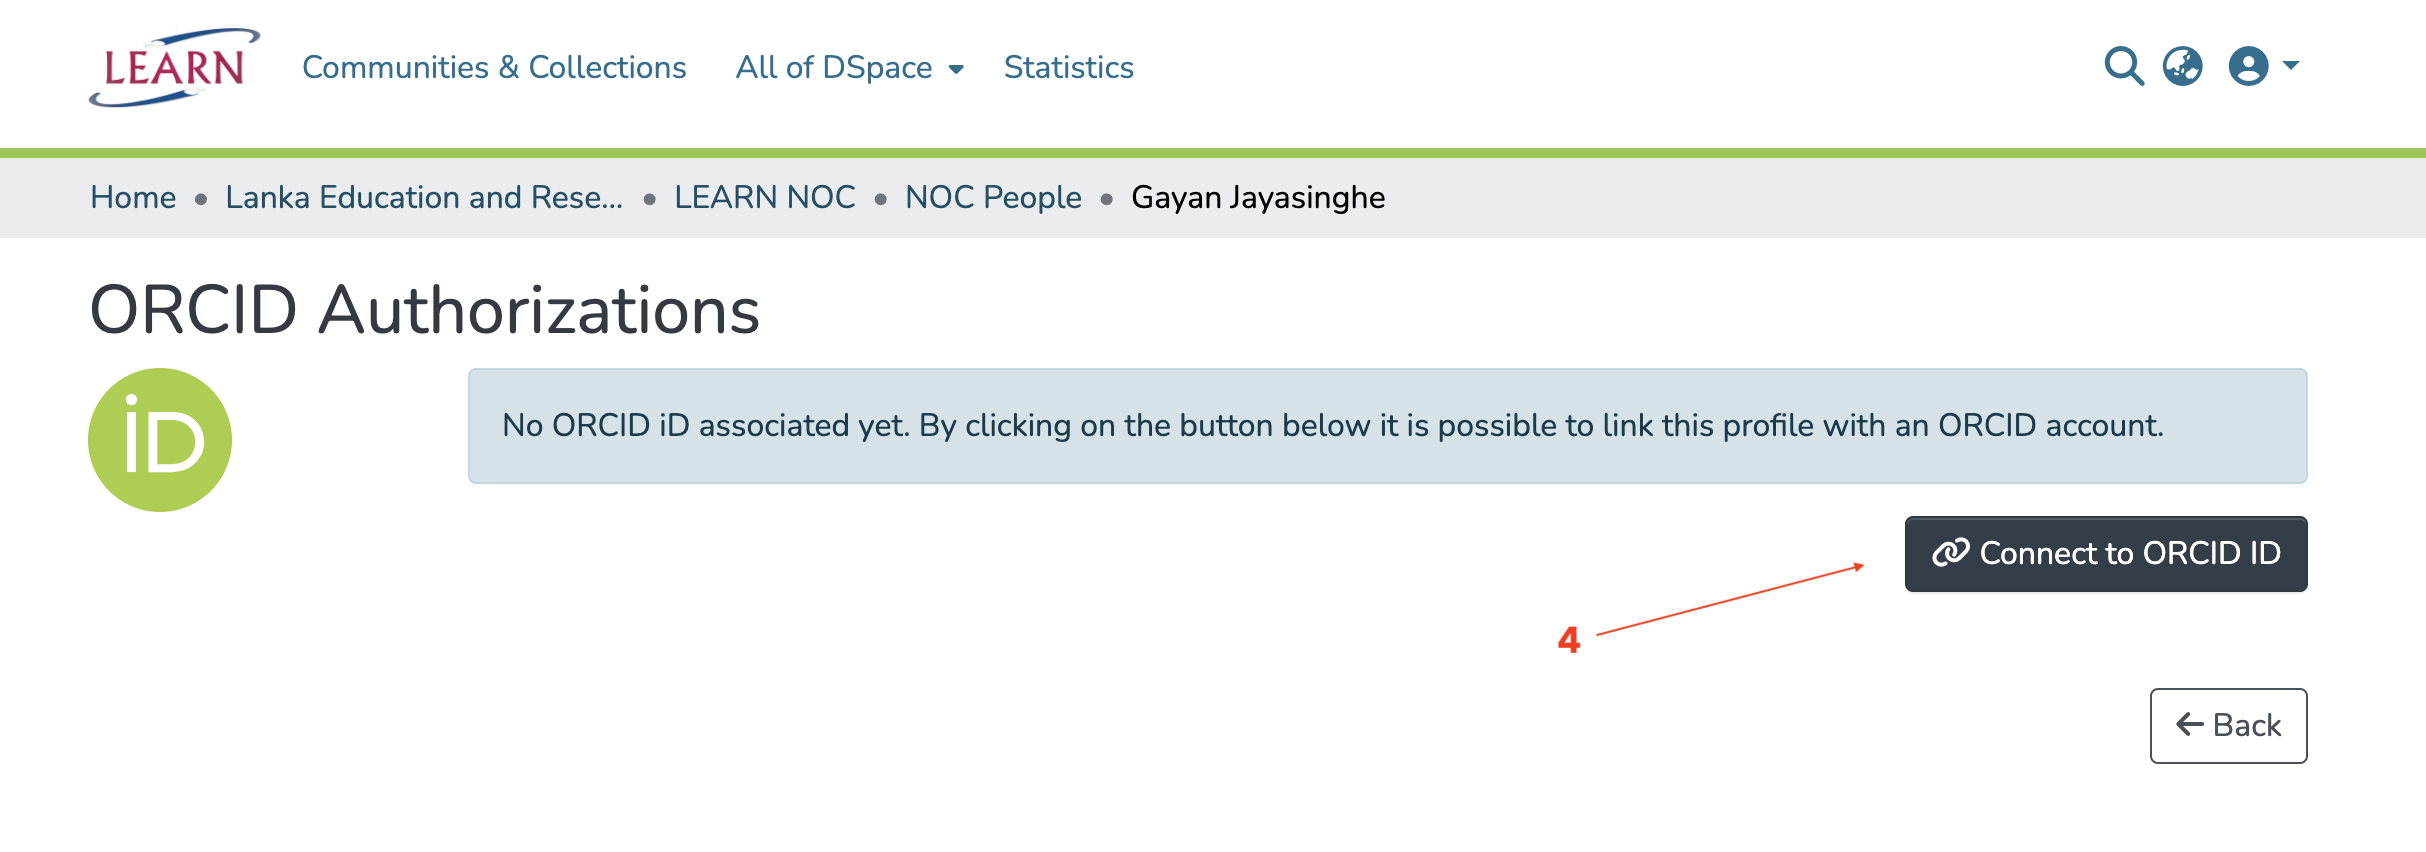
4. Connect Your ORCID iD
You should now be on the ORCID Authorizations page.
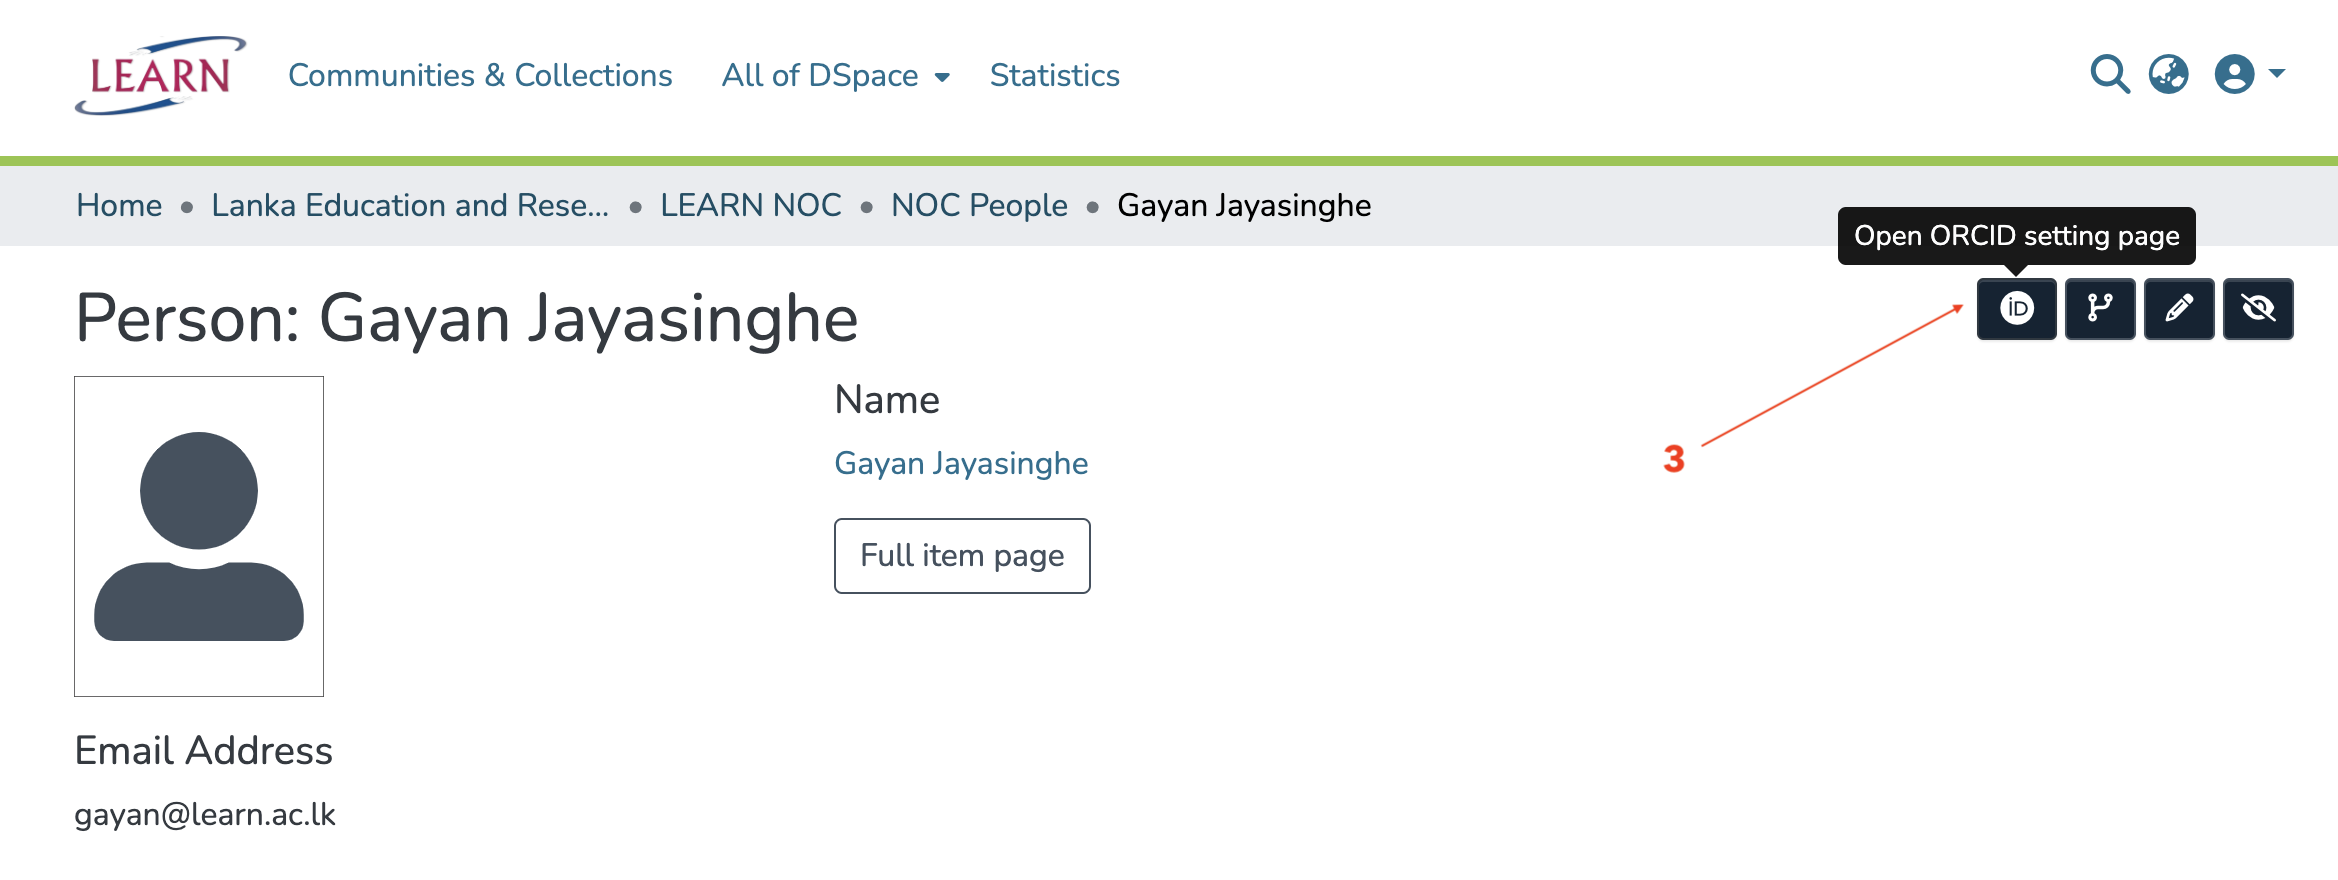
Click Connect to ORCID ID to begin the linking process.
5. Authorize DSpace in ORCID
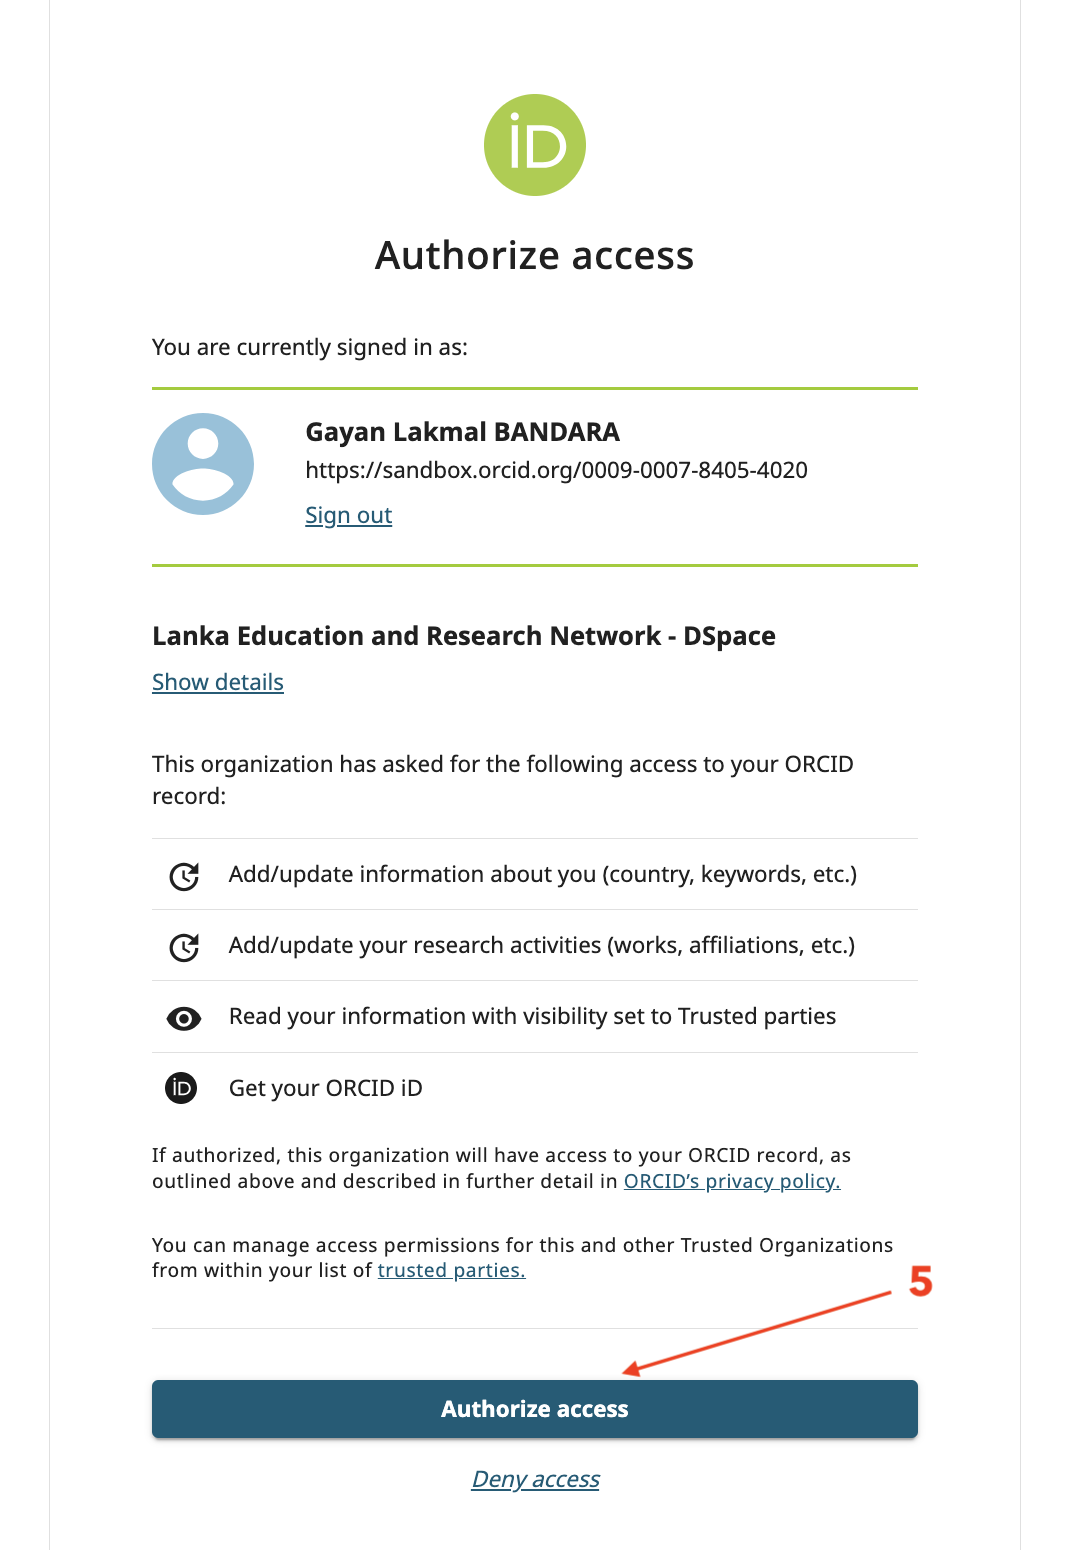
You will be redirected to the ORCID authorization page.
If DSpace is configured to use the ORCID Sandbox:
- Sign in using your ORCID Sandbox account.
- Confirm that you are using the Sandbox environment, not the production ORCID website.
- Review the permissions requested by DSpace. These may include:
- Get your ORCID iD.
- Read trusted-party data.
- Add or update research activities, such as publications.
- Add or update profile information, such as country or keywords.
- Approve the requested permissions if you agree.
- Click Authorize access or the equivalent authorization button displayed.
Important configuration requirement: The DSpace installation must be configured with the ORCID Sandbox API credentials and authorization endpoints for this test. Creating a Sandbox account does not automatically configure DSpace to use the Sandbox.
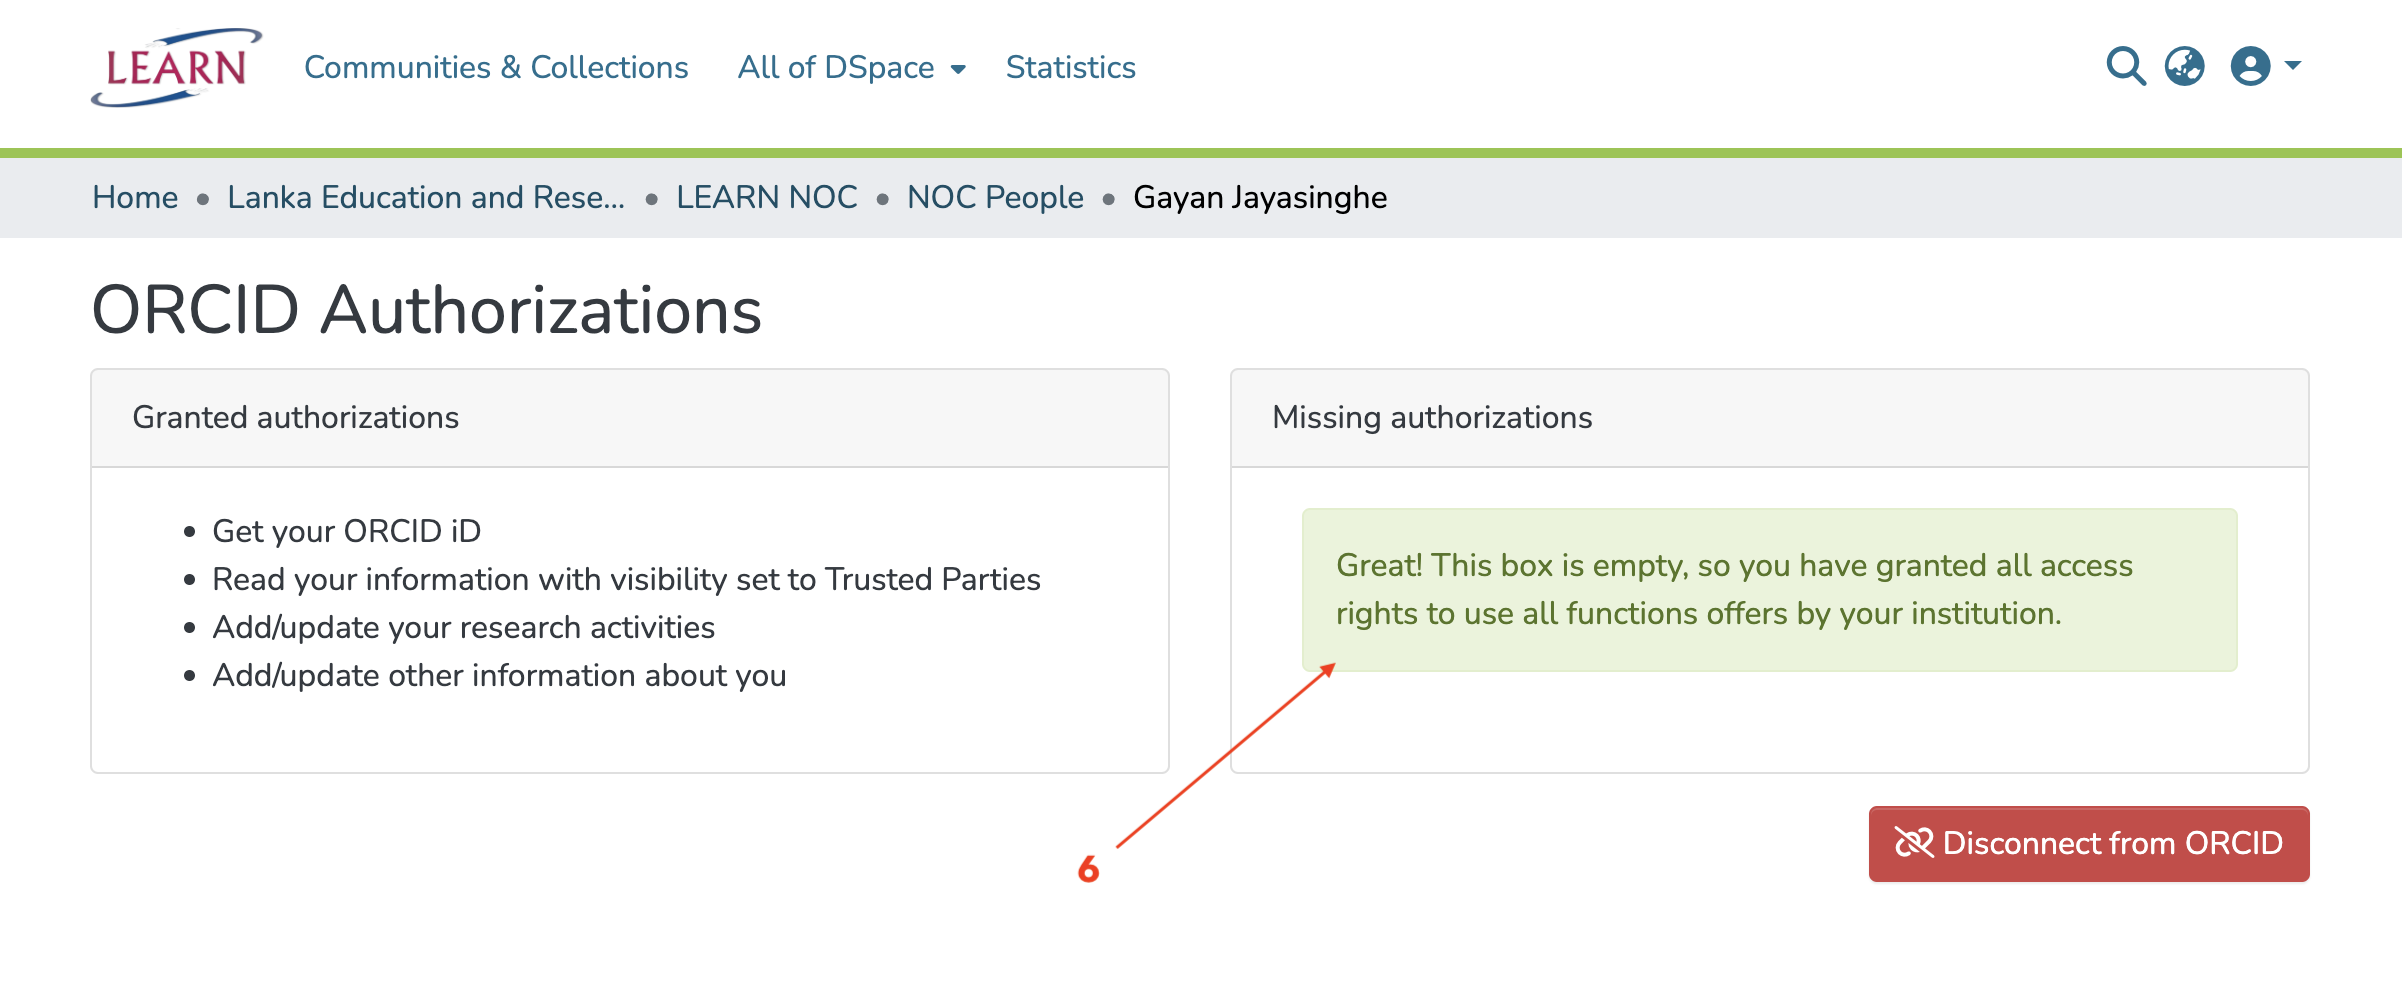
6. Confirm the Connection
After authorization, you should be redirected back to DSpace.
The ORCID Authorizations page should display the connection status and the permissions granted, depending on the installed integration.
You may see permissions such as:
- Get your ORCID iD.
- Read trusted-party data.
- Add or update research activities.
- Add or update profile information.
Troubleshooting Tips
- Verification email not found: Confirm that you are using the correct Mailinator inbox name and refresh the Public Inbox.
- Incorrect primary email: Make sure the Mailinator address entered during registration matches the inbox you opened.
- Verification link not working: Open the latest verification message and try its link again. Request another verification email if necessary and available.
- Unable to sign in: Ensure that you are accessing https://sandbox.orcid.org/ and using the Sandbox credentials.
- DSpace cannot connect to ORCID: Confirm that the DSpace installation is configured for the ORCID Sandbox, including the correct API endpoints, client credentials, and redirect URI.
- Connection already exists: If necessary, select Disconnect from ORCID and repeat the connection process.
- Permissions do not appear: Review the authorization screen and the permissions supported by your installed DSpace integration.