How to Upload a Presentation in vCR
🔁 You Can Upload in Two Ways:
- Before starting the Room
- During a live session
Option 1: Upload Before Starting the Room
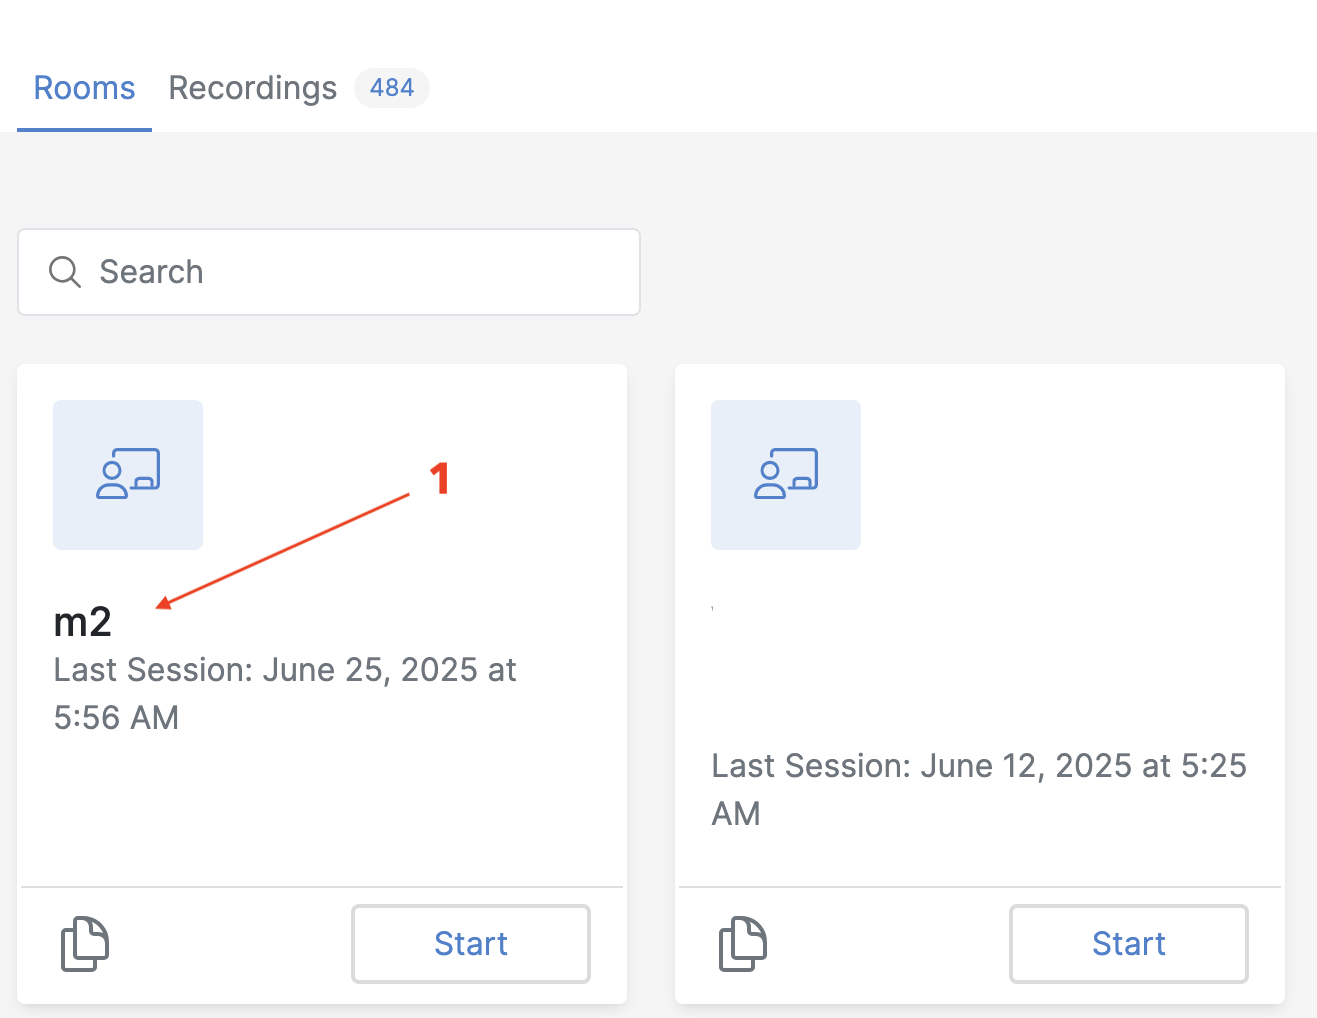
- Go to Your Dashboard Locate the Room you want to use.
-
Click on the Room Name [1] This opens the Room Details Page.
-
Click the “Presentation [2]” Tab

- You’ll see an option to upload files in PDF format.
-
Click Choose File, then Upload [3].
-
Upload Notes:
-
Only PDF files are supported.
- Maximum file size: 10 MB.
- Avoid high-resolution images to reduce file size for faster loading.
Option 2: Upload During the Session
-
Start Your Room Click the Start button from the dashboard to enter the session.
-
Click the Blue “+” Button [1] Located at the bottom center of the Room interface.

-
Select “Upload/Manage Presentation [2]”
-
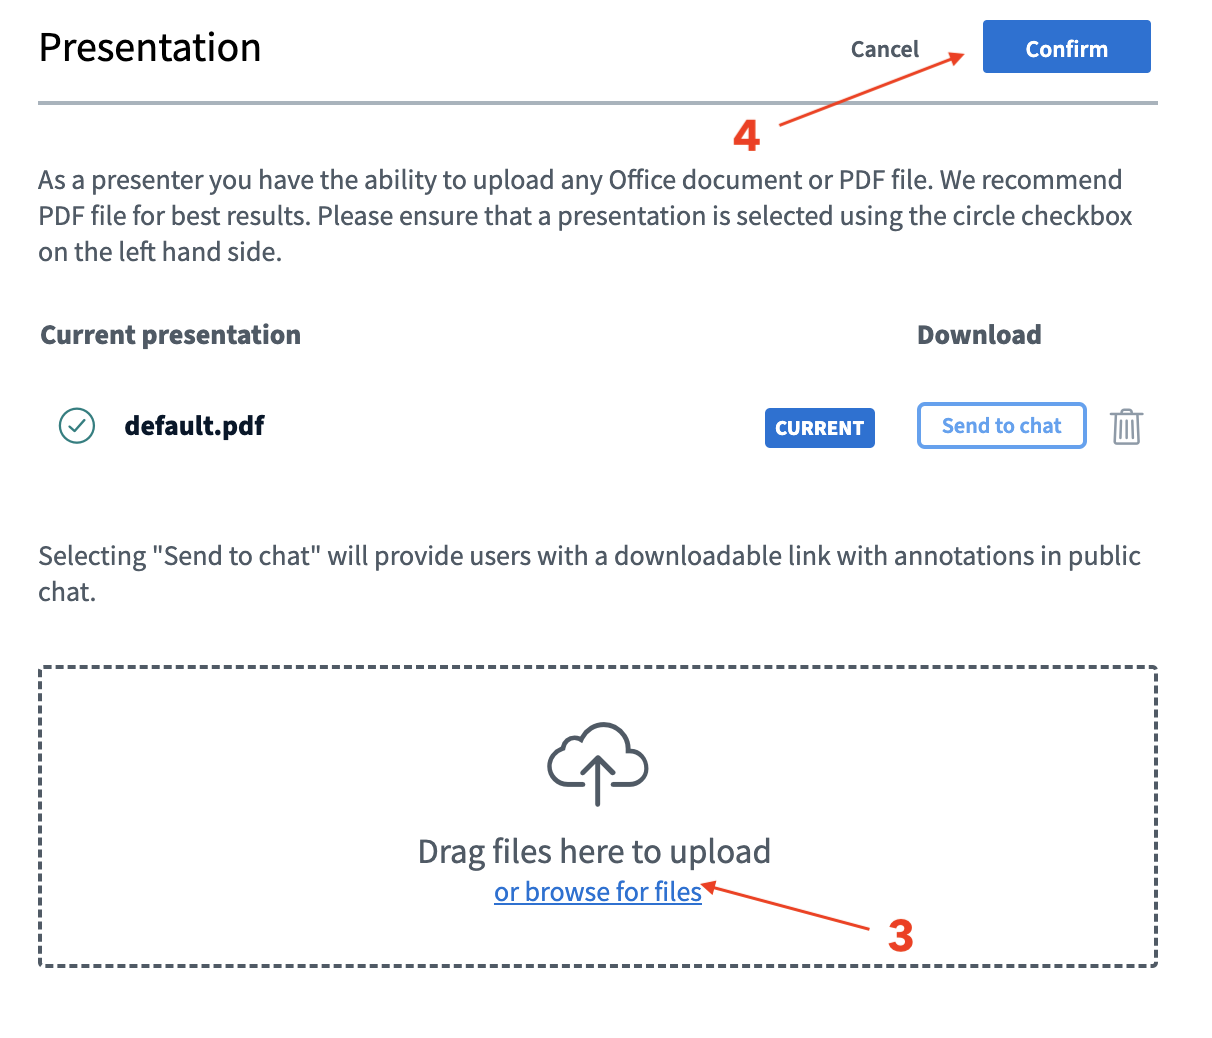
Choose Your PDF File
-
Click “Browse” or drag and drop [3] your file.
-
Upload multiple files if needed.
-
Click “Confirm” to Upload[4] Once uploaded, your slides will appear in the center.
-
Switch Between Presentations
-
Open the blue “+” menu again.
- Choose another uploaded file to switch presentations.
How to Share Your Screen in vCR
⚠ Important Notes
- Screen sharing is not recommended for presentations, as it reduces the room size and may cause performance issues.
- Always prefer using uploaded PDF slides for a better presentation experience.
- Use screen sharing only when absolutely necessary.
- If your presentation includes videos, upload them to an online platform such as YouTube.
- Use the “Share an External Video” option to play videos during your session.
Steps to Share Your Screen
-
Start the Room
-
Log in to the platform and click Start on your Room to enter the session.
-
Use Google Chrome Browser
-
Ensure you're using Google Chrome, as it supports the screen sharing feature reliably.
-
Click the Screen Sharing Icon
-
At the bottom center of the Room interface, find and click the computer screen icon [1] (next to the camera icon).

-
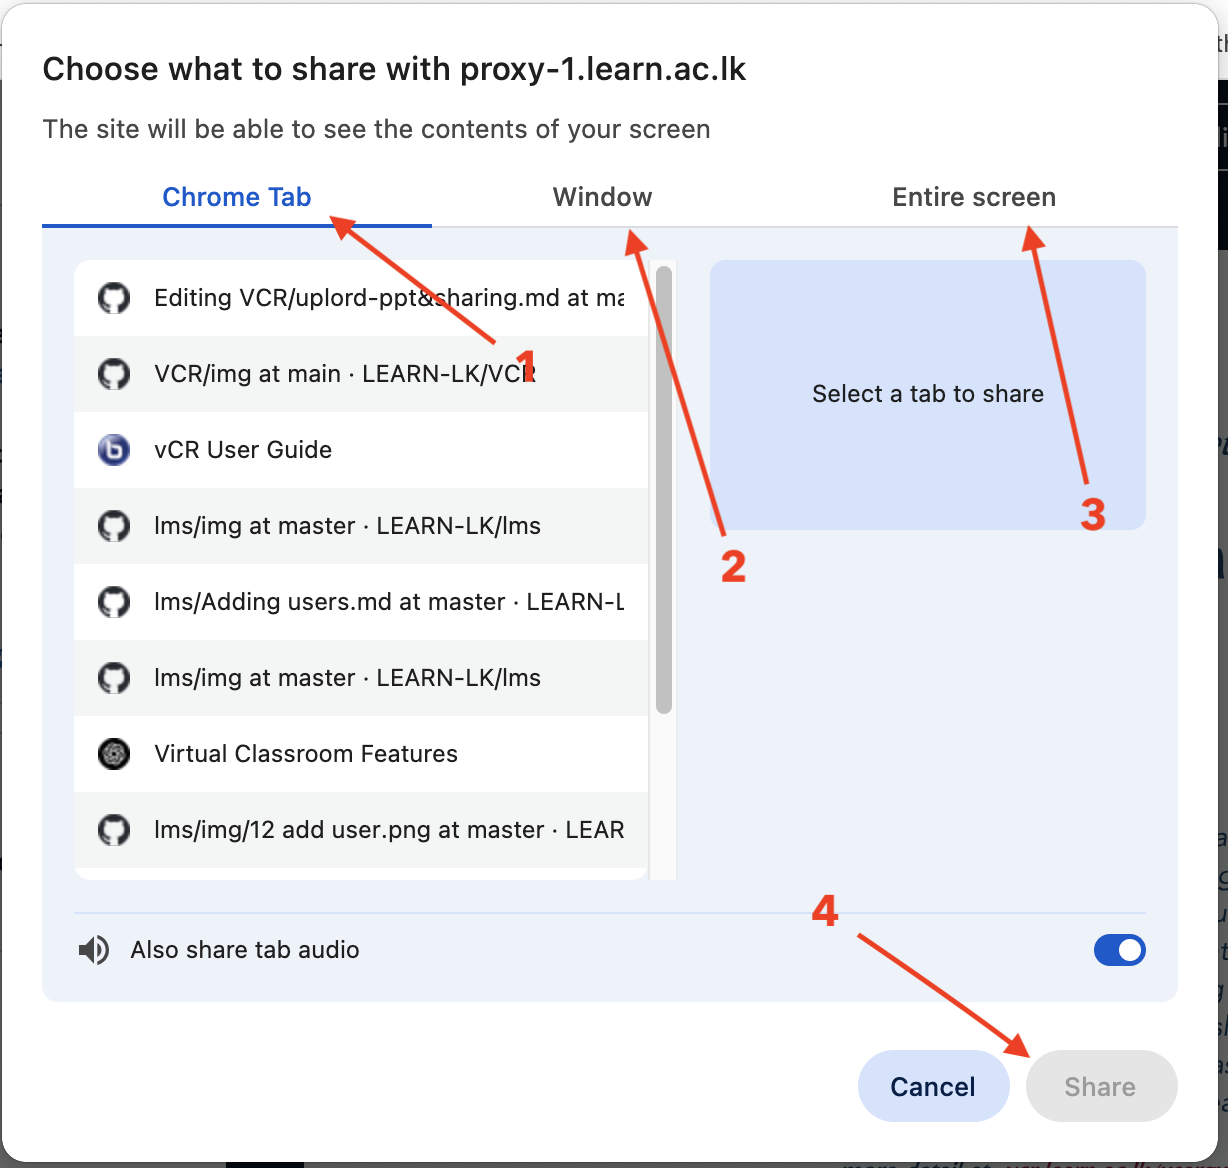
Select What to Share A new pop-up window will appear with three tabs:
-
Entire Screen [3]
- Window [2]
-
Chrome Tab [1] (if applicable)
-
Choose Your Option
-
Click the preview of the screen or window you want to share.
-
Click the “Share [4]” button.
-
Screen Now Visible to All
-
Participants will now see what you're sharing.
-
A banner or icon may indicate that screen sharing is active.
-
To Stop Sharing [5]
-
Click the screen sharing icon again or stop it via your browser's share indicator.

Before You Begin: Enable Screen Sharing
Make sure:
- You have granted browser permission to share your screen.
- Pop-ups are not blocked.
- Your system allows screen recording (on macOS, check System Preferences > Security & Privacy > Screen Recording).