Exabis e-Portfolio Training Guide
Introduction
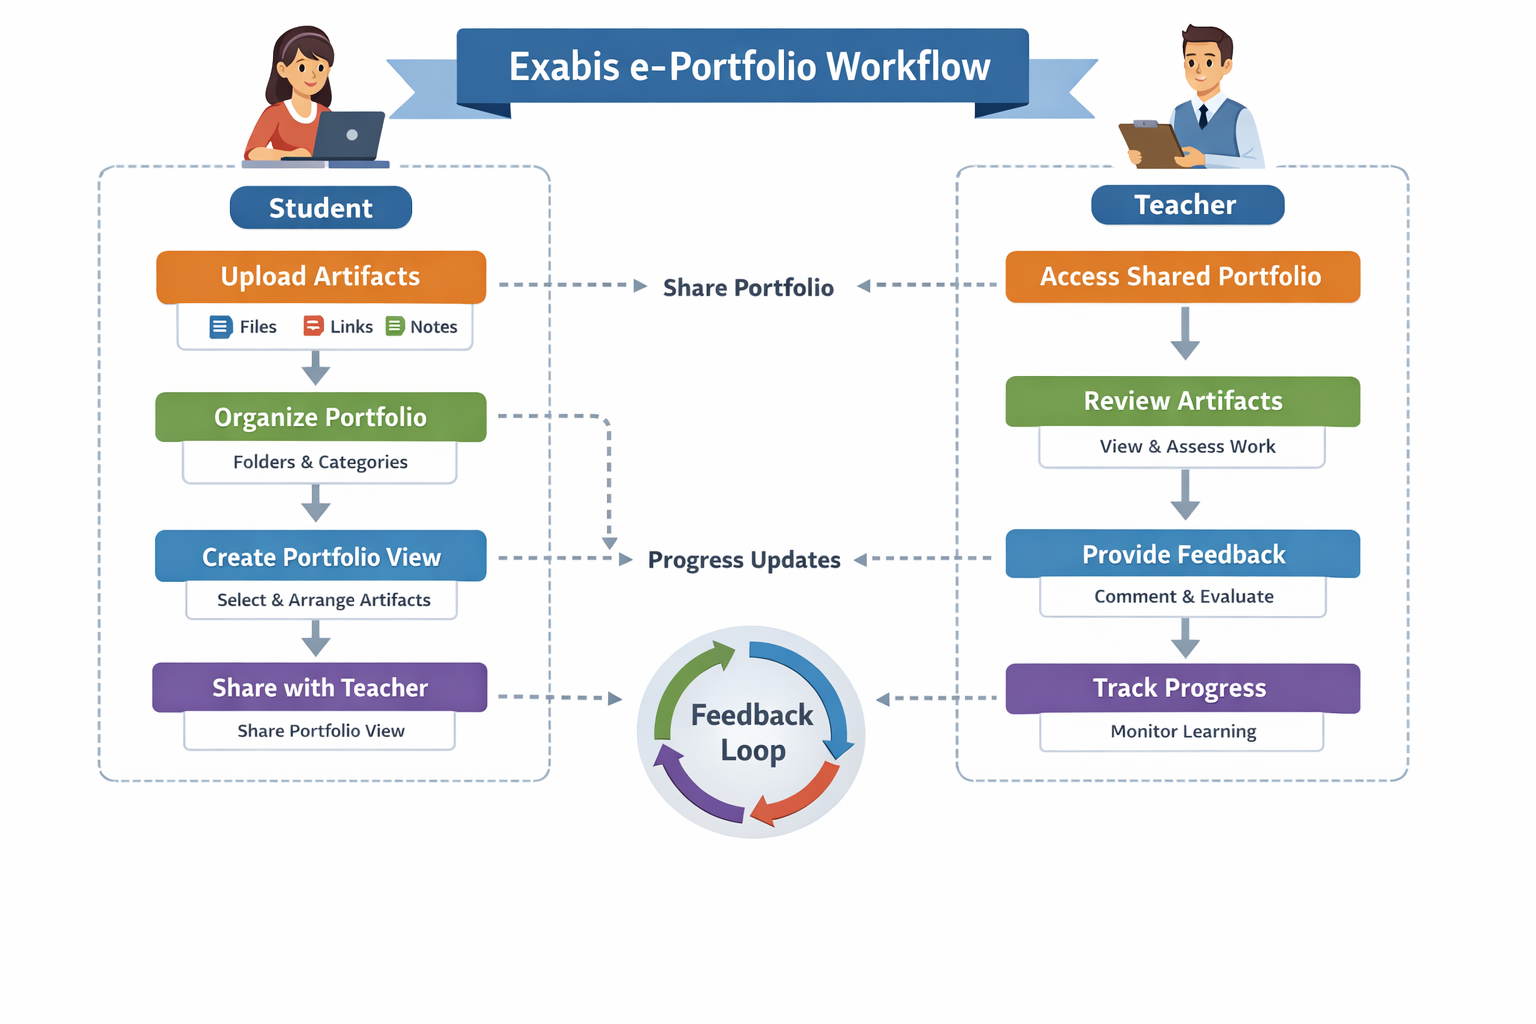
What is an e-Portfolio?
An e-Portfolio is a digital collection of a student's academic work, reflections, achievements, and learning progress.
In Moodle, the Exabis ePortfolio plugin allows students to:
- Upload files and documents
- Save web links
- Write notes and reflections
- Organize artefacts into categories
- Create portfolio pages (Views)
- Share work with teachers for feedback
This tool supports continuous learning, reflection, and competency-based education.
Figure 1: e-Portfolio Workflow Overview
1. Final Output (What Students Will Produce)
At the end of this activity, students will create a Portfolio Page (View) and share it with the teacher.
Example Portfolio View
Portfolio Title:
IT – Software Engineering Assignment
Portfolio Contents
- Assignment PDF uploaded
- Organized under Assignments category
- Displayed in a Portfolio View
- Shared with the course teacher
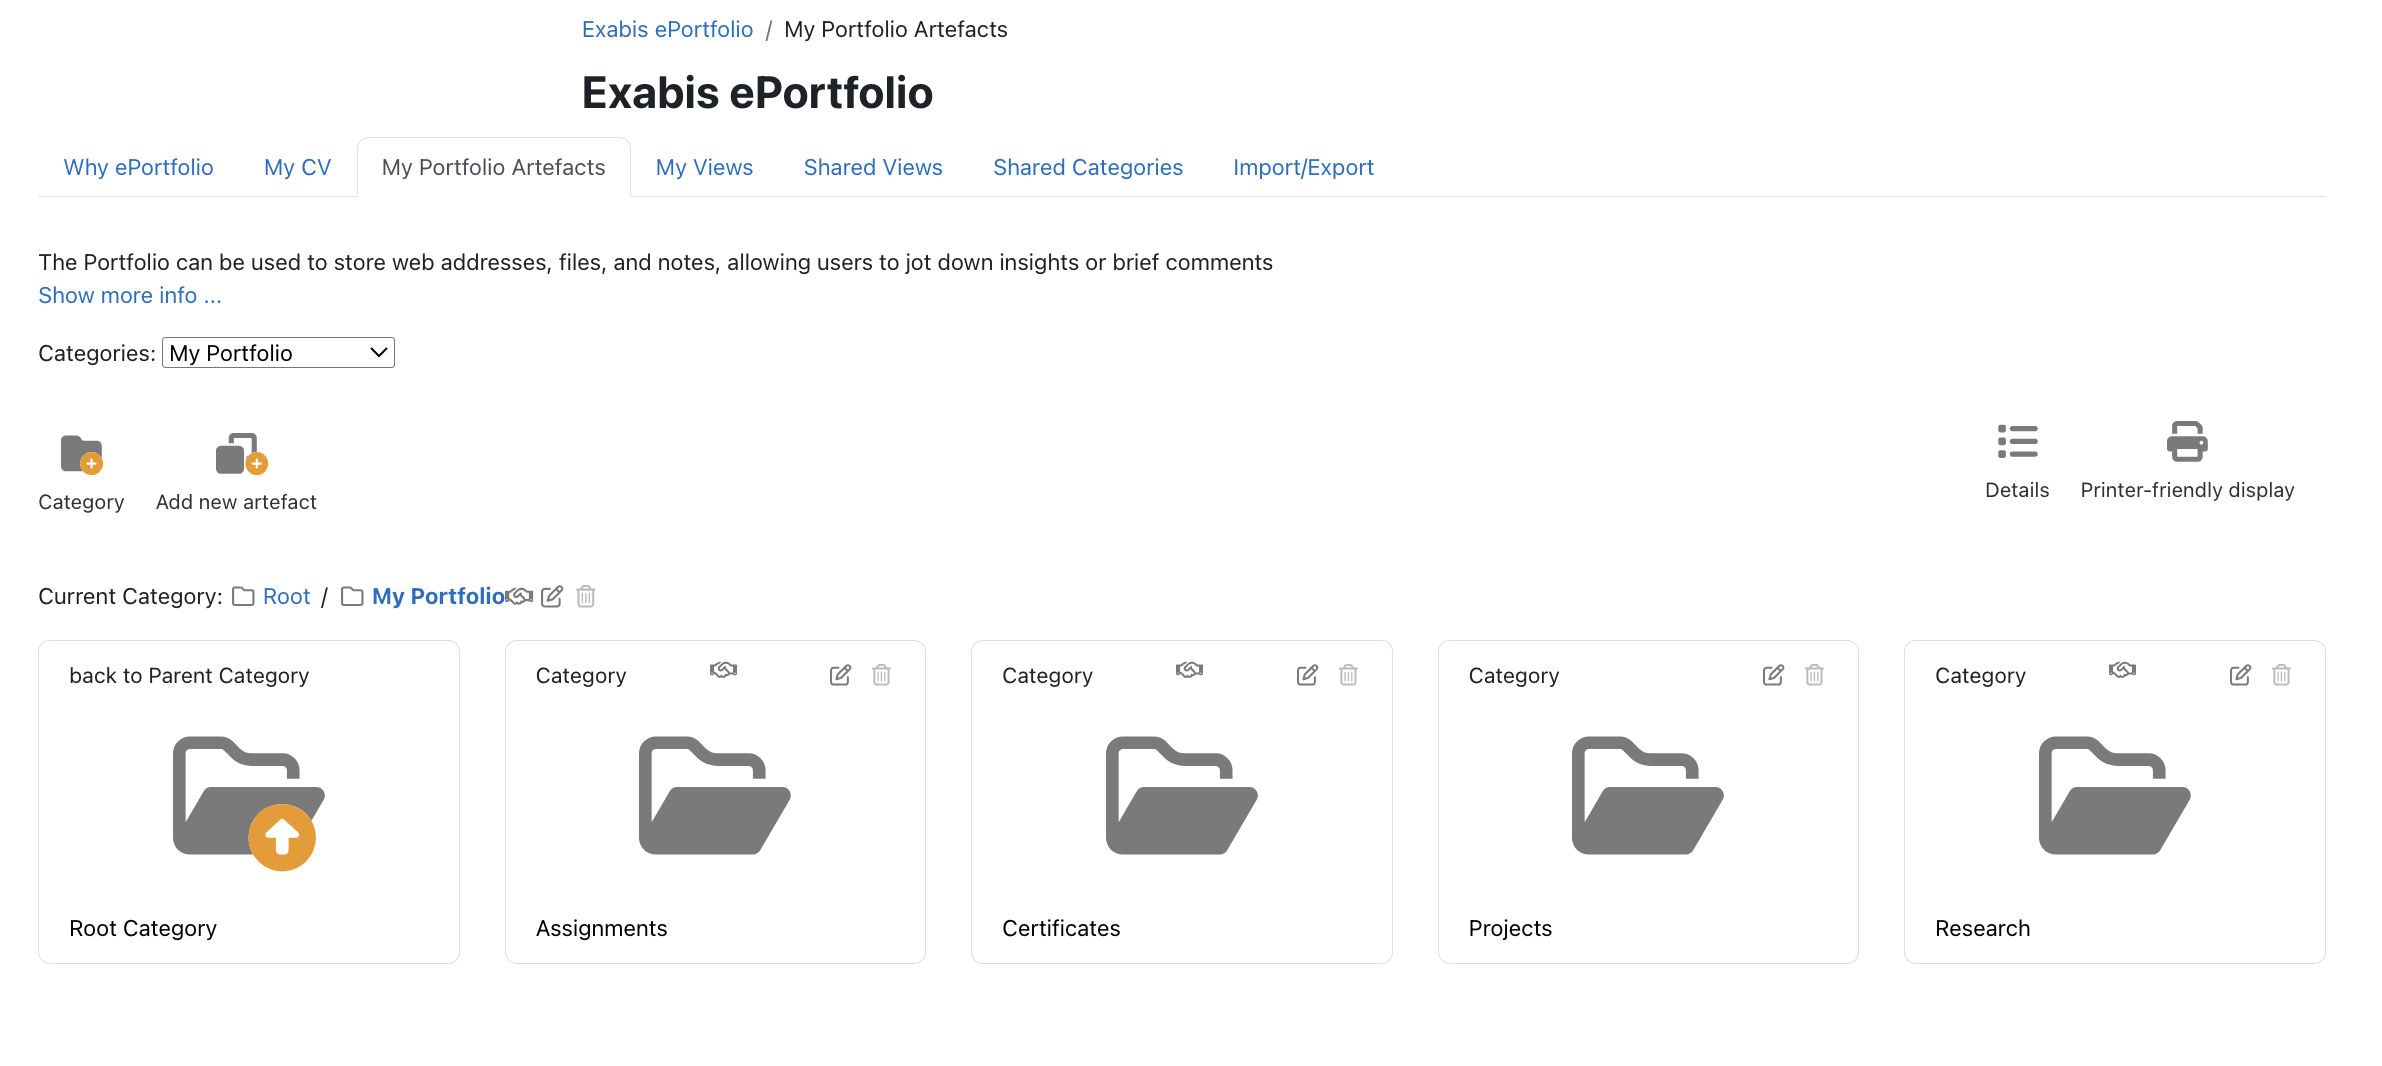
Figure 2: Example Portfolio Categories
Teacher View of the Portfolio
After sharing, the teacher will:
- Open the student portfolio
- Review the assignment
- Add comments and feedback
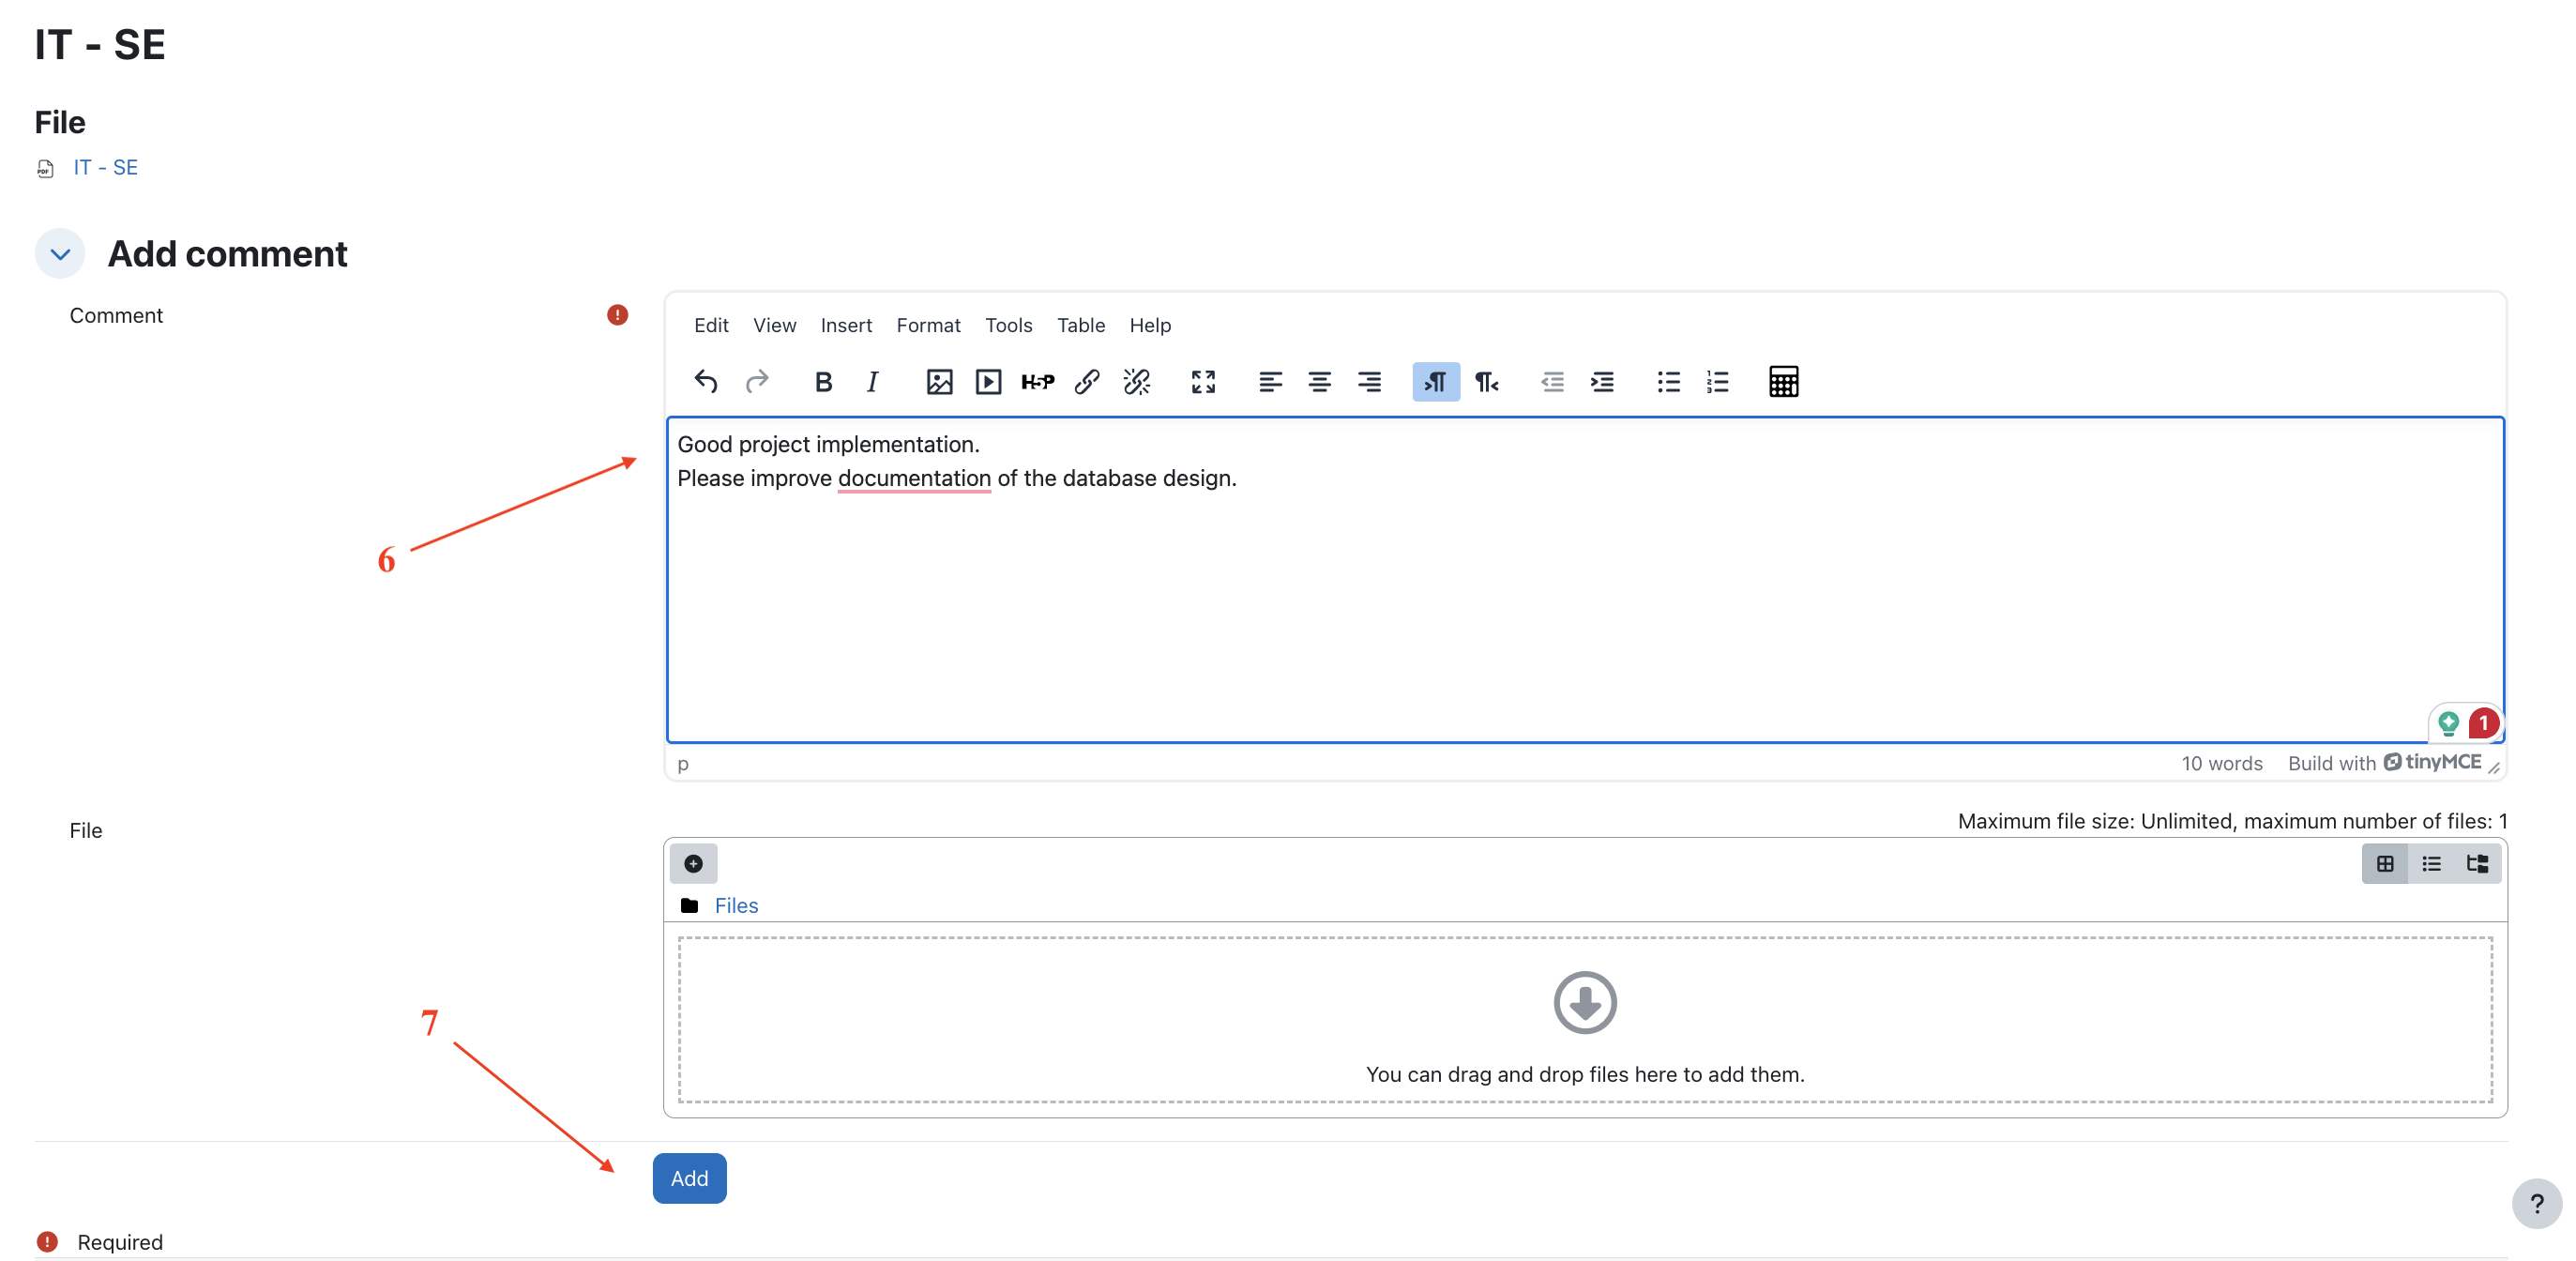
Example Feedback:
Good project implementation.
Please improve documentation of the database design.
Figure 3: Teacher View of Shared Portfolio
2. Activity Scenario
Program: BSc in Information Technology Semester: Semester 01
Course:
IT – Software Engineering
Student Task
- Upload assignment to portfolio
- Create a portfolio page (View)
- Add the assignment artefact to the view
- Share the portfolio with the teacher
3. Understanding the e-Portfolio Interface
| Menu | Description |
|---|---|
| My CV | Personal profile information |
| My Portfolio Artefacts | Upload and manage artefacts |
| My Views | Create portfolio pages |
| Shared Views | Views shared with you |
| Shared Categories | Categories shared with groups |
| Import / Export | Backup portfolio data |
Figure 4: ePortfolio Navigation Menu

4. Step 1 – Upload the Assignment Artefact
Artefacts are files stored in the portfolio.
Examples
- Assignment reports
- Research documents
- Certificates
- Presentations
Steps
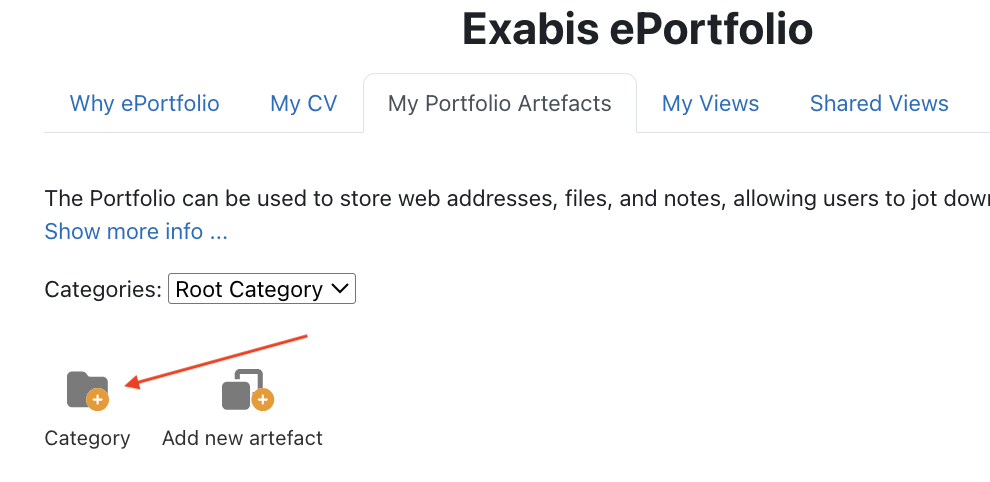
- Go to ePortfolio → My Portfolio Artefacts
Figure 5: Accessing My Portfolio Artefacts
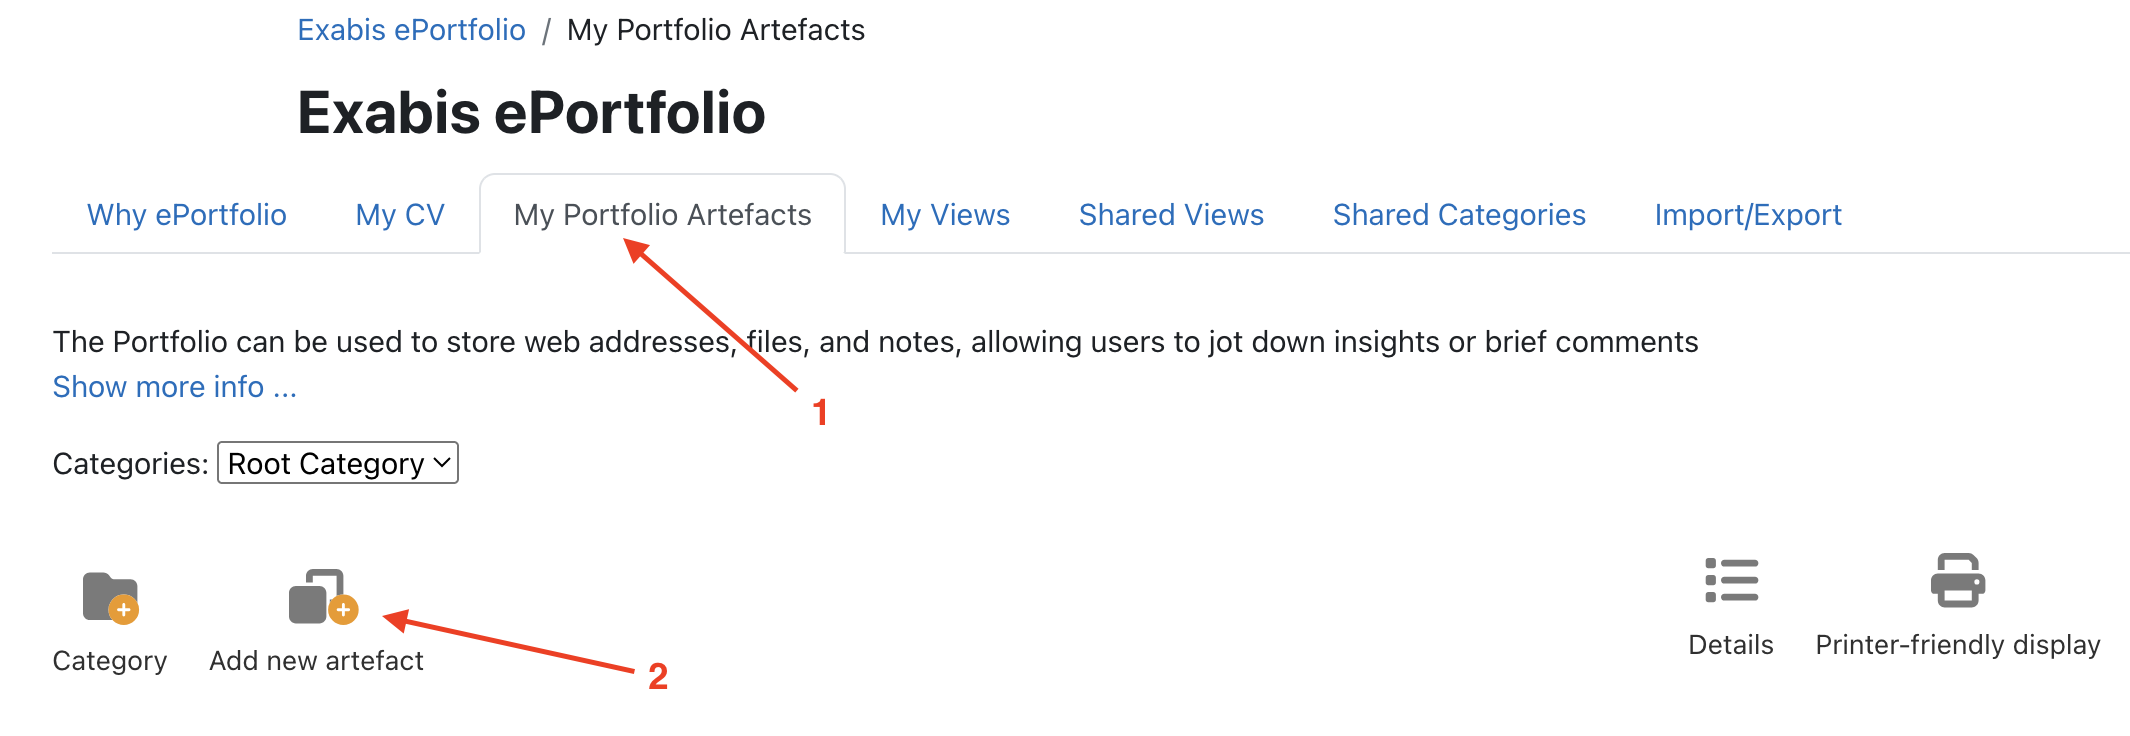
-
Click Add New Artefact
-
Enter details:
Title: IT – SE Assignment
Category: Assignments
Description: Software Engineering assignment report
File: Upload PDF
Figure 6: Add New Artefact Form

- Click Save
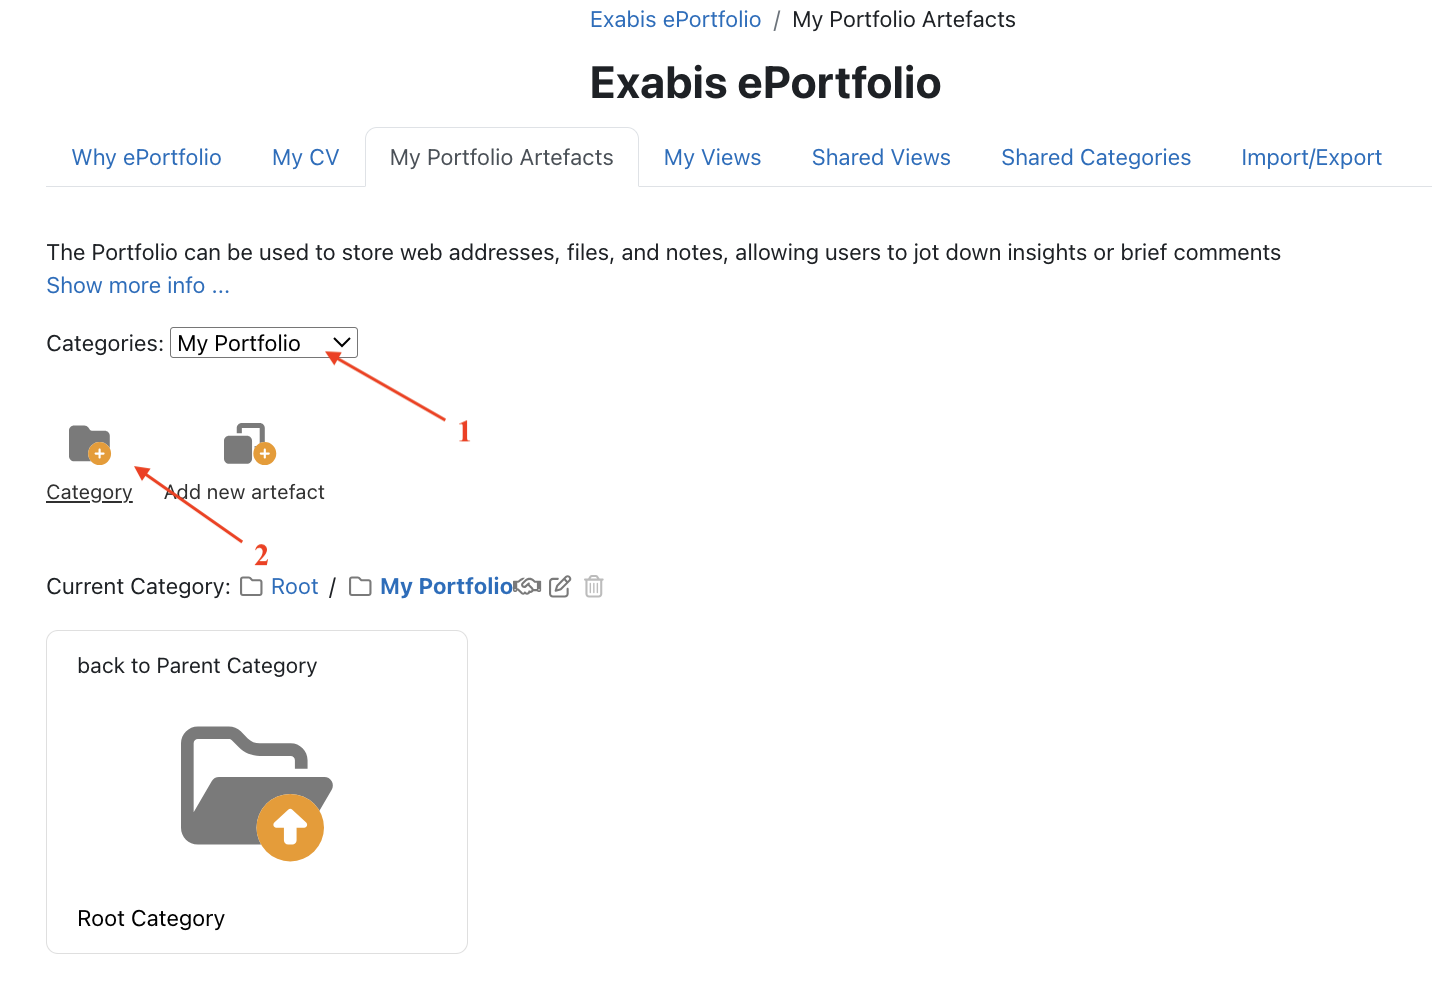
5. Step 2 – Organize Artefacts into Categories
Organizing artefacts makes your portfolio clear and professional.
Example Structure
My Portfolio
 ├── Assignments
 ├── Certificates
 ├── Projects
 └── Research
Figure 7: Portfolio Category Structure
6. Step 3 – Create a Portfolio View
A Portfolio View is a page that displays selected artefacts.
Steps
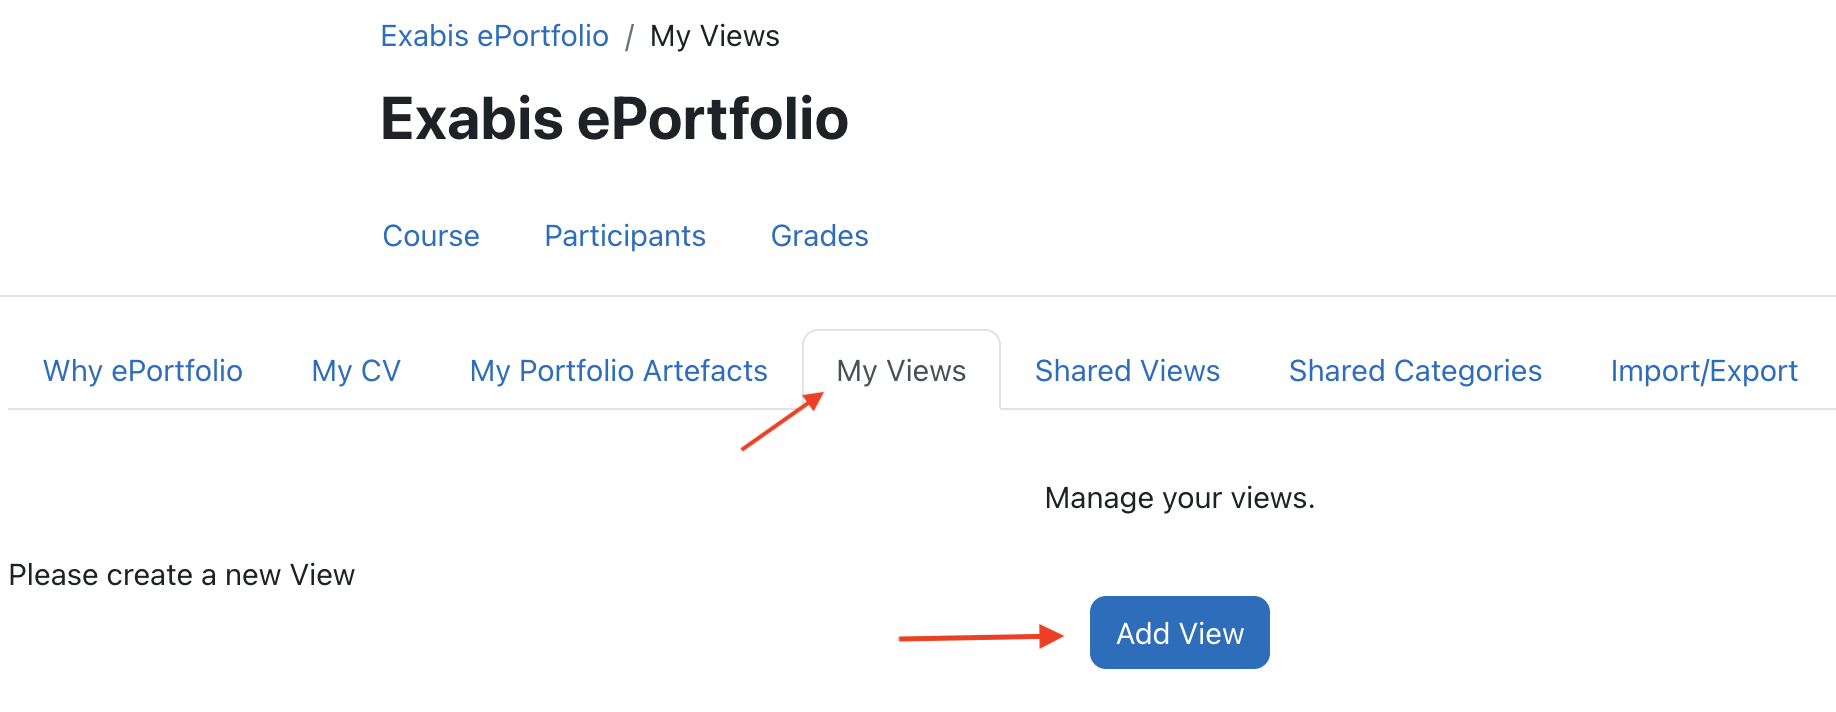
- Go to
ePortfolio → My Views
- Click
Add View
Figure 8: Create Portfolio View
- Enter details:
Title: IT – SE Assignment
Description: Semester 01 Software Engineering assignment
- Select layout (Example: One Column)
Figure 9: Portfolio Layout Selection

7. Step 4 – Build the Portfolio Page Layout
Steps
-
Go to Content Tab
-
Drag and drop the Artifacts Block
Figure 10: Content Tab and Blocks
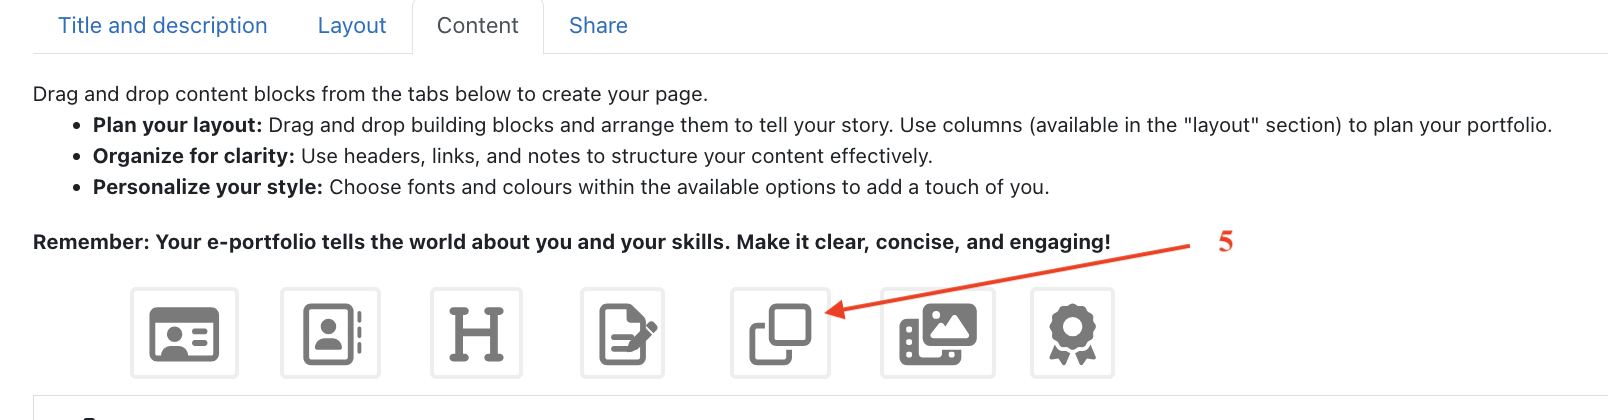
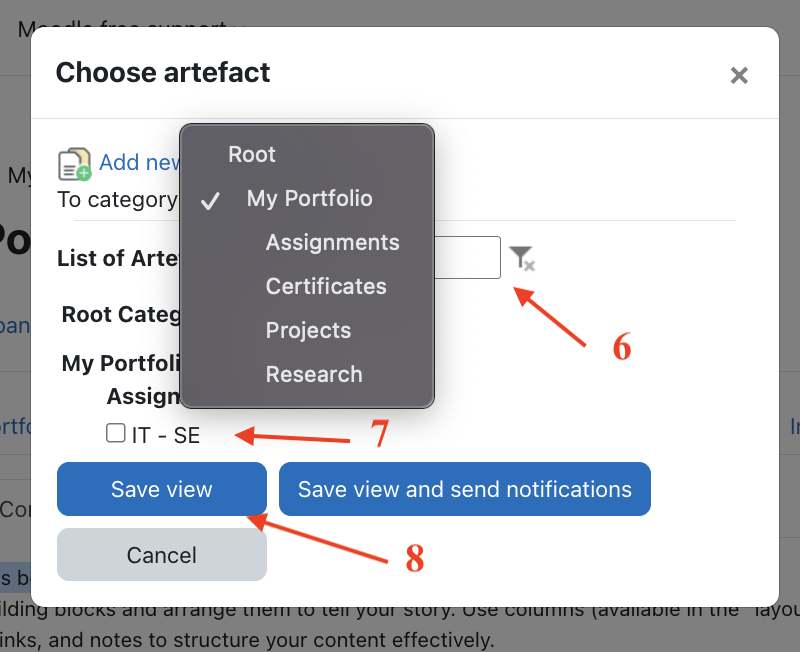
-
In popup:
-
Select category:
Assignments
- Select artefact:
IT – SE Assignment
- Click Save View
Figure 11: Adding Artefact to View
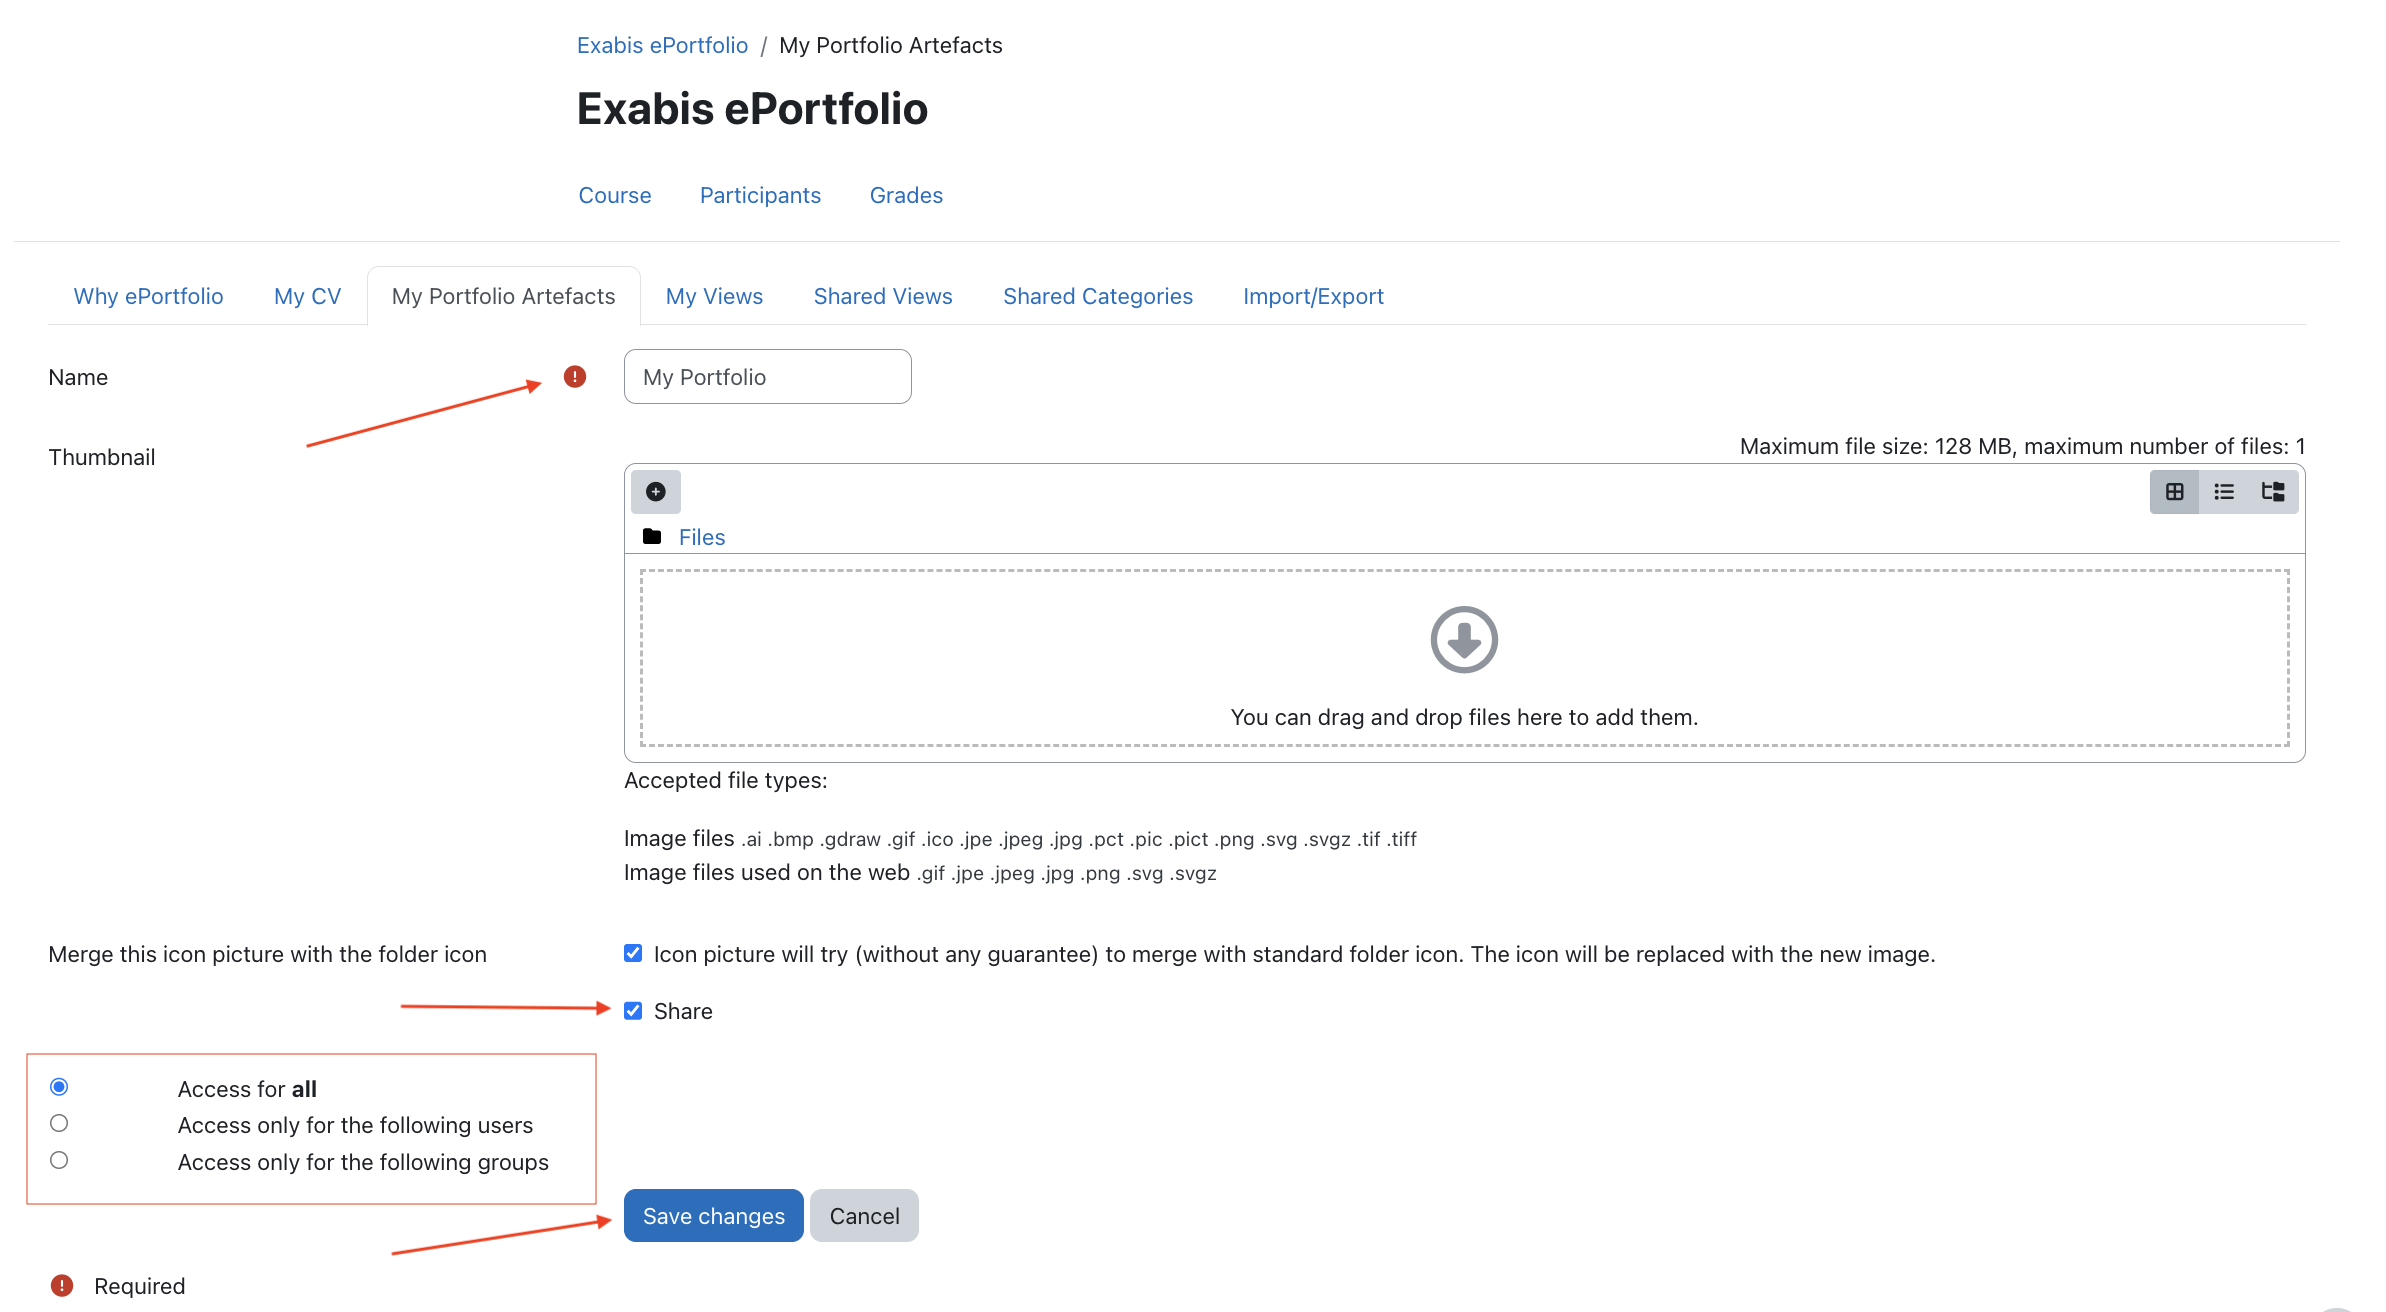
8. Step 5 – Share the Portfolio with the Teacher
Steps
-
Open the portfolio view
-
Click
Share
Figure 12: Share Tab in Portfolio View
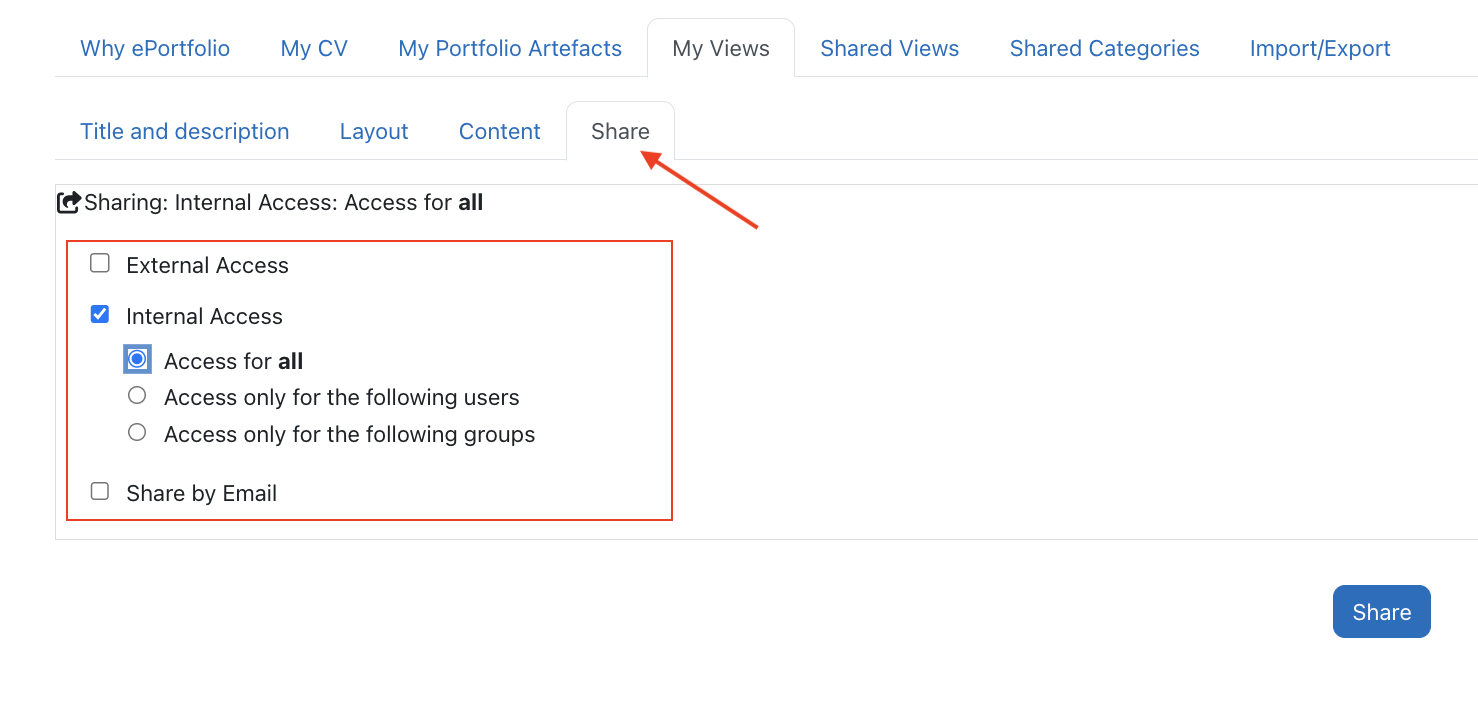
- Enable
Internal Access
- Select
Access only for the following users
-
Choose the course teacher
-
Click Share
Sharing Options (Quick Guide)
| Option | Description |
|---|---|
| Internal Access | Share within Moodle |
| Access for all | All logged-in users |
| Selected Users | Only specific users |
| Groups | Share with a group |
| External Access | Public link |
Recommended for assignments:
Internal Access
Access only for the following users
Select the course teacher
⚠ Important: If not shared, the teacher cannot view the portfolio.
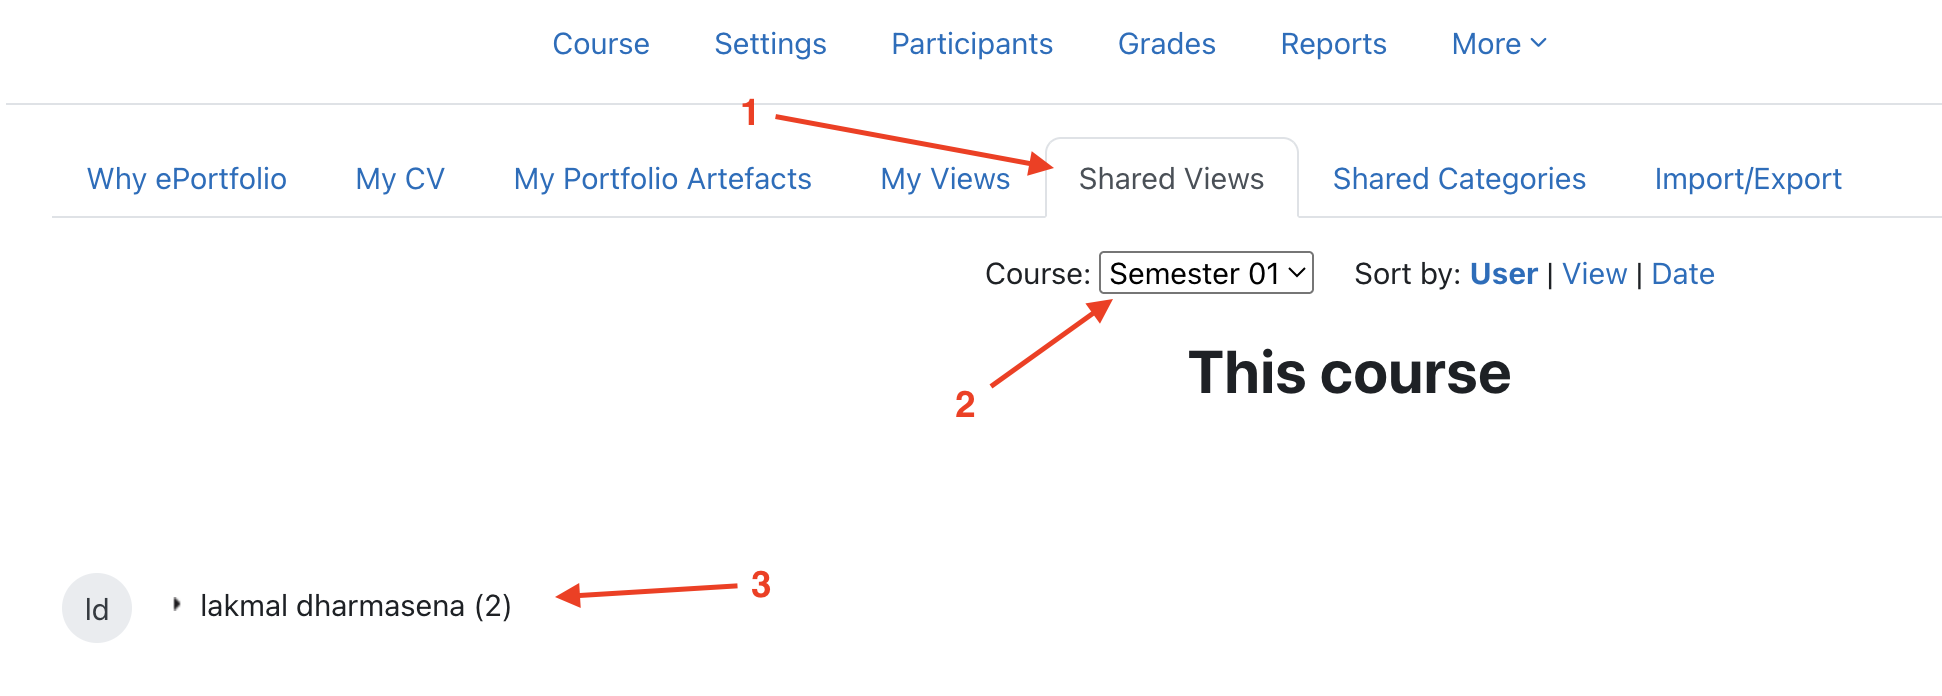
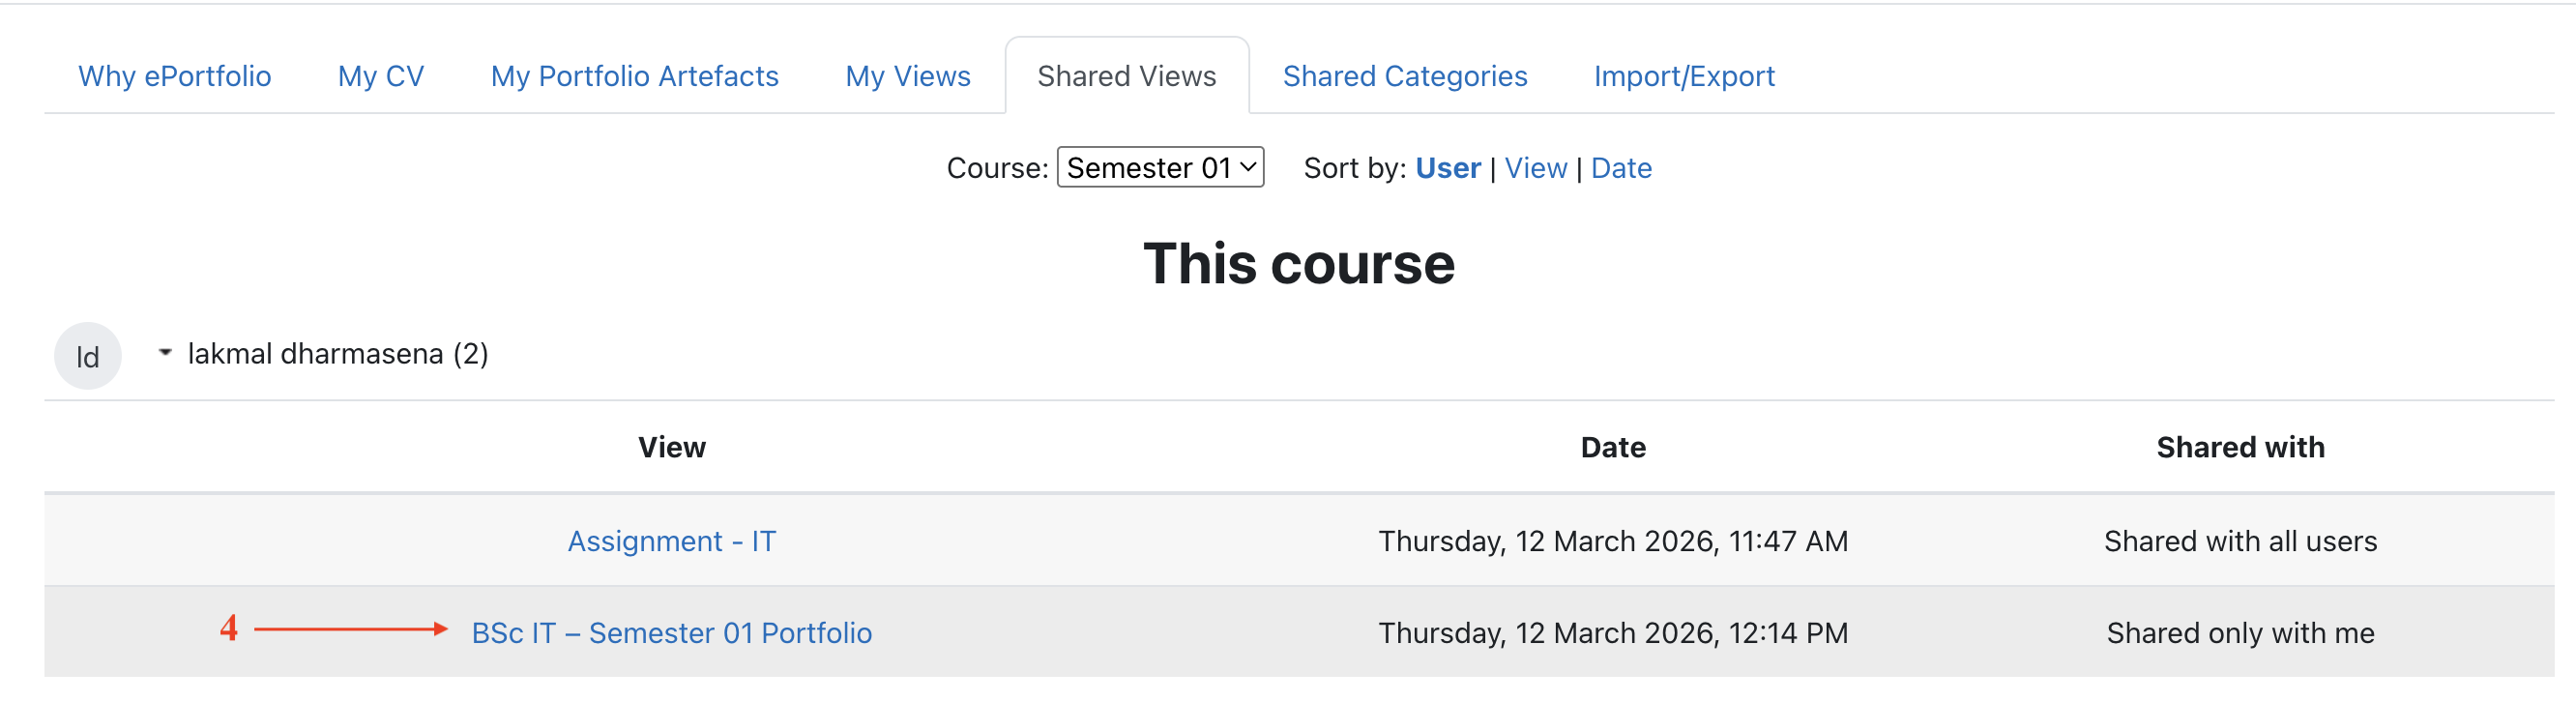
9. Teacher Workflow – Reviewing Student Portfolio
Steps
- Go to
ePortfolio → Shared Views
-
Select the Course
-
Select the Student Name
Figure 13: Shared Views – Student List
- Select the Portfolio View
Figure 14: Selecting Portfolio View
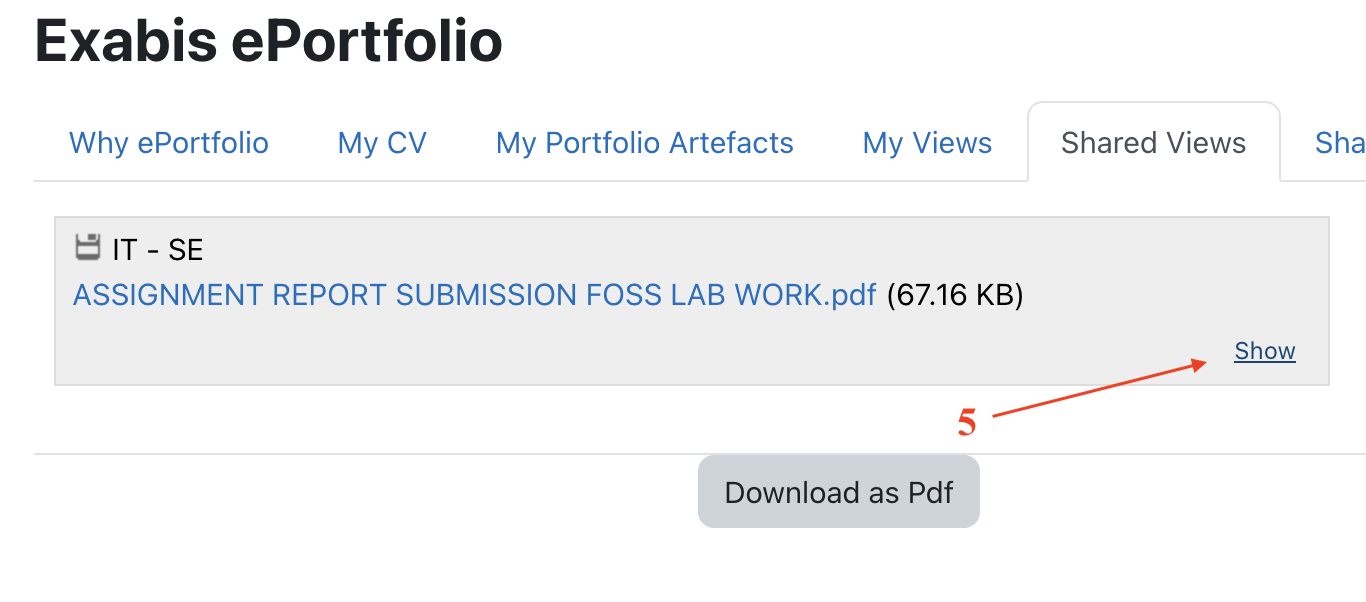
- Click Show
Figure 15: Viewing Portfolio
-
Scroll to Add Comment
-
Enter feedback:
Good project implementation.
Please improve documentation of the database design.
- Click Add
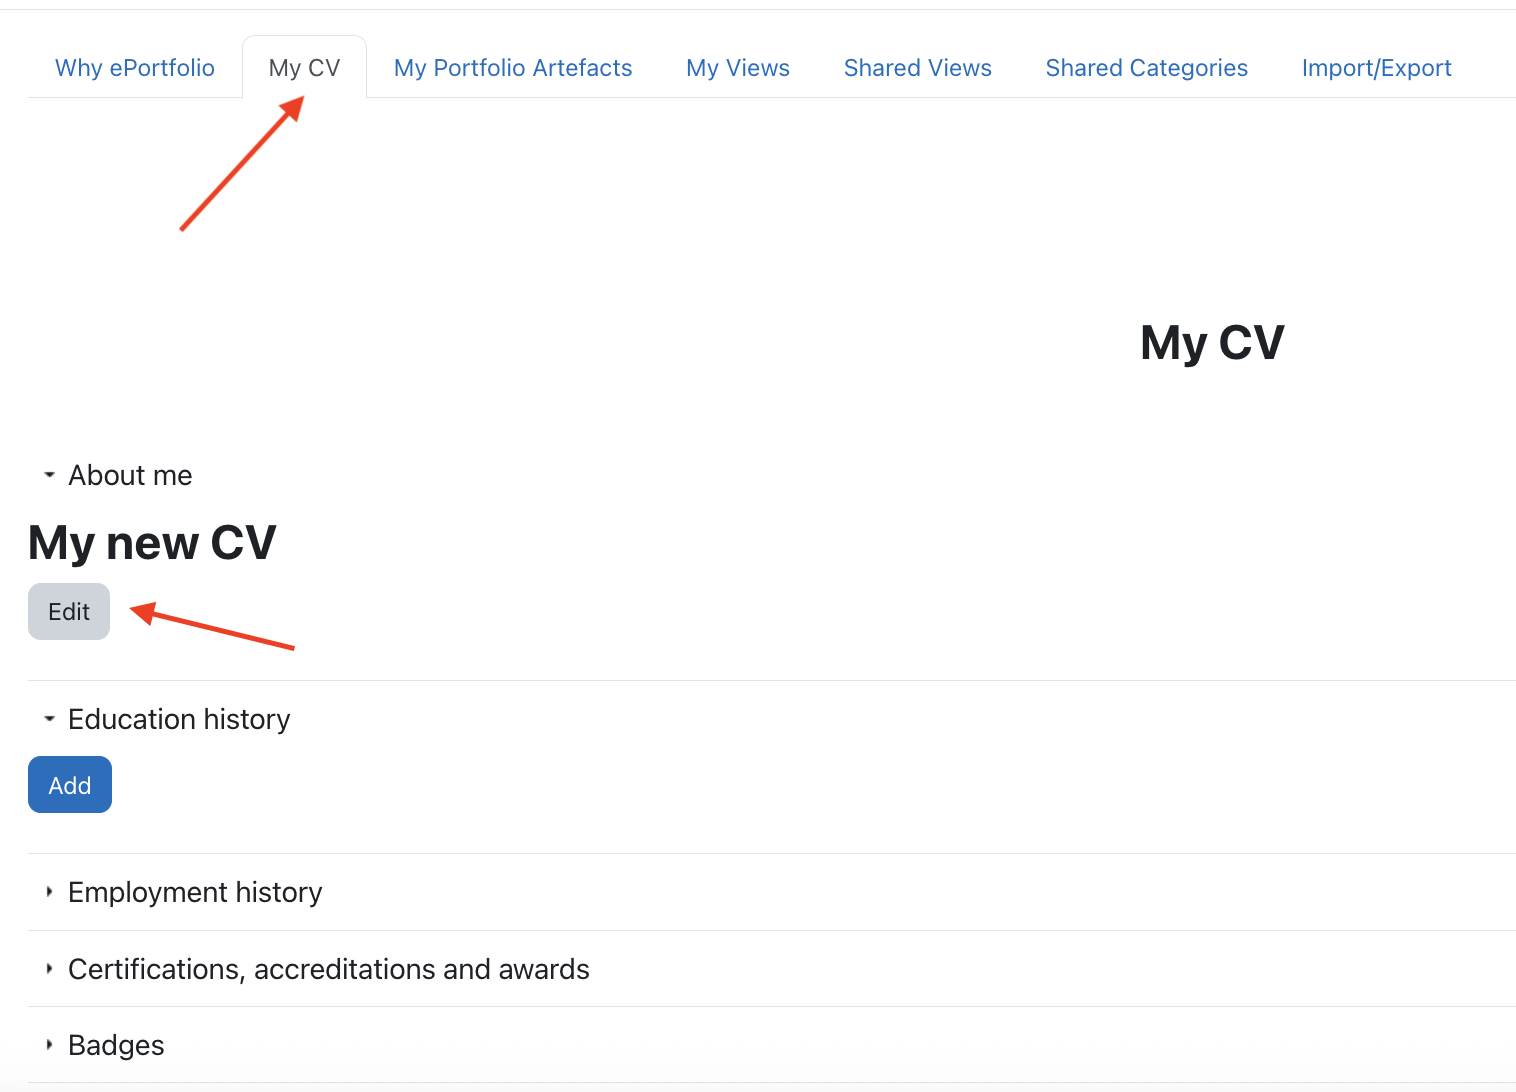
10. Completing the CV Section
The My CV section allows students to build a professional academic profile.
Steps
- Go to
ePortfolio → My CV
Figure 16: My CV Section
-
Fill:
-
Personal information
- Education
- Skills
- Experience
-
Certificates
-
Click Save
Tip
A complete CV helps:
- Teachers understand student background
- Students prepare for jobs
- Build a professional profile
11. Complete Workflow Summary
Student Workflow
Upload Assignment Artefact
        ↓
Create Portfolio View
        ↓
Add Artefact to View
        ↓
Share Portfolio with Teacher
Teacher Workflow
Open Shared Views
        ↓
Select Course
        ↓
Open Student Portfolio
        ↓
Review Artefact
        ↓
Add Feedback